Learn how to make copper pumpkins with metallic paint, and enjoy your on-trend pumpkins throughout the Fall season! Copper pumpkins — especially ones that look a bit rustic — are easy to create!
It’s pumpkin decorating season!
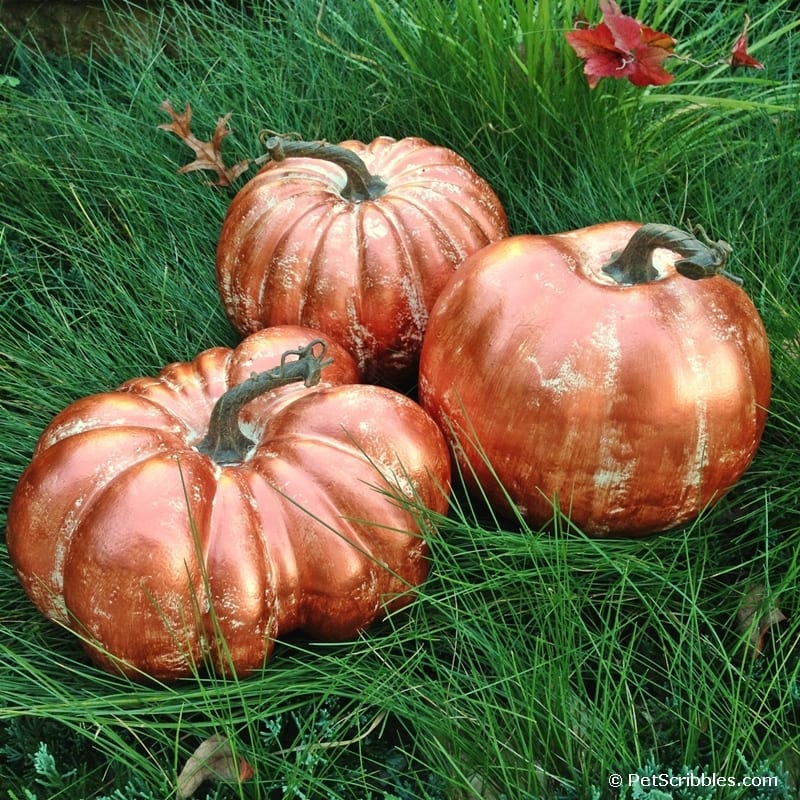
And one of the most popular styles this year? Copper pumpkins!
Don’t buy them — make them instead!
I found these really cool craft pumpkins at our new Super Walmart in town. (We live in a small town, and getting a new Walmart is a huge deal!)
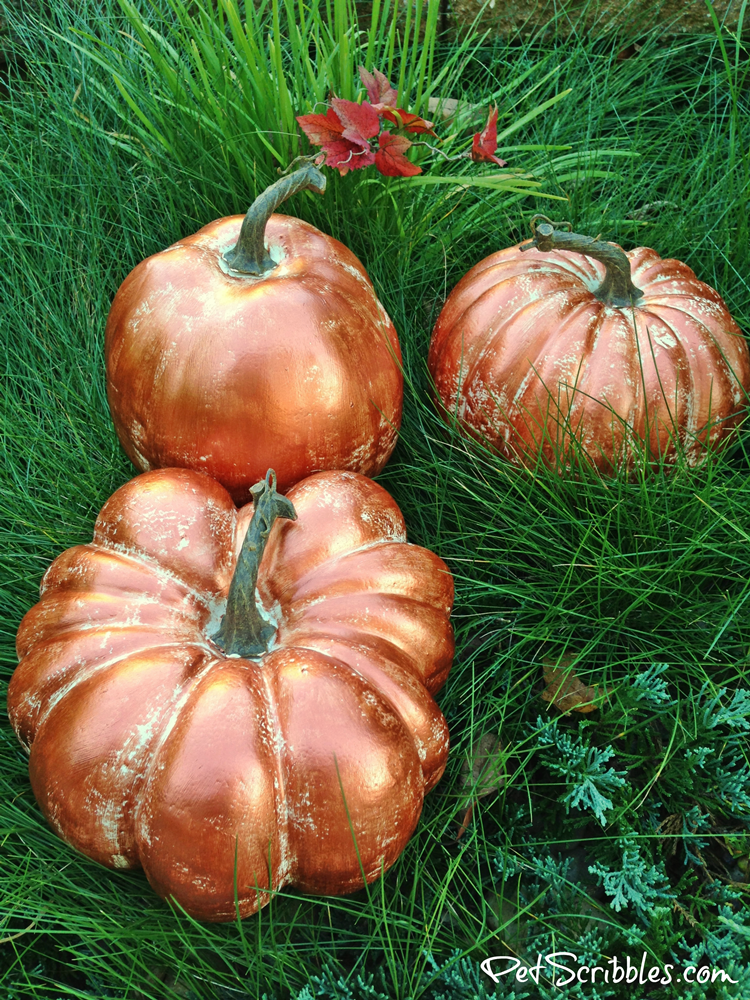
The three different pumpkin shapes are each so cool!

Each one has such a realistic-looking stem too!
Metallic Pumpkins — my previous DIYs!
I love decorating pumpkins — especially painting them!
I’ve created metallic pumpkins here on Pet Scribbles before:
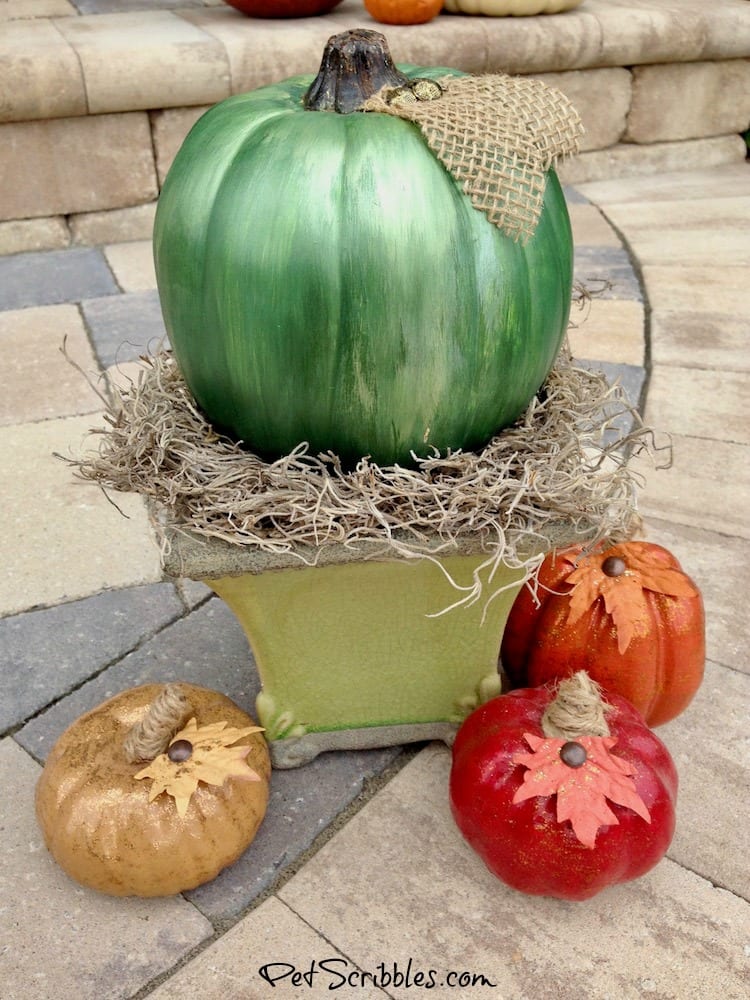
The green pumpkin was painted to resemble mercury glass. The small pumpkins were painted and glittered, and I added jute twine around the plastic stems.
You can see each of these tutorials here:
Now it’s time to create copper pumpkins!
How to Make Copper Pumpkins with Metallic Paint
Supplies:
- Copper metallic paint
- Chalky finish paint
- Paintbrush
- Paper towels
- Wax paper
Tutorial:
Step One: Paint each pumpkin with one coat of chalky finish paint in a white or ivory shade.
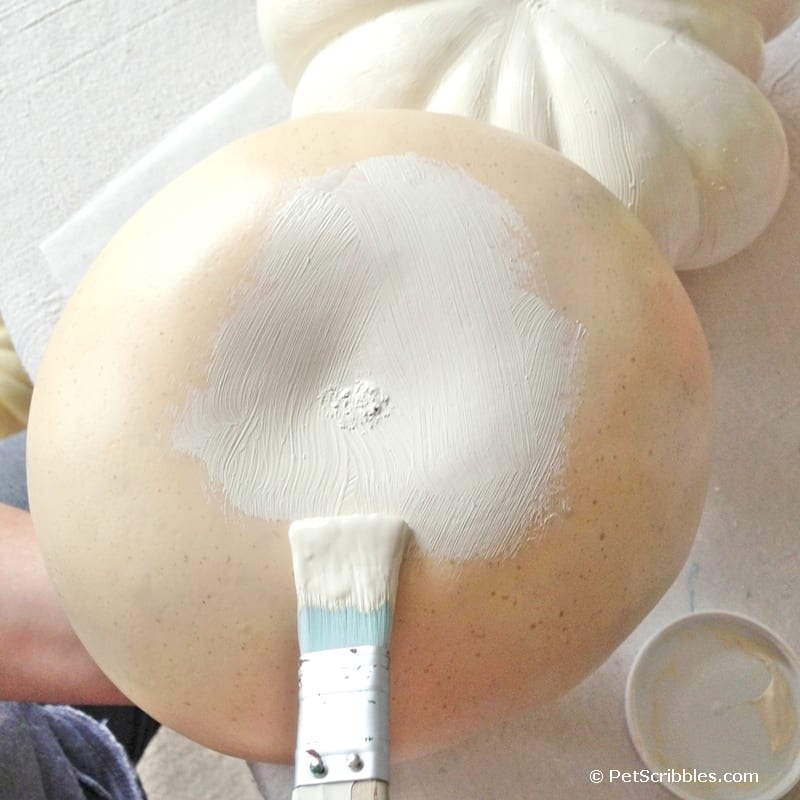
Even though these pumpkins are already an ivory shade, I like to have a base of chalk paint underneath the copper metallic paint.
Having a matte finish contrasted with a shiny finish is an interesting look, and one I’ve seen in several home decor stores featuring copper pumpkins.
Step Two: Dry brush copper metallic paint onto each pumpkin, building up the color slowly.
- First, dip your paintbrush into the paint then wipe most of it onto a clean paper towel.
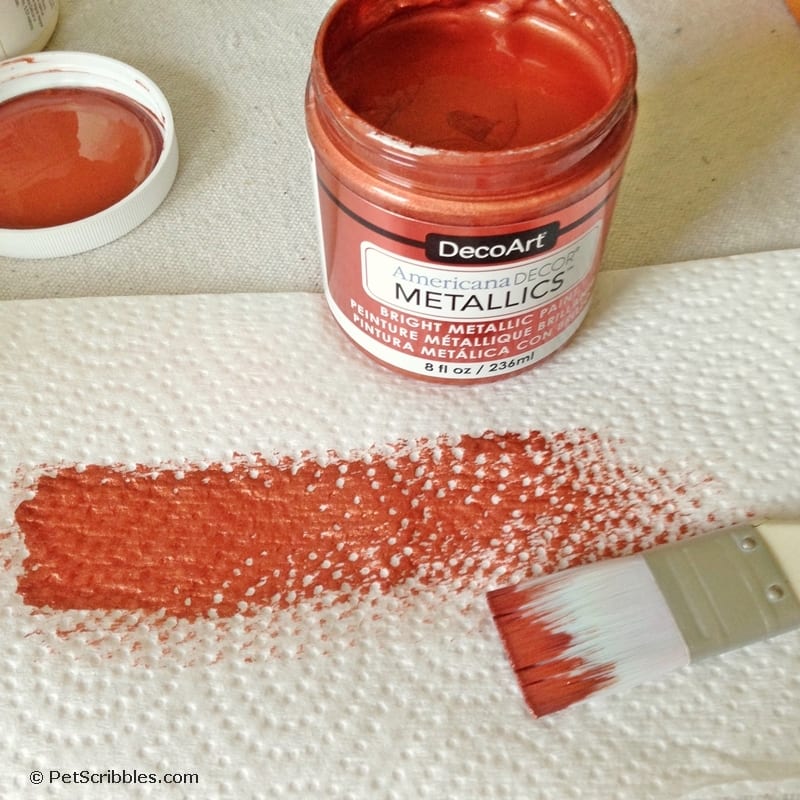
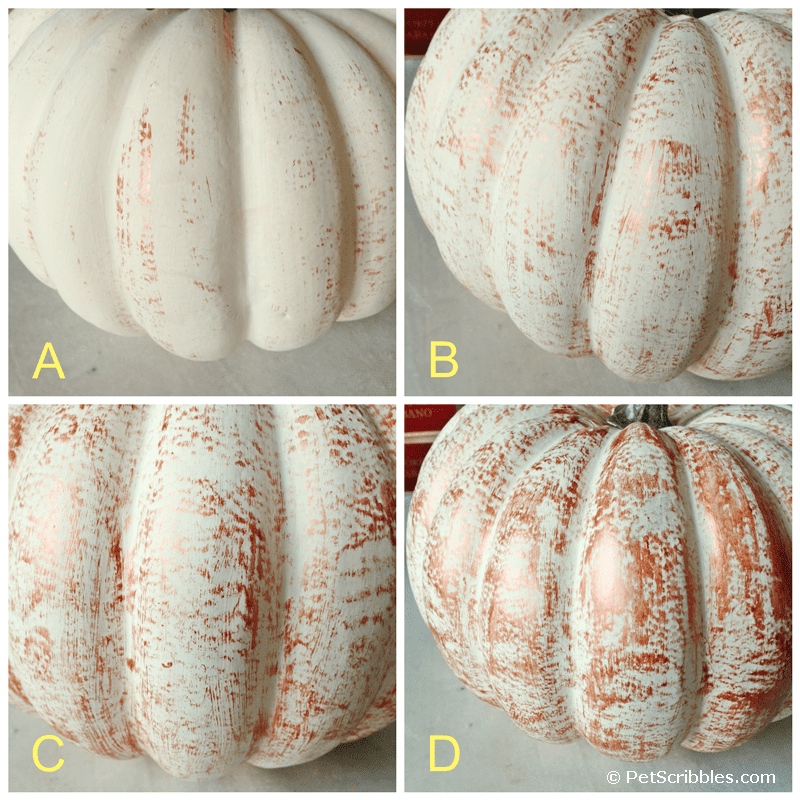
- Next, very lightly begin gliding your paintbrush over the surface of the pumpkin. (A)
- Build up your color with each new coat. (B) (C) (D)
Helpful tips:
- I purposely start very lightly, as it is much easier to add color versus removing it. (Trust me on this one!)
- Make sure to dry brush all of your pumpkins at the same time so they all look similar.
Step Three: Stop when you like the look of your pumpkins!
Yes, it’s up to you how much or how little coverage you want! (I said this was easy!)
Again, I’ve seen all variations of these pumpkins selling in stores this season, so why not make exactly what you want?
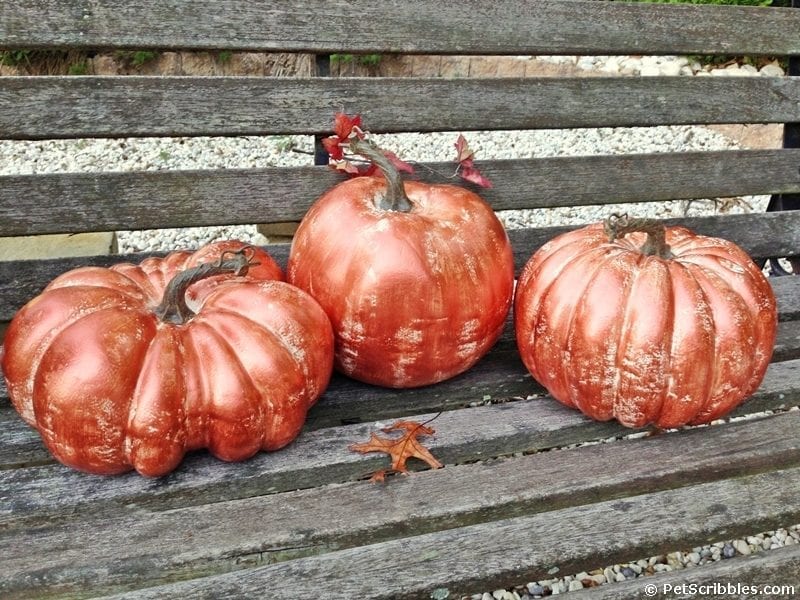
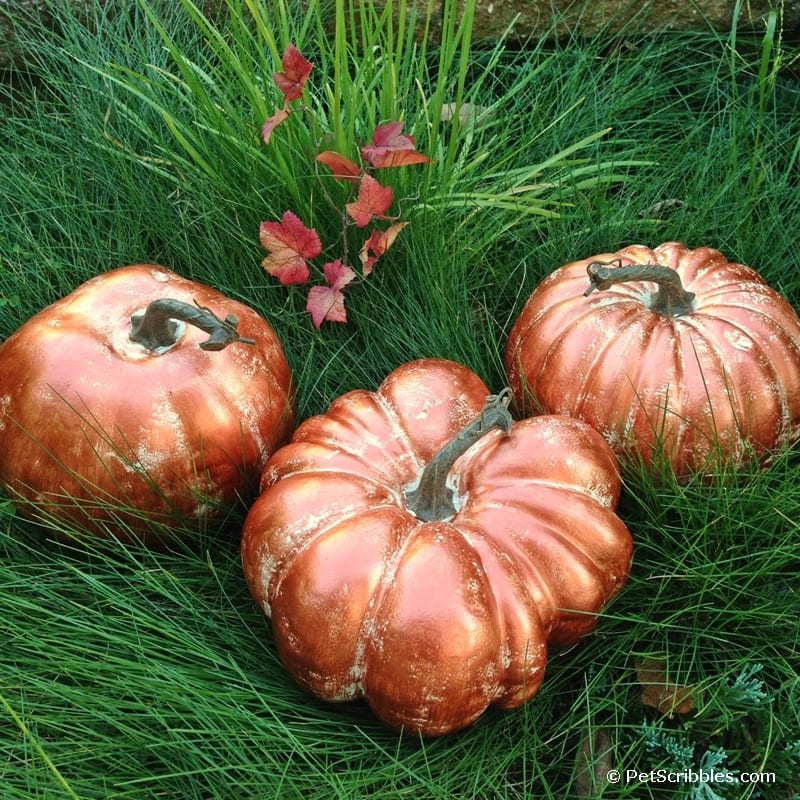
Copper Pumpkins!
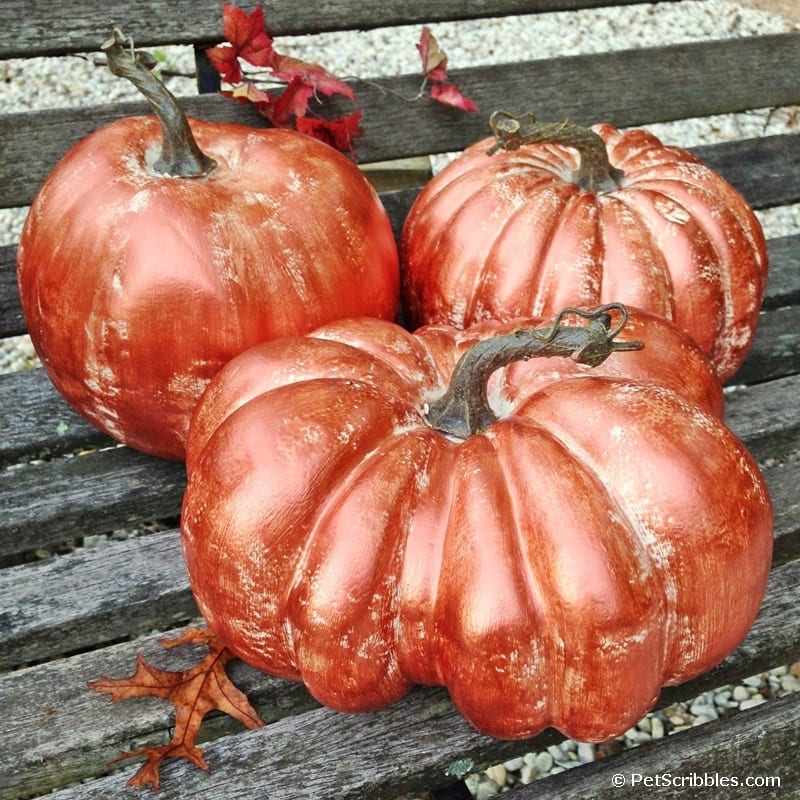
Normally I add some embellishments to the top of my pumpkins, but I kept these as is.
I hope you’ll try painting your own copper pumpkins this season.
Metallics never really go out of style, so even when the actual “all things must be copper” trend disappears someday, your pumpkins will still be dressed in a pretty Fall color!
Happy pumpkin crafting!
Stopping by from the Bloggertunities Stumble thread, but so glad I did! I haven’t seen the Deco Metallics….I don’t get out much… LOL.. BUT I must tell you that I just LOVE the look. Will be getting some of this nifty paint. Susie from Chelsea Project