How to make a sparkling pink snowflake garland using pretty cardstocks in shades of pink, rose gold and copper. Perfect hanging on a tree or from a mantel!
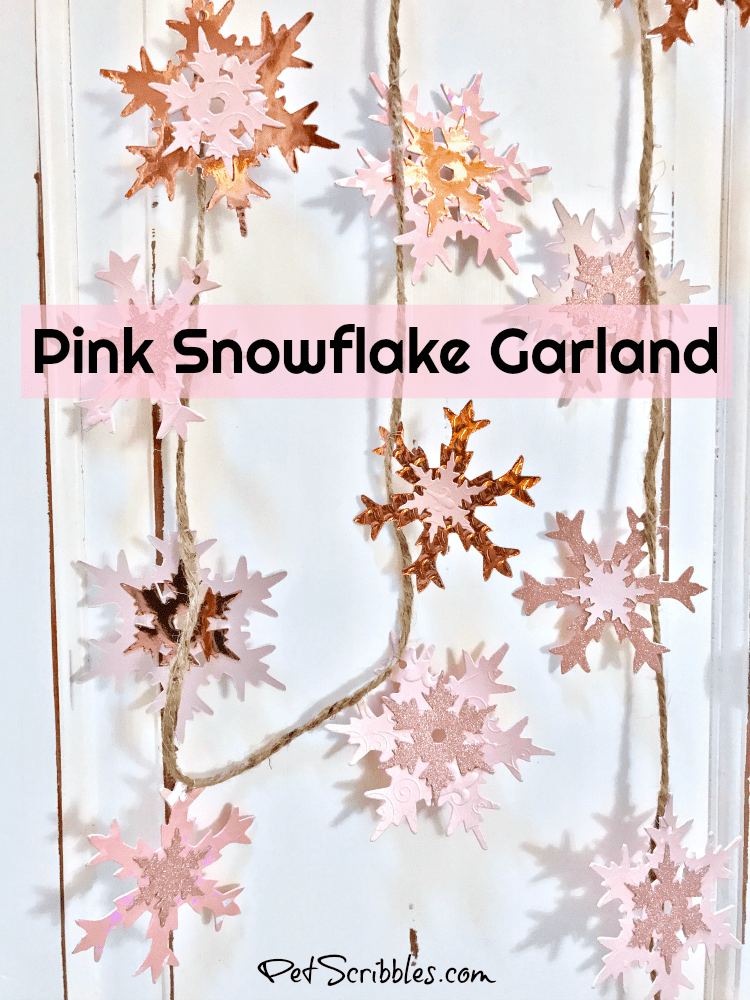
Today I’m sharing my sparkling pink snowflake garland!
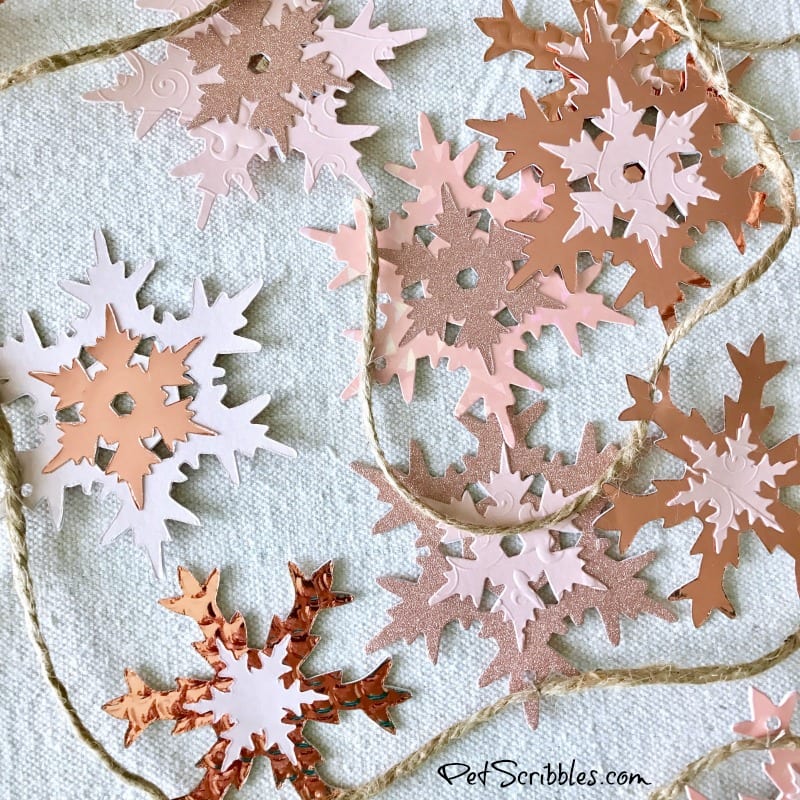
This is a paper garland, and in addition to three different shades of pink cardstock, I also used copper and rose gold cardstocks as well.
I found all of these gorgeous cardstocks in one paper pad, which made me so happy!
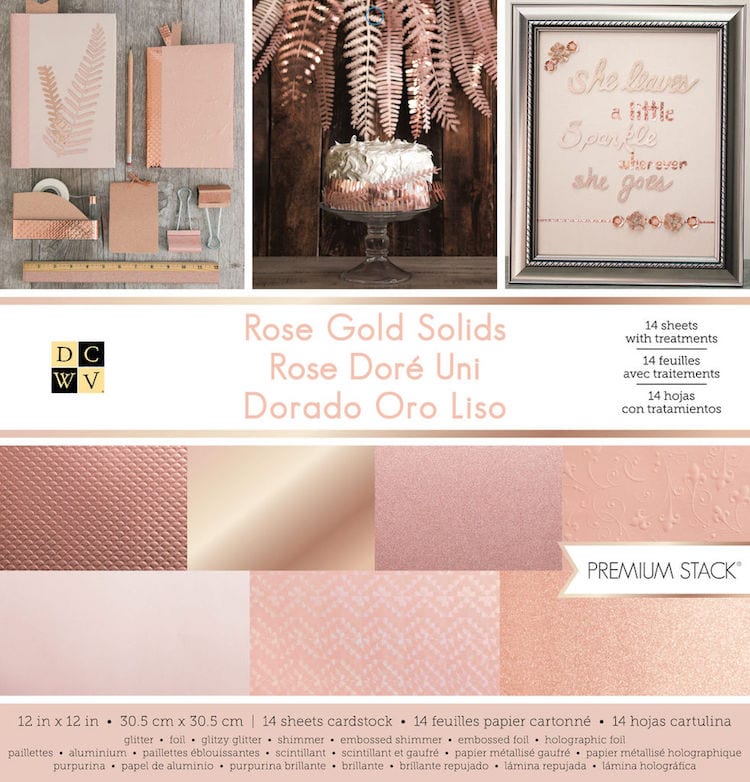
(I’ve got a link to it in the supplies list below.)
FTC Disclaimer: I’ve received products/compensation as part of the Xyron Design Team. This Pink Snowflake Garland, however, is 100% my own project!
How to Make a Sparkling Pink Snowflake Garland
Supplies:
- Xyron® Mega Runner
- Xyron® Tape Runner
- Xyron® Disposable/Recyclable Sticker Maker, 3-inch
- Swingline Paper Trimmer, Classic Cut Lite
- Stacked Snowflakes Die by Tim Holtz — Sizzix
- Big Shot Die Cutting Machine — Sizzix
- Rose Gold Solids Premium Paper Stack — DCWV
- Twine or jute for hanging
- Sewing thread to match the twine or jute
- Scissors
Tutorial:
Step One: Using the Swingline paper trimmer, cut the 12” x 12” paper down to a size that will fit through your die cutting machine.
Step Two: Cut out snowflake shapes using a die cutting machine.

I used my Big Shot machine with the Tim Holtz Stacked Snowflakes Die, which cuts 4 different sizes and styles of snowflakes. (Just one size is shown above.)
Step Three: Repeat Step Two, only this time place your paper the opposite way before making the die cuts.
In other words, if you normally place your paper “face down” on top of the die, switch the paper to being “face up” instead.
This will enable you to match up snowflakes perfectly, in order to make this two-sided garland.
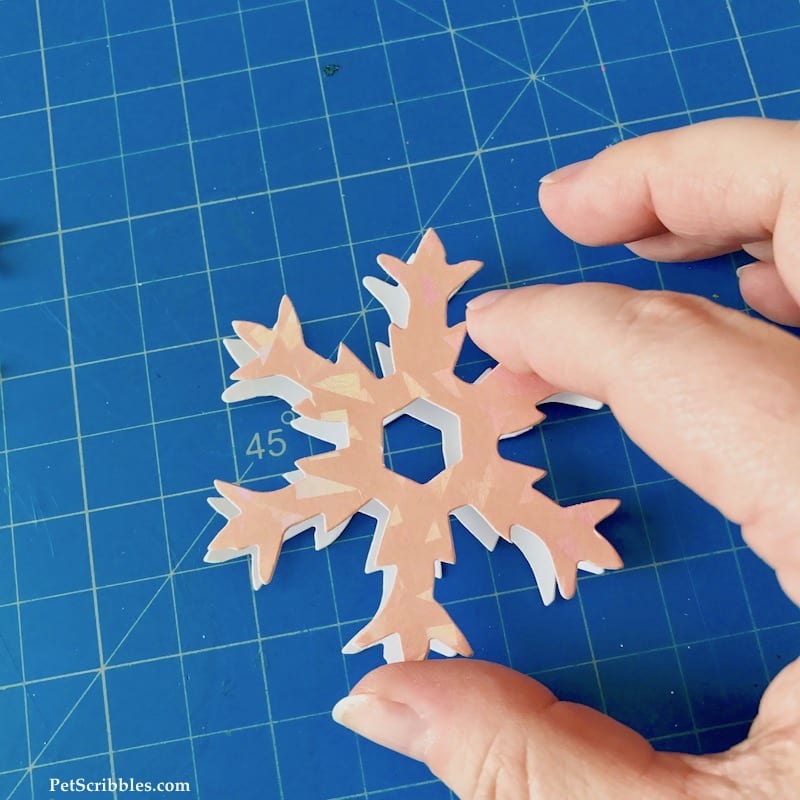
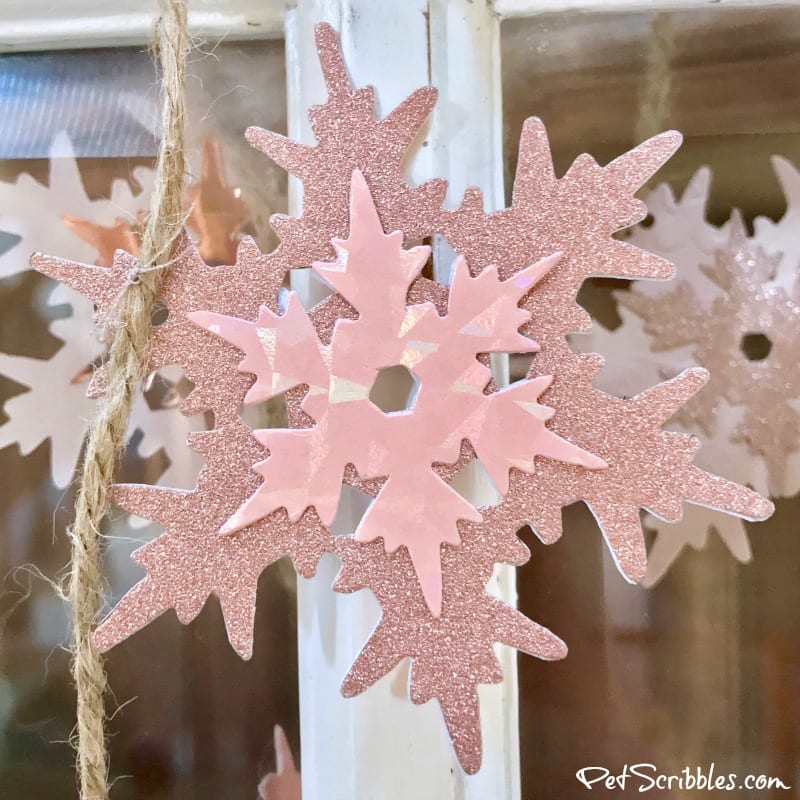
Step Four: Match up the snowflakes in the two largest sizes so that they can be glued together.
Set aside the smaller snowflake die cuts, as you will use them later.
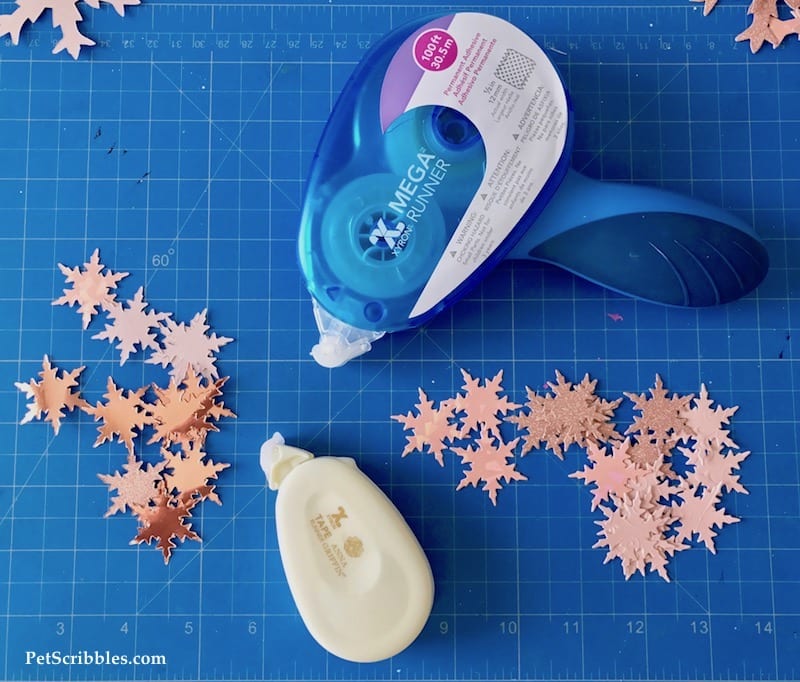
Step Five: Using Xyron adhesive, attach two matched-up snowflakes back-to-back. Repeat the process for all of the large snowflake pairs.
I used the Xyron Disposable/Recyclable 3-inch Sticker Maker to attach the snowflakes to each other.
The first snowflake goes in on one side of the Sticker Maker . . .
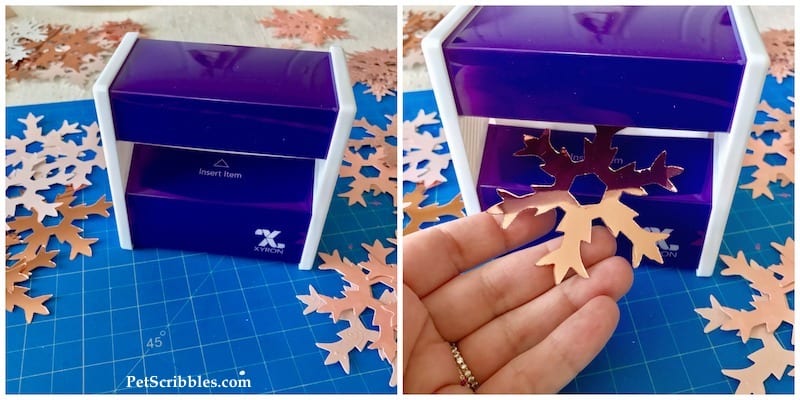
. . . and then you pull it through out the other side. Once through, simply tear off.
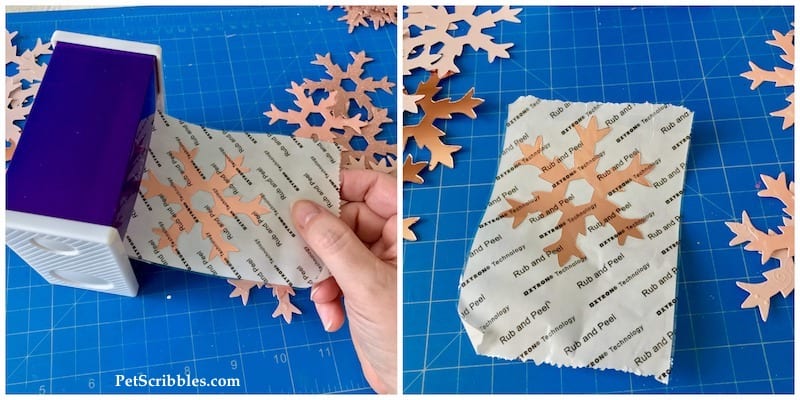
The snowflake above now has adhesive on the back of it, just like a sticker!
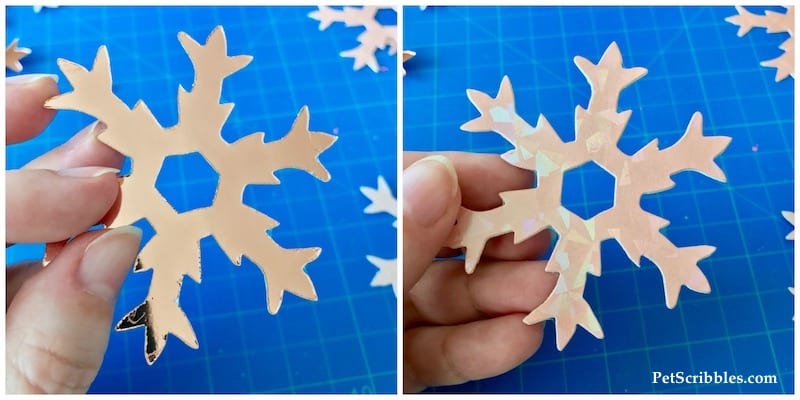
Match up the “other” snowflake — from the pairs you put together earlier — and place it (face up) onto the sticky back of the first snowflake:
Here’s how each side of the paper snowflake looks:
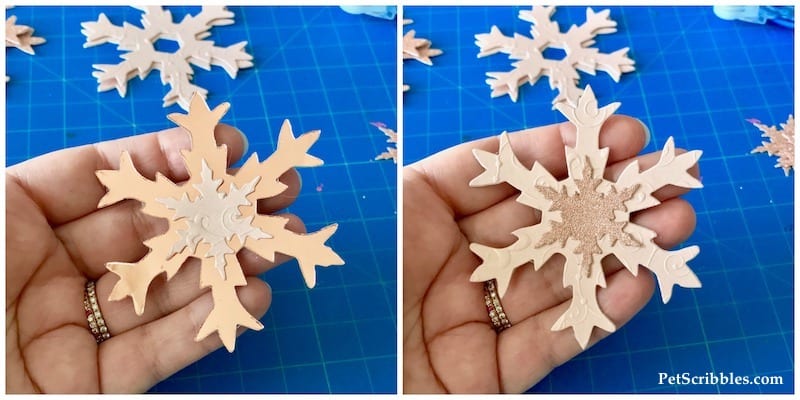
Step Six: Using the Xyron Mega Runner or a Xyron Tape Runner, attach the small snowflake die cuts to the centers of the larger snowflakes.
Adding the smaller snowflakes — and mixing and matching the cardstocks — really finishes off these snowflakes nicely!
Step Seven: Punch a small hole near the top of each snowflake, as shown below:
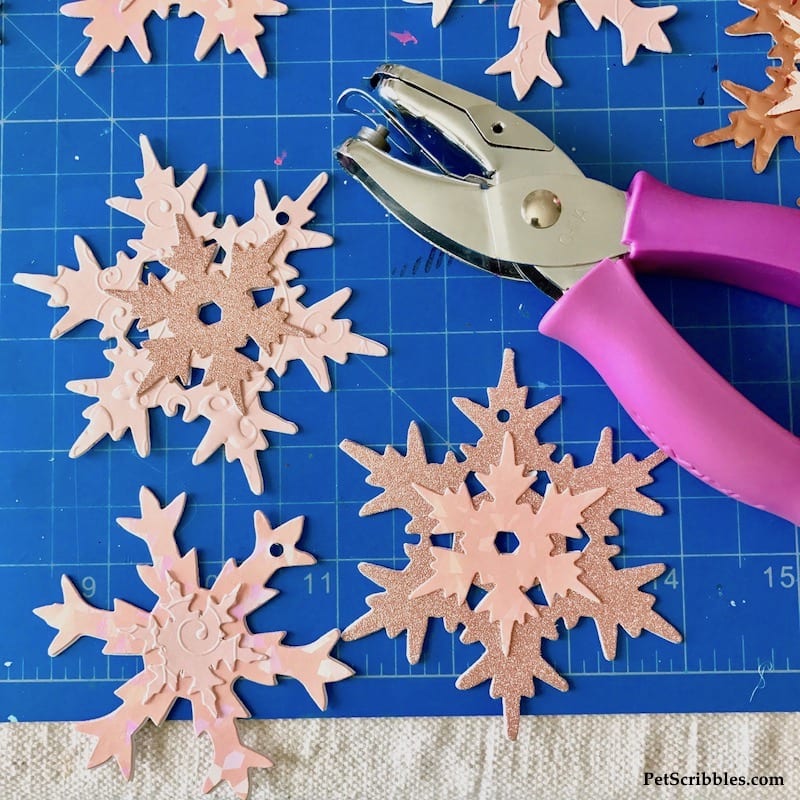
Step Eight: Take your thread and measure out a length for each snowflake, then double it just to make it extra sturdy.
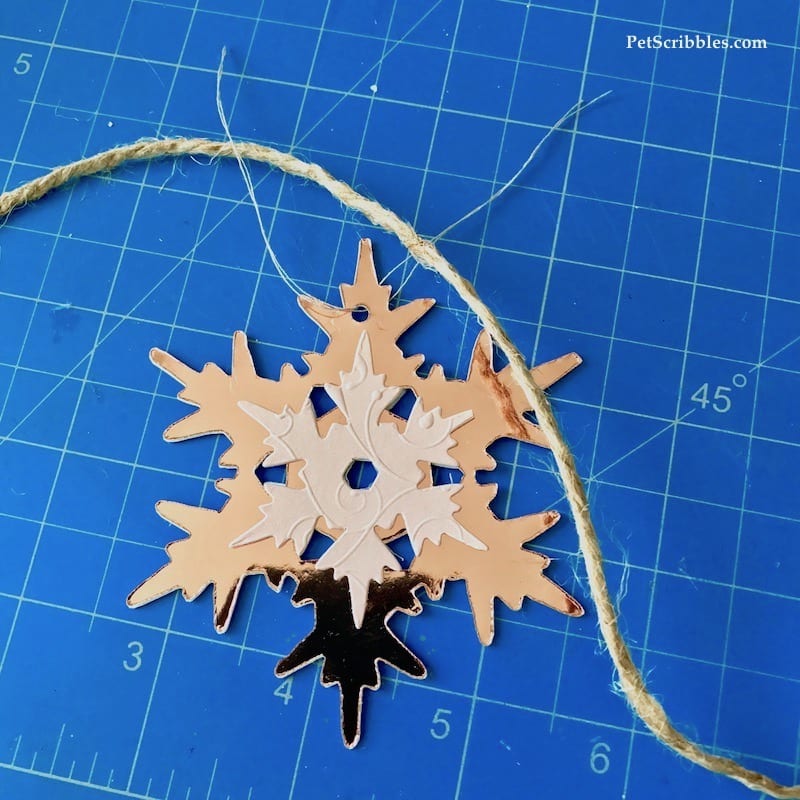
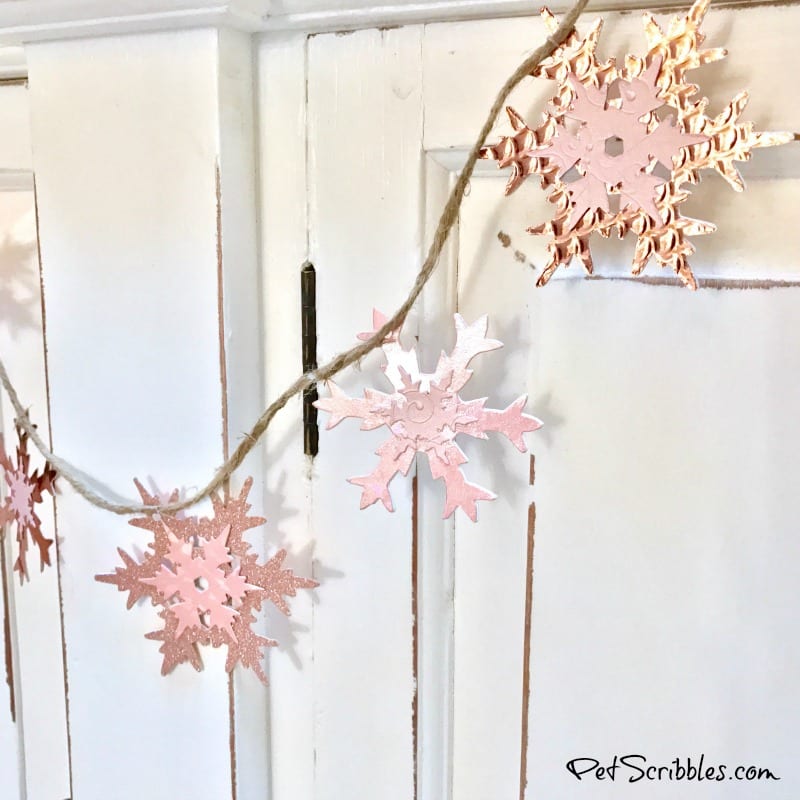
Step Nine: Attach each snowflake to the jute or twine with the matching thread. Snip off any extra thread.
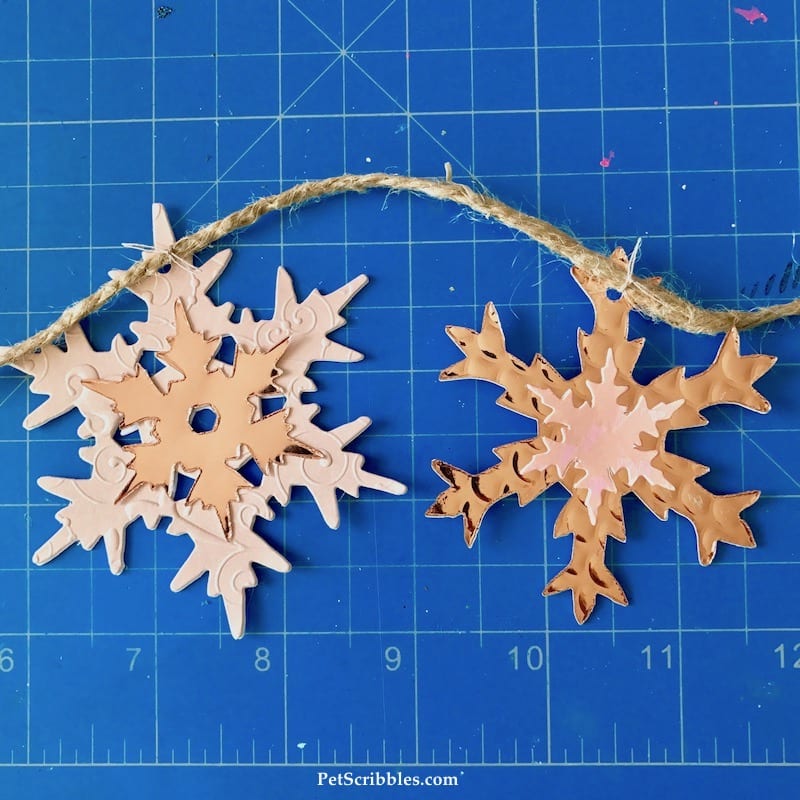
This step is the most time consuming — however — the end result it well worth it!
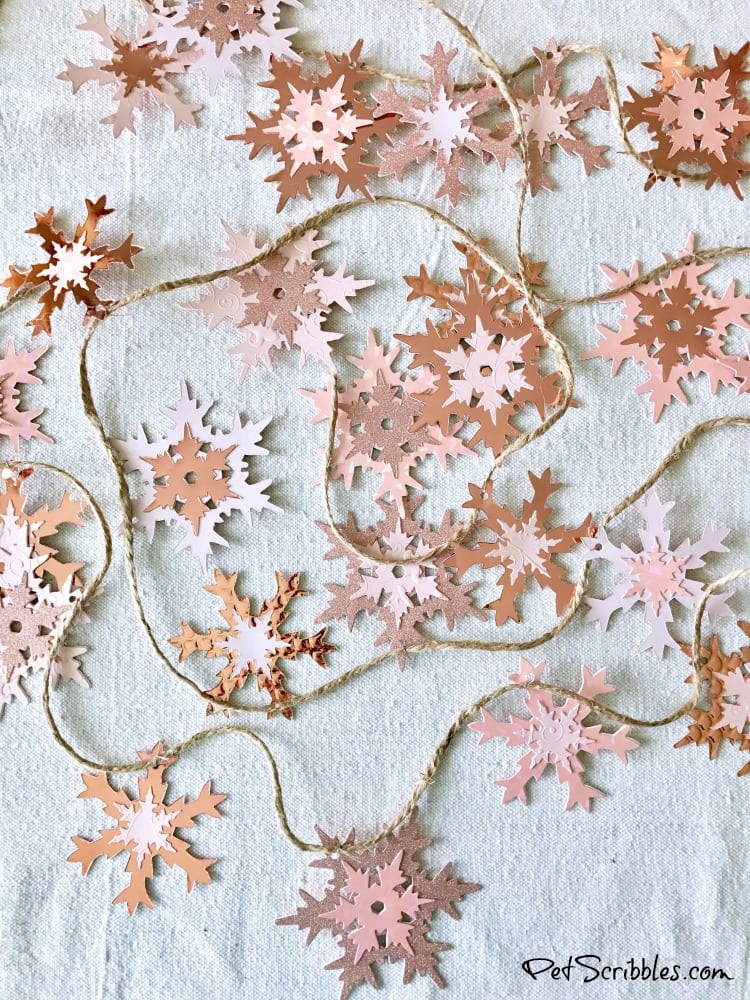
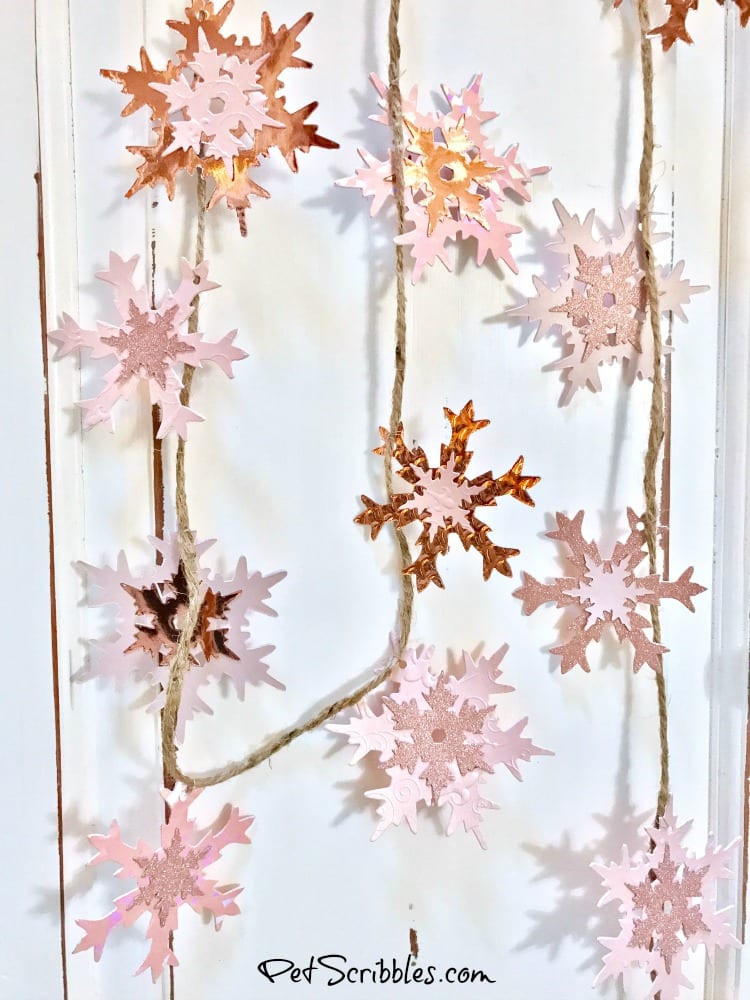
I’m not even sure how many color combinations I ended up making with the pretty cardstocks I used, but I love the variety!
I also love the sparkling pink snowflakes mixed with the jute: a little bit glam and a little bit rustic!
This garland will look so pretty hanging from a mantel or on a Christmas tree — or any other idea you can dream up!
Happy holiday crafting!
Leave a Reply