Making a Silver Glitter Ornament with a hanging star inside is easier than you might think. Only a few supplies are required, and the end result is stunning! Craft these up to sparkle on your own tree this year!
Have you seen these laser-cut, unfinished wood ornaments in the craft stores?
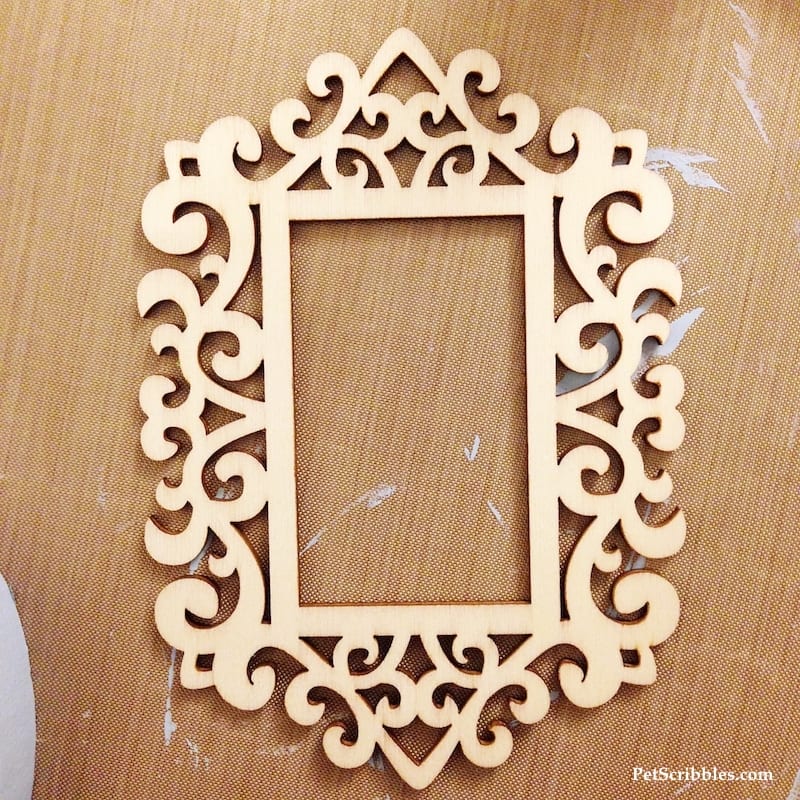
They come in various shapes, designs and sizes, ready to be decorated any way you can imagine!
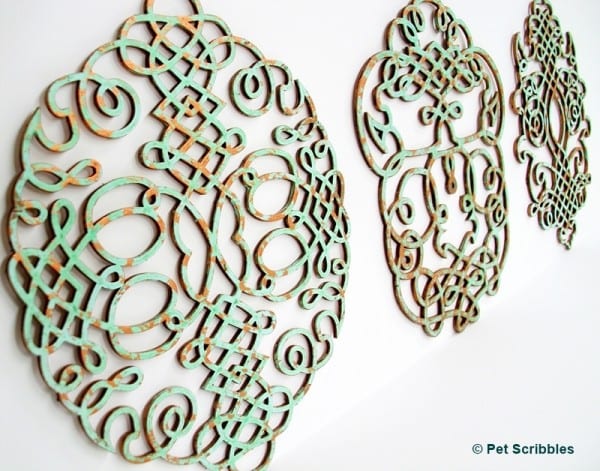
Years ago I used much larger laser-cut ornaments to create Faux Metal Wall Art:
To make these sparkly tree ornaments, I painted the unfinished wood with both paint and a chunky glitter paint — which has larger bits of glitter in it than traditional glitter paint.
FTC Disclaimer: Some of the links in this post are affiliate links. I explain more here.
These silver glitter ornaments are easy to put together.
Here’s how . . .
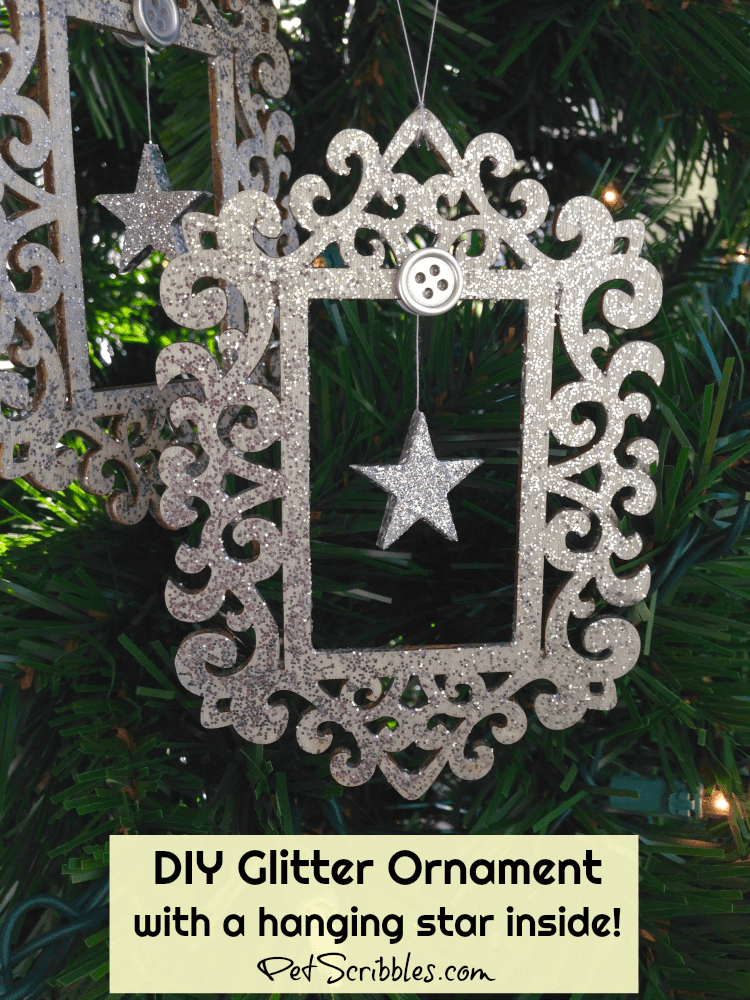
Silver Glitter Ornament with a hanging star inside!
Supplies:
- Laser-cut, unfinished wood ornaments (3)
- FolkArt sterling silver metallic outdoor craft paint — Plaid Crafts
- FolkArt chunky silver glitter paint — Plaid Crafts
- Small paintbrush
- Small recycled plastic lid (to hold paint)
- Thread (in matching color)
- Silver buttons (2 per ornament)
- Silver adhesive-backed scrapbook stars (2 per ornament)
- Scissors
- Glue Dots (mini)
Tutorial:
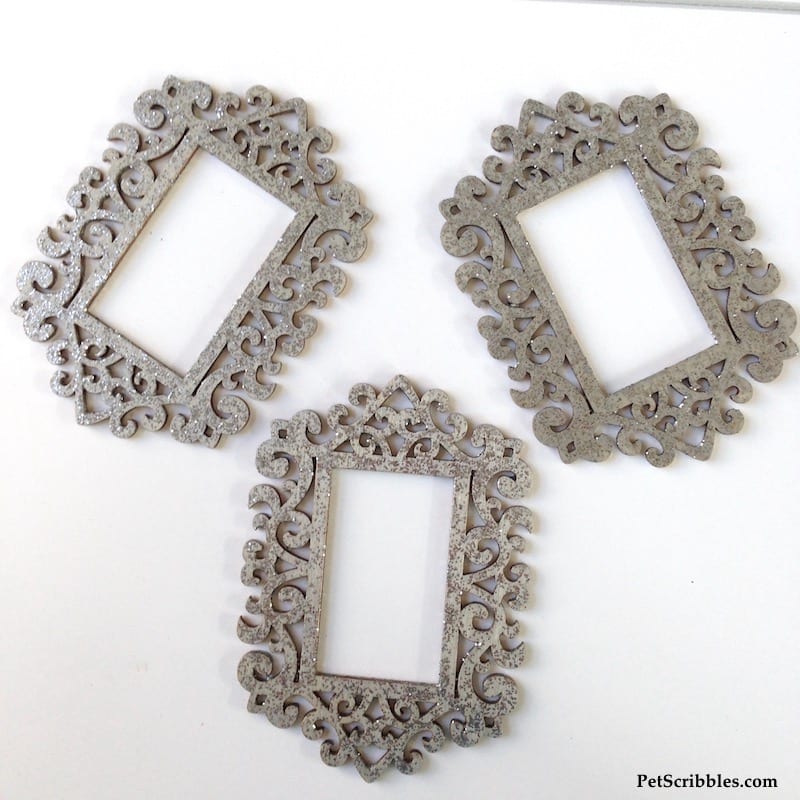
Step One: Paint one coat of silver metallic craft paint onto each unfinished wood ornament. Let dry.
The metallic paint gives a nice sheen and is the perfect base for the next coat of chunky glitter paint.
Step Two: Paint two coats of chunky silver glitter paint onto each ornament. Let dry in between coats.
A) Load the chunky glitter paint onto one of the flat sides of your small paintbrush:
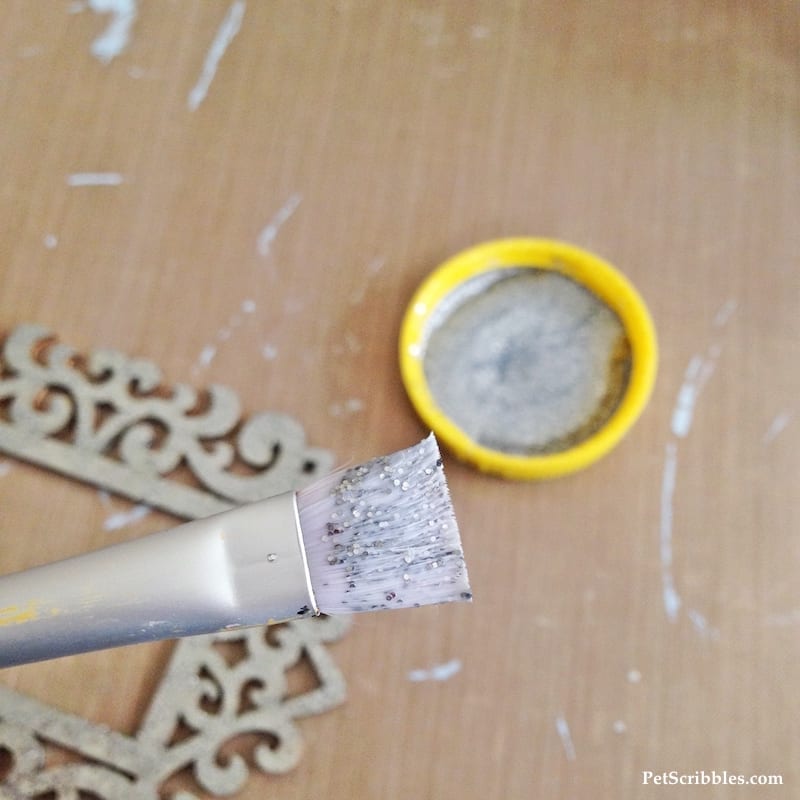
B) Tap that flat side of the paintbrush (loaded with glitter) onto the ornaments, working in small sections at a time.
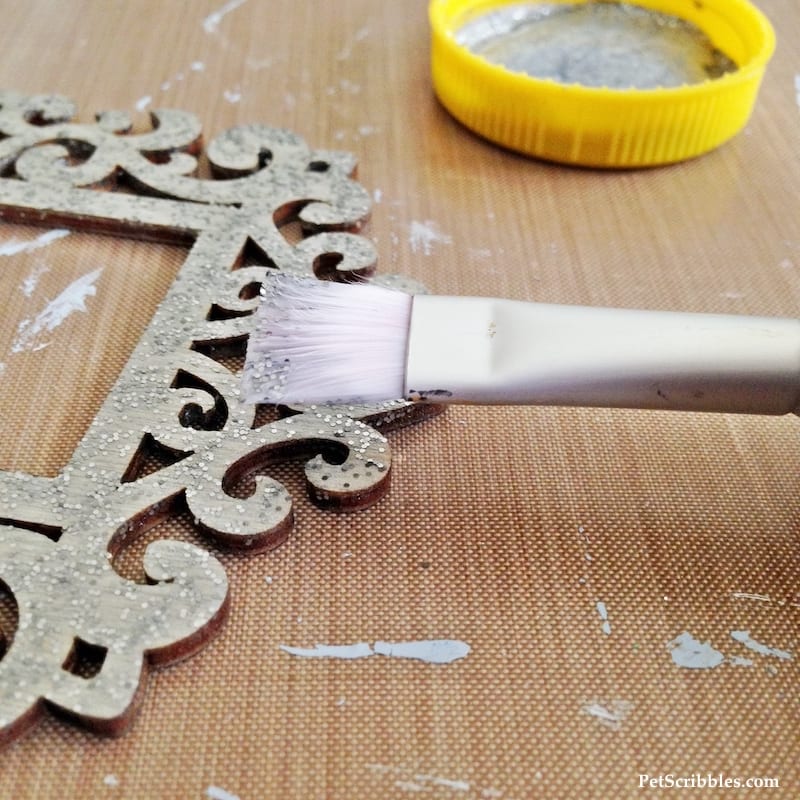
You want to coat the surface of the ornaments with glitter, rather than paint it on.
Let dry thoroughly.
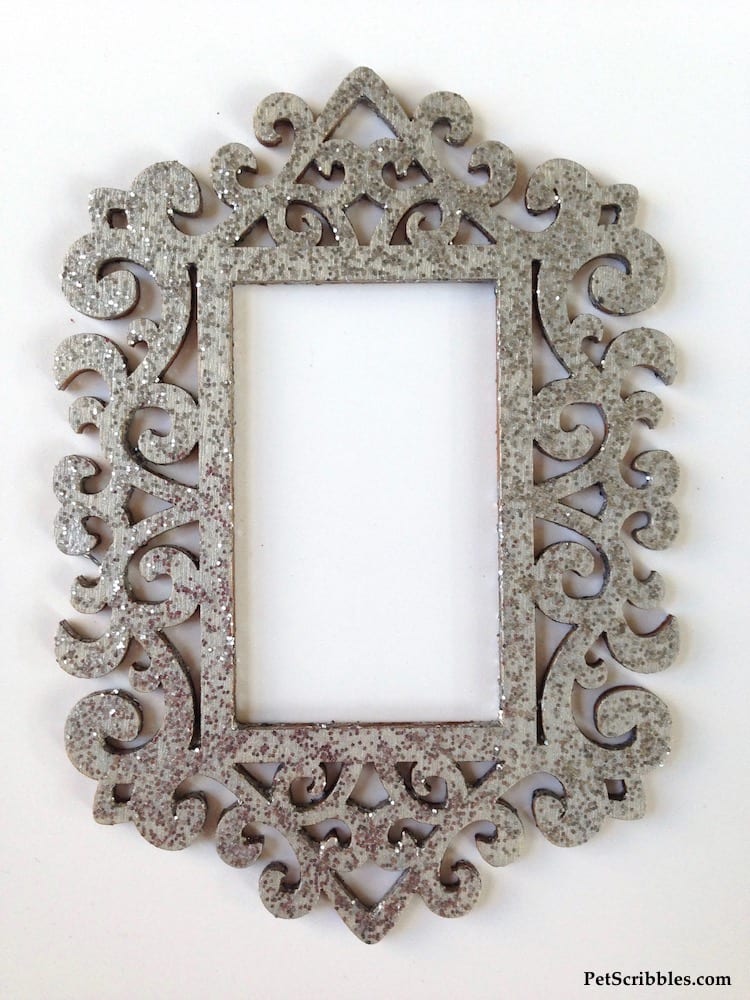
Once dry, the chunky glitter paint looks like glass glitter! (At least to me it does!)
Helpful tip: You can substitute regular silver glitter paint if so desired. You will still achieve sparkling ornaments and they will reflect the twinkling lights on your tree wonderfully.
Here are the painted and glittered ornaments so far:
Helpful tip: You can stop here if you’d like. Hanging several of these pretty ornaments on your tree — or on a wreath — will look lovely!
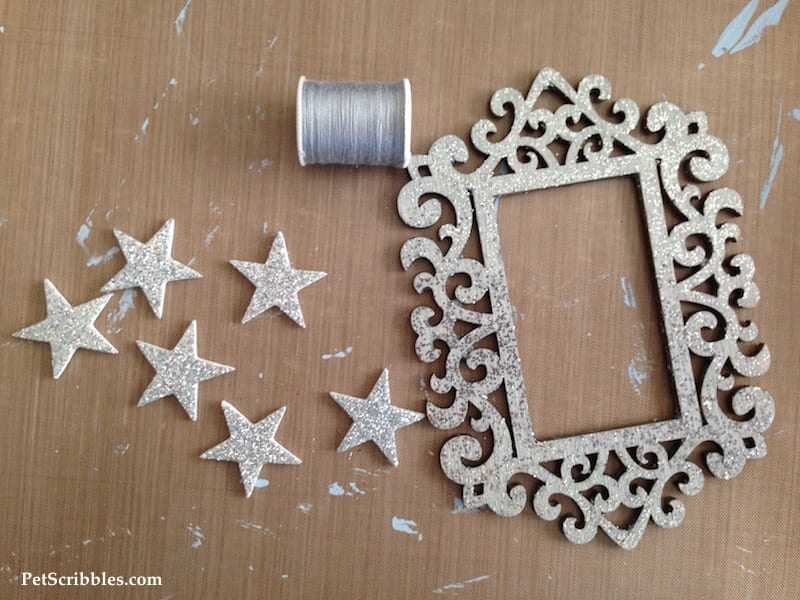
Now it’s time to add the hanging star inside the frame of the ornament.
You’ll need adhesive-backed stars, thread and scissors for this step.
Helpful tip: You can find adhesive-backed stars in the sticker aisle of your favorite craft store. I also found these stars on Amazon for you.
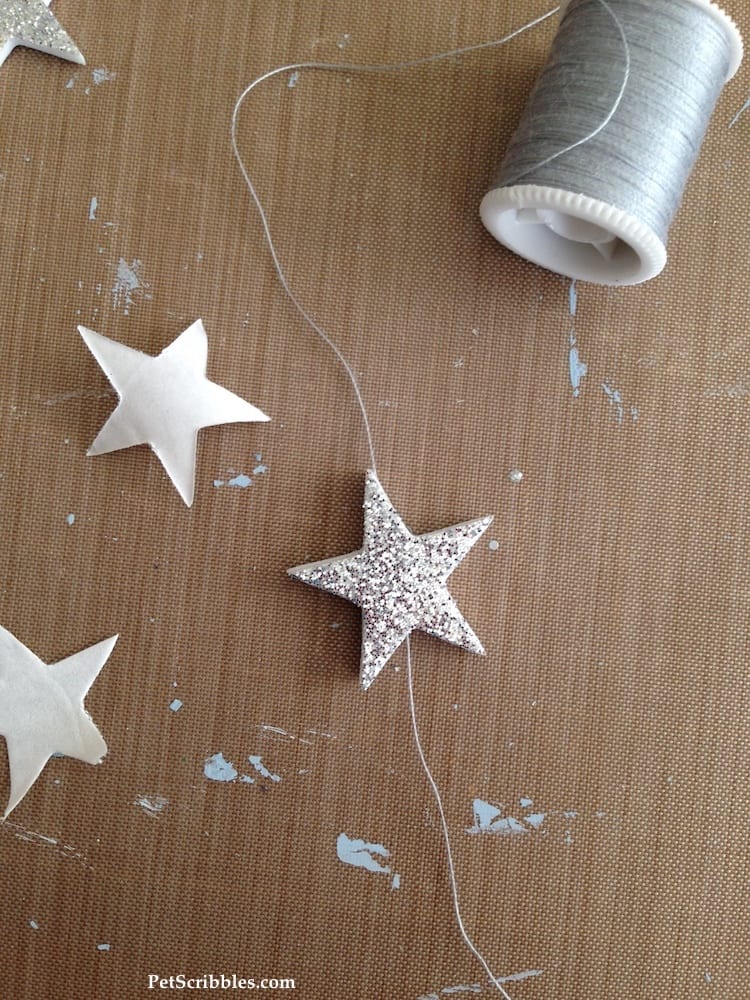
Step Three: Cut a length of thread longer than you’ll need.
You can eyeball this, as the star will be hanging “within” the framed ornament.
Step Four: Remove the adhesive backing from one of the stars. Place the thread onto the adhesive, leaving lots of thread on either side of the star.
Helpful tip: I purposely wanted one of the star’s points to be pointing straight up, so that’s how I positioned my thread, as if it’s coming up through the top point of the star.
Step Five: Take a second star, remove the adhesive backing and place the star adhesive-side down onto the the adhesive side of the first star. (See photo below.)
You’re making a “sandwich” with the thread in between the two stars.
The adhesive sides will easily stick together, keeping the thread secured in between them.
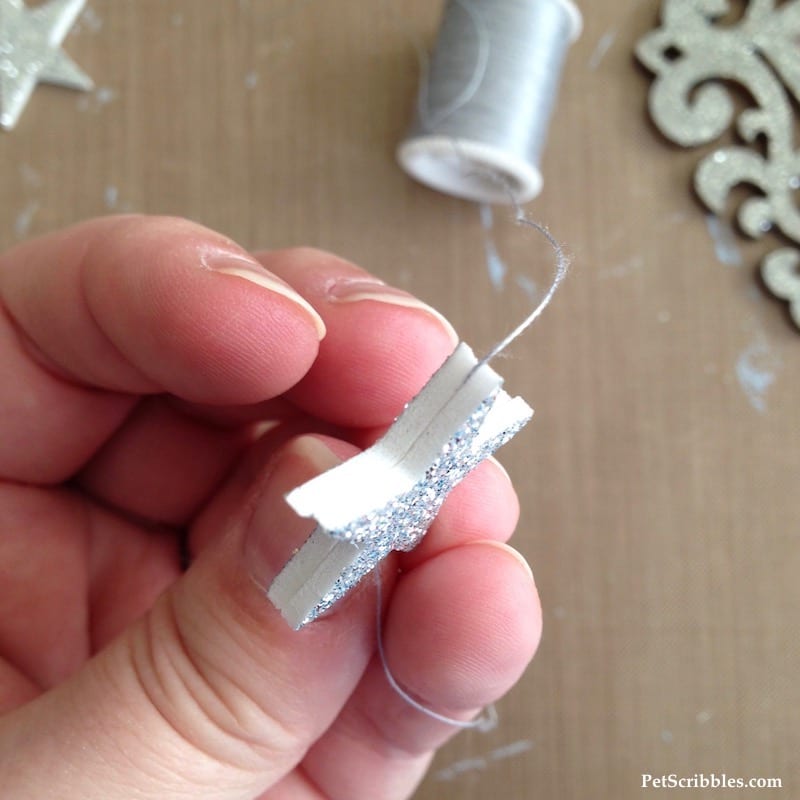
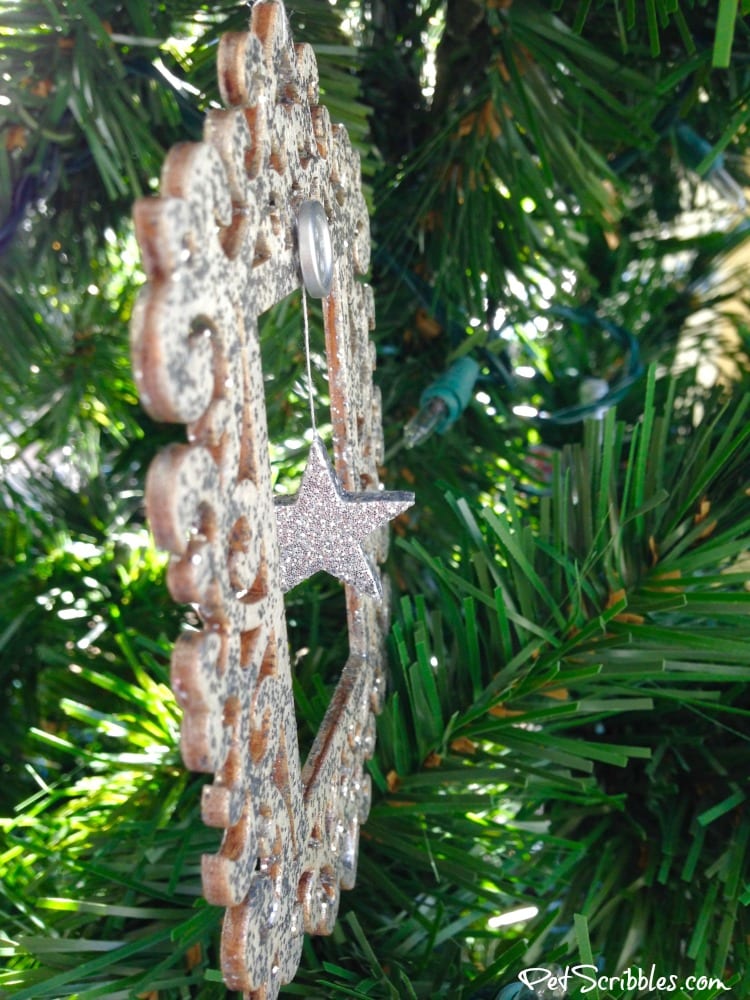
One end of the thread comes out of the top point of the star. The other end of the thread comes out between two of the star’s points. (See photo above.)
Repeat this step for each ornament.
When finished you should have three stars (one for each ornament) that have a thread in between them.
Optional step: Apply chunky silver glitter paint onto the edges of your stars if needed. Let dry.
My adhesive stars had white edges that I didn’t like (see photo above), so I covered them up with glitter.
Step Six: Cut the extra thread off from the bottom of the stars.
Step Seven: Line up each threaded star with the center of each ornament’s frame, and decide how far down you want your star to hang within the opening.
Step Eight: Take a silver button, apply a mini glue dot to the back of it, and attach it to the ornament directly on top of the thread.
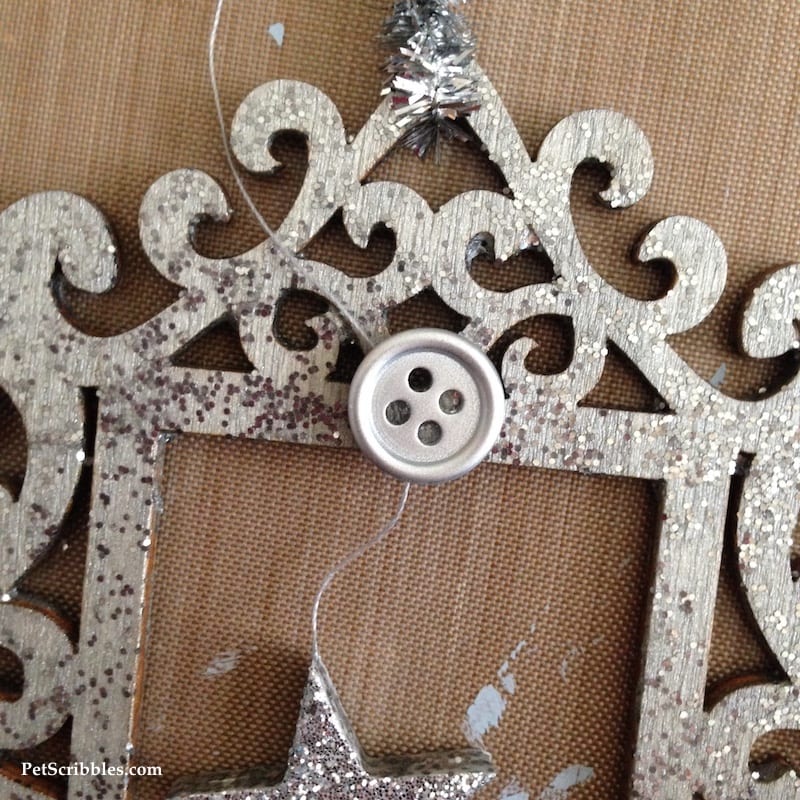
Cut off the extra thread sticking out from the top of the button.
Step Nine: Cut a length of thread to make a simple ornament hanger.
I tied mine into a long circle, then looped it through the top of the ornament.
Helpful tip: You’ll see some silver tinsel in the photo above. I had originally tried making ornament hangers using tinsel pipe cleaners, but I didn’t like how it looked. The thread works much better as the ornament can turn freely and reflect the Christmas lights!
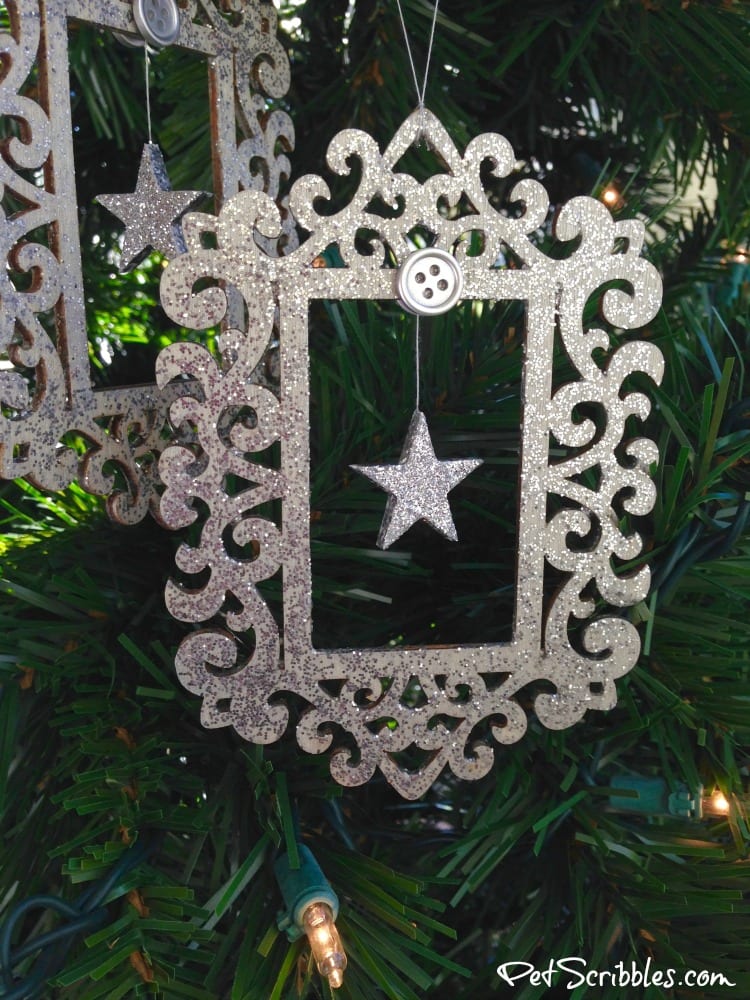
And that’s it!
Hang on your tree and enjoy!
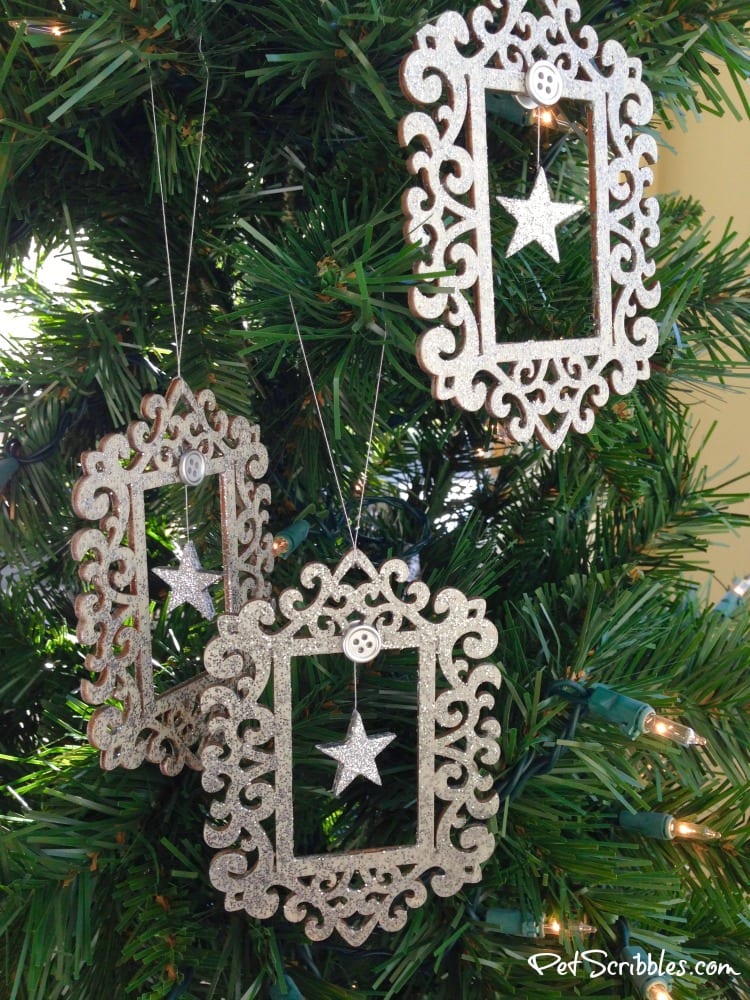
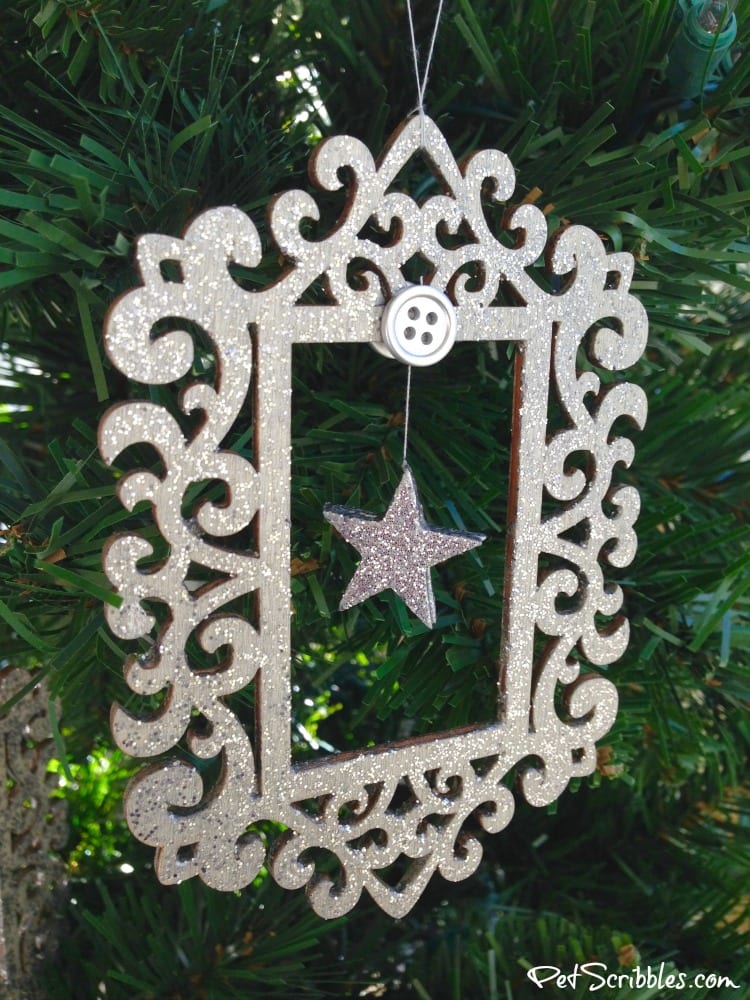
I love how the silver star turns on its own inside the ornament!
These ornaments are fun to make and look so pretty on our Christmas tree!
Happy holiday crafting!
An older version of this tutorial first appeared on Deja Vue Designs, when I was a craft contributor there. This post has been completely updated for you here!
Leave a Reply