When to cut back daffodils, which continue growing long after the flowers are done blooming. Learn how to easily deadhead daffodil flowers (if needed) and when to prune daffodils. This is super helpful info to know!
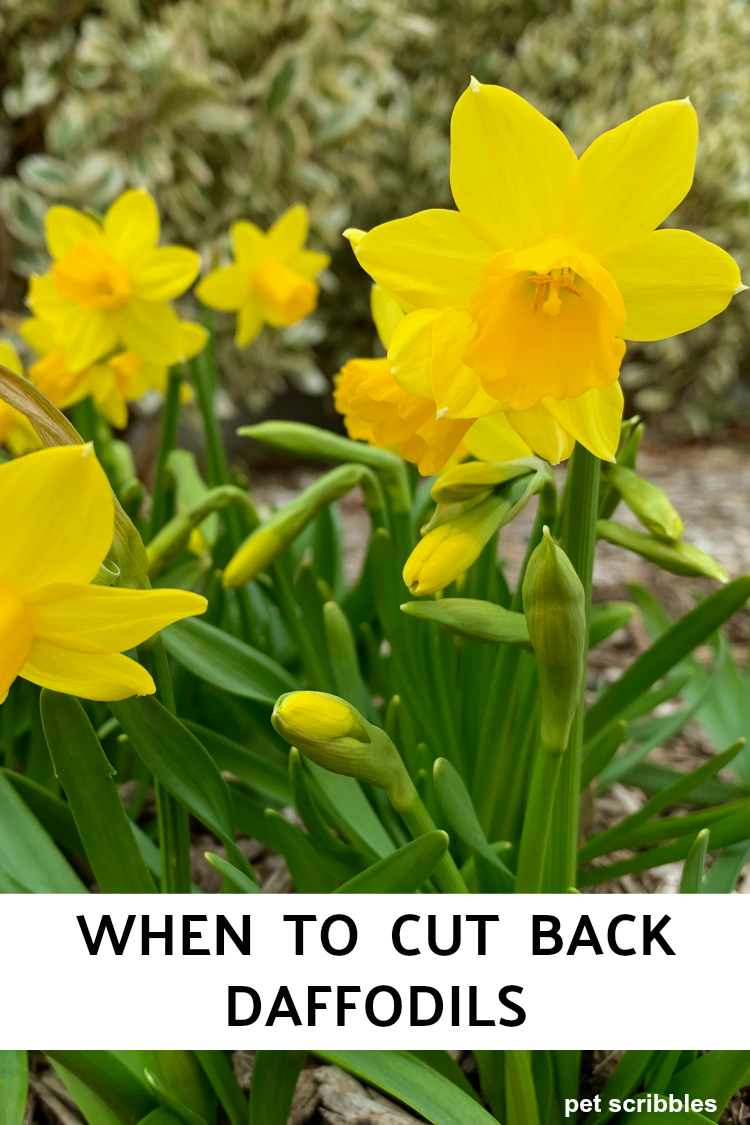
Daffodils are my favorite Spring-flowering bulb.
Here’s why:
- Reliable bloomers year after year
- Gradually increase their spread over time
- Deer and rabbits don’t like them
- Varieties that bloom early-season, mid-season and/or late-season
- Almost overwhelming choices of color and size
- They last long in a vase
In addition to how daffodils usher in the Spring season, they have always been a symbol of hope, especially for cancer patients as well as survivors like me.
So daffodils bloom and bloom and make you smile.
And then what?
Daffodils continue to grow even after the pretty flowers are gone. This is why it’s important to keep the leaves and stems in place for at least six weeks after blooming is completed, so the bulbs store enough energy and nutrients for next year’s flower show.
Table of Contents
- Deadheading Daffodils
- Daffodil Seed Pods
- Bulb Energy
- Unsightly Appearance
- Should I save daffodil seeds from seed pods?
- When to cut back daffodils after blooming
- What Experts Suggest
- How and when to cut back Early Blooming varieties
- How and when to cut back Mid-Season and Late-Season varieties
- Can I wait until the stems are completely yellow?
- Daffodil Fertilizer
- A note about bonemeal fertilizer
- Better options for daffodil fertilizer
- Daffodil Books: Further Reading
- More Spring Pruning Tips
Deadheading Daffodils
Deadheading daffodils is optional, however there are three reasons to deadhead your daffodils when they’re finished blooming:
- Seed pods
- Bulb energy
- Unsightly appearance
Daffodil Seed Pods
There are thousands of daffodil varieties in existence, and many of them can produce seed pods while the plants are finishing up the growing season.
This is something I did not know, and as soon as I learned about these possible seed pods, I headed outside to check our daffodils.
Sure enough, I spotted those darn seed pods — which totally reminded me of my eye-opening moment learning about the Stella D’Oro Daylily seed pods and how they can affect future blooming.
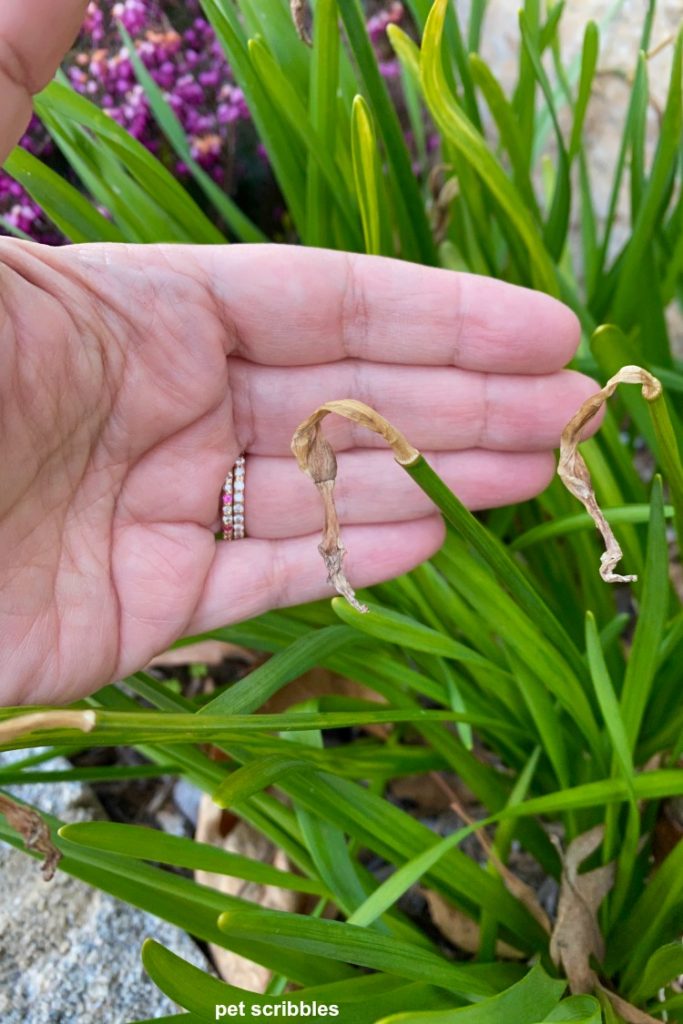
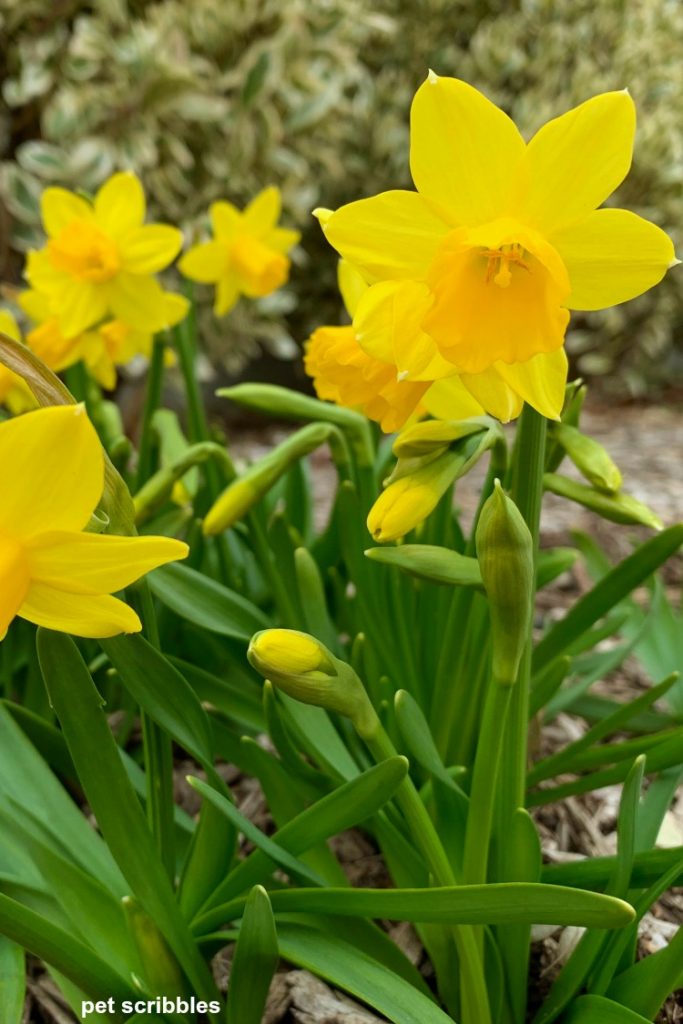
Here is what daffodil seed pods look like:

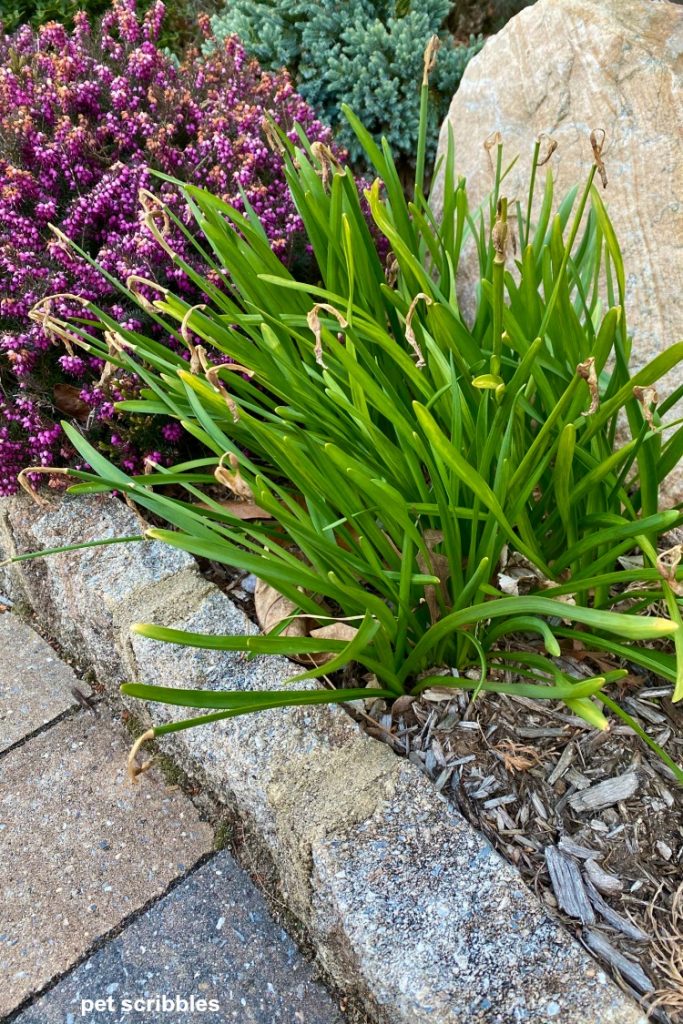
Below, on the right side of this image, you can see a daffodil still in bloom while others on the same plant are already finished blooming. I cut off the faded daffodils (and their seed pods) as an easy, quick chore during the Spring.
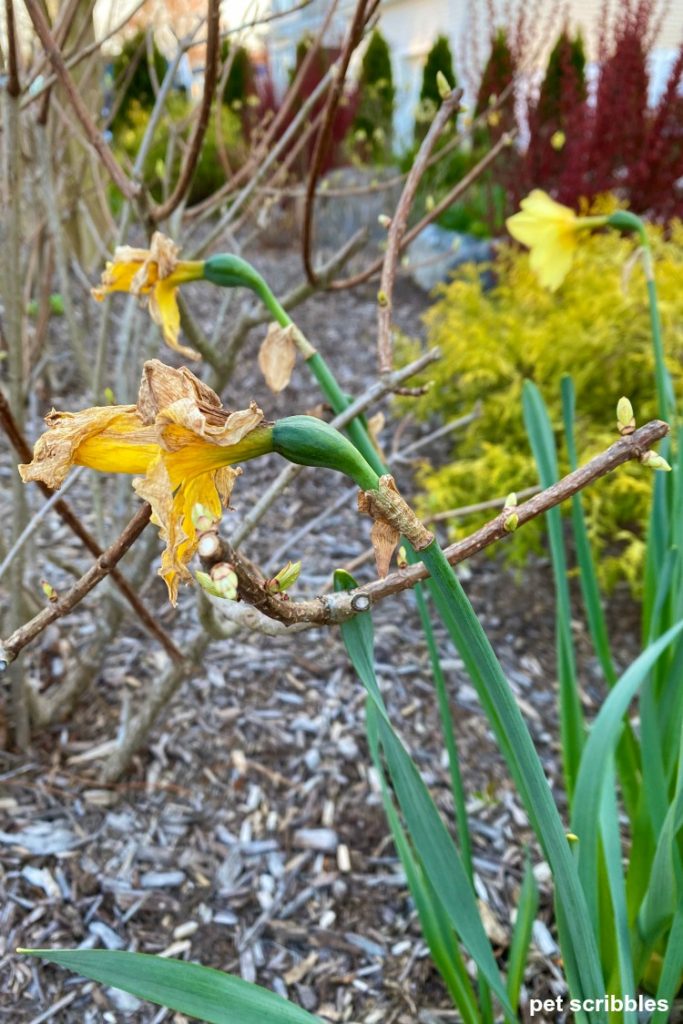
Here is a close up view of what the seed pods look like:
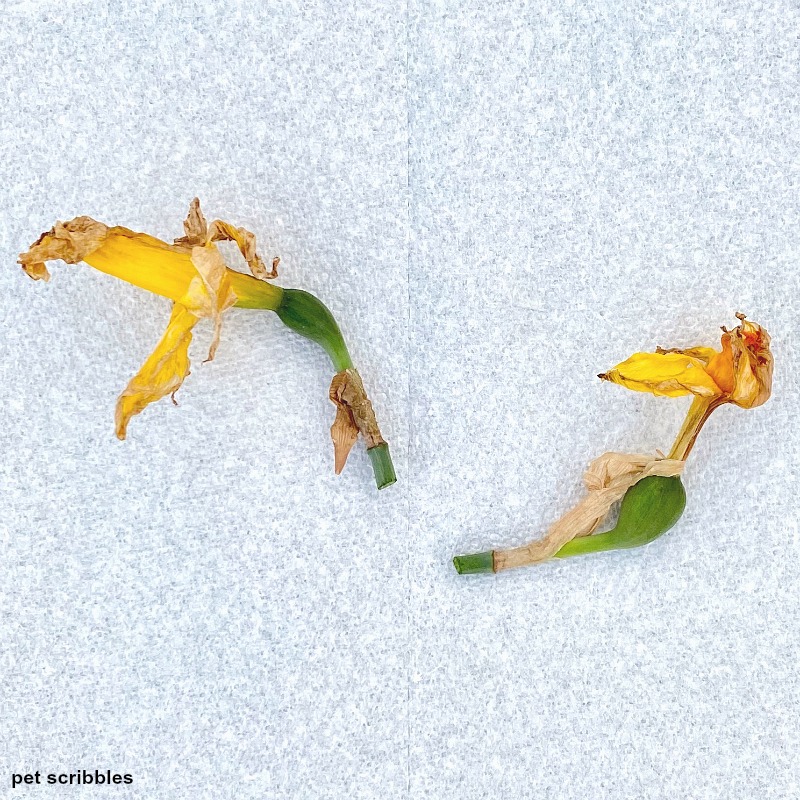
Simply snip them off near the tip and throw them away. Make sure to leave the stem in place. (I use these small Fiskars Pruning Snips which work well.)
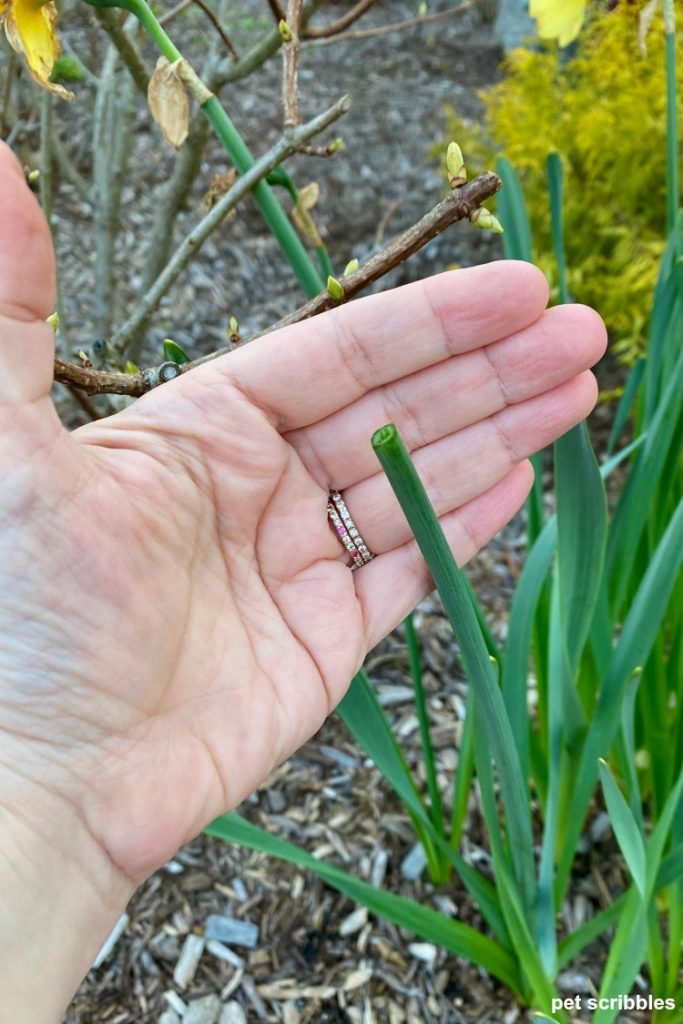
These bulbous seed pods don’t show up on every daffodil variety — for example my miniature Tete-a-Tete Daffodils don’t have them:
And luckily for me, what’s left of the Tete-a-Tete miniature daffodils fall off the plant on their own.
There might be a small seed pod in the above image, but notice it’s on the brown part that falls off. Easy peasy and no work for me!
Pay attention in case your daffodils develop seed pods and snip them off as needed.
Why is deadheading daffodils important?
Bulb Energy
All of the daffodil’s energy needs to be put into the bulb to prepare for next year’s show. And this bulb energy begins right after they are finished blooming.
Just as it’s important to leave the leaves and stems in place for daffodils to store up nutrients, it is equally important to remove seed pods so the plant doesn’t focus any energy on developing seeds.
Unsightly Appearance
For some varieties of daffodils, especially the large-cupped ones, you might want to remove the dying blooms just because they don’t look so great — even if you don’t see any seed pods developing.
This isn’t necessary for our miniature Tete-a-Tete Daffodils, because the blooms fade quickly, turn brown and then fall off the plants on their own. And there are no seed pods to be seen.
However, on our large-cupped Red Devon Daffodils, I clip off the dying flowers and the seed pods. This improves the look of the garden and highlights those daffodils still in bloom.
Should I save daffodil seeds from seed pods?
Not unless you are a very patient gardener!
Daffodils grown from seed can take several years to develop, and you might not even remember where you planted them. Planting bulbs is the best and fastest way to add daffodils to your landscaping.
When to cut back daffodils after blooming
Here is what the experts suggest:
Allow daffodils to remain until the leaves and stems have turned yellow and die.
Only then should you cut back the plant to the ground.
Daffodils use their leaves to create the energy that the bulbs need.
Daffodils continue to need sunshine and water as they grow, and as the bulbs do their thing underground.
If you cut back daffodils too soon, the bulb has no way to store up what it needs for next year and may result in no flowers the following year.
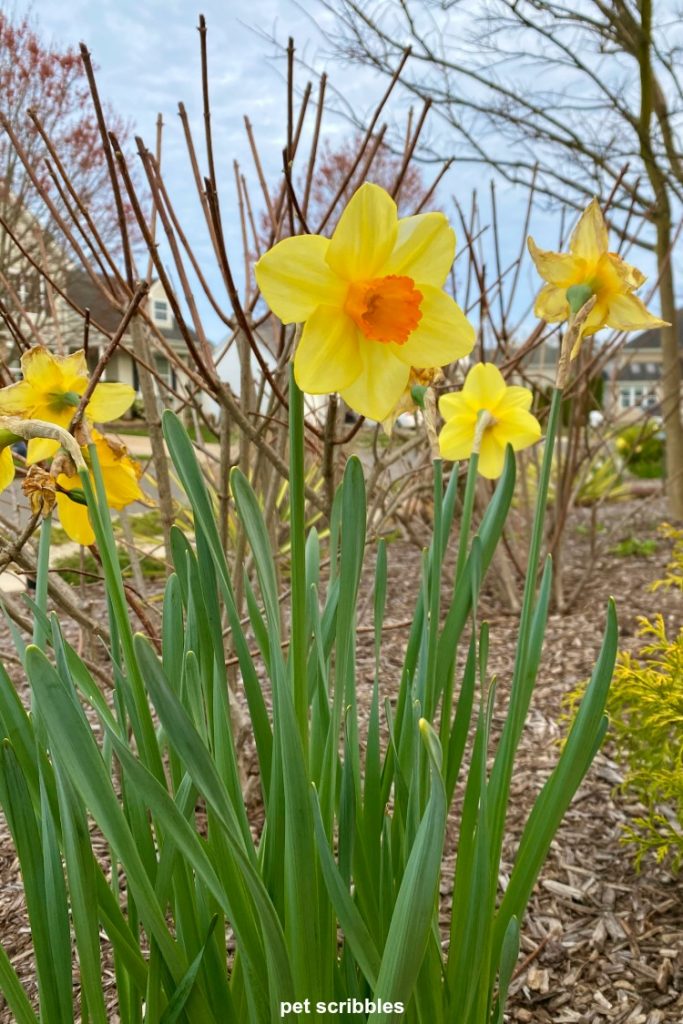
How and when to cut back daffodils: Early Blooming varieties
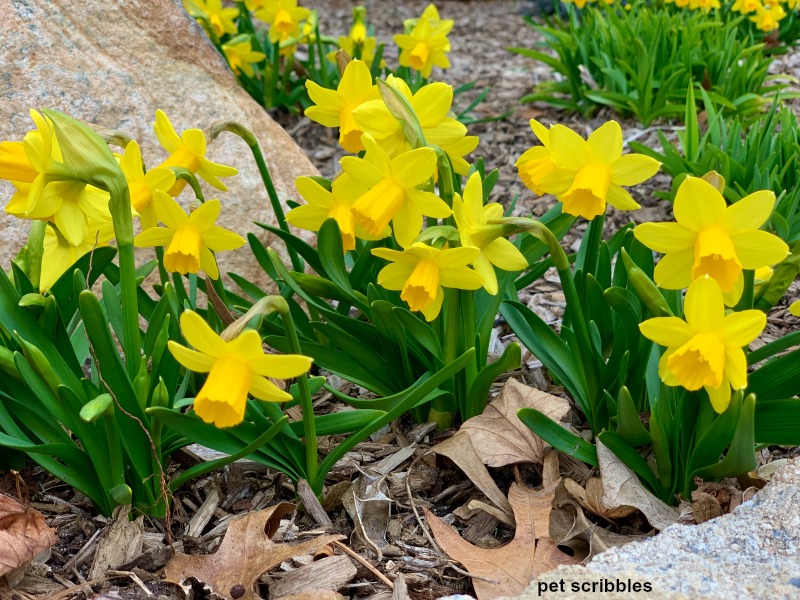
Using my miniature Tete-a-Tete Daffodils as an example:
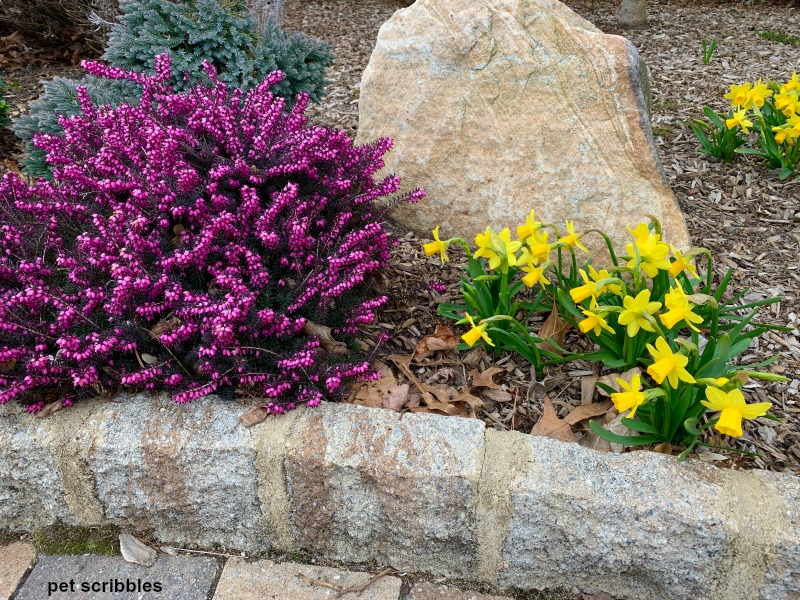
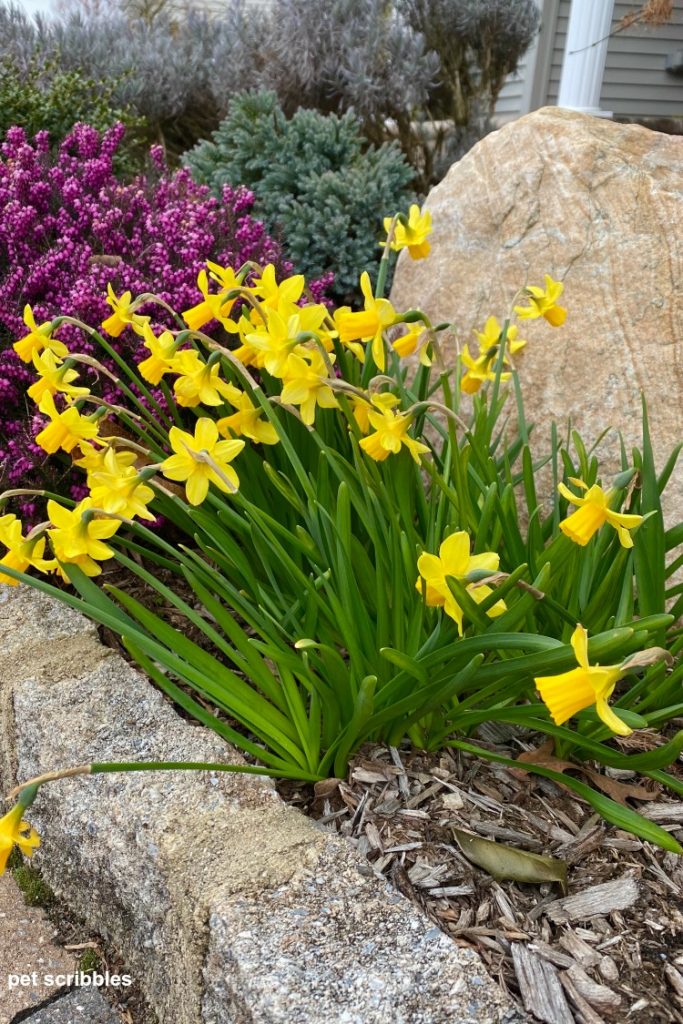
These small daffodils are classified as early-blooming. Here they are next to Kramer’s Red Winter Heath:
I adore the way these little flowers look like they are whispering secrets to one another while continuing to rise up and grow. They always look like they’re socializing with each other!
Several weeks later, they are taller, though still on the petite side:
Last year, they were in full bloom at the end of March, and then finished blooming one month later, at the end of April:
I left them alone for quite some time, waiting for them to yellow.
Here’s a patch of them behind the white-blooming Candytuft flowers:
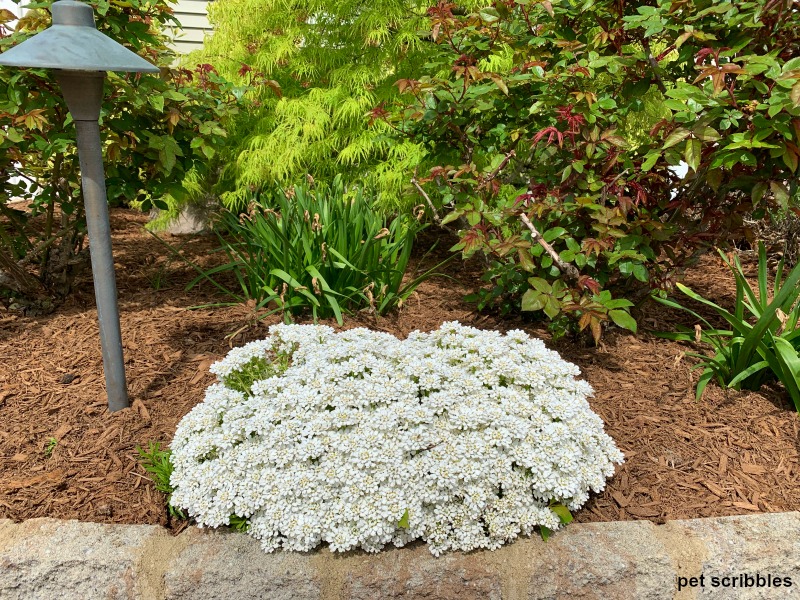
The rose bushes are flush with new growth, but haven’t bloomed yet. Having the Candytuft in full bloom keeps the eyes from looking at the daffodil foliage, although it mostly looks green.
After another month, as you can see in the image below, the daffodil stems and leaves were still green, with hardly any yellowing at all.
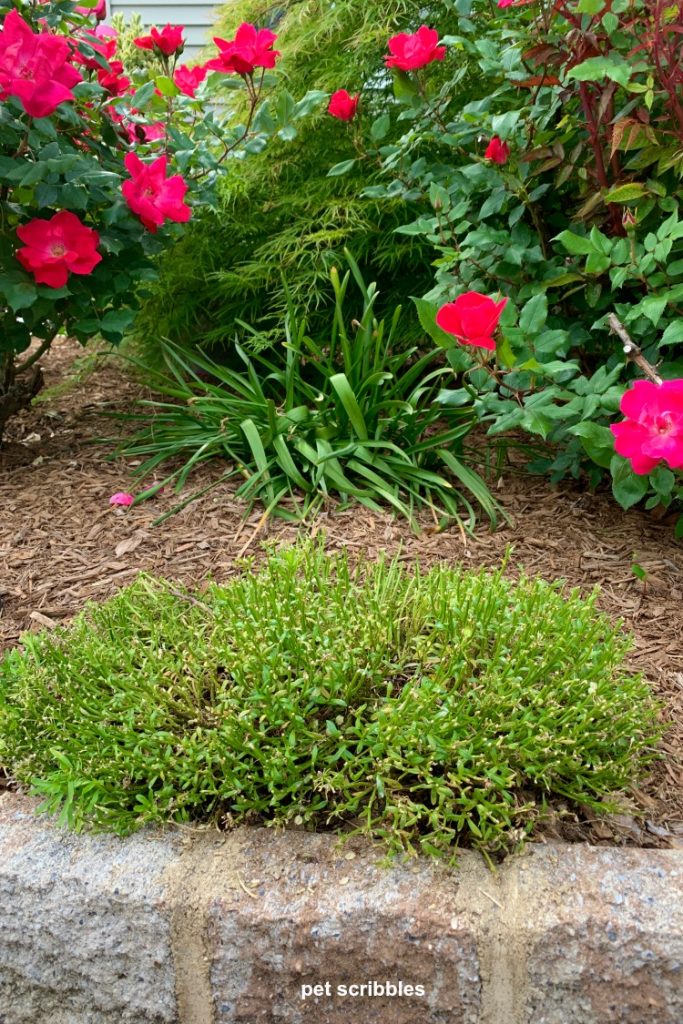
When the Knockout Roses are blooming, they draw the eye away from the Candytuft and the daffodil leaves.
I waited another two weeks. They still looked like this:
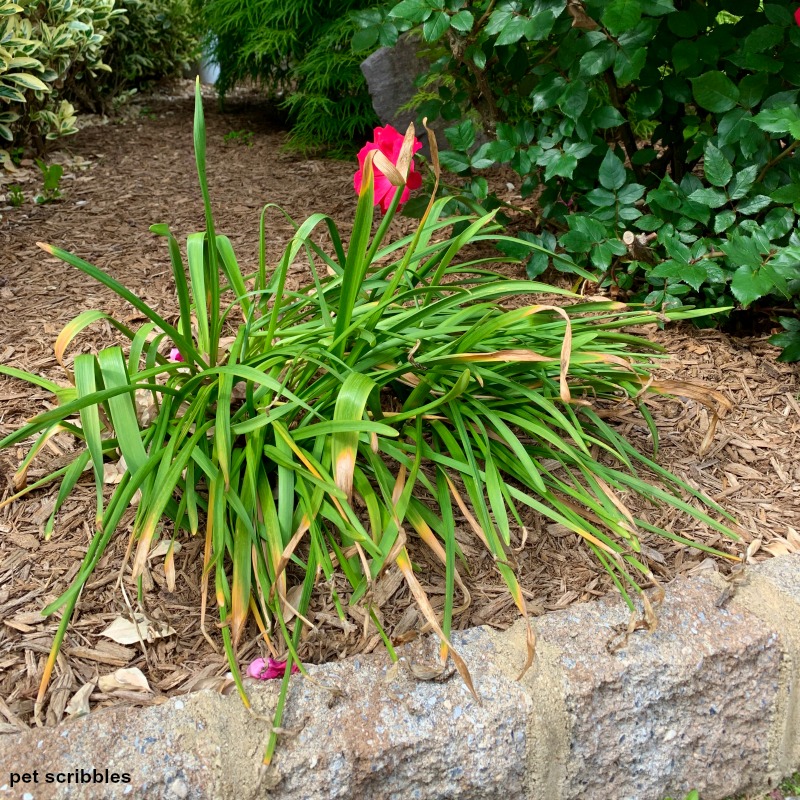
After six weeks of patiently waiting, I felt they had enough time getting nutrients and storing up energy for the next season, so I cut them down to just above the mulch.
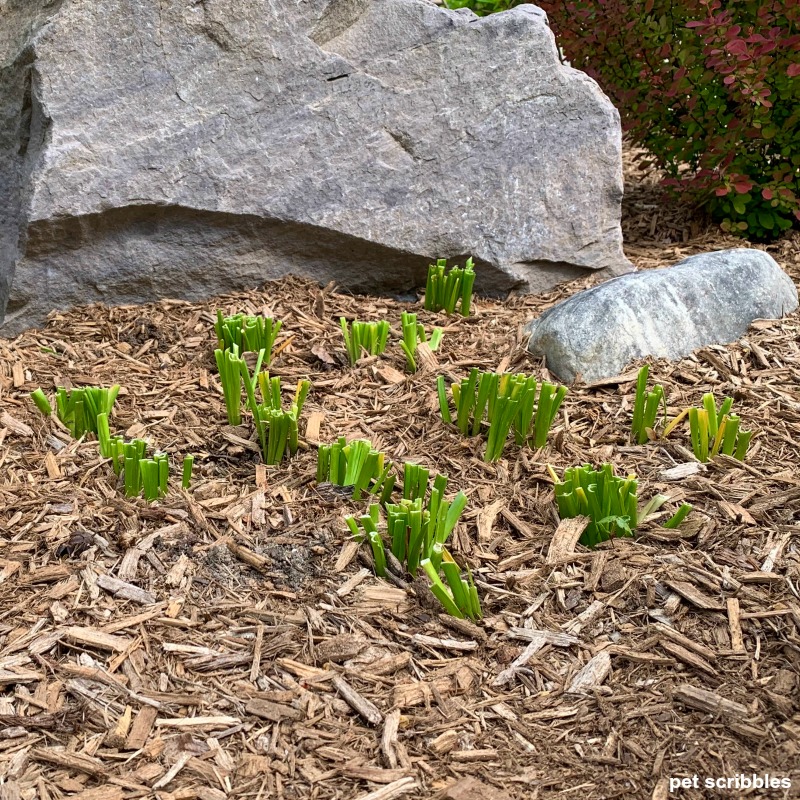
The daffodil stubs eventually die off, and you don’t seem them anymore.
In the image above, there’s white Salvia blooming plus another Kramer’s Red Winther Heath in the lower left corner. Again, the eyes see the flowers rather than the daffodil stubs.
This year, these daffodils bloomed again no problem, and had increased their spread too.
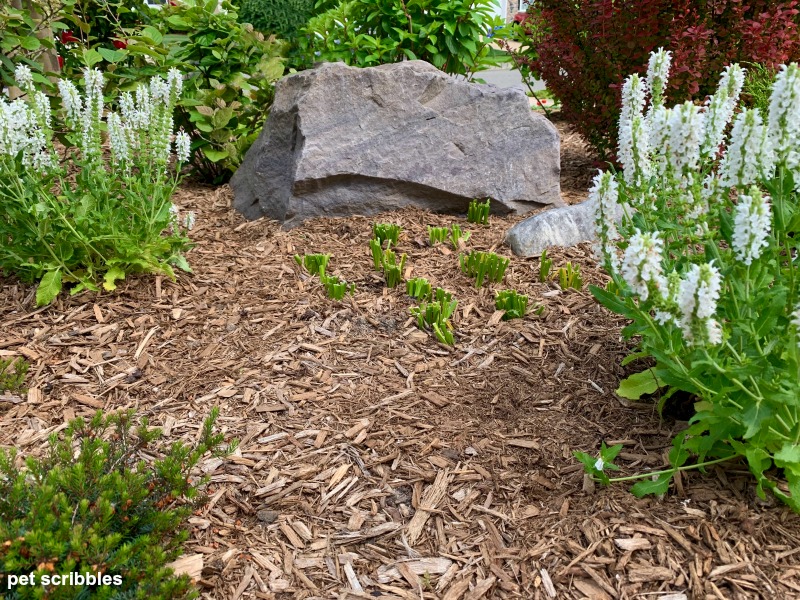
How and when to cut back daffodils: Mid-Season and Late-Season varieties
For mid-Spring and late-Spring blooming daffodils, I extend that same amount of time: six weeks at least.
This means I’m not cutting these back until some time in June.
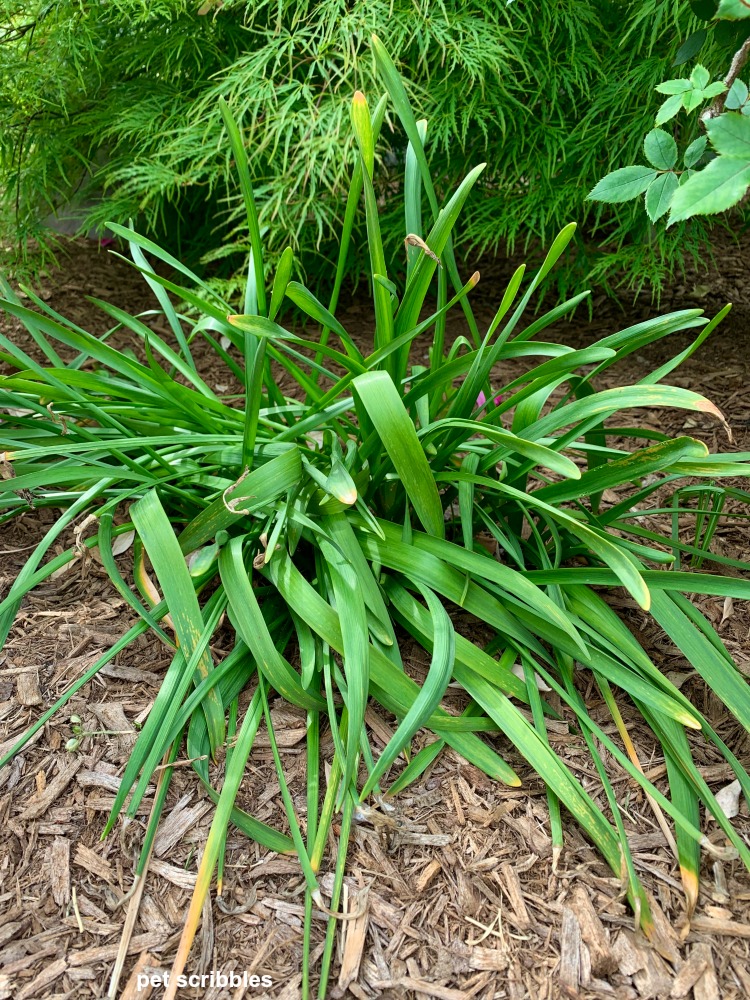
Here’s my Red Devon Daffodils:
Because of our warm Winter season this year, the blooming time of these mid-season daffodils were earlier than usual.
In fact, all of our Spring-flowering plants and shrubs have bloomed early this year.
This year, I will wait six weeks BUT if the daffodil leaves and stems haven’t yellowed yet, I will wait longer. I don’t want to screw up my chance at an even more beautiful daffodil season next year.
I already know that my husband will periodically ask me, rather casually, when to cut back daffodils. His casual manner will be hiding his intent: to enourage me to remove them already. But I will hold out. I must be strong!
Can I wait until the stems are completely yellow?
Of course you can! That’s what the experts suggest we do.
But many of us gardeners won’t.
We just don’t have the patience to wait that long when we begin seeing other plants next to them blooming nicely.
Pretty pink dianthus next to yellow-brown dying daffodil leaves just doesn’t make for a pleasing planting combination.
Remember: What matters is the length of time you let the daffodil leaves and stems remain, not so much waiting until they are completely yellow.
Daffodil fertilizer
A note about bonemeal fertilizer:
It once was very common to fertilize daffodils with bonemeal.
Today’s bonemeal formulations are not like those of yesterday. Today’s versions have a scent that is extremely attractive to animals, in part because bonemeal is manufactured differently now.
If you add bonemeal as a fertilizer, expect to have some interested furry friends digging around your garden, possibly even your pets.
Better options for daffodil fertilizer:
A better solution is to use a fertilizer made specifically for daffodils and/or Spring-flowering bulbs in general.
Look for the words bulb fertilizer or bulb food.
Several companies make their own, including White Flower Farm, and Breck’s Bulbs. Most garden nurseries also carry bulb food. In some cases you add it to the planting holes in the Fall. In other cases you can sprinkle the bulb food around the plants in the Spring. Follow package directions.
Another option is to use composted cow manure, working it into the mulched soil around where the bulbs are planted. It’s completely natural and improves the garden soil. This is what I do every year in the Spring.
(You can see my post on composted cow manure here.)
Do you have any daffodil tips to share?
Add them in the comments below!
Daffodil Books: Further Reading
For those of you — like me — who enjoy reading about your favorite plants, here are three of my favorite books about daffodils. In two cases, there are Kindle versions so you can read them for free!
Daffodil: The remarkable story of the world’s most popular Spring flower by Noel Kingsbury
“A recognized authority on the selection and management of ornamental perennials, Kingsbury relates the role of daffodils in legend and history. He emphasizes their great diversity and the divisions within these different forms. . . . Photographer Jo Whiteworth captures the glory of daffodils in individual portraits of plants, blended together in fields, hedges, and borders.”
—Chicago Botanic Garden
Daffodils in American Gardens, 1733-1940 by Sara L. Van Beck
“One of our best-loved spring flowers, the daffodil has been grown for hundreds of years. Possibly the daffodil’s finest virtue is its persistence, becoming a telltale of a long lost garden. Ever the meticulous researcher, Sara Van Beck relates the intriguing story of our beloved daffodil: how it got here and where it came from.”
—Gordon W. Chappell, Fellow, American Society of Landscape Architects and former landscape director, Colonial Williamsburg Foundation
The Kew Gardeners Guide to Growing Bulbs: The art and science to grow your own bulbs (Kew Experts Series)
“The new Kew guide to planting and cultivating bulbs features 12 easy and inspiring projects, detailed information on 66 of the most important species to grow, accompanied by Kew’s beautiful botanical illustrations. With expert advice from Kew bulb expert Richard Wilford and the Kew Gardens team, this is the ultimate companion to growing and planting with bulbs.“
More Spring Pruning Tips
I prune all of my plants and shrubs in the Spring — except for our Knockout Roses, which I prune back in late Fall.
Here are more of my helpful pruning guides for you . . .
How to Prune Liriope
Pruning Pinky Winky Hydrangea
How to Prune Little Lime Hydrangea
These same tips will work for Limelight Hydrangeas too!
How to Prune Ornamental Grasses — short, medium and tall ones
Happy gardening!
Very helpful information along with wonderful pictures. Excellent for new gardeners. Thank you.
Thanks so much for letting me know! I’m happy to help, and hope you enjoy your Daffodils!
Last year was my first year with a heavy daffodil planting. The stems never yellowed but the tips browned. They were green all winter. This spring after blooming I cut off the flower stem and the brown tips. Here it is July 1 and the leaves are all green.
Do I dare cut them back?
Hi Michael — If you’ve had the stems (post blooming) in the garden for at least 6 weeks, you can feel free to cut them back for the year. I just finished cutting the last of mine last week! Mine stayed green pretty long this year too — maybe it was some odd weather or something! Before you cut them back, add some bulb fertilizer if you haven’t yet done so. This way you can “see” where to sprinkle it around before the small stem stubs die off. I hope this helps!
Thanks. will do the fertilized and cut them down