How to prune Stella D’Oro Daylilies, including spent flowers and seed pods. Also how to remove seed pods and prevent them from developing during the blooming season. Helpful images and video included.
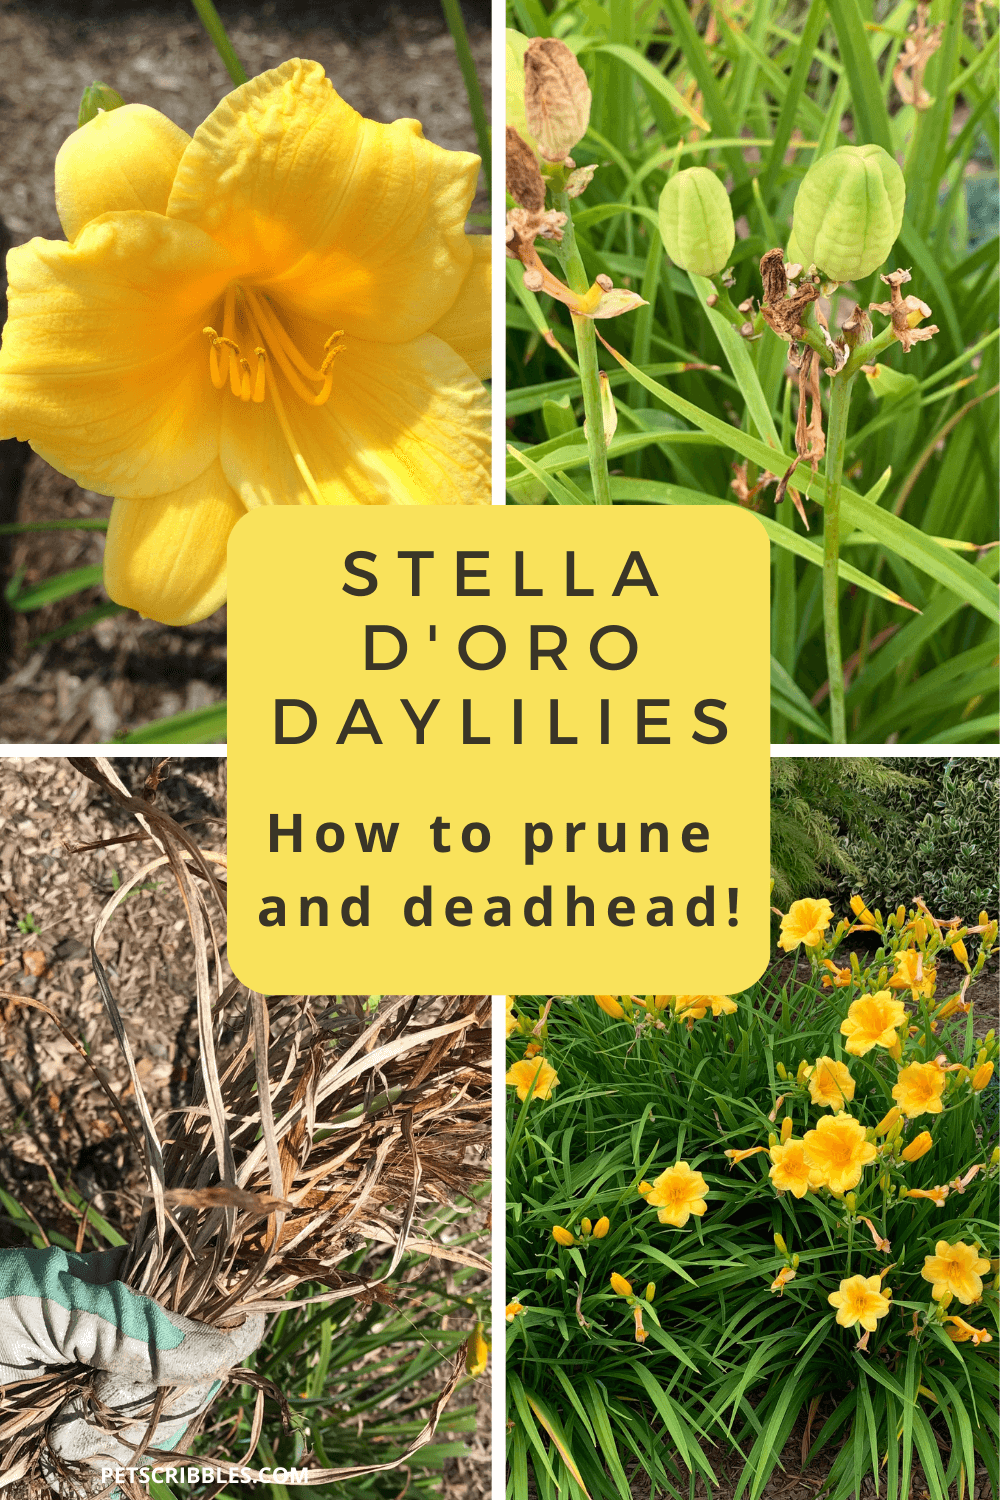
This article will show you how to prune Stella D’Oro daylilies and answer many of the common questions surrounding pruning and deadheading these perennials.
Table of Contents
- Deadheading versus Pruning
- Stella D’Oro Daylilies: what to deadhead and prune
- Why are my Stella D’Oro Daylilies not blooming?
- Stella D’Oro Daylily seed pods
- How to remove Stella D’Oro seed pods
- How to properly deadhead spent flowers on Stella D’Oro Daylilies
- What are those brown stems that appear in my Stella D’Oro Daylilies?
- How to prune Stella D’Oro Daylilies
- Video: Deadheading Daylilies versus Pruning Daylilies
Have you been “hands-deep” in Fall gardening chores like I have?
After recently cleaning up our Stella D’Oro daylilies, I felt like I accomplished so much because of how neat and tidy they looked!
However, I’m not sure whether or not I like our Stella D’Oro Daylilies.
One one hand, they look so pretty when in bloom.
But once the major blooming is done — by the time Fall rolls around — man do they look awful!
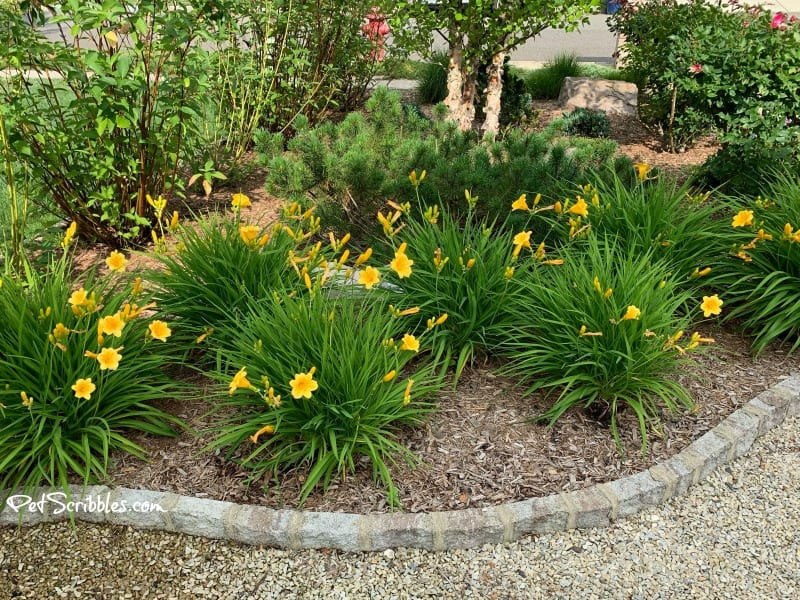
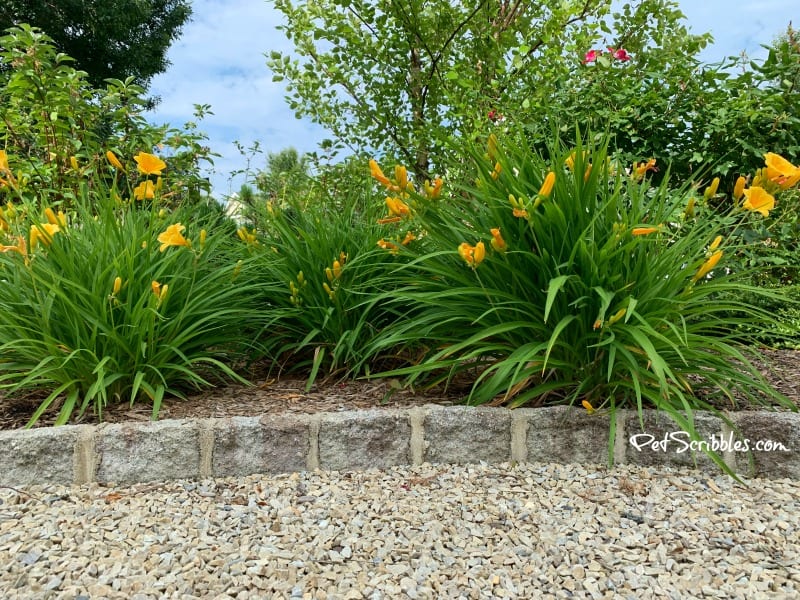
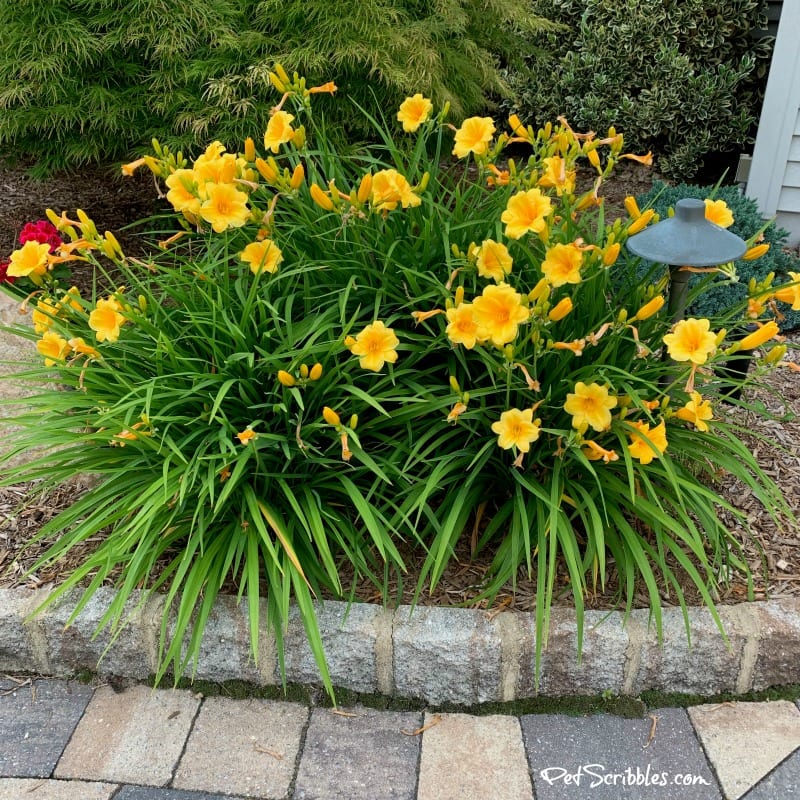
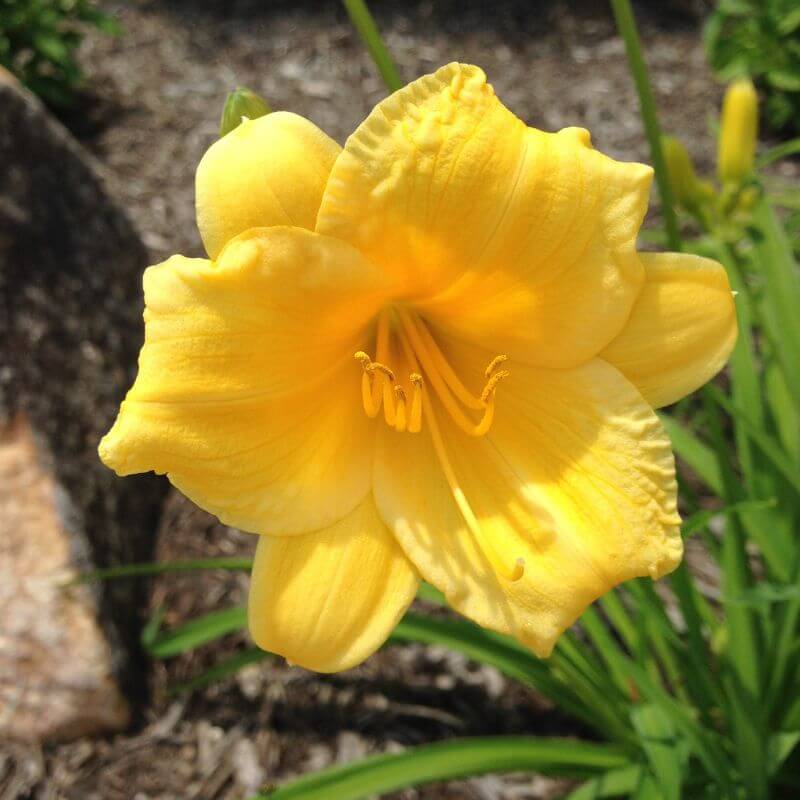
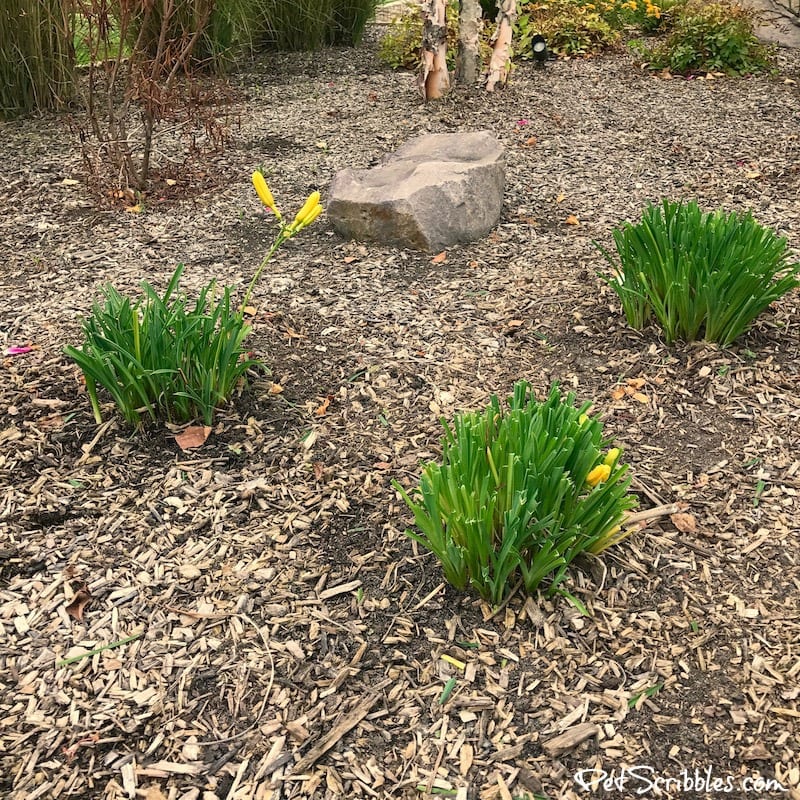
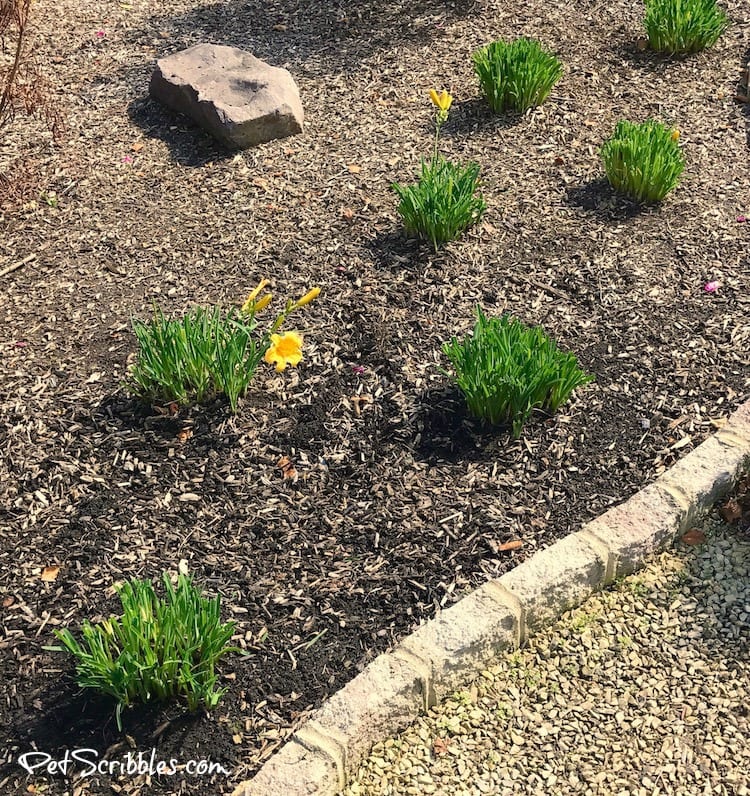
Here’s a picture of some of our daylilies when they were just about to bloom . . .
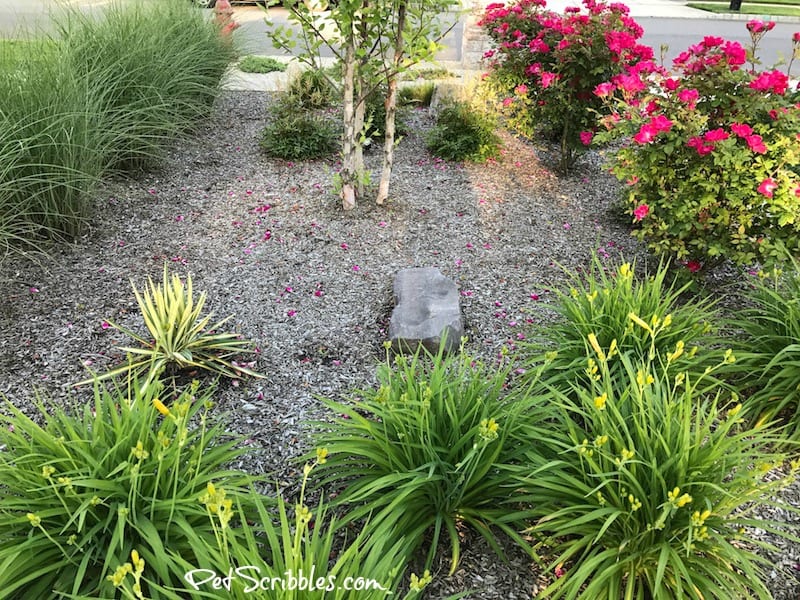
The daylilies are nice and bushy, and even the buds have a yellow “hint” of the sunny blossoms to come!
And when that happens, I always love the daylilies!
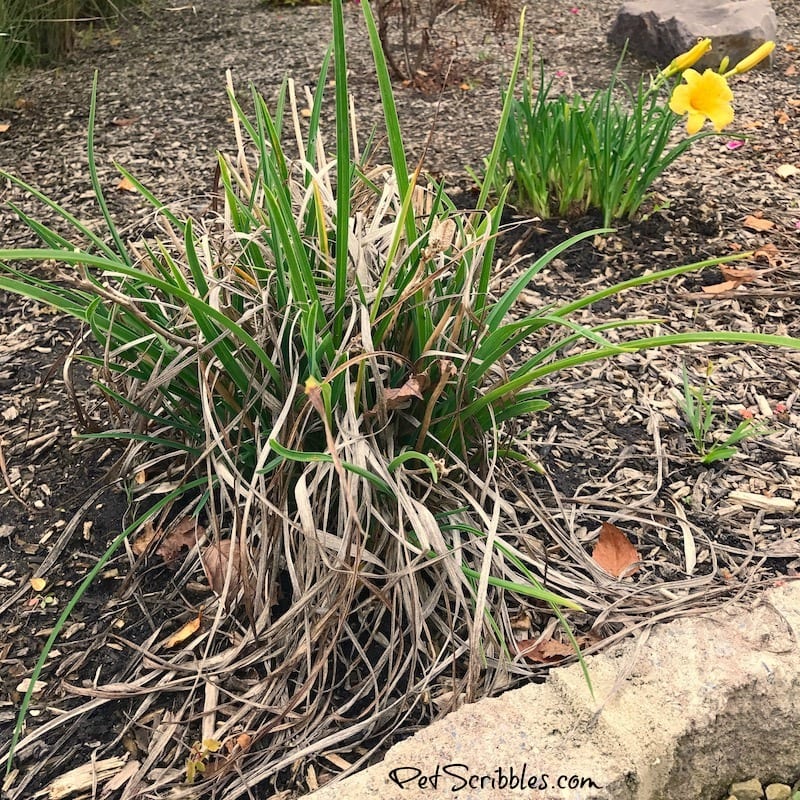
As I was pruning Stella D’Oro daylilies a couple of weekends ago, I grabbed my camera because the “before and after” was amazing.
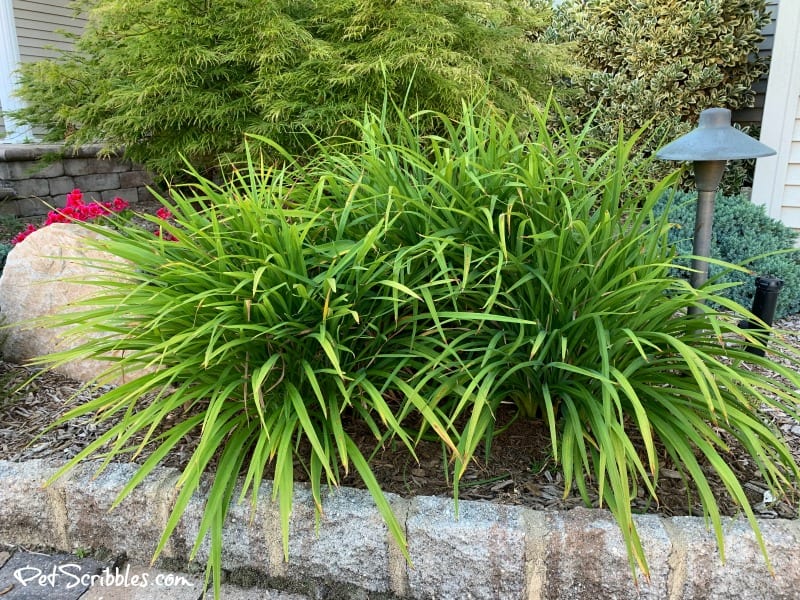
Here’s a wonderful image showing you the freshly pruned and cleaned up Stella D’Oro Daylily on the right, versus it’s sad counterpart up front, on the left . . .
Deadheading versus Pruning
When you deadhead a Stella D’Oro Daylily, you are primarily removing the dead flowers from the plant — including its “ovary” which we will talk about below.
When you prune a Stella D’Oro Daylily, you are primarily removing dead grass leaves, any seed pods and trimming back the plant to a smaller size.
That’s the main difference between deadheading and pruning.
Stella D’Oro Daylilies: what to deadhead and prune
With Stella D’Oro Daylilies, you want to remove spent flowers, any seedpods that form on the end of stems, and yellowing or dead grass stems.
In Fall, give these plants a hard pruning and tidy them up.
Let’s dive a bit more deeply into all of this.
Why are my Stella D’Oro Daylilies not blooming?
Until a few years ago, I thought that as long as I gently pulled and removed the dying Stella D’Oro flowers, I was good.
Remove the dying flowers and supposedly more flowers will pop up.
Right? Wrong!
I originally wanted Stella D’Oro Daylilies because they bloom all season long.
But mine weren’t doing so after the initial flush of flowers.
And they were planted in full sun, which Stella D’Oro daylilies prefer.
Why weren’t they blooming?
Because I wasn’t fully removing the spent flowers from the plant.
I had no idea that I need to prune Stella D’Oro daylilies during the season, and not just in the Fall and/or Spring.
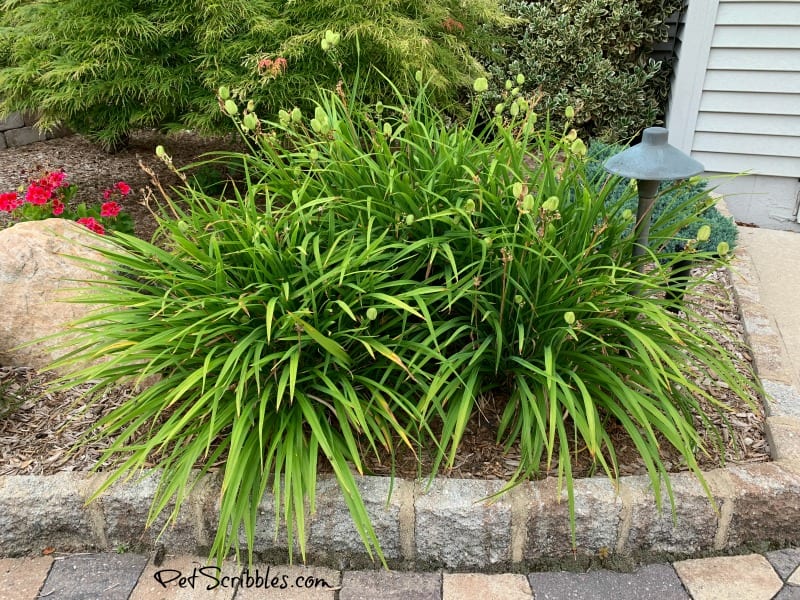
Stella D’Oro Daylily seed pods
Instead of getting a new flush of blooms, I was getting seed pods forming where the flowers once were.
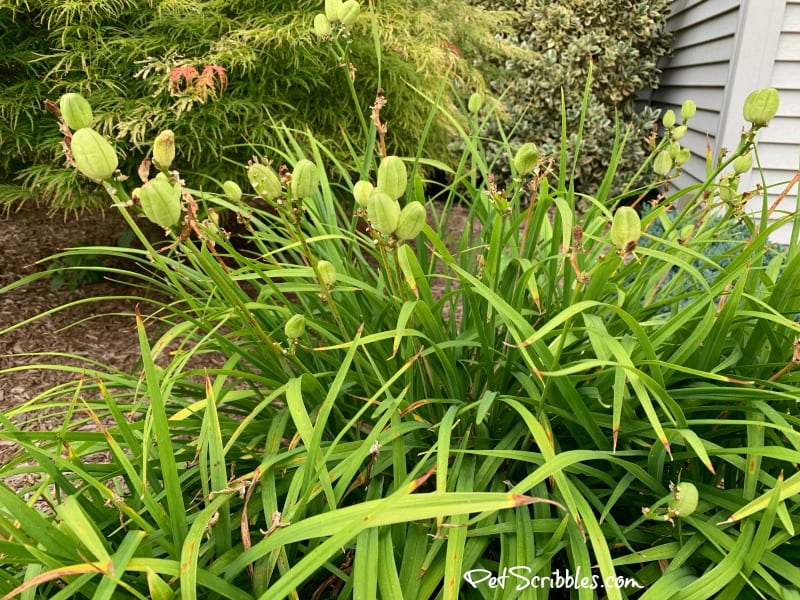
When seed pods begin to form, the plant will focus its energy on developing those seed pods.
The plant’s energy is no longer focussed on producing flowers.
The plant thinks the growing season is over, so it’s time to work on producing seeds for next year.
Thus, no more flowers appear.
The solution to the seeds pods versus blooms is two fold:
- Remove the seeds pods immediately.
- Learn how to properly deadhead the spent blooms of your Stella D’oro Daylilies, to avoid seed pods in the future.
How to remove Stella D’Oro daylily seed pods
To remove the seed pods, use either Fiskars hand pruners or Fiskars garden snips.
Snip off the seed pods AND their stem as far down as you can go.
The base of the stem is usually hidden by the daylily leaves.
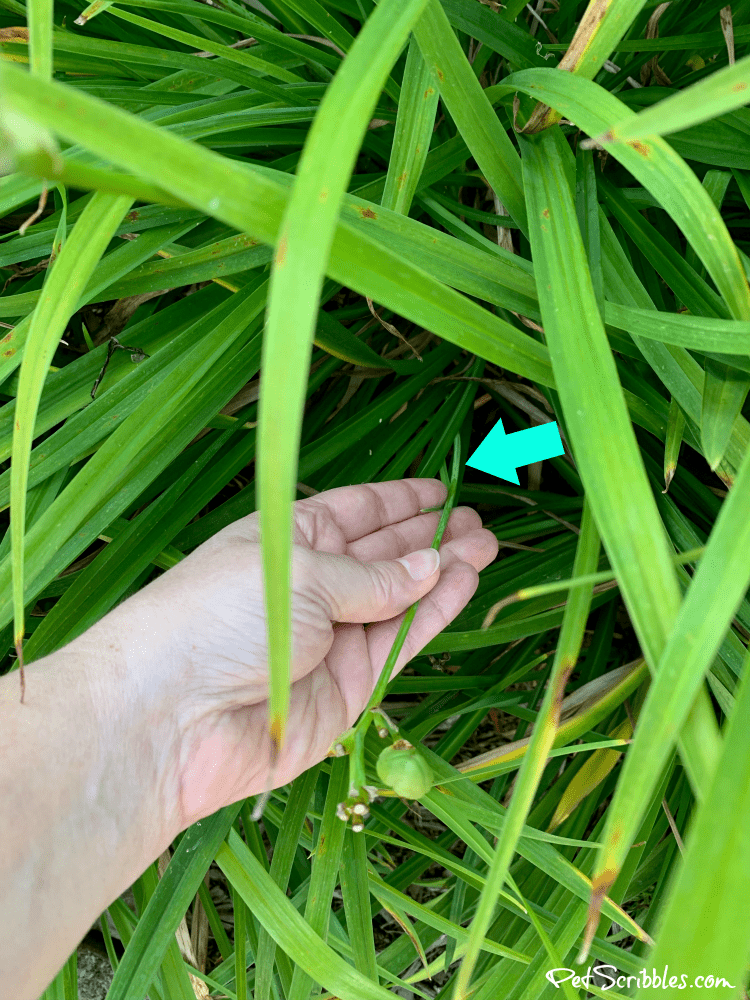
These leaves are pretty resilient, so you can move them without worrying you will damage the plant.
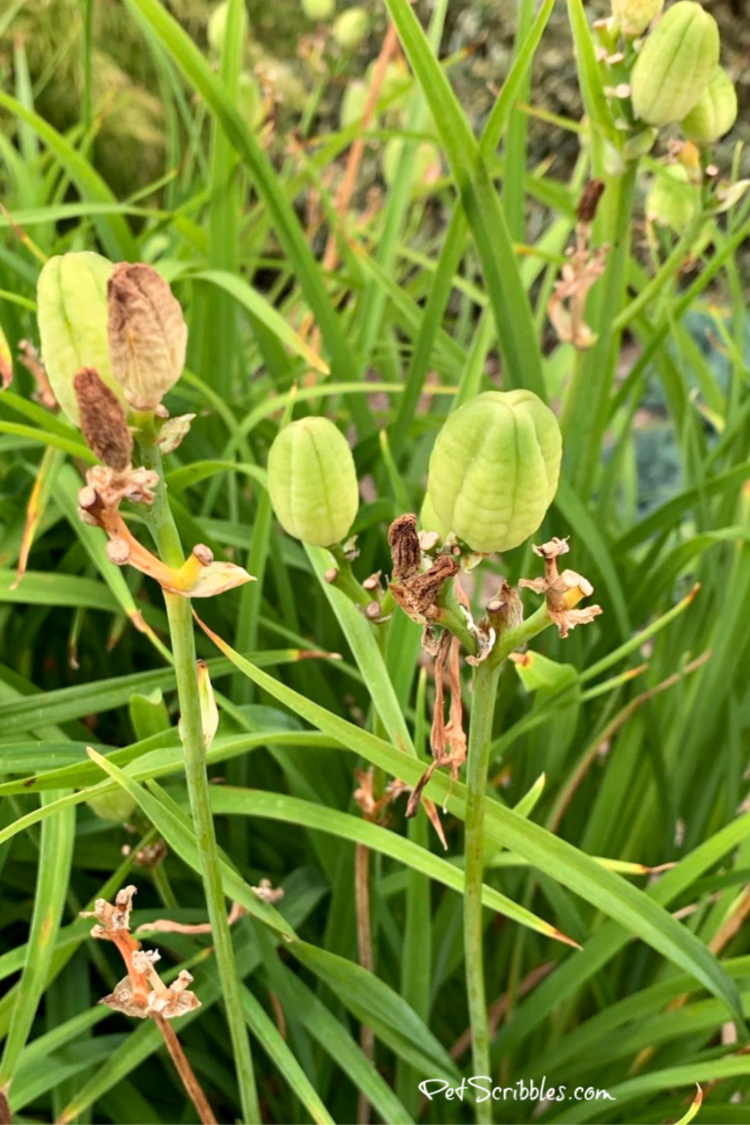
If you just snip off the seed pods near the top of the stem, those remaining stems will soon dry up and turn tan or brown.
Not a big deal, but you probably want to cut them out with the seed pod to avoid another chore of removing the brown stems later.
Removing these seed pods will be a pain to do if there are a lot of them.
But once those seed pods are removed, your Stella D’Oro daylilies will refocus their energy back to producing flowers.
Pretty soon, you’ll have those wonderful yellow blooms back!
How to properly deadhead spent flowers on Stella D’Oro Daylilies
Usually when we see spent blossoms on our garden flowers, we know to remove them — whether with garden snips, pruners or even by just pinching them off with our fingers.
Doing so prevents those flowers from going to seed, which helps the plant continue to focus its energy on producing more flowers.
You want the plants producing more flowers instead of diverting their energies to developing seeds and/or seed pods.
Here is a typical Stella D’Oro Daylily stem:
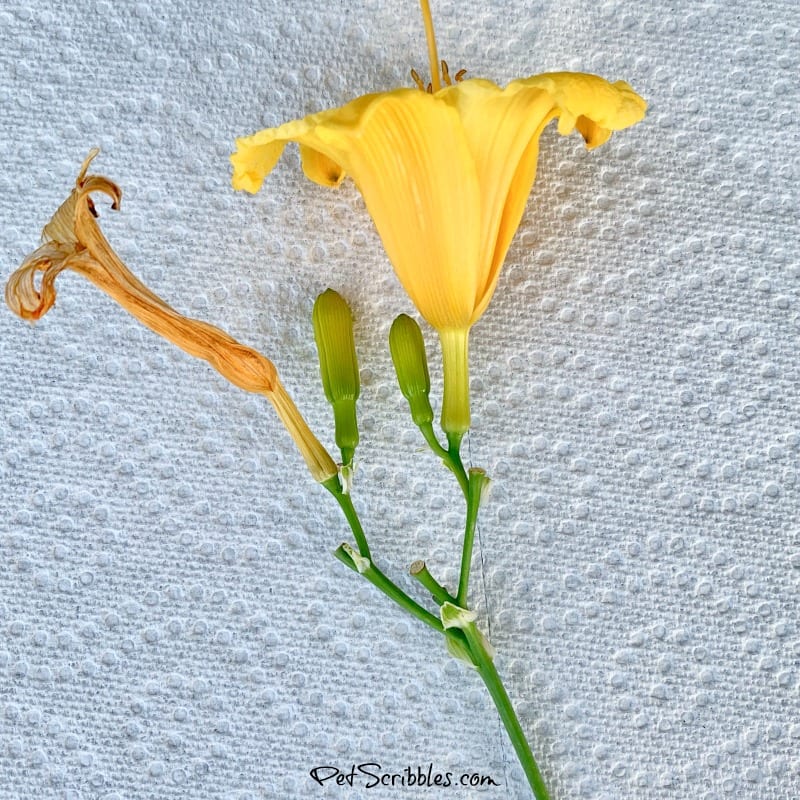
There is a full-bloom flower, a spent flower shriveled up, and two flower buds yet to open.
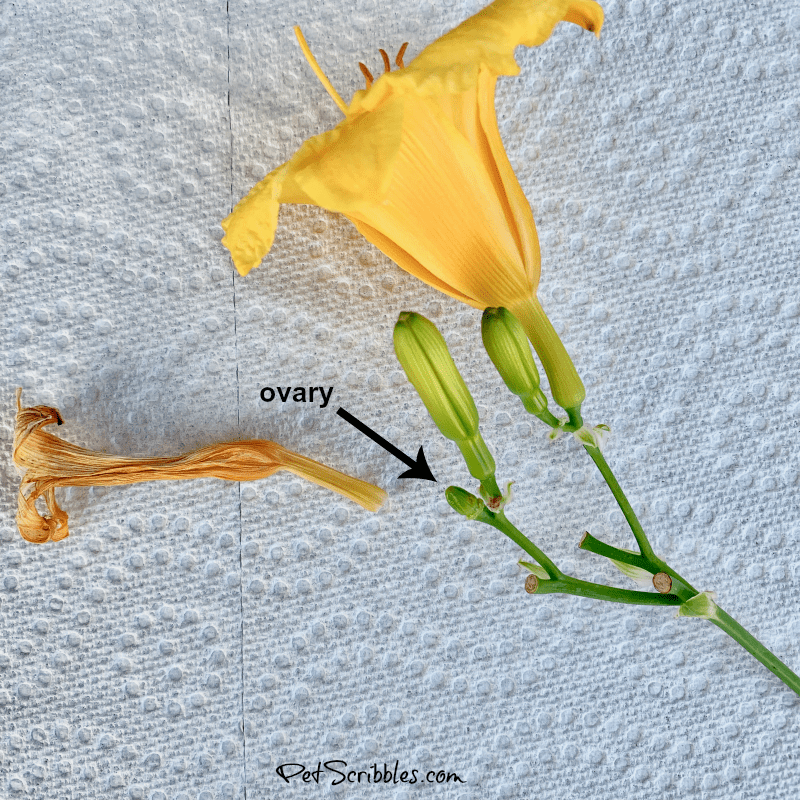
If you tug on the spent flower, it will easily come off:
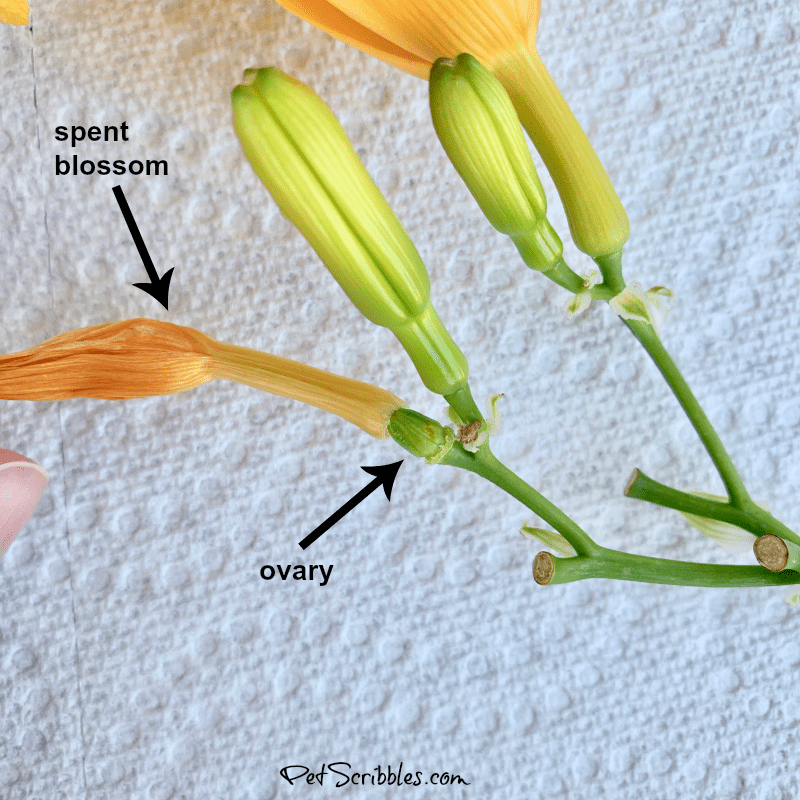
However, you are left with the flower’s ovary, which is small and can appear like it is just part of the stem.
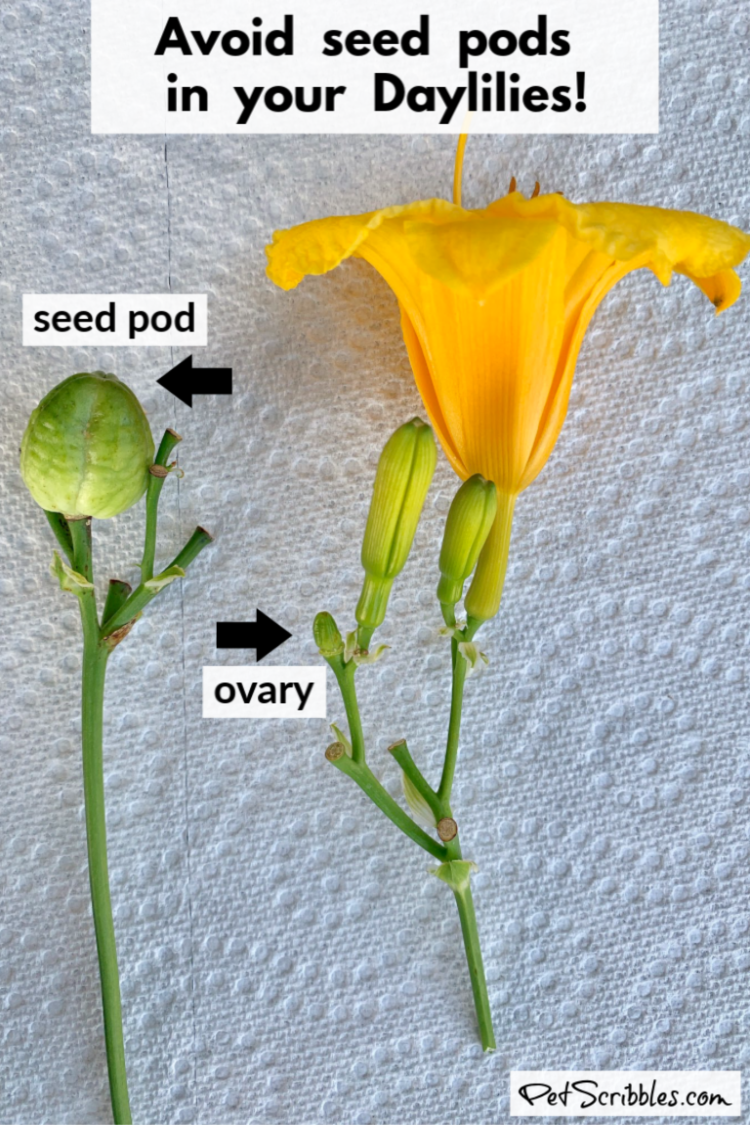
You need to also remove the ovary, otherwise that tiny ovary (below, right) will turn into the large seed pod (below, left).
I find it easiest to gently grab the spent flower by the bottom, where you can feel the ovary inside of the thin blossom covering it.
Gently snap off the complete spent flower with its ovary and throw it away.
That’s all there is to it.
Once you get the hang of deadheading Stella D’Oro daylilies the right way, this becomes an easy chore you can do regularly.
And if you deadhead Stella D’Oro daylilies properly, you will prevent those giant seed pods from developing.
What are those brown stems that appear in my Stella D’Oro Daylilies?
Once you snap off the spent blossom with its ovary, a new stem or flower will not form in its exact spot.
Instead, once all of the Stella D’Oro flowers on that stem have finished blooming, the stem will just turn brown and die.
When you’ve removed all of the spent blooms on a particular stem, cut back that stem as close to the base of the plant as possible.
I usually try to at least cut those stems down into the leaves so they aren’t as visible when they begin turning brown.
The good news is that once those stems are brown, they are easy to pull out of the plant without needing pruners.
New stems (with new buds and flowers) will continue to form from the base of the plant.
How to prune Stella D’Oro Daylilies
I prune my Stella D’Oro Daylilies twice a year.
- Fall: main pruning and clean-up for the Winter months.
- Spring: secondary clean-up from the Winter, possible (optional) pruning if needed.
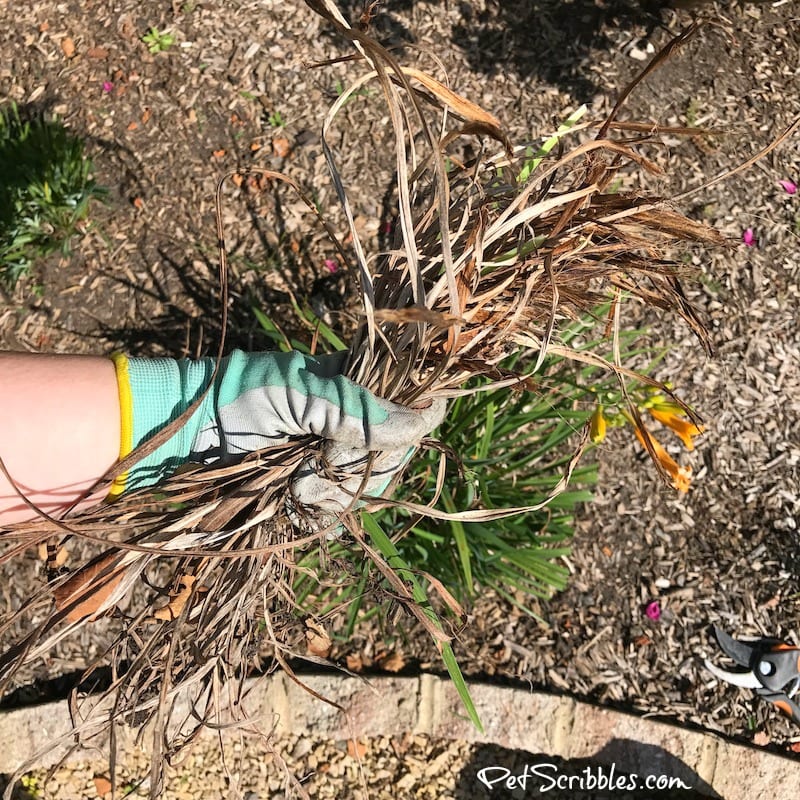
First, grab those dead leaves around the outer base of the plant and gently tug — they come right off. (They look like dried grasses, don’t they?)
Next, use your fingers as a rake and comb “up” from the center base of the plant to remove the rest of the dead leaves.
Look at this ugly mess I removed from just one plant . . .
Using your favorite pruners — I use these from Fiskars — start trimming the green leaves down.
I hold a bunch with one hand, then cut them with the other.
This way, I’m holding the remains that go right into the garden trash, no mess in the garden bed.
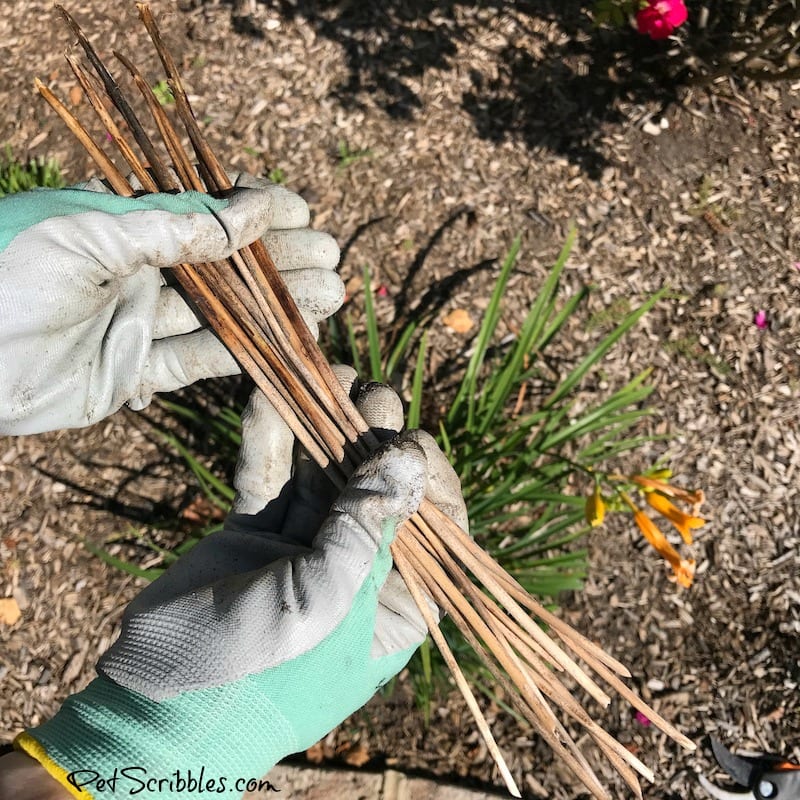
When you see any stiff brown stems — stop and pick those out. Most will come up readily, you might need to gently tug on a few of them.
Finally, continue cutting the leaves down to just a few inches tall.
I kept any remaining flowers, just because.
Check out this before-and-after shot . . .
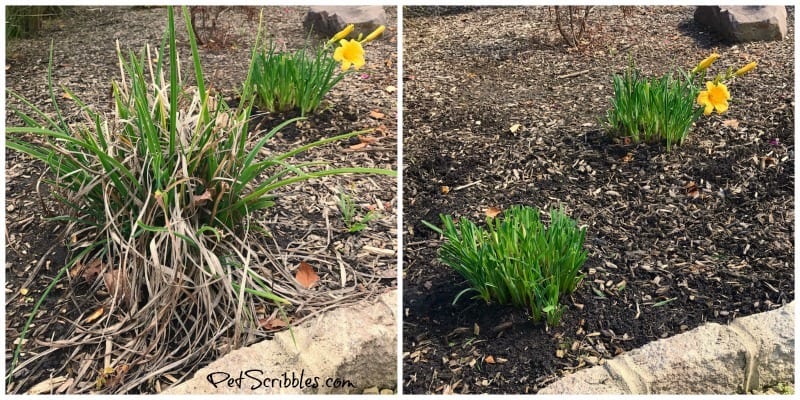
Such a huge difference, and it only takes a few minutes per plant once you get the hang of it.
Doesn’t this section of the garden bed look like it could be early Spring instead of early October?
Kind of funny!
Video: Deadheading Daylilies versus Pruning Daylilies
Happy gardening!
Little late to this party, but… If you let the stems dry out to a woody brown state, they work really well as reeds for fragrance oils.
That is really interesting Jack — thanks for sharing! And it makes sense, as they are a good width and rather sturdy when dry. Thanks so much!
This is just the very best tutorial! I have done several things wrong in managing my Stella de Oro. Several comments were spot on & I have taken them to heart. I’m hoping for many more blooms to come!
I’m so glad this tutorial was helpful to you Tommie! Sometimes it’s the smallest of “tweaks” to what we do that make a huge difference, and so I’m also hoping for many more blooms for you!
I also started planting these because I had heard they are repeat bloomers. I also see them everywhere including gas station gardens and thought they must be very easy to care for. Mine start off in the spring beautiful and full with lots of blooms. But by July, half the green leaves have turned yellow and died leaving me with a floppy, sparse plant that doesn’t repeat its blooms. I suspected it had leaf streak fungus and tried to treat it but have not been able to fix the problem. Thinking I might just rid myself of this once beautiful addition to my garden. Any advice?
Hmmmm… A bit of a puzzle, Lynda. Yes, Stella D’Oro are repeat bloomers, but I don’t know why yours won’t bloom again and are getting yellow leaves. Not sure where you are located, but we have had a brutally hot Summer in many parts of the US, and it isn’t too surprising there’s some yellow leaves. The good news, is those leaves can easily be removed — in most cases gently pulling them should be enough to remove them, pruners not needed. If the remaining green leaves look healthy, then I wouldn’t think it’s a fungus. I’m wondering if a different variety was sold to you accidentally, i.e. putting the wrong plant in the pot labeled as Stella D’Oro. Have you ever had them reblooming all Summer for you? Or are these a recent garden addition?
Thanks for the reply! I’m pretty sure they are Stella D’Oro. I’ve bought them from more than one place on multiple occasions. The first couple of years they were great, full and repeating blooms until the end of August. This problem started maybe two summers ago. I also pull the yellowing leaves but can hardly keep up. I have them in several different locations in the garden, all with about the same conditions. I really thought it was leaf streak. I am still hoping that if I get on it earlier next year it may be better. They are very sad right now though. 🙁
I always remove the seed pods as far down as possible and my day lillies only bloom once, what else can I do to promote another bloom
Hi Joanne — are your daylilies a reblooming variety? There are so many varieties of daylilies, and many of them only bloom once a season. (That’s why I’m asking, just to make sure.) If you removed the seed pods, and it is a reblooming variety, you should see more flowers. I will mention that many plants slow down during the heat of the Summer, and we had extreme heat in many parts of the US and world this Summer. It’s possible you may see some flowers form once the weather cools. I hope this helps!
Thank you for your response. I have had these DayLilly’s for 15 years or more and they use to bloom more than once. I have never thinned them out. Do you think that may help them to bloom again? If yes, when should I thin in spring or now in the fall? Thank you for your help!
Hi Joanne, There are some gardeners that will swear they never touch their daylilies once planted and they bloom just fine. And there are other gardeners that swear by thinning them out over time and replanting some of them elsewhere. If yours aren’t blooming as much, and like you said you deadhead them and everything else is fine, then I would try thinning them out. You can do it either now in the Fall or wait until the Spring. and I hope thinning out will help!
Hi when do u stop removing the seed pods? And ovaries. Or do u just cut everything back in late fall. Kathy.
Hi Kathy, If you’re tired of removing them — and/or the flowers appear to be finished for the season — you can go ahead like you suggested and cut everything back in late Fall. I usually stop some time in September and then cut them back some time in October. I hope this helps!
Thanks for your helpful information! Would like to know if living within zone 10, these daylillies still need to be cut back in the fall.
Hi Gladys, Your Daylilies will still go through a bit of a dormant (i.e. not actively growing stage) even in the warmth of Zone 10 during the Winter. It’s a good idea to prune them once a year just to freshen them up. You can prune them in the early Spring instead of Fall, if you want to keep the nice green foliage on for the Winter season. I hope this helps!
My Stellas got away on me. I spent much of the fall dividing, replanting and tossing the excess plant material (wheelbarrows full of it) in the compost bin. I’m in the “hate” camp now. By spring, I’ll be back in the “love” camp. These hardy little plants with pretty flowers survive like no others in the freeze-thaw cycles of my 3A zone. Stomped by dogs, dogged by drought, crushed by snow, covered in ice at their crowns and they still come back. It might be foolish to transplant other perennials in late fall where I live, but Stellas will survive.
Wow! I’m super impressed at how hardy they are for you! Almost too hardy, it sounds like! That’s a lot of work, but you’re right — pretty soon when you see all the new green growth everywhere, followed by the flowers — you’ll be quite happy you did all that dividing and replanting!
Thank you so much for the article- & the illustrations! While you’re excellent with words, sometimes my brain simply demands graphic accompaniment. This piece nailed it for me. I finally understand how to give my beloved lilies the care they need!
You’re welcome Amanda — and thank YOU for the feedback, which helps me too! Enjoy your day lilies!