Do wood burning and adult coloring pages go hand in hand? The answer is yes! This is my first wood burning project, and I share what worked and what didn’t. I also tell you just how much flippin’ fun wood burning is too!
Very special thanks to Walnut Hollow for sponsoring this tutorial!
This tutorial was originally published here in 2015. Due to its renewed popularity, this post has been revised and republished. Enjoy!
Wood Burning Supplies:
- Basswood Rectangle Wide Edge Plaque – Walnut Hollow
Basswood is a wonderful surface for wood burning, as it’s a soft wood. As this was my first time trying wood burning, I got a scrap piece of basswood to practice on first. - Creative Versa-Tool® – Walnut Hollow
- Glamour Dust Glitter Paint in Turquoise Sparkle – DecoArt
- Laser copy of free adult coloring page – Doodle Art Alley
- Paint brush
- Wax paper
- Scissors
- Washi or masking tape
Wood Burning Tips – Literally:
Here’s an image showing you three of the tips — or points as they’re called — that I practiced with on a scrap piece of basswood:
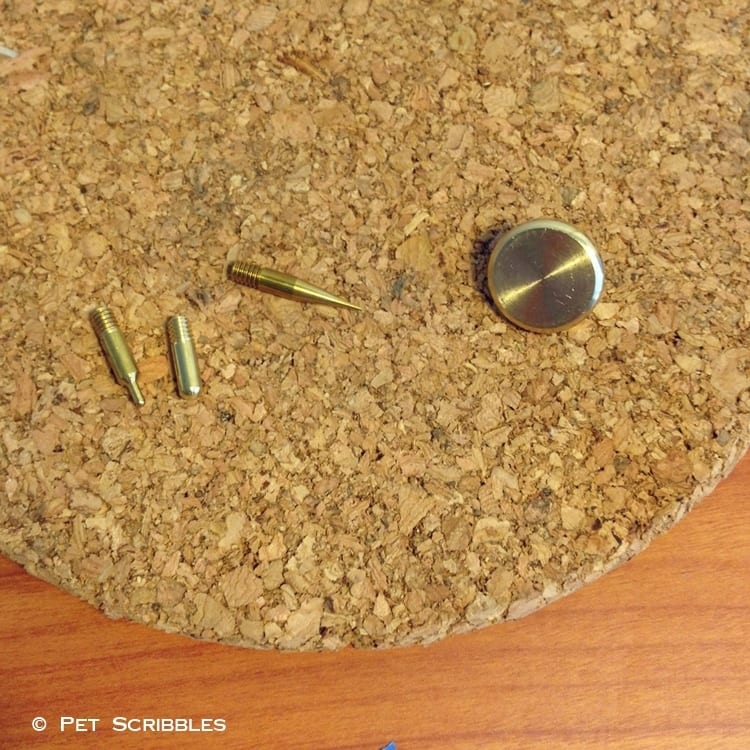
From left to right (above): Mini Flow Point, Flow Point, Tapered Point and the Transfer Point. All of the points are included with the Creative Versa-Tool, except for the Mini Flow Point which is sold separately.
Choosing Your Coloring Page:
There are so many adult coloring pages and printables that I want to wood burn, but for my very first project, I needed something with clean lines and not too many curves!
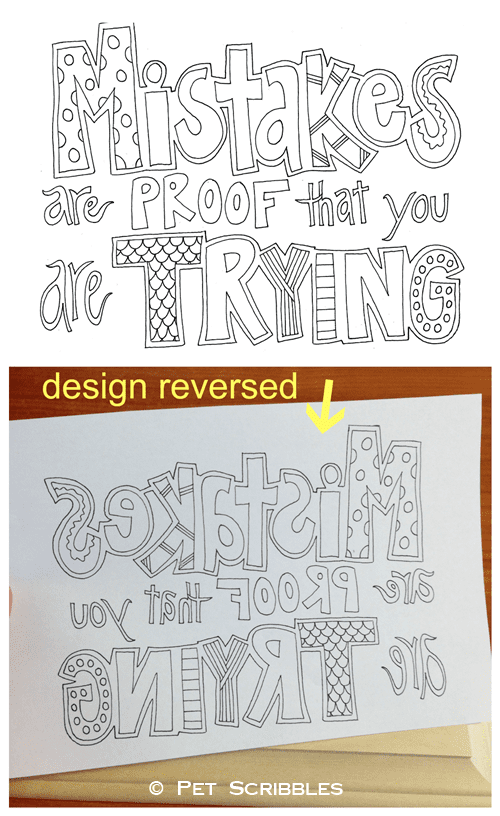
I found a great printable on Pinterest from Doodle Art Alley and clicked over to their website where I found the perfect quote for my first wood burning project:
Wood Burning and Adult Coloring Pages Tutorial:
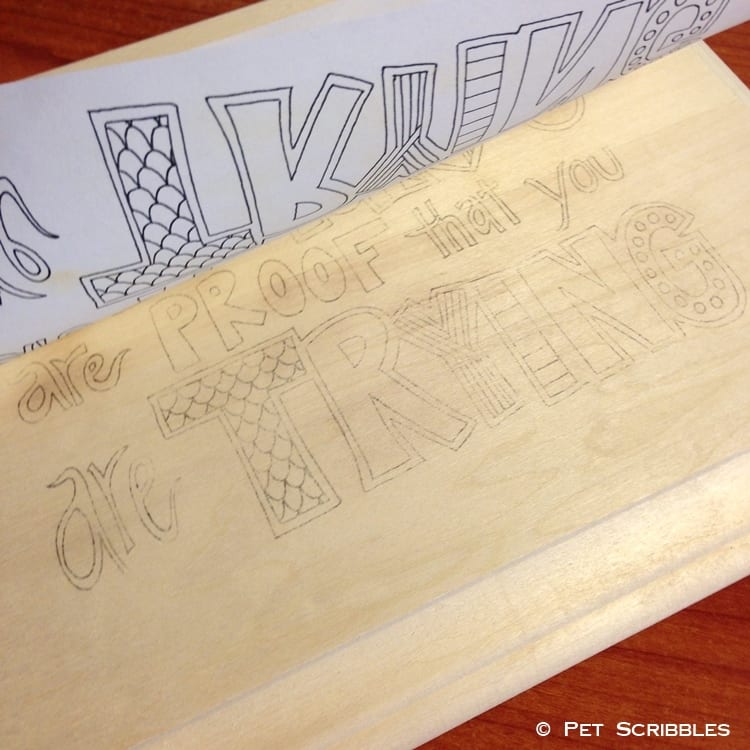
Reverse your image and make a laser copy of it (in reverse).
Once you transfer the image, the words will be flipped and therefore readable.
Attach the laser copy face down, so that the printed image is against the wood surface.
I used washi tape to secure it to the plaque, but masking tape will also work.
Just make sure to use something that removes easily and leaves no sticky stuff behind.
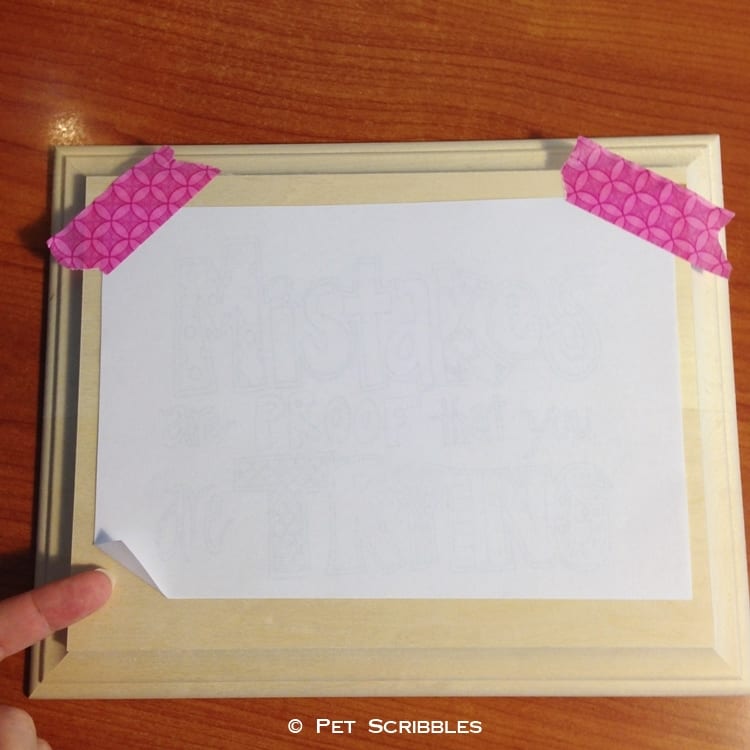
Turn up a bottom corner of the paper to make it easy to lift up and check your work while transferring the image.
See where my finger is pointing in the image above? This is a super-handy tip, and one of many I learned from watching the Walnut Hollow YouTube Channel. (Helpful links are at the bottom of this post.)

Transfer your image to the basswood plaque.
Use the Creative Versa-Tool for this step with the Transfer Point (shown earlier) attached. Normally you can hold the Versa-Tool like a pen or pencil – however – when transferring an image you want to hold it like this:
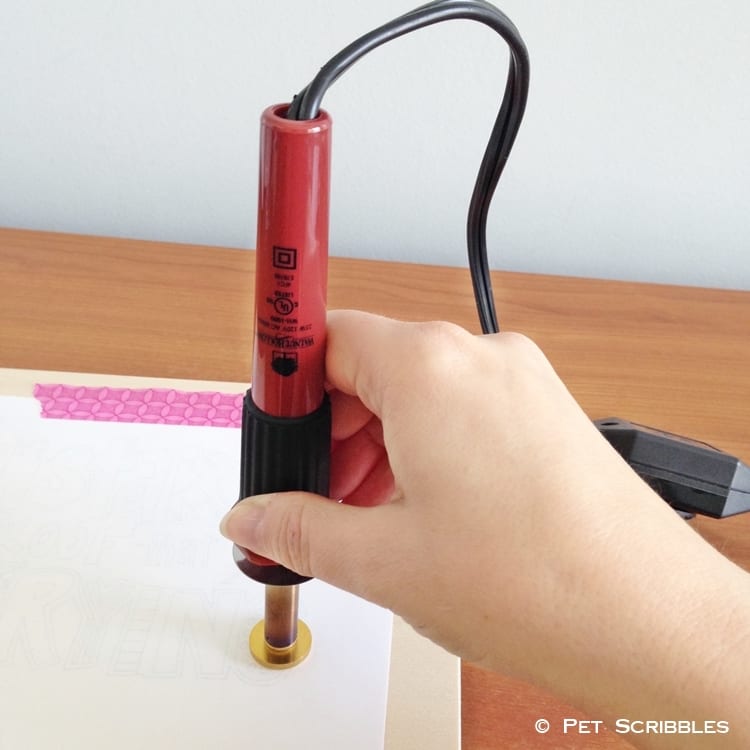
While holding the tool and pressing onto the paper (not hard), move the tool in a circular motion like you’re ironing something.
Lift up the page corner as you work to check if there’s areas you need to go over again.
Don’t let the Transfer Point sit on any one area too long – always keep moving – otherwise you could end up with some blemishes in your transferred design like I did.
See the arrows below: You can see a darker spot on the paper which matches up with a darker spot on the wood.
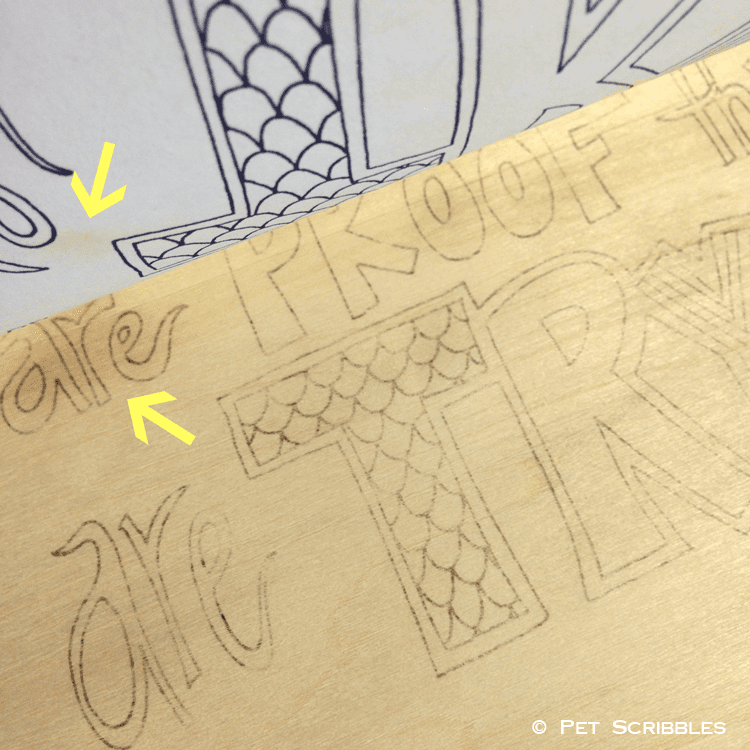
It’s not a huge deal and with practice won’t happen.
How to change out the different points on your Creative Versa-Tool.
Here’s a short 3-minute video on how to change your points. The video also walks you through all of the different points that come with the Creative Versa-Tool.
Wood burn your image.
After practicing with the different wood burning points mentioned earlier, I settled on using the Tapered Point. It has a very fine tip, perfect for the thin lines of this adult coloring page.
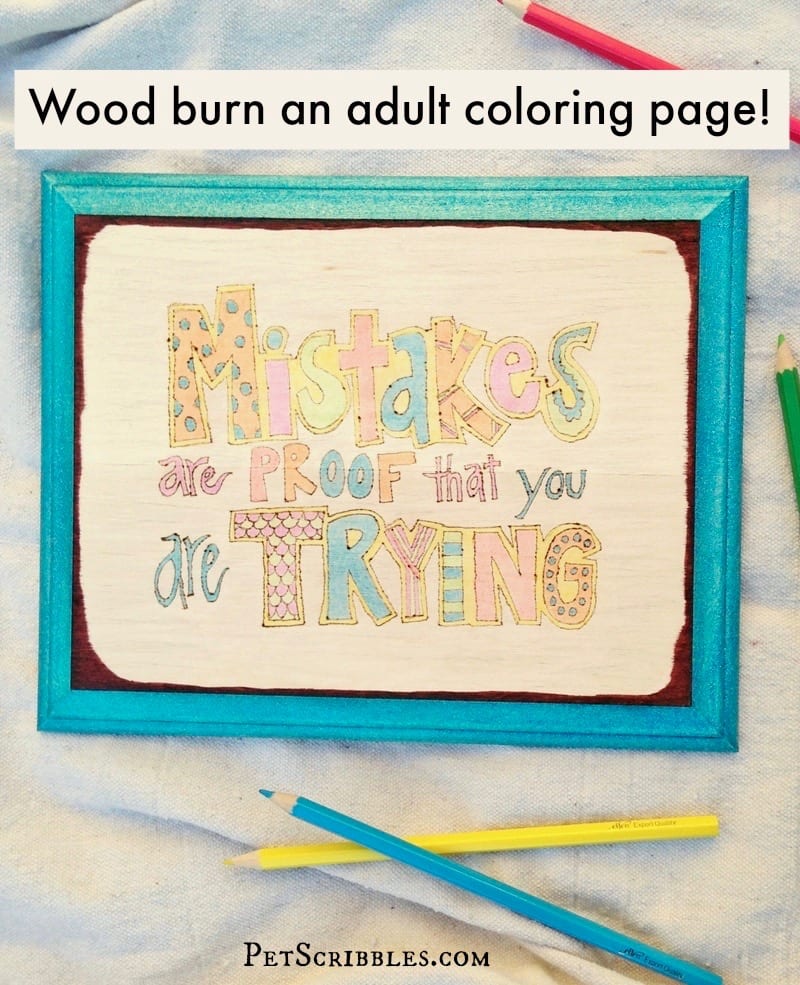
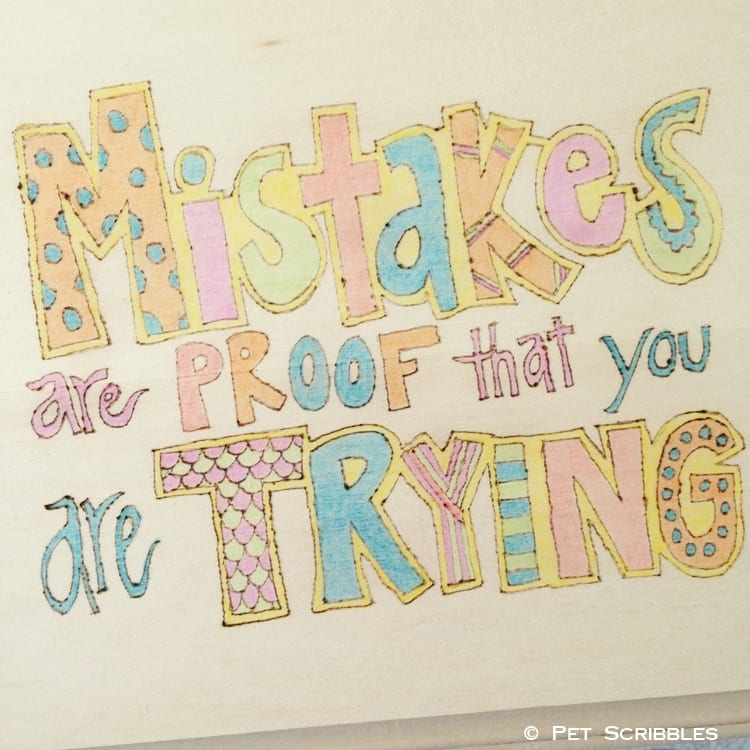
Here’s my wood burned adult coloring page:
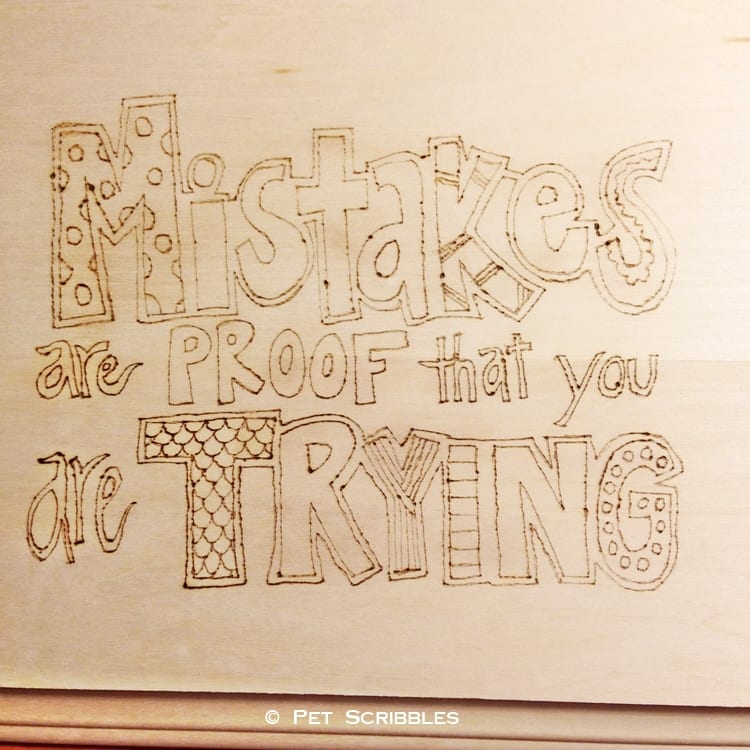
Not bad for my first time, right? I was actually pretty pleased with how it turned out!
And can I just say how totally relaxing I found wood burning to be? Seriously, I’m kind of hooked on it now!
A few minor wood burning mistakes . . .
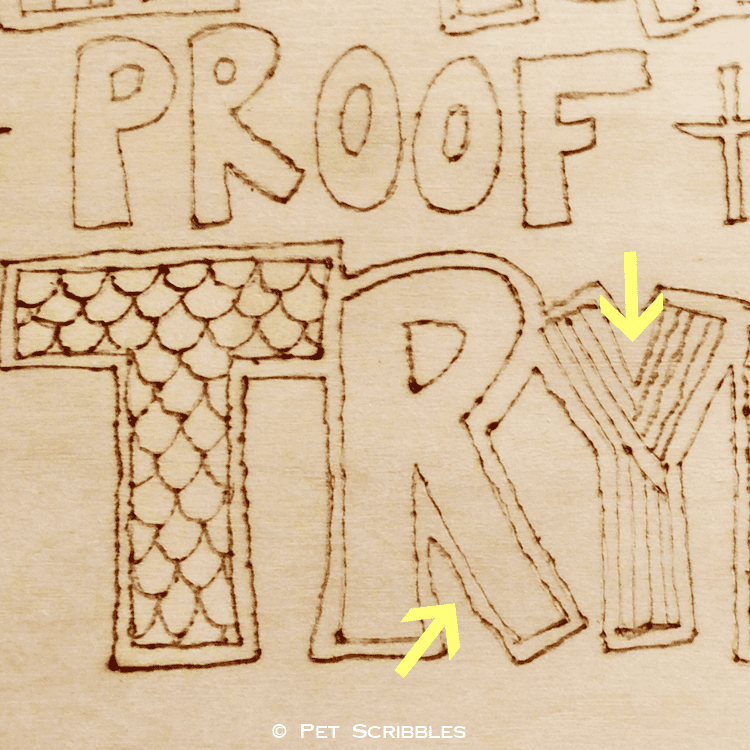
In the image below, the arrows point to some dots that definitely don’t belong among the thin lines of the design.
The dots can happen for a few reasons:
- You are a newbie to wood burning (check!);
- You are holding the point too long in one spot, even for a second (check!);
- You’re pulling the Versa-Tool away from you rather than toward you, which can result in the tool just sort of stopping and getting stuck in the soft wood; (did this too!)

Next, let’s talk about my not-so-straight lines!
Wood burning straight lines is much easier to do when the line matches the direction of the wood grain. Curves can be even harder.
Practice makes perfect, and that’s part of the fun of any craft or hobby!
Plus, remember the quote I used in this project: Mistakes are proof that you are trying!
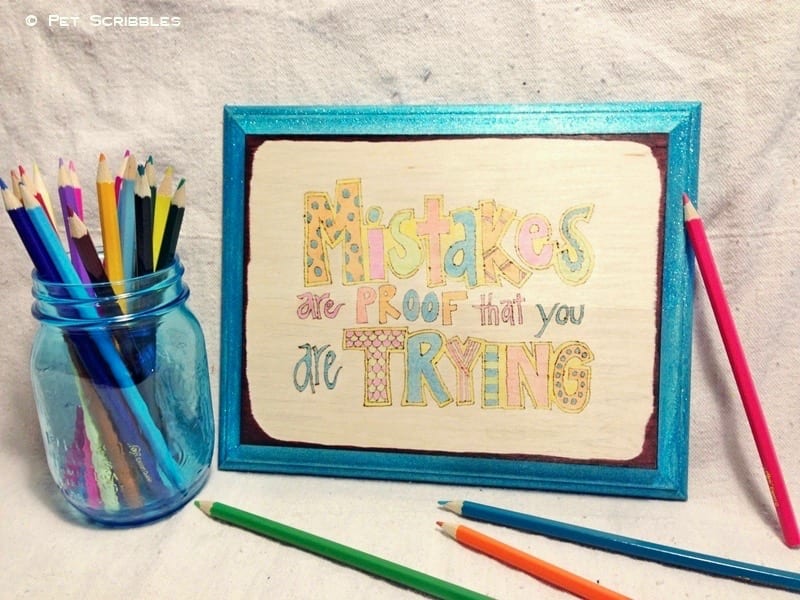
Color your image with colored pencils.
This step is so much fun. If you love coloring in adult coloring books, coloring a wood burned coloring page is even better!
A fun handmade gift idea would be a wood burned coloring page with a set of colored pencils tied up with a ribbon, for the gift recipient to color in. Totally cool gift idea!
Shade the background of your coloring page.
This step is optional, but sometimes I like to shade in every part of the adult coloring pages I’m working on.
In this instance, I used a light gray colored pencil and shaded in the direction of the wood grain.
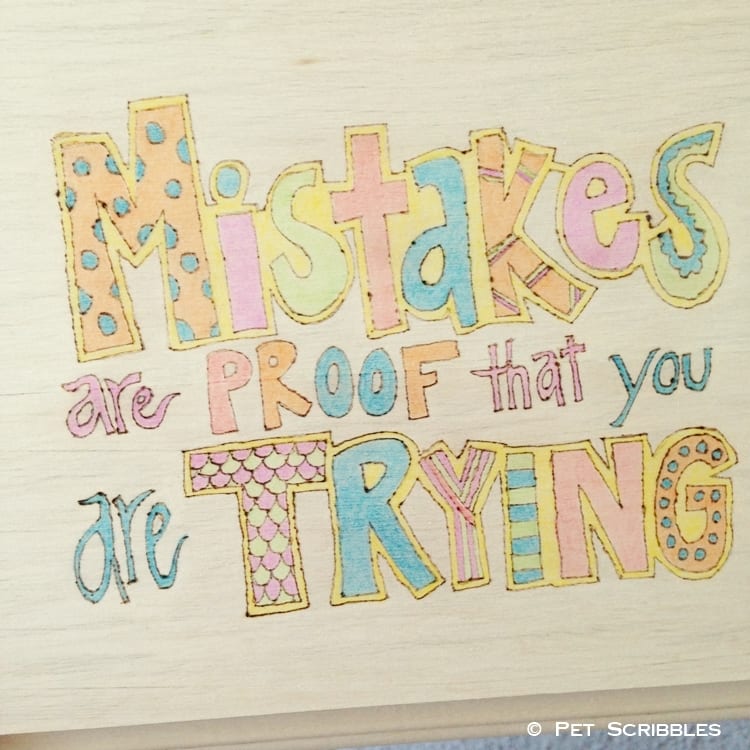
I feel like the shading helped the words to pop out even more.
Paint the border of the plaque in a color to match.
I used DecoArt’s Glamour Dust for this purpose. I did two coats for some extra sparkly shine!
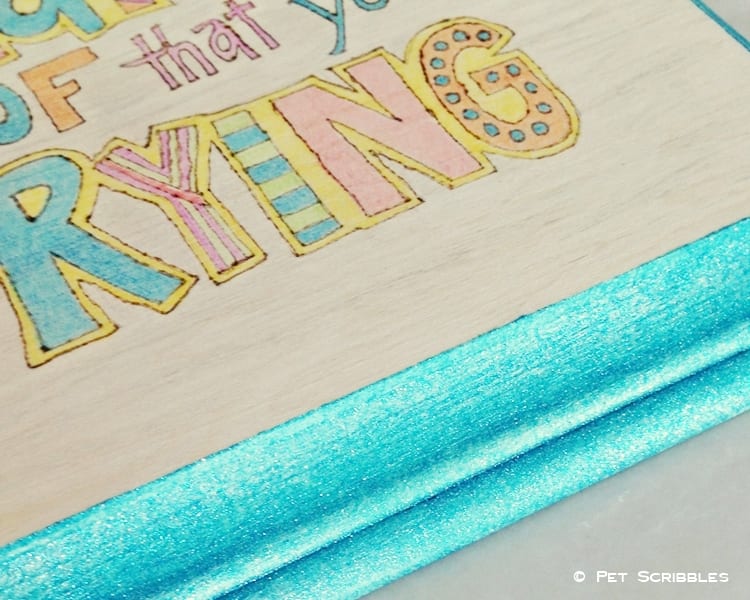
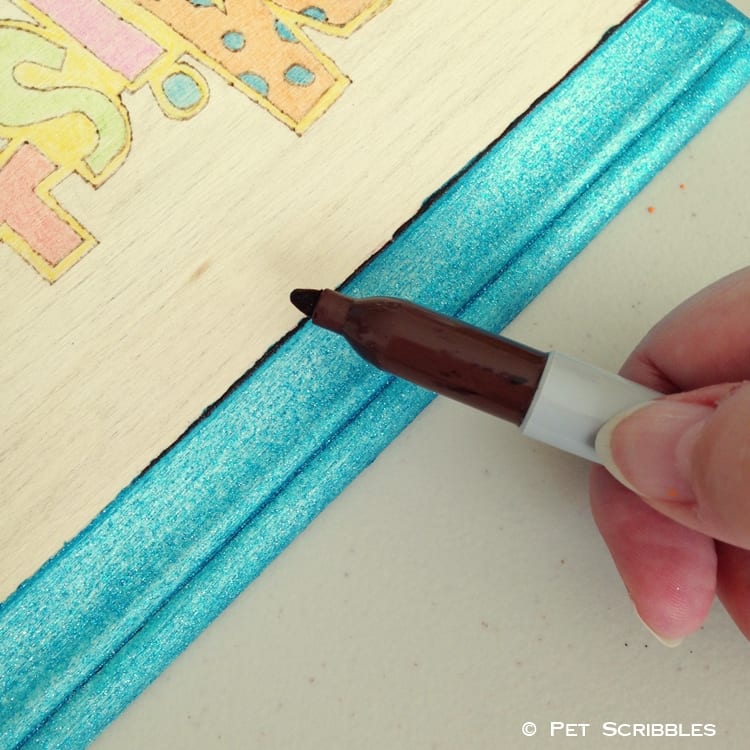
Faux distress the edges with a brown permanent marker.
This is a handy trick when you want to add some distressing to edges only. Use the marker on it’s side at an angle and lightly rub it along the edge, just a small section at a time. I always start with a very light coat first, then slowly build up the color and look until I’m satisfied.
And that’s it! You’re finished!
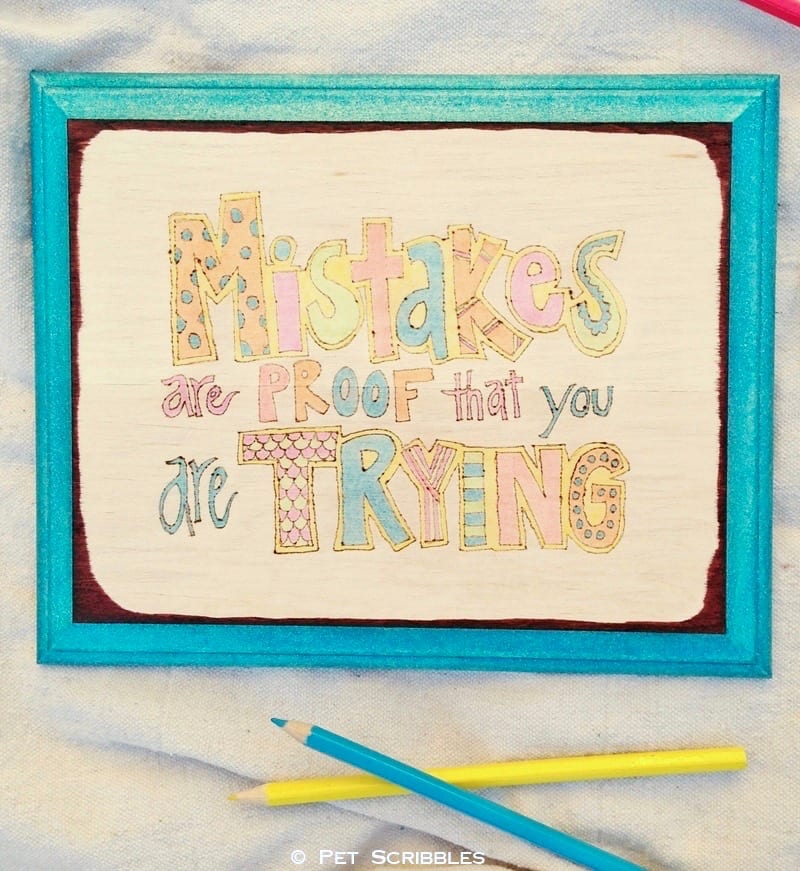
This one is going in my craft room for sure!
How can I learn how to wood burn?
That’s what you’re asking yourself, right?
I taught myself by watching the instructional videos on Walnut Hollow’s YouTube Channel. Each of the videos are only a few minutes long, plus it’s like having a private class with an expert!
Here’s a few links to specific videos that are super helpful:
Intro to the Creative Versa-Tool®
Creative Versa-Tool® Temp Control
Different Wood Species — this one is a great overview of not only of different woods but also which crafts work best on those woods.
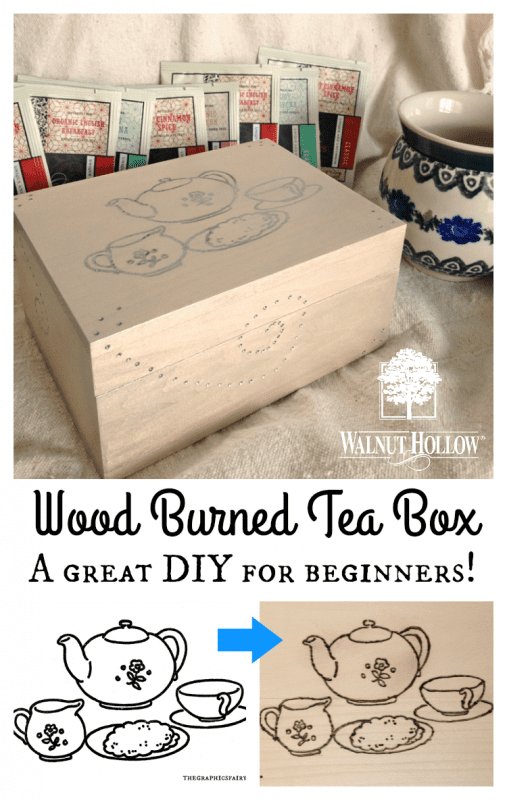
Another wood burning and adult color pages idea:
Here is another wood burning project, this time using an image of a tea set.
I transferred the image and wood burned it onto the tea box exactly the same way I just showed you.
Wood Burned Tea Box: A Great DIY for Beginners!
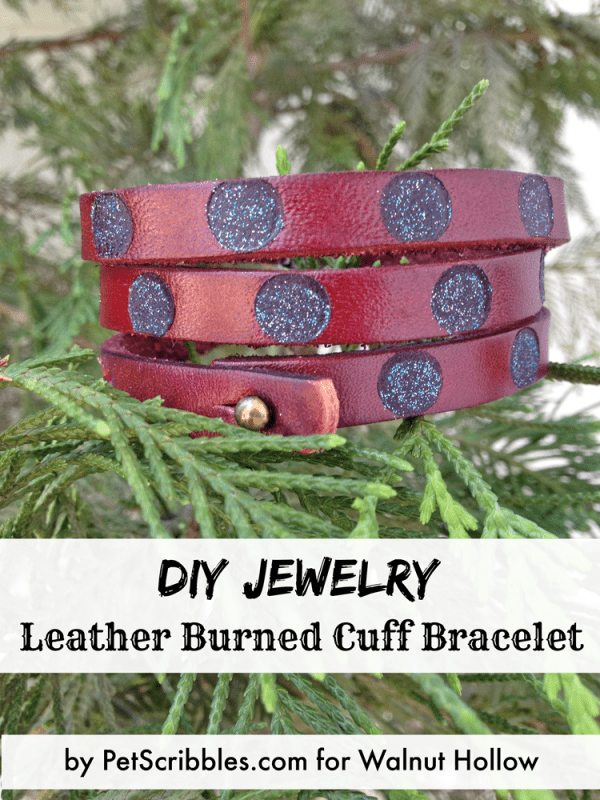
Wood Burned Leather Bracelet:
Here is one more simple project that is fun to make. I wear this bracelet a lot, especially in the Summer. Click here for the tutorial.
Will you try wood burning?
I hope so!
Happy crafting!
I love the quote and how your sign turned out.
Thanks so much Kelly! It was a lot of fun to do!
What is the wax paper used for?
I always use wax paper underneath anything I’m painting, such as the sparkly blue perimeter of this sign. This way, if and when any paint gets onto your work surface A) your project won’t stick to the table or surface you’re working on; and B) it makes for super easy clean-up too!