How to make a DIY Winnie the Pooh Nursery Sign with a free printable inspired by Pooh’s favorite thinking spot! A sweet addition to a child’s nursery room!
Editors note, August 2019: I created this tutorial 6 years ago in 2013. I’ve updated this post and added in new finished project pictures taken in August 2019. Enjoy!
One of my favorite characters from my childhood was Winnie the Pooh. I had a stuffed Pooh bear that I kept on my bed with my Raggedy Ann and Raggedy Andy dolls. Pooh was part of my stuffed animal “family” and I played with him for hours at a time, thinking up all kinds of adventures.
I recently watched The Many Adventures of Winnie the Pooh and was reminded instantly why I love this movie — and Winnie the Pooh in particular. The characters are all stuffed animals belonging to Christopher Robin. When the film opens, you see them scattered about his bedroom, and this part of the film is not animated. Right there, at that moment, I remember thinking this validated what I already knew as a smart little girl: that my own stuffed animals were real, but maybe only I knew that!
I remember pretending we had our own Hundred Acre Woods behind our home. Yes I had many childhood friends, but my Mom has told me countless times over the years how I could play by myself with my stuffed animals and dolls for hours and hours.
This film has such a magical way of bringing these characters to life. The personalities of each animal are very distinct, not unlike the current animated movies popular today. The friendships between the animals and how they help each other out are important lessons for children, all tucked inside the imaginative forest where they live.

Winnie the Pooh’s “Thotful Spot”
One of Pooh’s favorite spots to think is his “Thotful Spot” which even has a wooden sign designating it as such. When he goes there to think, he sits down and puts his stuffed paws up to his head and says, “Think, think, think!” as he tries to come up with a thought. Total cuteness! But also something that stayed with me after I watched the film.
After watching the film, I kept thinking about Pooh’s special place to sit down and think. I like the idea of having a designated spot to do my thinking. Guess what? I already DO have that spot, of course, here in my craft room.
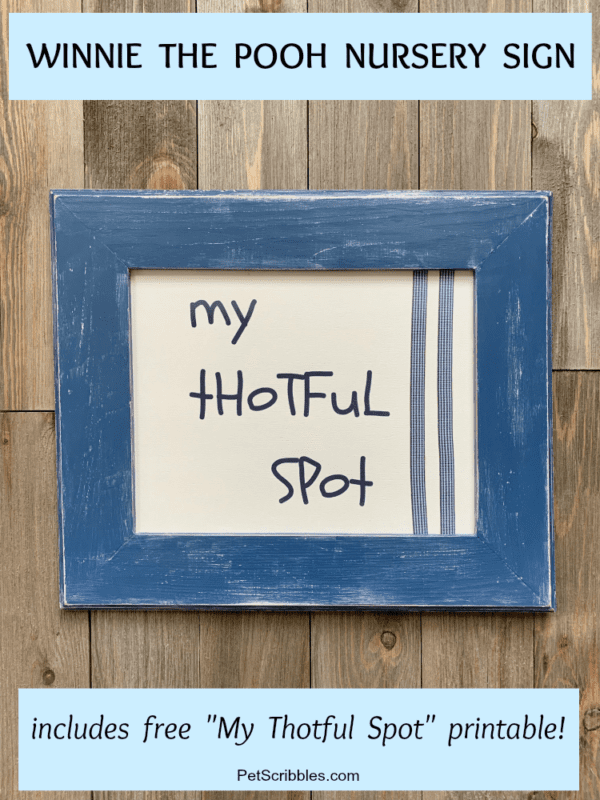
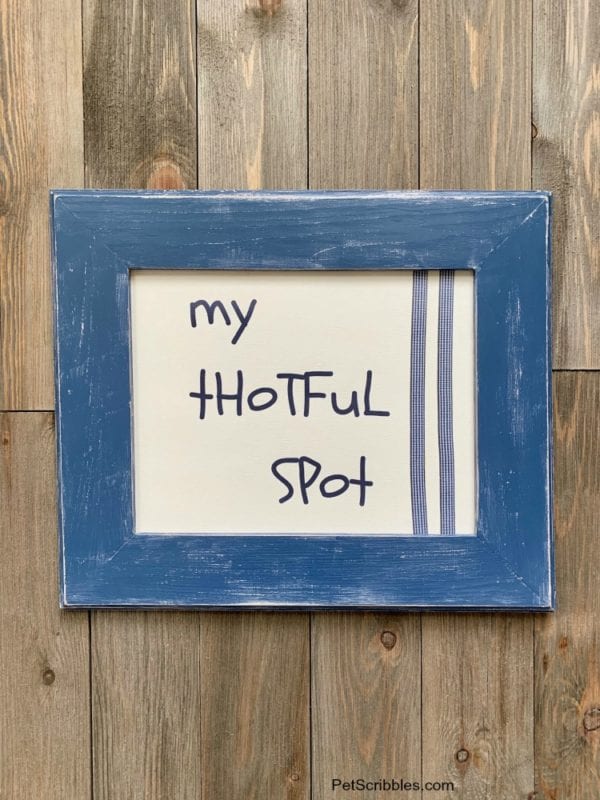
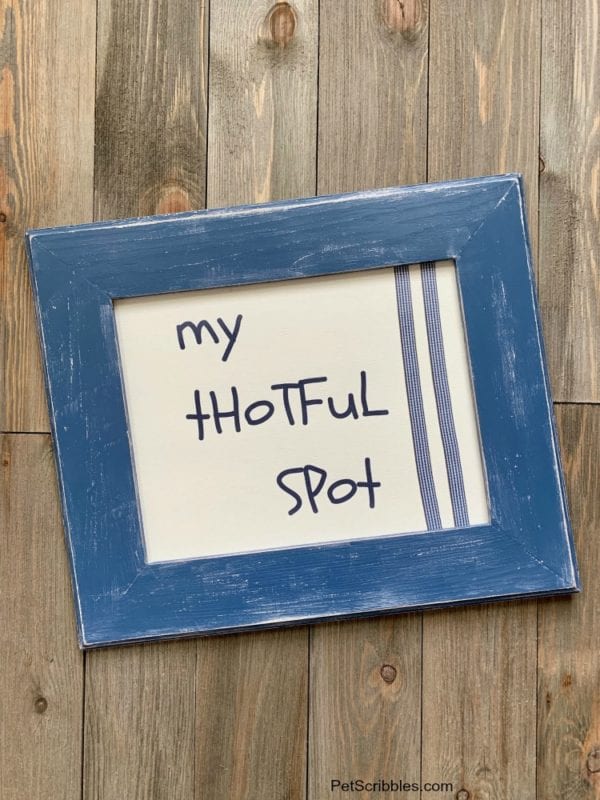
I know I’m very fortunate to have an entire room devoted to crafting, and maybe what I needed was my own sign to remind me of that. Because, afterall, this is my own thoughtful spot. Or rather: My Thotful Spot!
“My Thotful Spot” Winnie the Pooh Nursery Sign
FTC Disclaimer: Some of the links in this post are affiliate links. I explain more here.
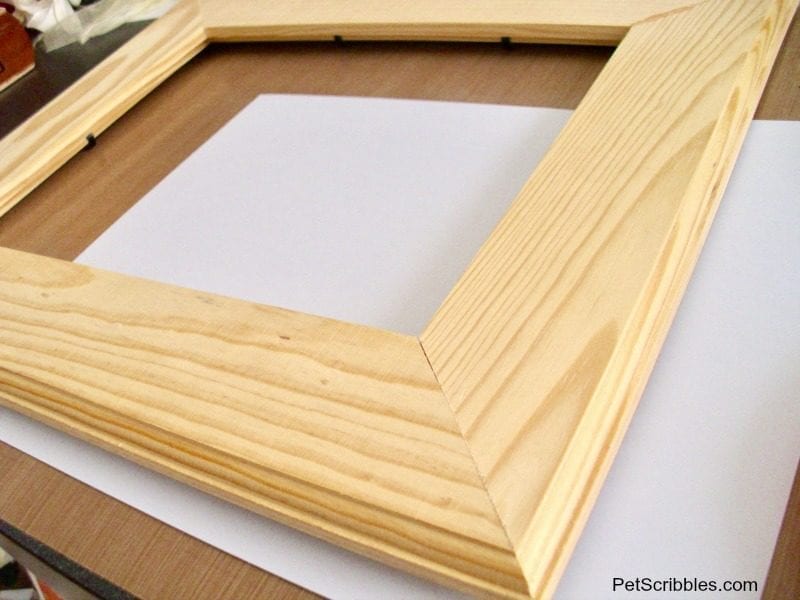
Start with an unfinished wood frame (approximate size 12″ x 14″) that has an opening for an 8″ x 10″ picture, or in this case an 8×10 printable sign!
Paint two coats of ivory — or your choice of light-colored paint. Let dry thoroughly.
We’re going to make this frame look weathered, sort of like it’s been outdoors in the Hundred Acre Wood for a very long time. To do this, we need to apply a resist, which will prevent your top coat of paint from adhering completely in certain areas. This will help your bottom color to show through in a nicely distressed way. There are many ways you can apply a resist, and one of the easiest is to simply use a wax candle.
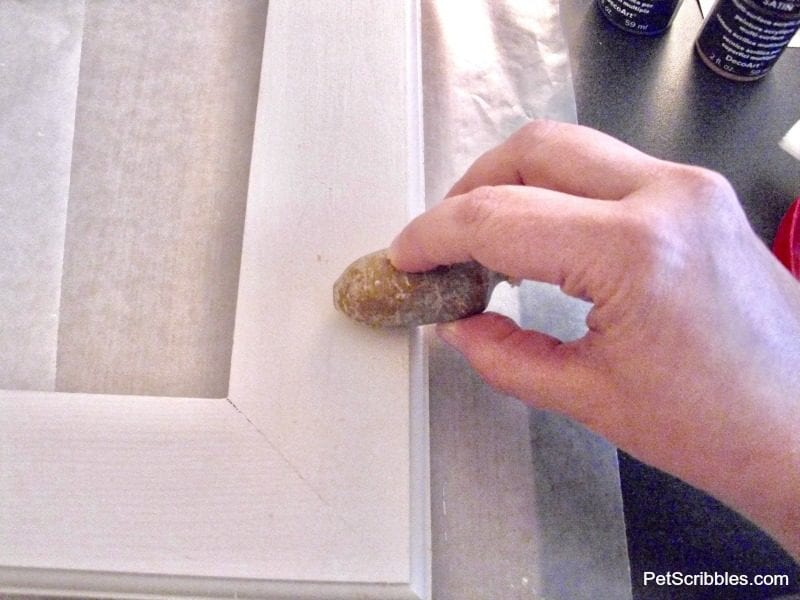
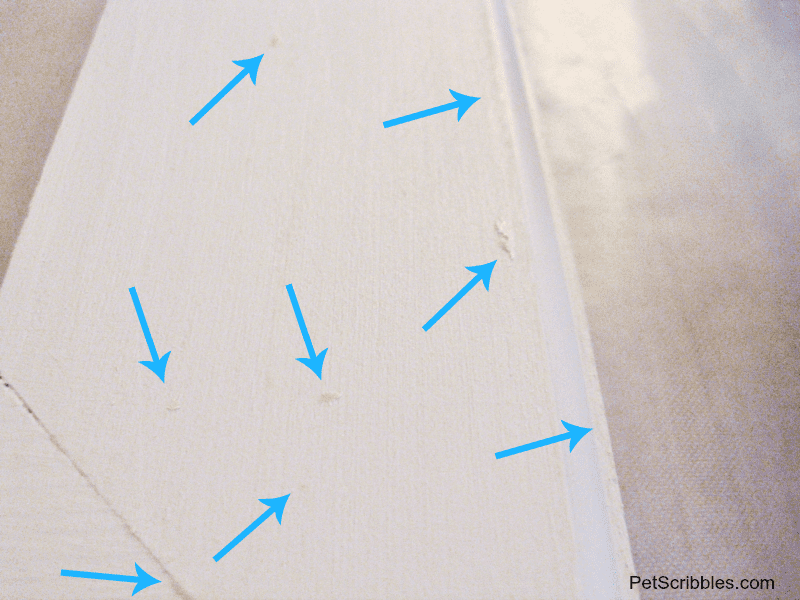
Take the edge of a candle and simply rub it on the edges and anywhere else you want the bottom color to show through. You can see all the bits of candle wax below, amongst my pretty collage of arrows. (Hah!)
No need to wait, just start painting your top coat onto the frame. Cover your frame completely including all waxed areas. Just one thick coat is needed for this step.
You can already see how the paint doesn’t quite cover those areas that have wax on them:
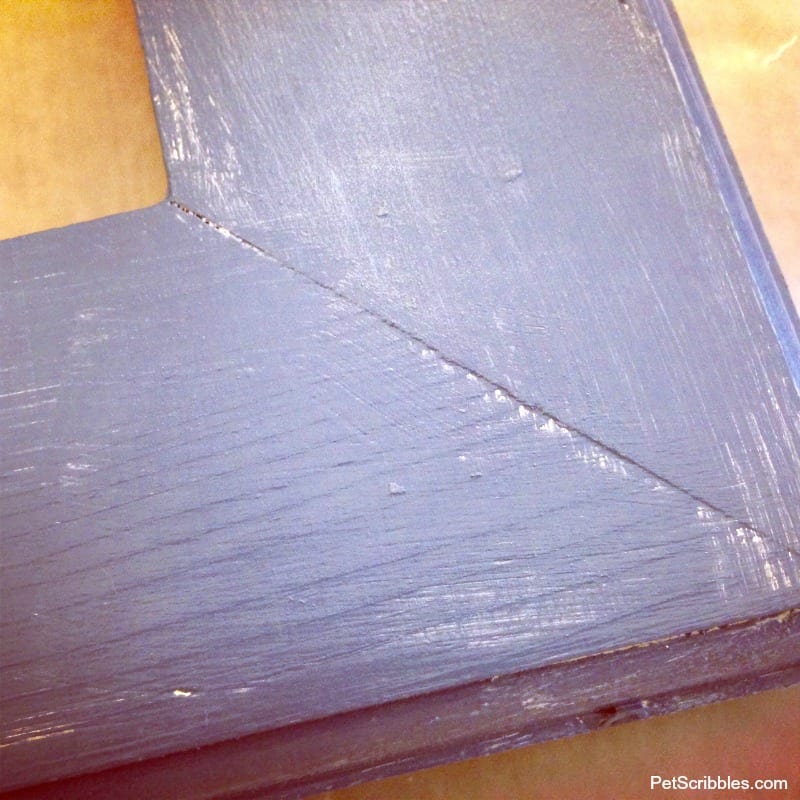
Let this dry thoroughly. I let mine dry overnight.
Using a sanding block, sand over your frame and the wax helps easily remove the paint from those areas. As you sand, the wax is removed, any bumps are smoothed out and you’re left with a sweet distressed frame!
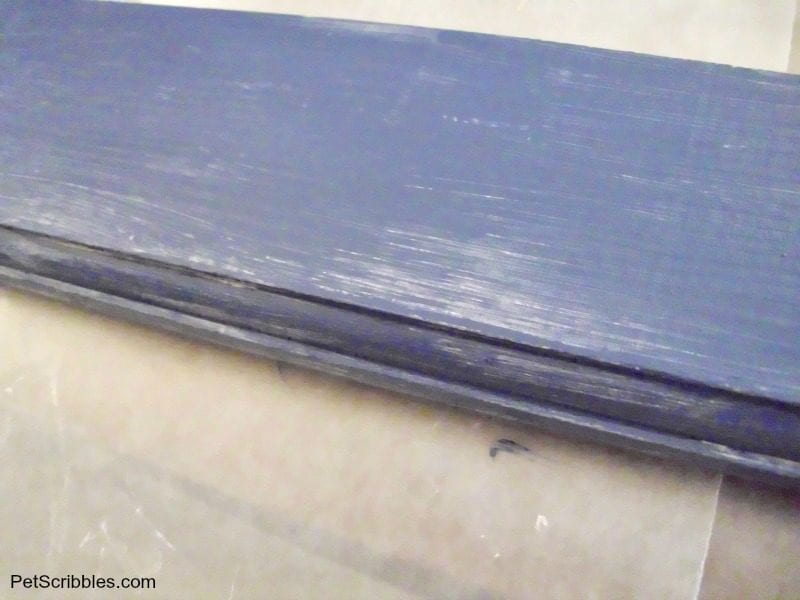
Instant gratification! And instant weathered look! You can apply an acrylic sealer to finish, but it isn’t necessary.
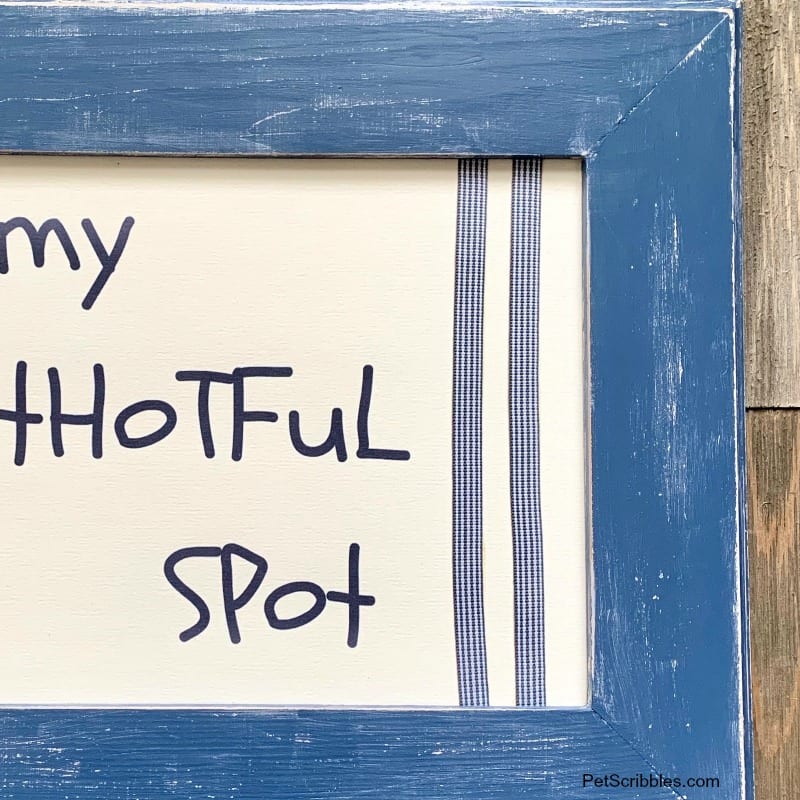
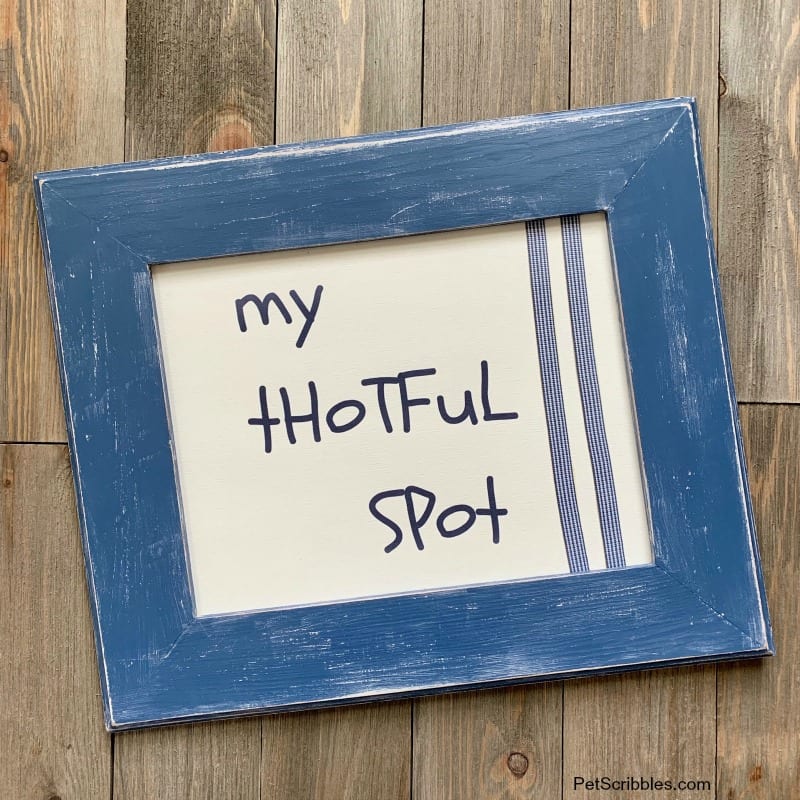
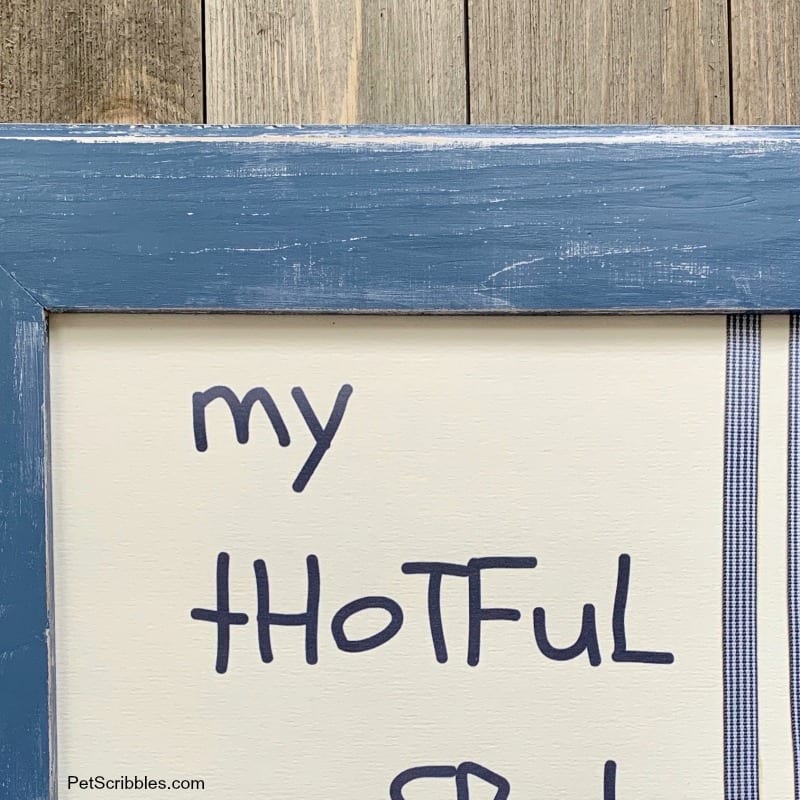
“My Thotful Spot” Free Printable
Here’s free printable I made, which I’m happy to share with you. I liked the way Pooh’s own sign was, so tried to imitate it with mixed up capital letters.

To download, click on the image above and open it in a new browser window. Then, in the new window, right-click your mouse on the image, choose “Save” and then save it to your computer. Easy peasy!
Remember: this is for personal use only.
I printed mine out on an 8.5″ x 11″ piece of textured ivory cardstock, and added two pieces of blue patterned ribbon (just adhere them to the cardstock with a tape runner).
If you adhere them with a tape runner the entire length of the cardstock, then when you place it into the frame, the ribbon will look nice and finished as it “keeps going” into the edges of the frame.
Editor’s note, August 2019: I did not use the plexiglass in the frame. I really loved the look of this nursery sign without the glass covering up anything. After 6 years, this sign still looks like the day I made it!
DIY Winnie the Pooh Nursery Sign
You can see how the ivory paint that was covered by the candle wax now shows through the blue paint layer . . .
And now I have my very own Thotful Spot!
This sign would be perfect for a child’s nursery room. Maybe near some special picture books and a favorite chair, or hung above a favorite collection of stuffed animals.
So… Do you have a Thotful Spot?
More Painted Frame Ideas
Here are additional ideas for painted frames that I’ve created here on Pet Scribbles!
A Faux Verdigris Picture Frame in One Simple Step!
IKEA KVILL Frames: from white plastic to looking like painted wood!
Peeling Paint Technique on a Frame!
Happy crafting!
this is adorable! Great tip on how to make a weathered looking frame as well.
Thanks Carissa, and glad you liked the tip! It makes quick work of “distressing” new paint projects!
very cute idea!
Thanks so much Jessica! (And I adore your Hundred Acre Wood Lamp!)
Oh Laura, I love everything about this!
Why thank you Carol! I had so much fun with this idea once I thought about the Thotful Spot. And I had that thought in my own Thotful Spot too. 😉
Super cute, Laura! We’re big Winnie the Pooh fans over here – love it!
Thanks Tara! Glad to know you’re also Pooh fans! I love how positive the messages are, especially for kids!
So cute Laura! We have always loved Winnie the Pooh.:)
Thanks Kadie! I love how timeless Winnie the Pooh is! 🙂
That is adorable! I never saw the movie, but I love the book! And Winnie the Pooh was my favourite character… and still is 🙂
Thanks Julia! I think I want to reread the book, as I bet I’d pick up things I didn’t see when I was a child! 🙂
OK this is the cutest! Thanks Laura! Pinning.
Awww, you’re welcome Malia! And thank YOU, my friend!
This is so cute! I wish I had a baby again so this could be added to our nursery. Also love the tip with the candle. I never thought of that.
Thanks Cassie! That’s a great idea to use this sign as nursery wall decor! Thank YOU for that tip! 🙂
So cute Laura!! Pinned and tweeted!
So glad you liked it Barbara! Thanks!!
This is a great tutorial! I’m hoping to use a similar technique to make some wooden photography backdrops–thanks for sharing!
What a fantastic idea, Liz! I’d love to see the backdrops when you’re finished!c Of course, I will no doubt see them on your blog! 🙂