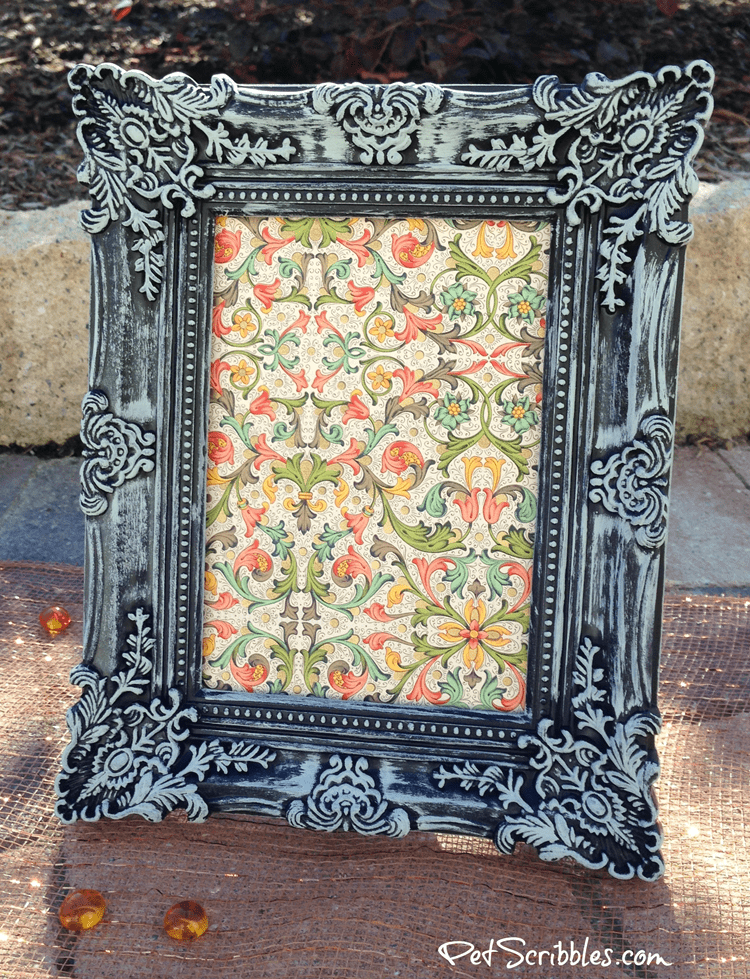
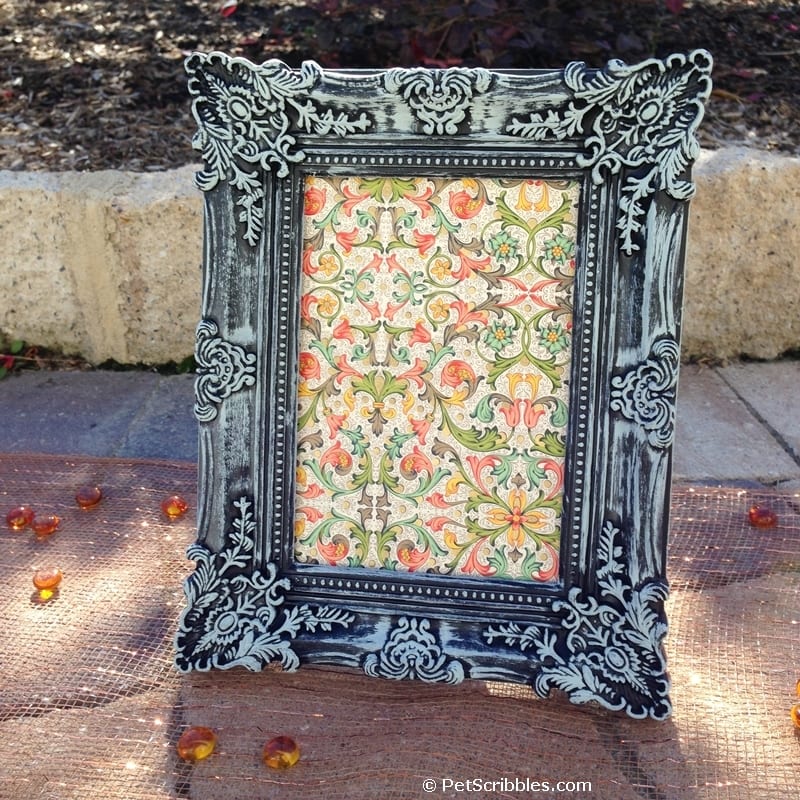
Grab a black plastic frame from the dollar store and turn it into a faux verdigris picture frame in one simple step! A quick and easy paint makeover! For reals!
Here’s a craft that takes about 15 minutes to do, yet is quite a major update!
I saw this black plastic frame at the local dollar store, but you can find them just about anywhere. This particular frame was $4.00.
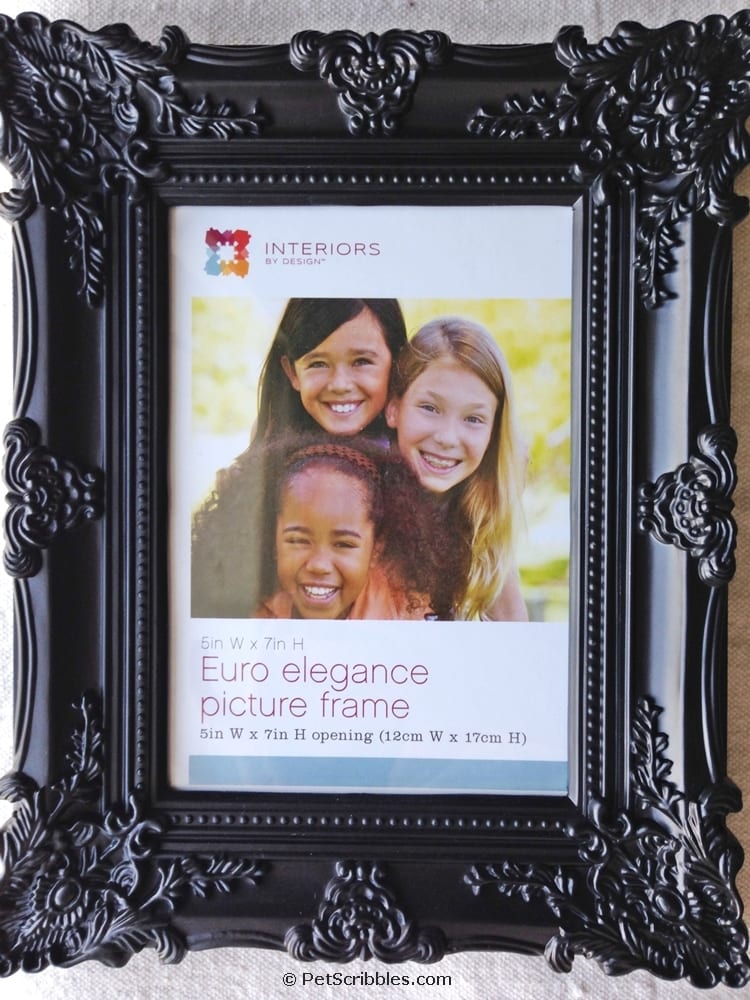
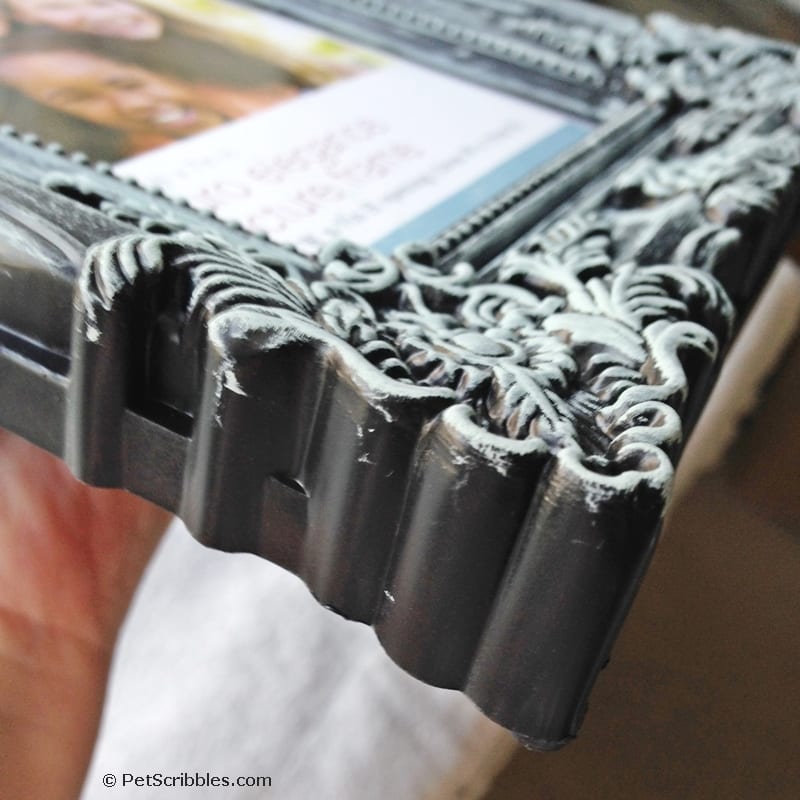
Because it had so much detail — which you almost can’t see because the entire frame is black — I knew it would be fun to paint.
Supplies:
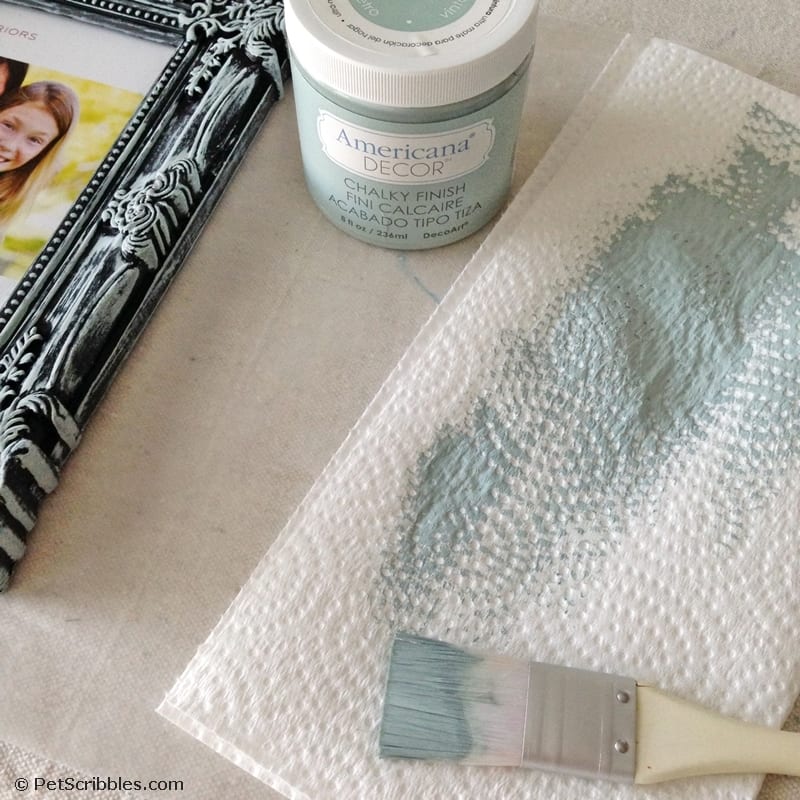
- DecoArt Americana Decor Chalky Finish Paint in Vintage
- Paintbrush
Just two supplies for one step!
Easy peasy, I swear!
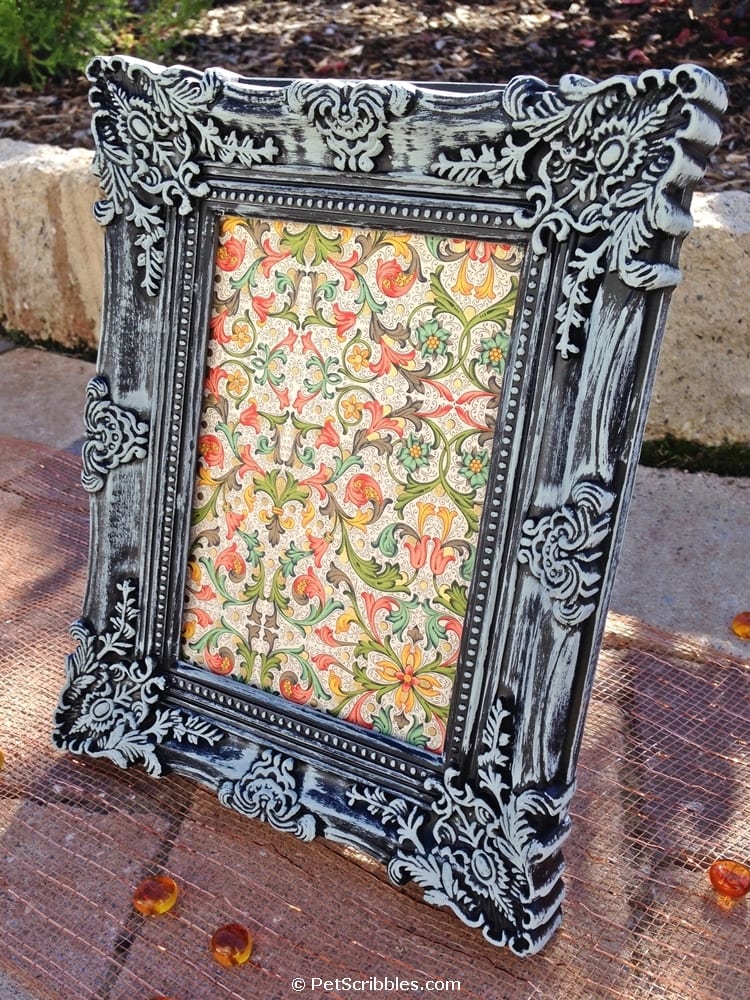
A faux verdigris picture frame in one simple step!
Are you ready?
Dip your paintbrush into the paint, wipe most of it onto a clean paper towel, then lightly go over the frame.
This technique is called the dry brush technique, or simply dry brushing.
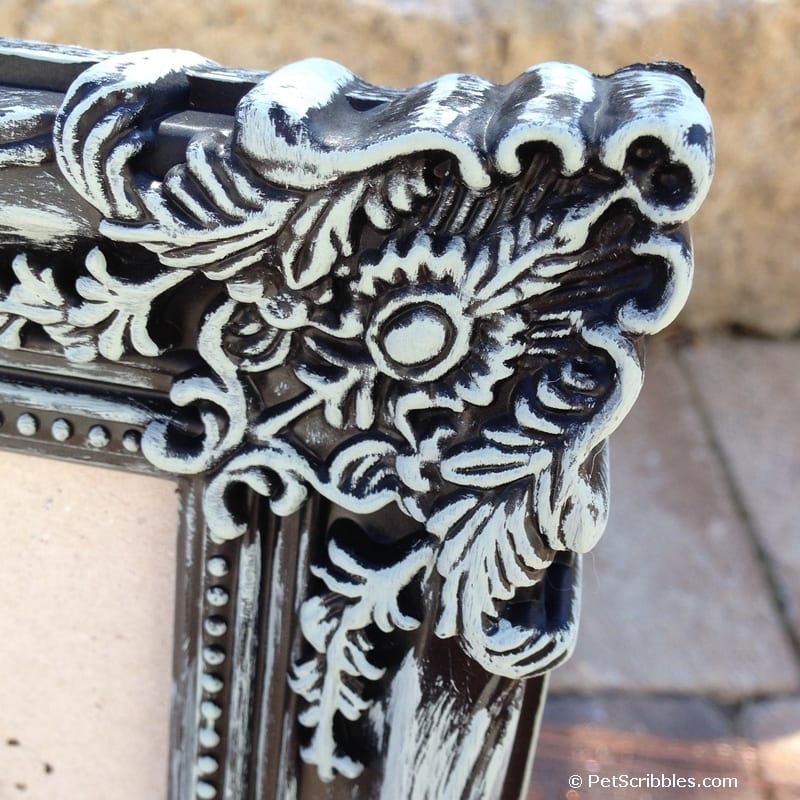
The paint will cover the raised elements on the frame and get a bit into other areas, while leaving the crevices black.
At the bottom of this post — in the Related Posts section — you can click to see other DIY examples of how I’ve used dry brushing.

Helpful tip: The key is to do this very lightly, i.e. very little paint on your brush at first. It’s much easier to build up the color gradually until you’re happy with the look.
Paint the front of the frame first. Once the front dries quickly, begin painting the sides.
I swear I was finished in less than 15 minutes, and all that was left to do was let it fully dry.
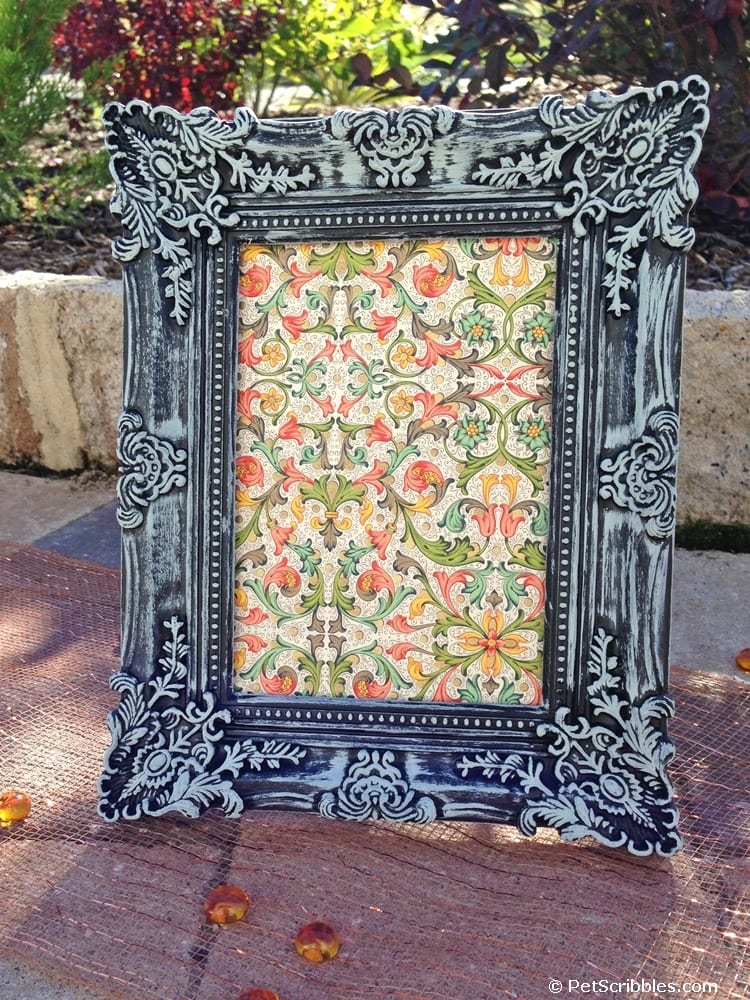
Here it is!
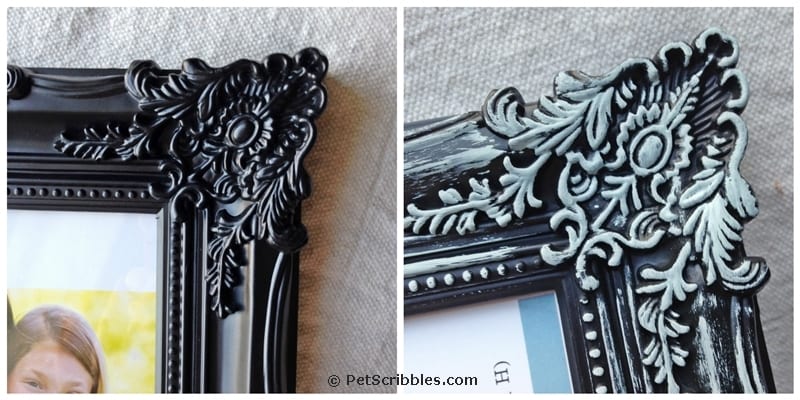
Here’s one of the corners close up . . .
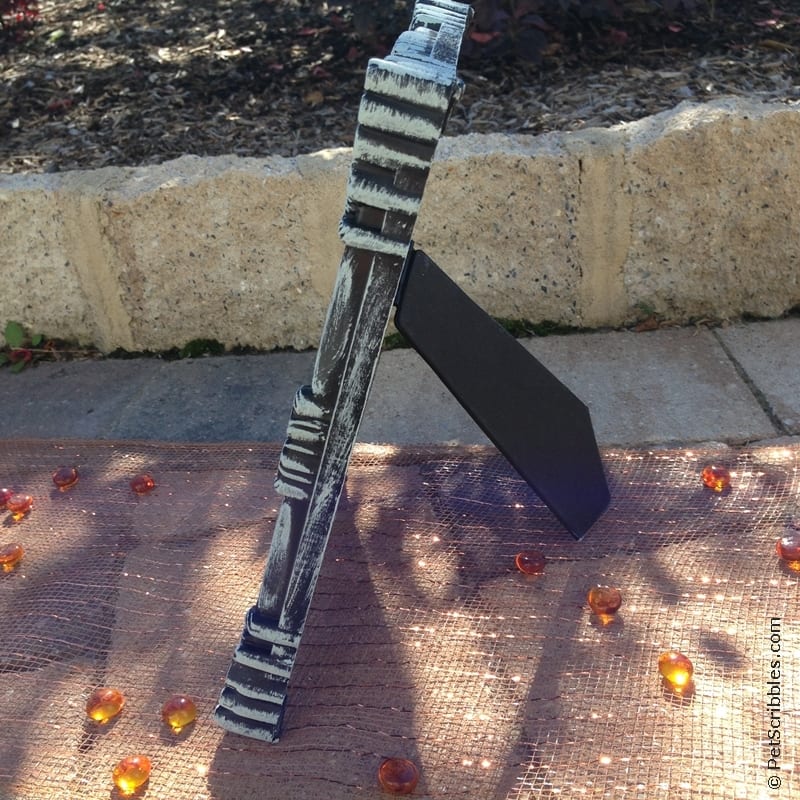
Here’s the side view . . .
Next time you’re in a dollar store, check out their black plastic picture frames!
Want to see what you can do with a white plastic picture frame? Check out my IKEA frame makeover tutorial here.
And check out the Related Posts below for more of my paint tutorials using the dry brush technique.
Happy crafting!
~Laura
Fabulous makeover! I will be using this for sure! Love it!
Love the paper inside the frame also!
Laura, you always have some of the best ideas… These frames are beautiful!