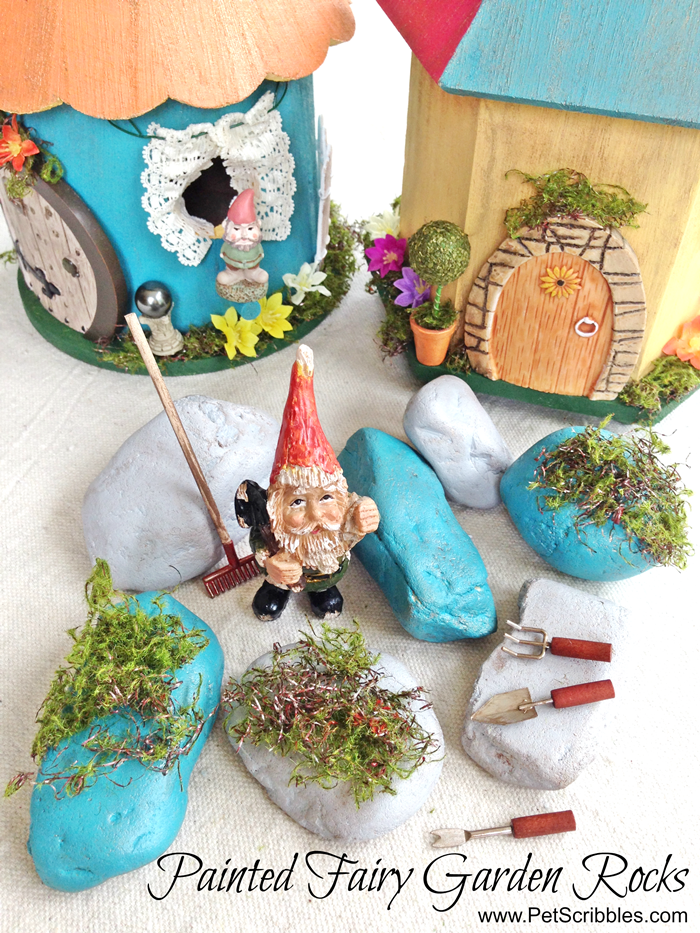
Painted fairy garden rocks are easy to make! Paint them with outdoor paint and add some moss. Match the rocks to the colors in your fairy garden! This is a fun DIY!
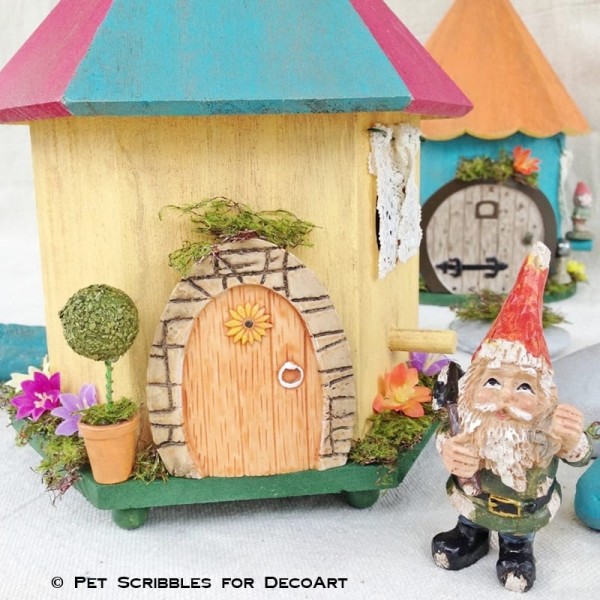
I’ve been working on some painted fairy garden houses for DecoArt and decided to paint some rocks to match.
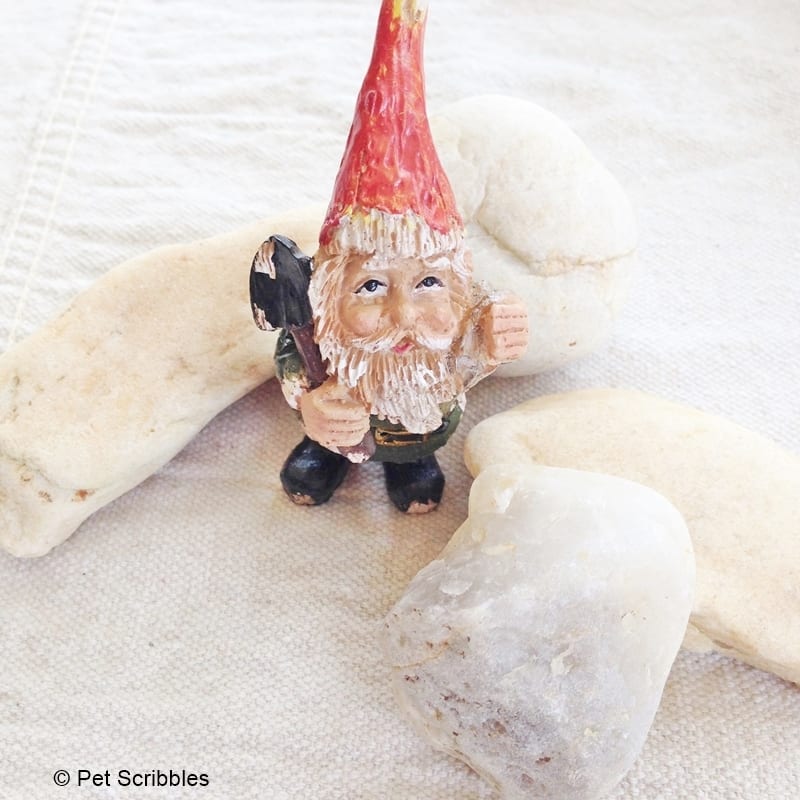
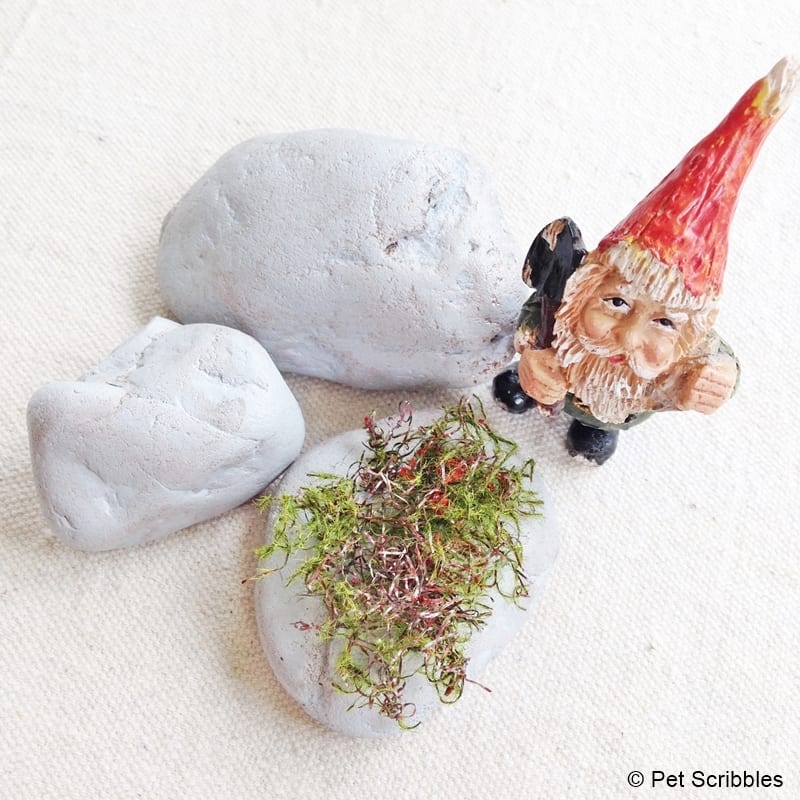
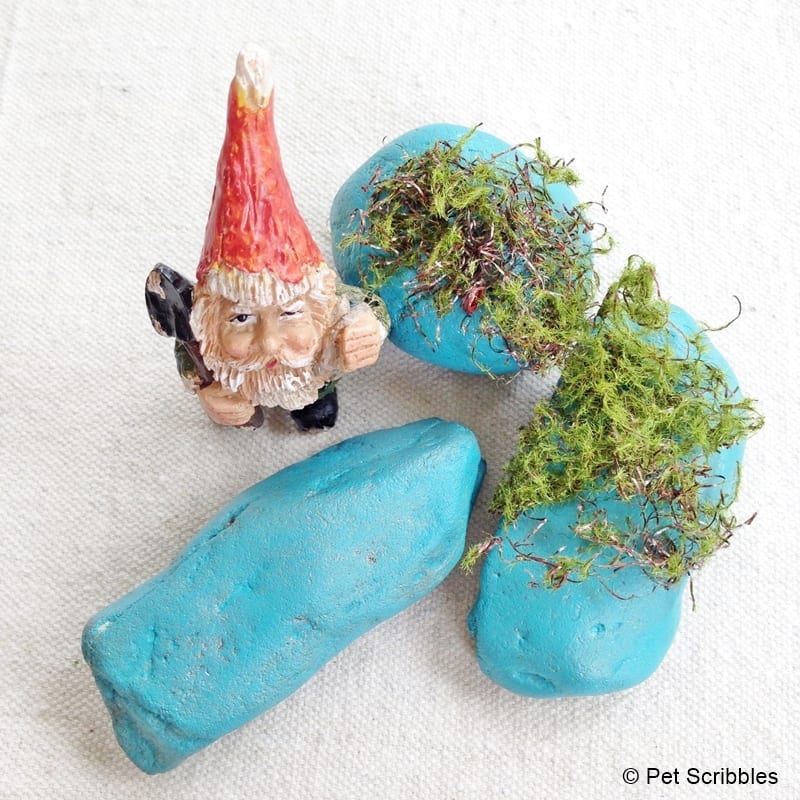
I grabbed rocks from our backyard garden bed.
Mr. Gnome seems to approve, but I think he’s going to love them painted even more!
Painting rocks is a fun – and quick – project. And let me tell you – I found it to be very relaxing! I may just paint rocks the rest of the Summer. Can you imagine? LOL
Disclosure: I’m an artist with DecoArt, and they provided me with the paints discussed in this blog post. All opinions and this project are totally my own! Some of the links in this post are Amazon Affiliate links. I explain more here.
Painted Fairy Garden Rocks using outdoor paint!
I used DecoArt Patio Paint, which is an outdoor paint – perfect for anything that will be spending time outside, as this paint is weather and water-resistant. You can use it on rocks, cement, terra cotta, wood, etc.
Handy Tip: Place a sheet of wax paper underneath the rocks before you paint them. Paint doesn’t stick to wax paper, so you can paint your rocks more quickly this way.
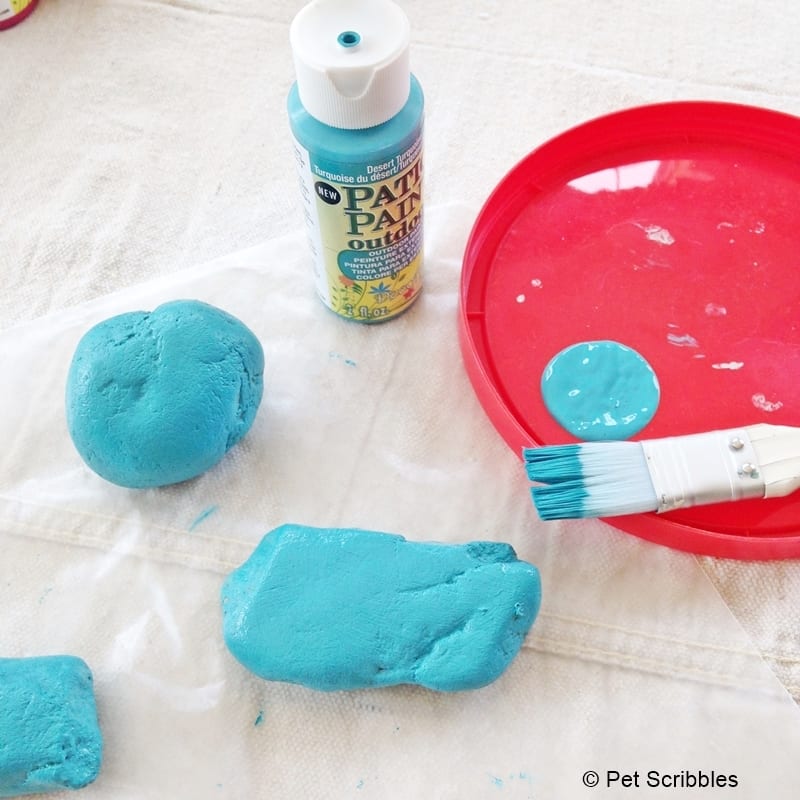
Paint one side of all rocks, then flip over to paint the other side of each. Go back and fill in the edges and then let dry.
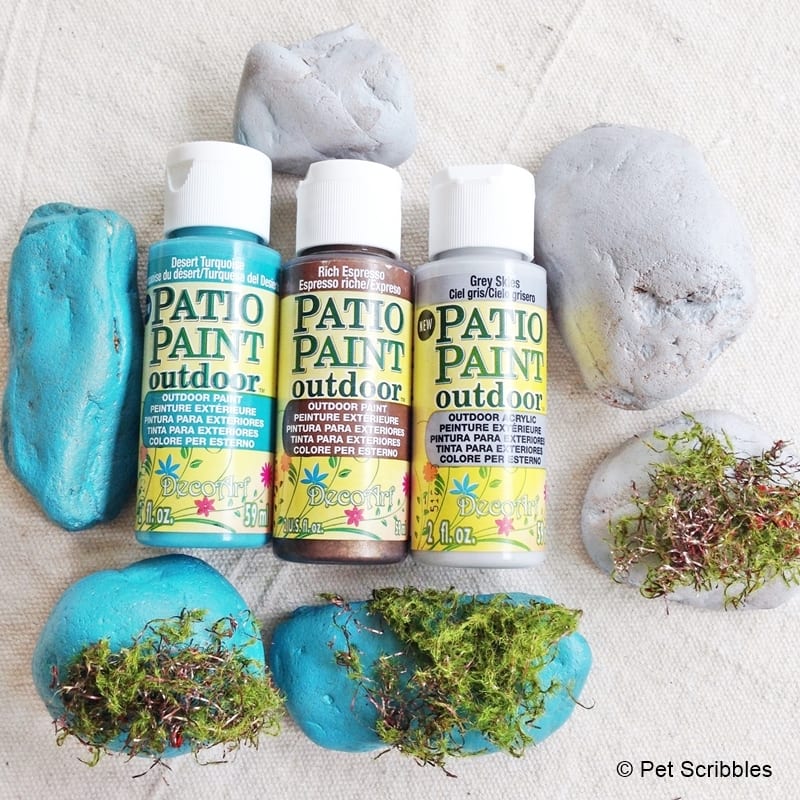
Colors used for my painted fairy garden rocks: Desert Turquoise, Grey Skies and Rich Espresso.
How to distress painted fairy garden rocks!
The Rich Espresso outdoor paint color is a pretty metallic, and I like to use it for a distressed or aged look.
Here’s how:
Water down the Rich Espresso paint and lightly brush it onto a rock. Immediately wipe the Espresso paint off with a damp paper towel, then set aside to dry. Repeat this process for each stone.
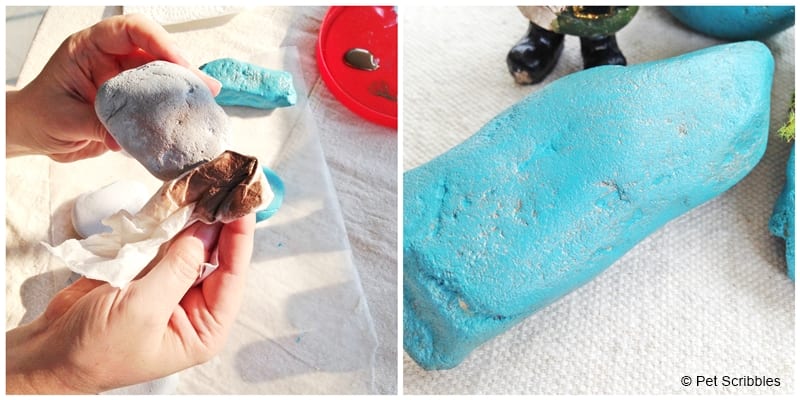
In the image above, you can see how the metallic paint leaves behind a nice sheen, and settles into the cracks and crevices of the rock. I love how it looks!
Add some moss!
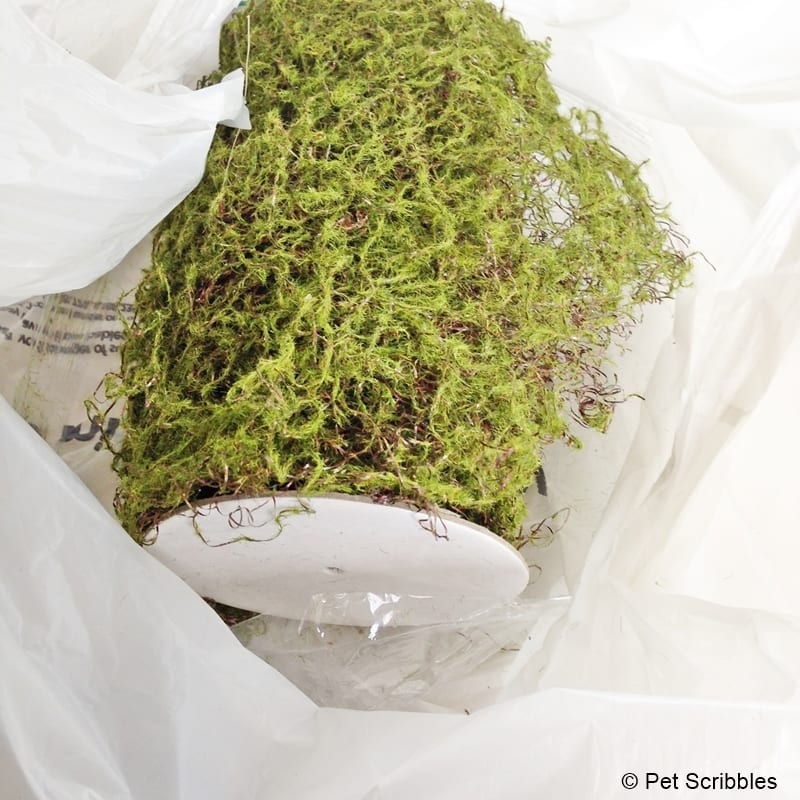
I bought a roll of moss at the craft store. Yes, moss comes in rolls now – very cool idea!
Handy Tip: Keep the moss in a plastic bag while you work with it, otherwise you will have bits of the stuff everywhere. Trust me.
I snipped off a small section of the moss, then attached it with Aleene’s Clear Gel adhesive. Press down to make sure it adheres, then set it aside to dry.
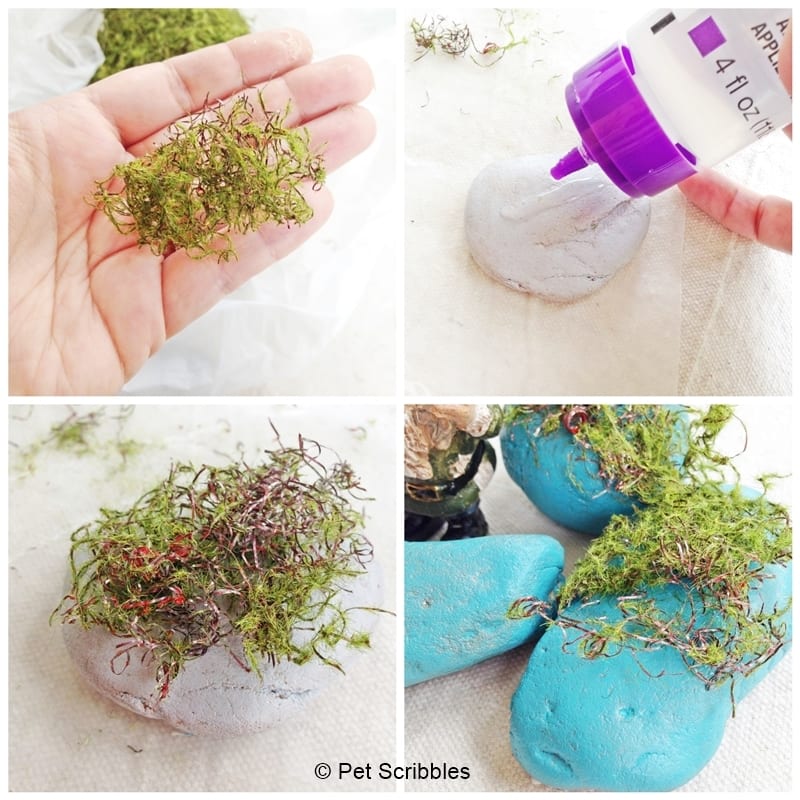
Here’s what the painted fairy garden rocks look like in the pretty blue-grey color called Grey Skies . . .
And here are some painted fairy garden rocks in the vibrant Desert Turquoise shade . . .
Distress those fairy gardening tools too!
While I was distressing the rocks, I decided to distress some miniature garden tools for my fairy garden.
Here’s how:
Brush on a tiny bit of the Rich Espresso paint, then wipe it off with a damp paper towel and let dry.
The garden tools look better this way, versus the shiny “Made in China” way they looked before.
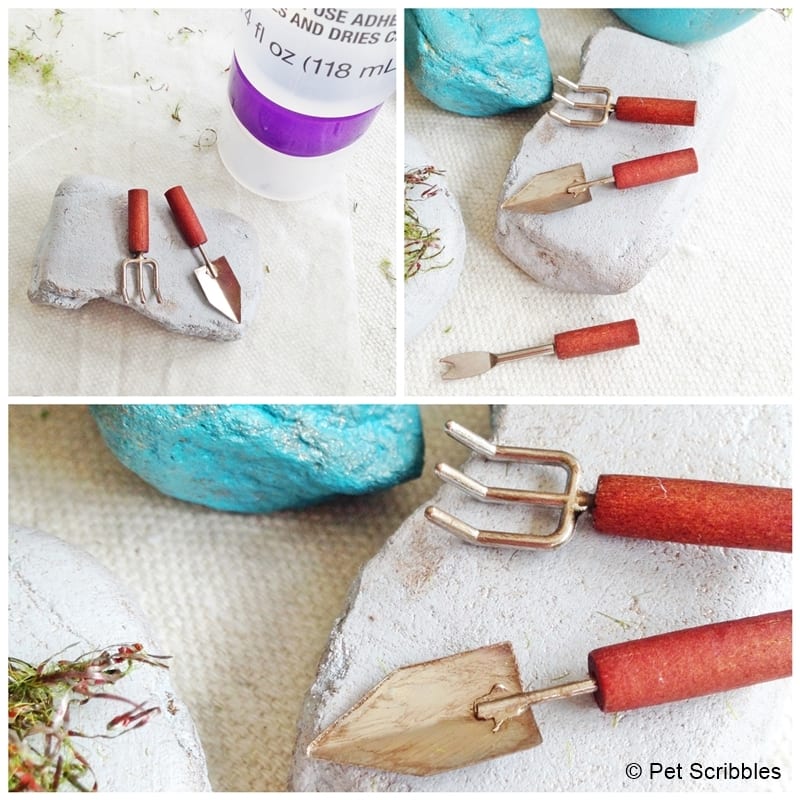
Finally, attach two of the tiny garden tools to one of the painted rocks with glue.
It’s a good spot to keep them until Mr. Gnome needs them again!
He’s magic, so he can unstick those tools any time he wants!
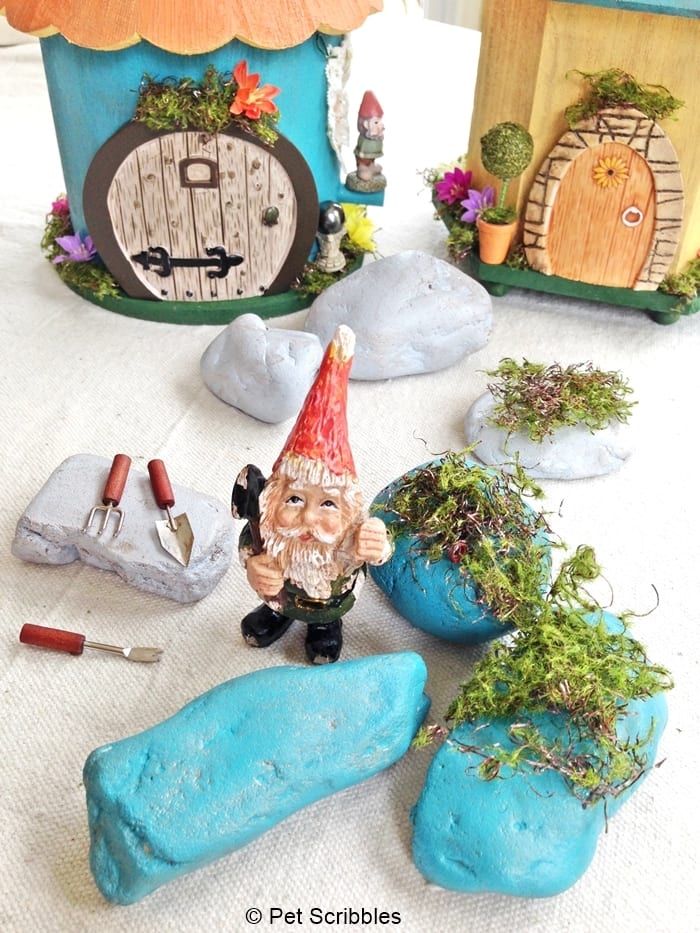
I think Mr. Gnome definitely likes these rocks better now that they’re painted.
I do too!

You might also enjoy these related DIYs I did for this project:
Fairy Garden House Lace Curtains

DIY Fairy Garden Homes from Birdhouses
Happy crafting!
You did a great job making the rocks look perfect for the gnome. I only heard of the moss on a roll recently and I think it opens up a lot of crafting possibilities. Thanks for sharing you awesomeness!
Thanks Kelly – I’m blushing! Yes, the moss on a roll is crazy handy! I just hope nobody thinks they could unravel it and make a moss garland with it! LOL
I love your painted rocks – so perfect for your fairy garden which I am dying to make one myself. I have to agree with you painting of any sort is very relaxing for me. Cathy
Thank you Cathy! I love to paint too – it rivals gardening! 🙂