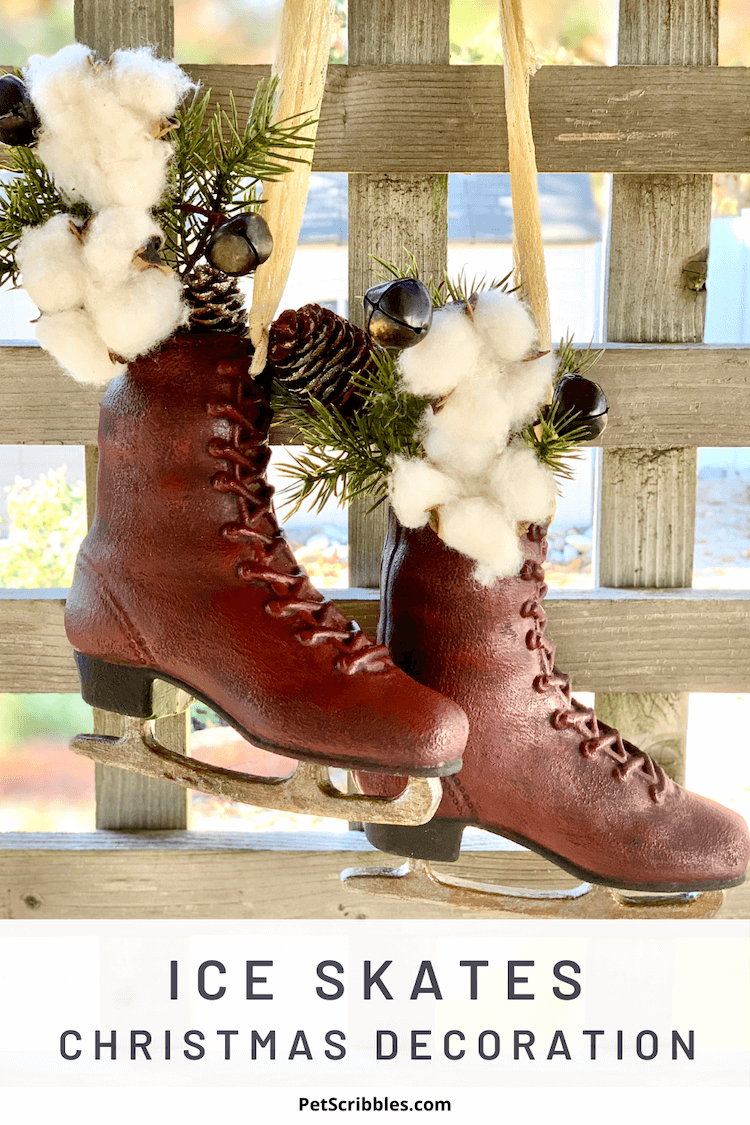
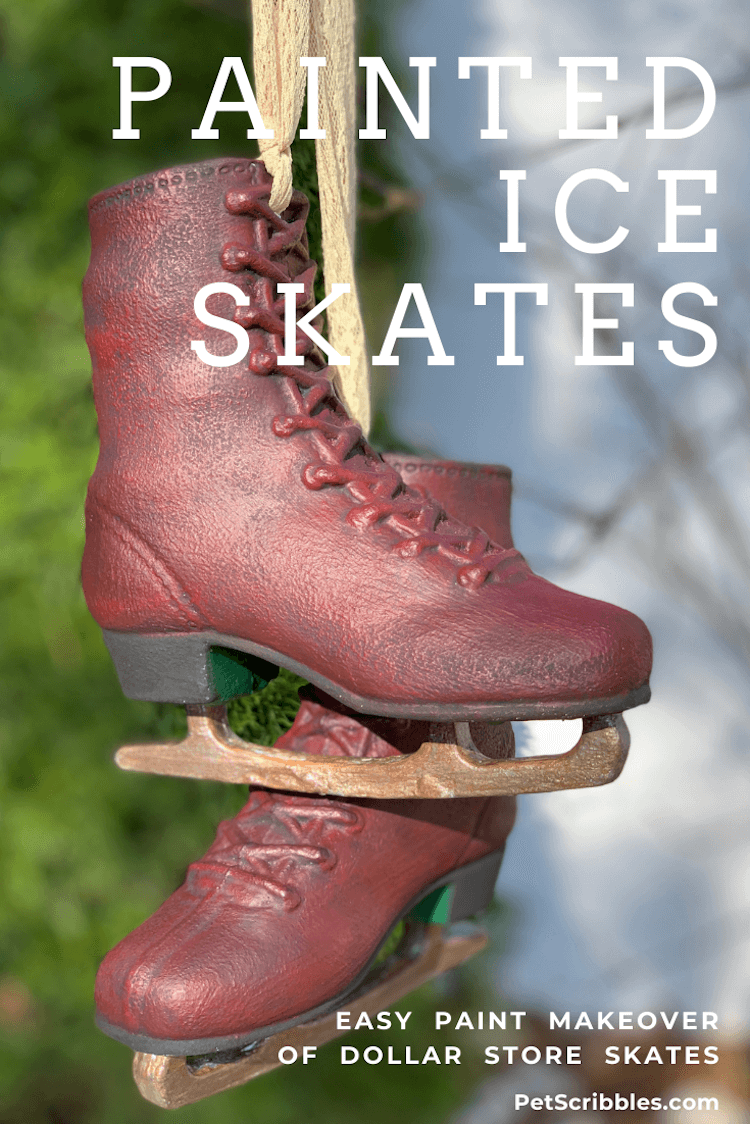
For holiday and Winter decor, create this ice skates Christmas decoration. A sad-looking large ice skates ornament got a makeover just using paint. An easy DIY that makes ice skates look vintage!
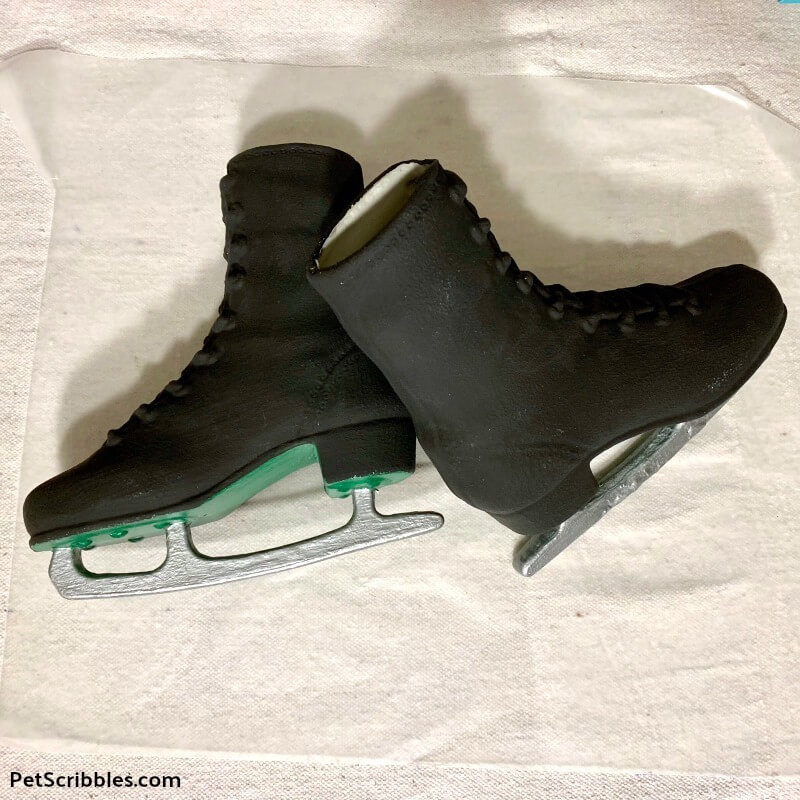
I saw these oversized ice skate ornaments at the dollar store last year.
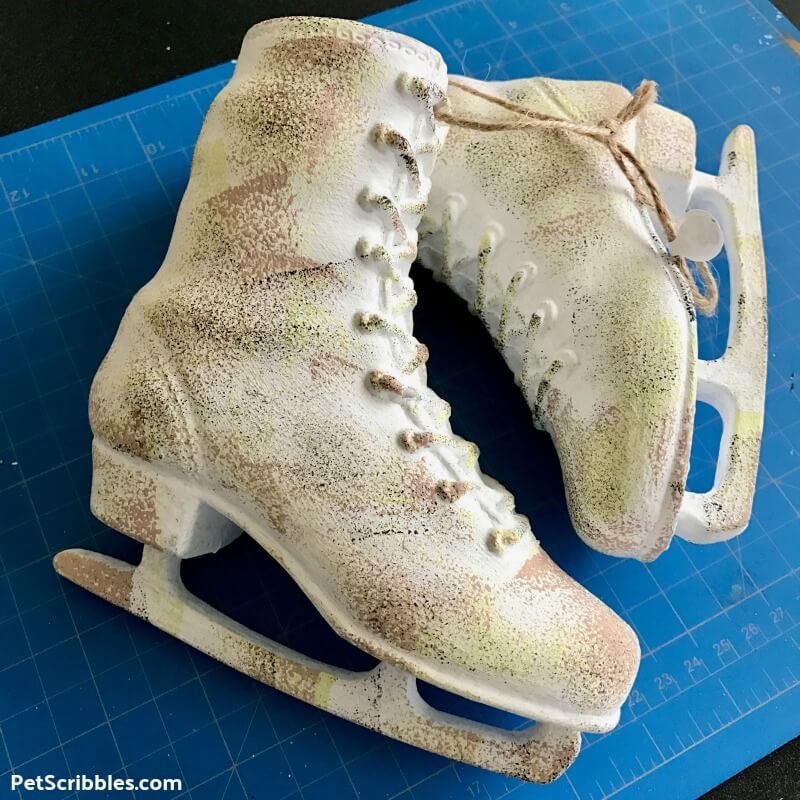
Yes, they are ugly, and it was probably the exact reason they were still left over after Christmas.
I knew I could give them a makeover just using paint.
The before-and-after is amazing and I hope this inspires you!
FTC Disclaimer: I receive products to try out in my role as a Plaid Crafts Ambassador. These ice skates, however, are 100% my own project!
Supplies:
- Ice skates decoration from the dollar store
- FolkArt Home Decor Chalk Paint in Rich Black — Plaid Crafts
- FolkArt Multi-Surface Paint in Classic Green and Cardinal Red — Plaid Crafts
- FolkArt Multi-Surface Paint in Coffee Latte — Plaid Crafts
- FolkArt Brushed Metal Paint in Brushed Silver and Brushed Dark Gray — Plaid Crafts
- Small paint brushes from Martha Stewart Crafts Basic Brush Set — Plaid Crafts
(These are my favorite brushes — they last forever and clean up great!) - Recycled plastic jar lids to hold paints
- Wax paper
- Lace or ribbon to hang skates
- Optional: seasonal floral picks to stick inside
Ice Skates Christmas Decoration Tutorial
First I painted the ice skates black.
Using a chalk paint gives them a nice matte finish.
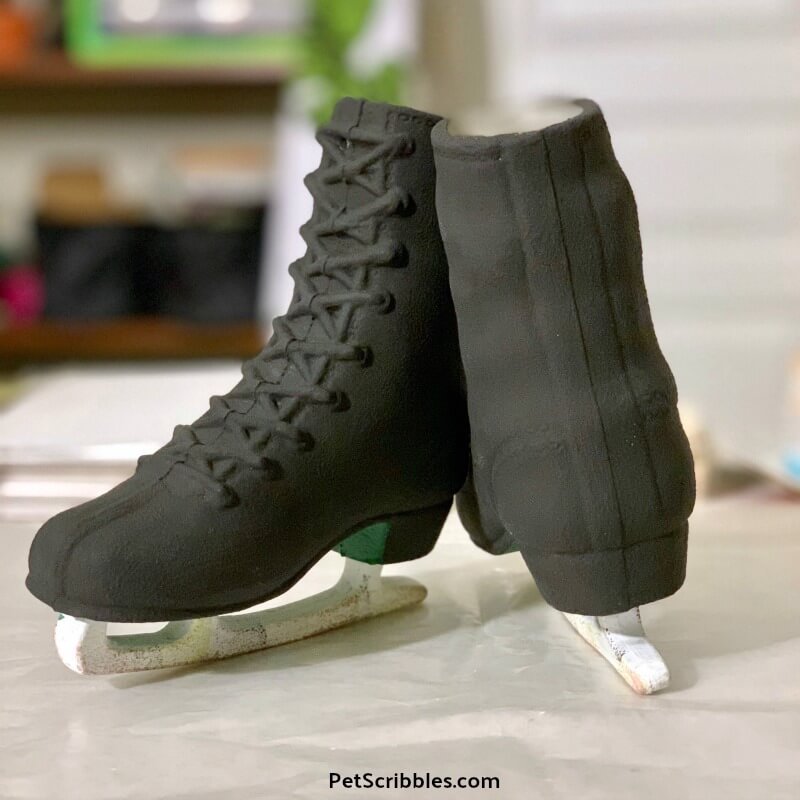
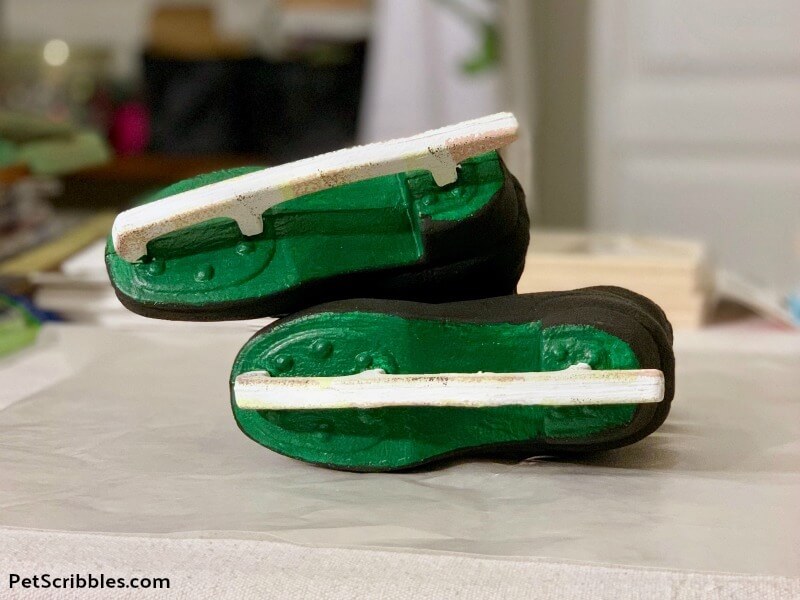
Next, I painted the bottoms green. I used regular craft paint for this step. The bottoms aren’t really seen as well as the other parts of the ice skates.
Finally, I painted the blades silver. I used a metallic silver paint for this step.
And then I sat back and felt like I wanted to do a more with these skates.
I flipped through Pinterest for inspiration and then looked at some holiday magazines.
Then more thinking.
And more staring at the skates.
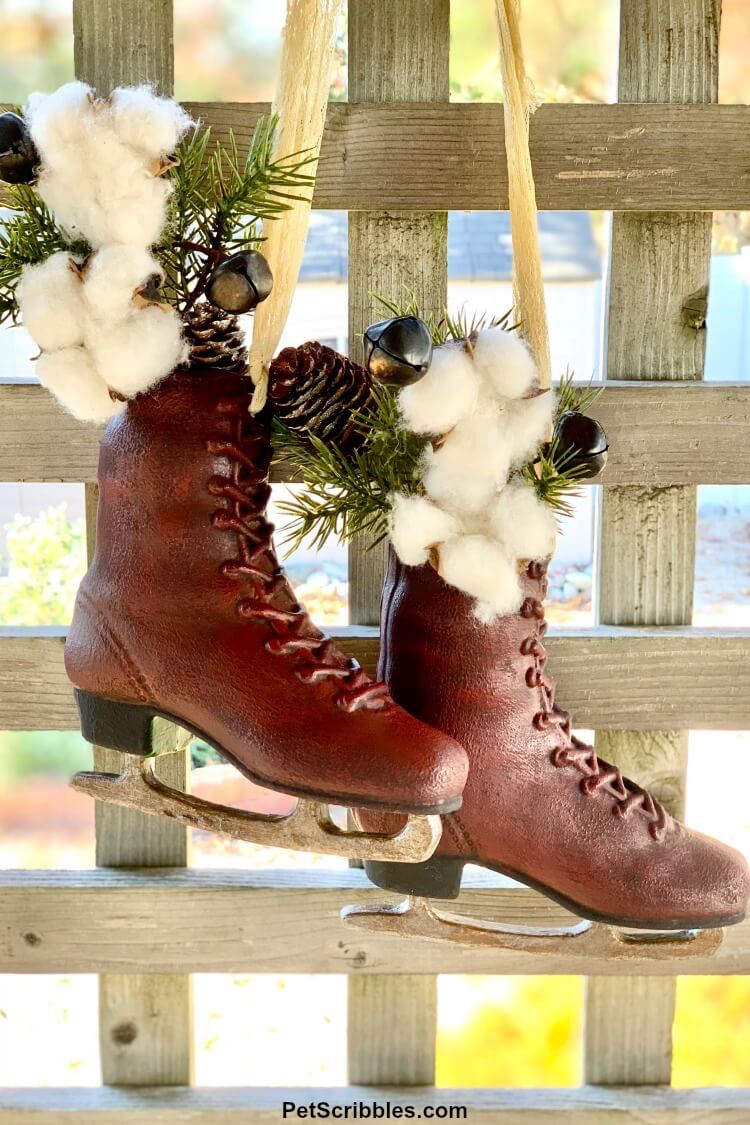
Turning the ice skates Christmas decoration into something vintage!
I love anything vintage, so why not make these ice skates look old and distressed?
It’s easy to do, again just with paint.
The look of red leather . . .
First, I painted a rough coat of dark red craft paint over the matte black painted ice skates.
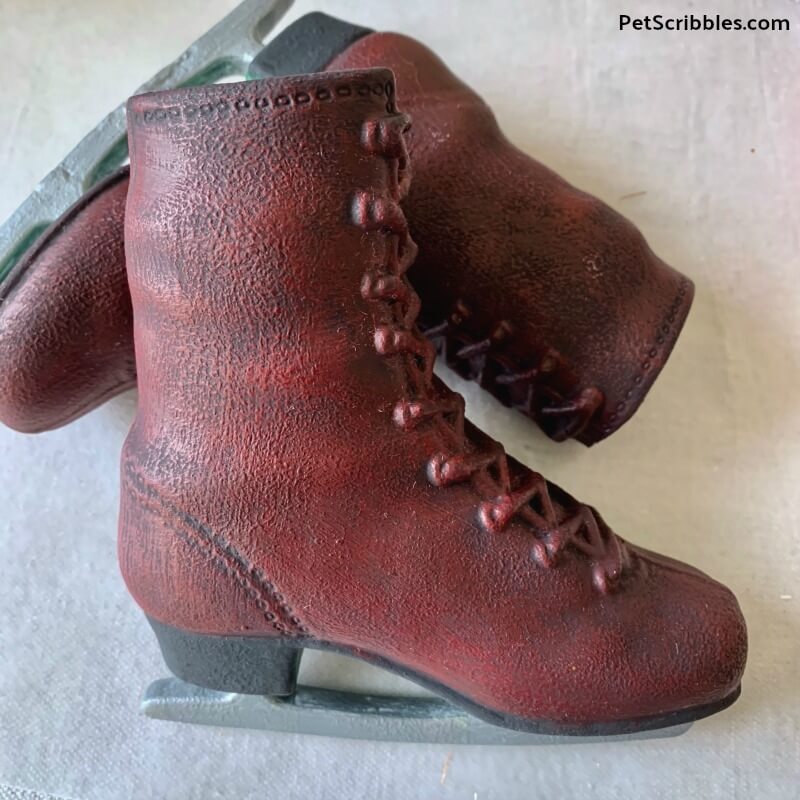
By painting the red coat roughly, I feel like I created the look of worn leather.
Helpful tip: Put a small amount of paint on the tip of your paint brush. Lightly paint over the surface, leaving the base color showing through. Start lightly, and go slowly. Build up the color to a point that you love. That’s when you will know it’s done.
I like the look much better than the black.
The look of old blades . . .
The silver blades looked very new and didn’t match the vintage look of the faux red leather.
I began to play with two different paint colors using a tiny detail brush that had a nice point (from that Martha Stewart brush set I mentioned in the supplies list above).
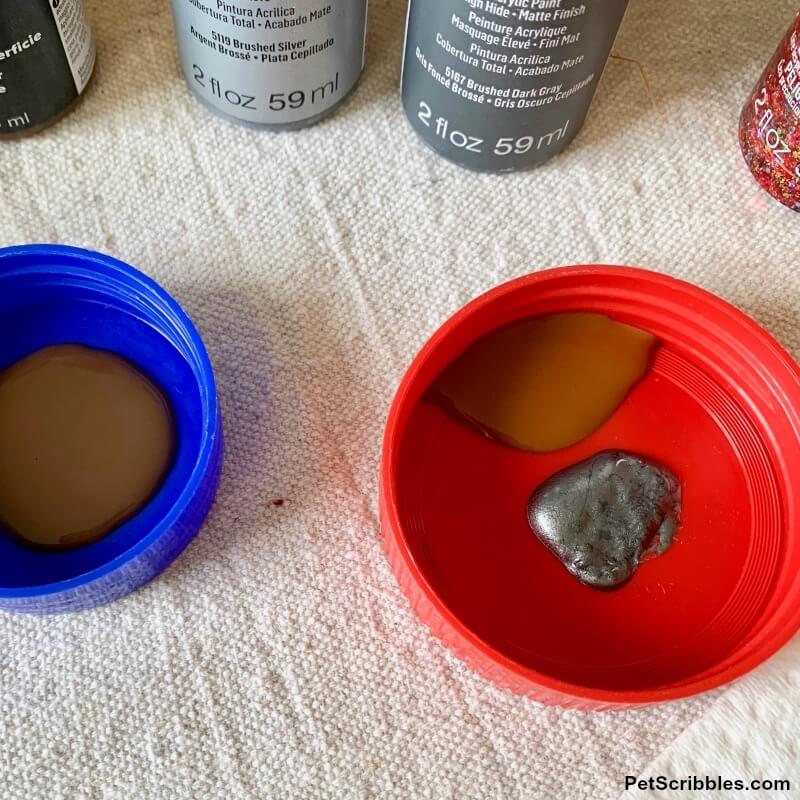
By dabbing on some of the brown paint, and then dabbing on some of the dark gray metallic paint, I gave the blades an old, rusty appearance.
Just dab the paints on until you like how it looks.
There is no wrong way to do this!
I used old lace seam binding to hang them up. Lace ribbon will work great too.
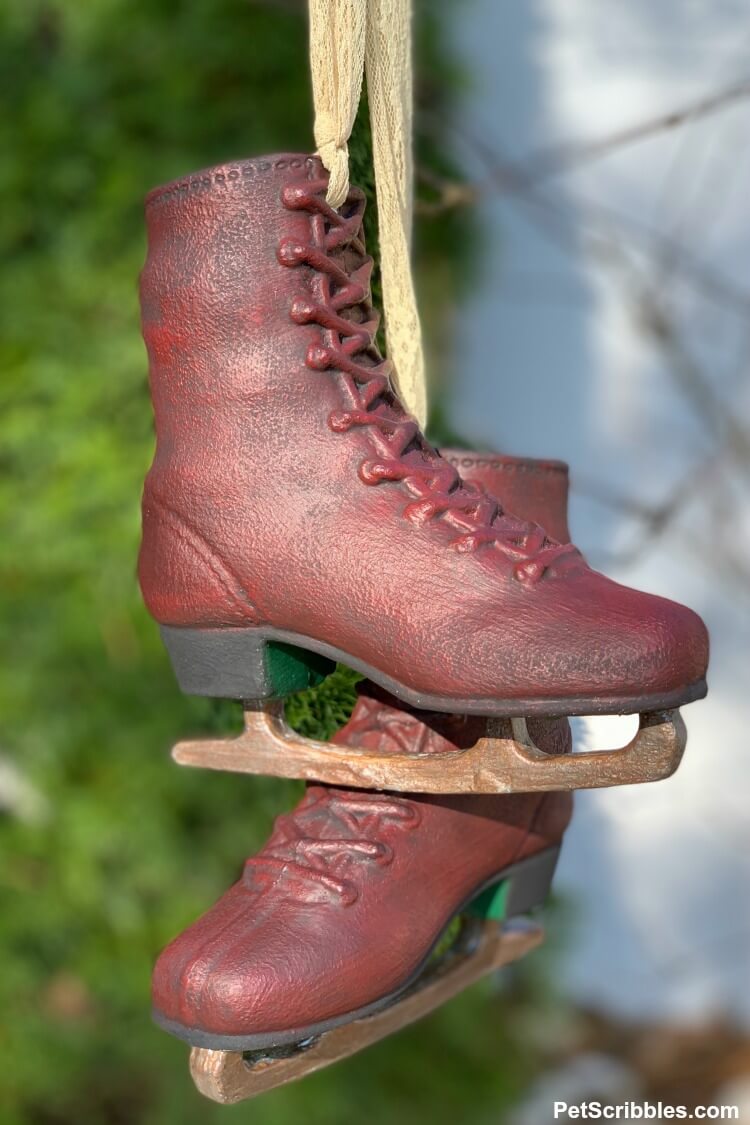
And to add a bit more decoration, I used cotton ball and greenery picks I found at the craft store, complete with rusty jingle bells.
So next time you see a sad-looking, oversized ornament, pause for a moment and consider if it’s a candidate for a paint makeover!
Pin for later:
More DIY Christmas Makeover Ideas
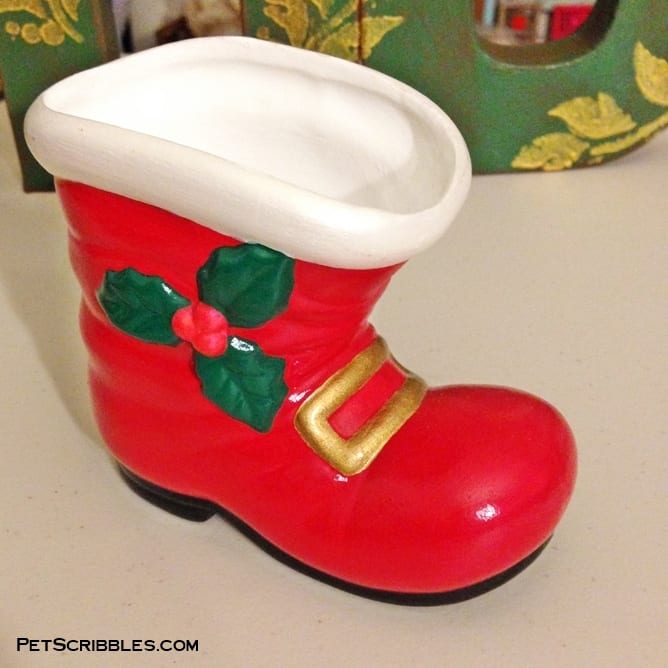
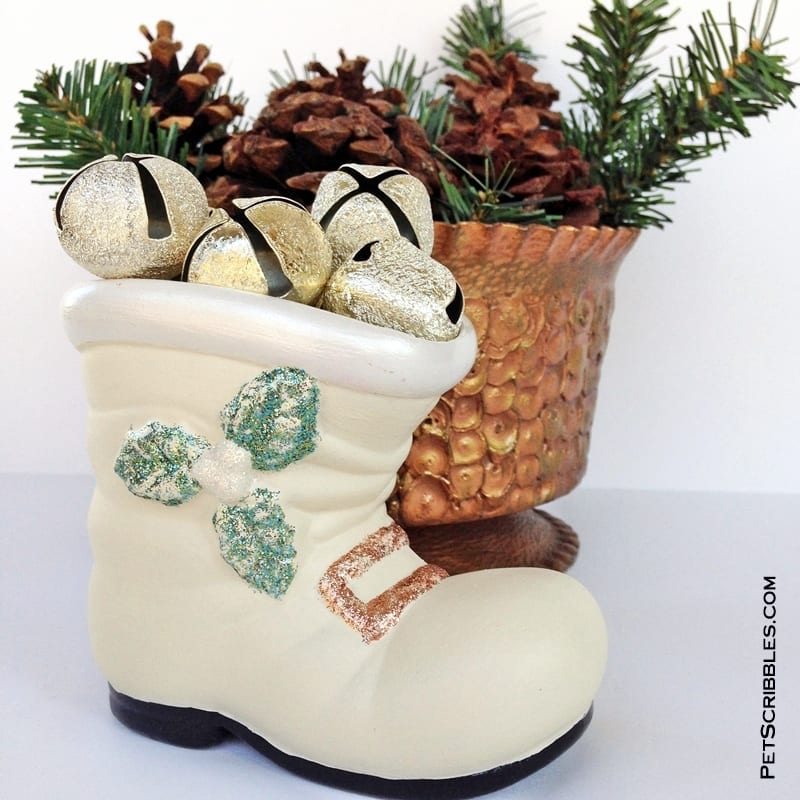
Santa Boot Makeover with Paint
I took a thrift store red Santa boot . . .
. . . and gave it a softer look that fits in better with farmhouse country decor.
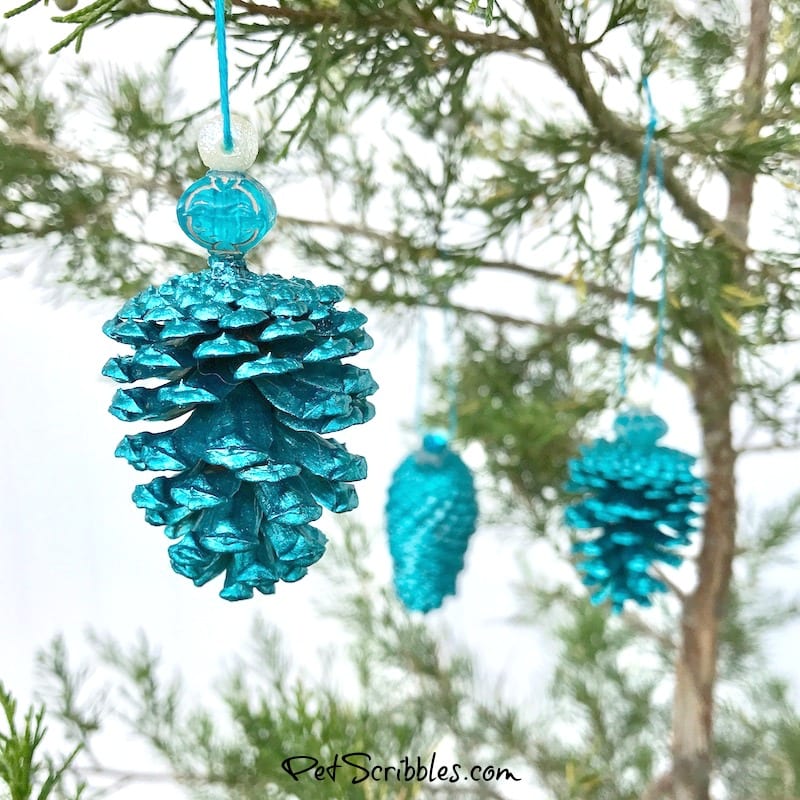
Painted Pine Cones
I took plain pinecones . . .
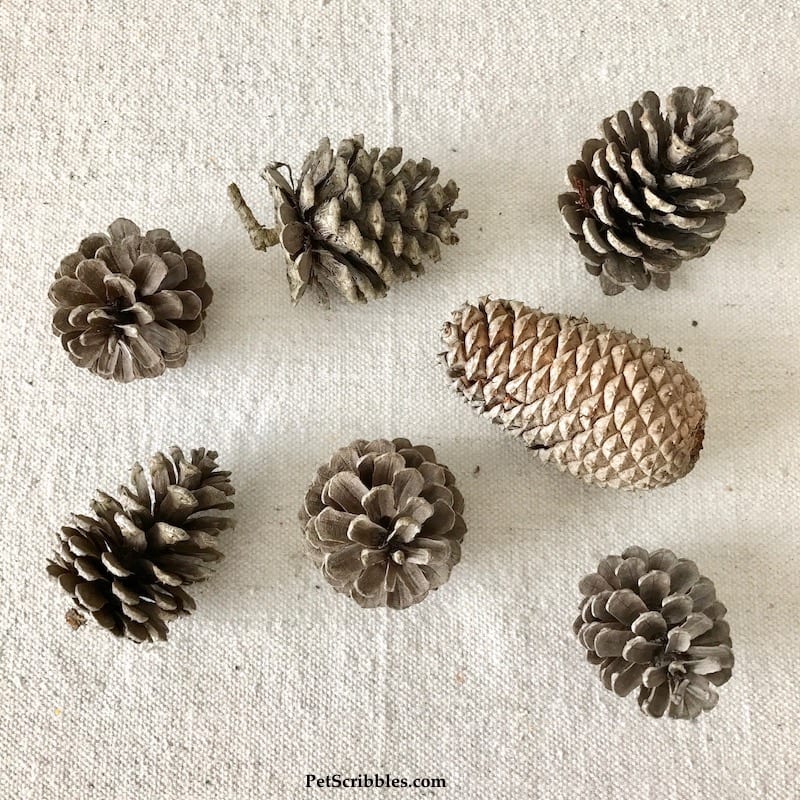
. . . and gave them a metallic paint makeover.
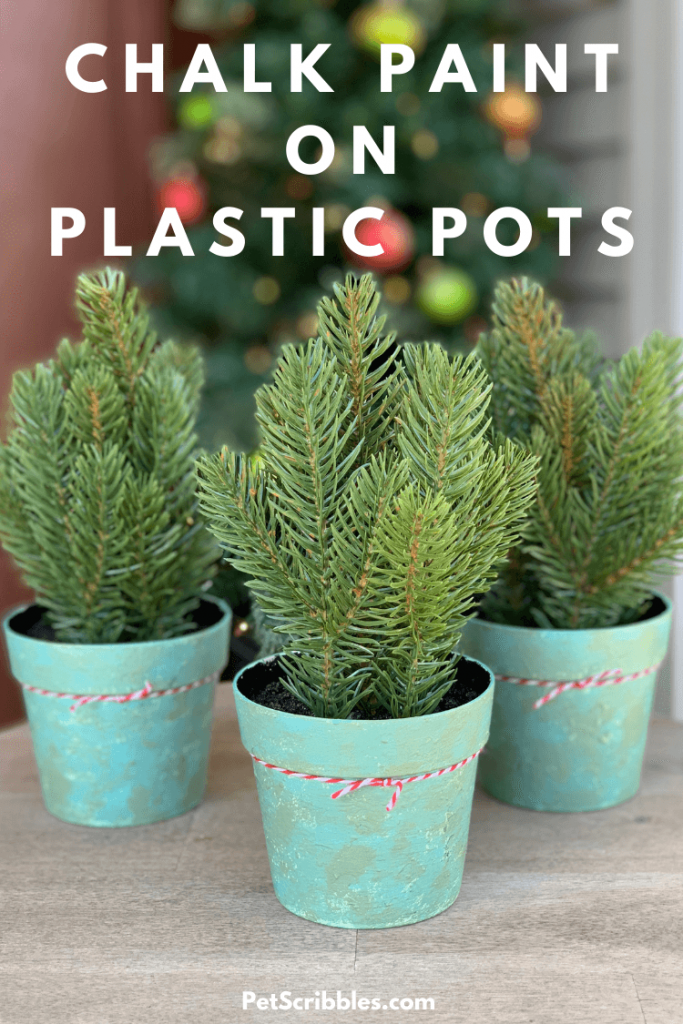
Painted Pot Makeover
Another popular makeover is this one, where I took some plastic pots with fake Christmas greens in them, and turned them into a fabulous bit of decor for the holidays and the Winter season.
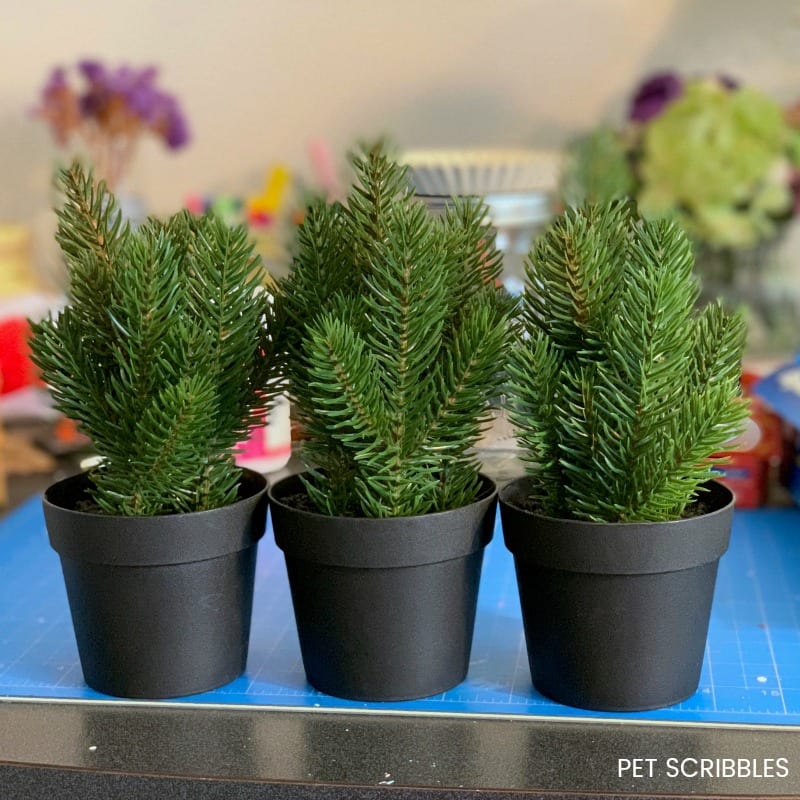
I used chalk paints and some Antique Mod Podge to seal them.
Click on the titles of each project above to see my complete tutorials.
And check out the “More from my site” below for more Christmas DIY crafts.
Happy holiday crafting!
Leave a Reply