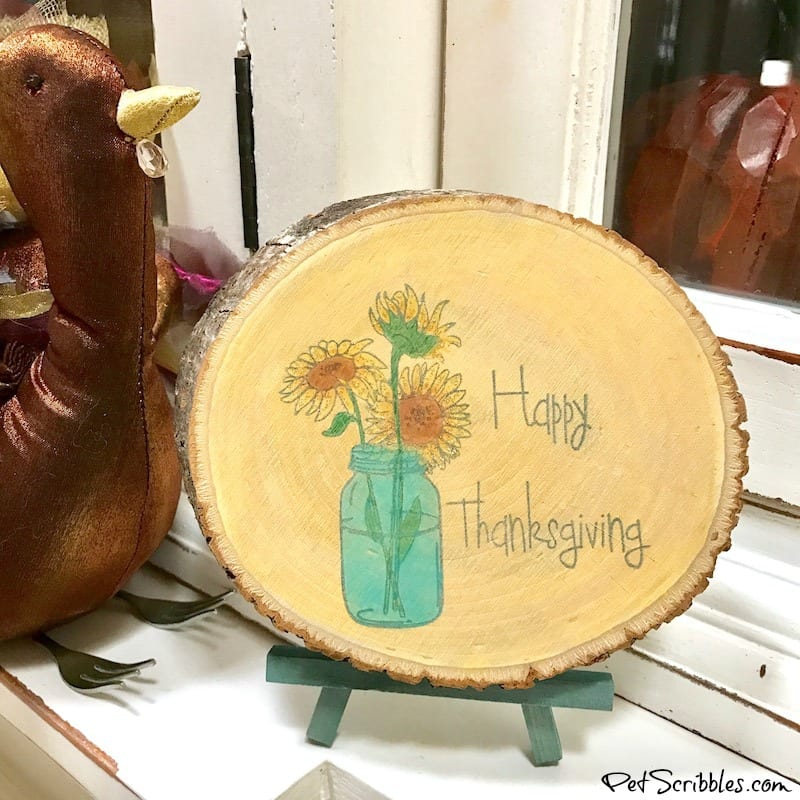
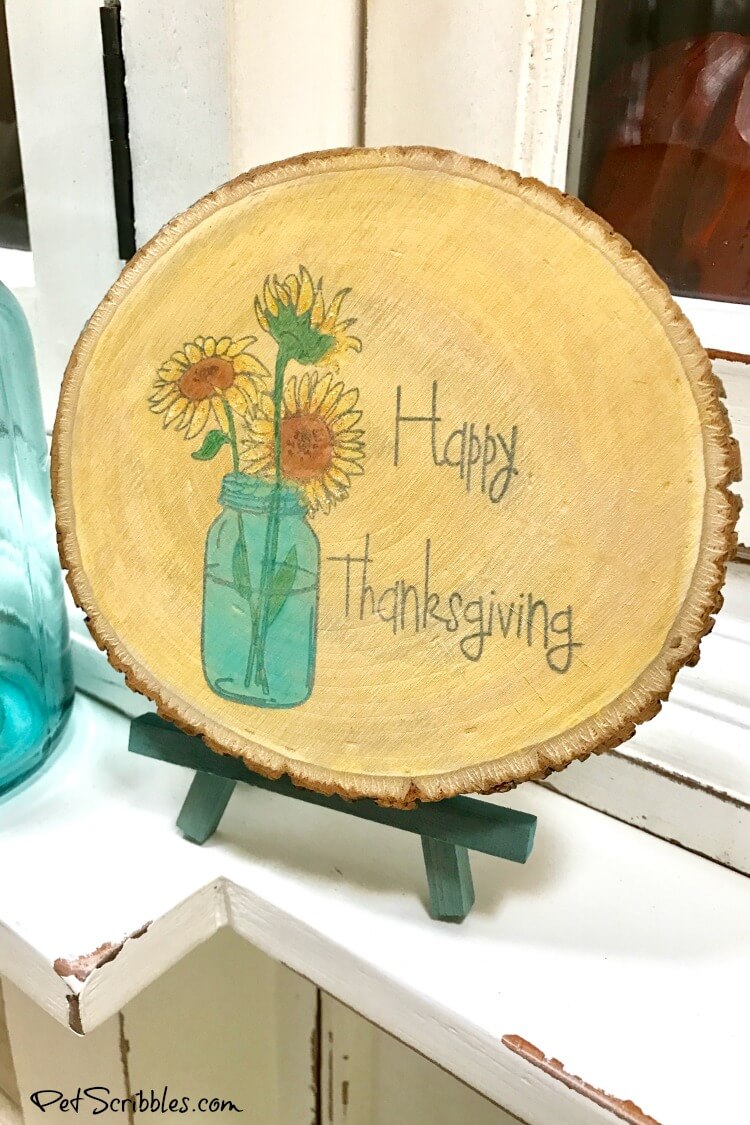
How to make a farmhouse Thanksgiving wood slice using a rubber stamp, colored pencils and pickling wash (colored stain). Complete tutorial with step by step images. Great way to decorate wood slices!
Do you decorate for Thanksgiving?
I always have, and am so happy to see more and more stores carrying Thanksgiving decorations, as it used to feel like the forgotten holiday in between Halloween and Christmas.
Each year I craft some new decorations for Thanksgiving, and this year I’ve been using some of the beautifully designed stamps from Simply Stamps, where I’m on their design team.
I went head over heels for this Happy Thanksgiving Sunflowers Stamp because I love the font, and adore the mason jar and sunflowers, which I guess means I love everything about this stamp!
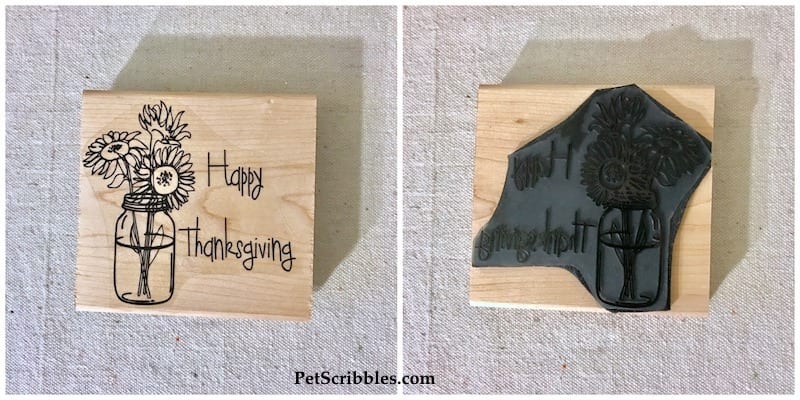
Simply Stamps offers their rubber stamps in multiple sizes, and I chose the XL size of this stamp, which is 4 inches.
This extra large size is perfect when you want to use a rubber stamp design as the main artwork in a project, like I’m doing with this Thanksgiving wood slice.
FTC Disclaimer: I’ve received products/compensation as part of the Simply Stamps Design Team. This Farmhouse Thanksgiving Wood Slice, however, is 100% my own project!
How to Make a Wonderful Farmhouse Thanksgiving Wood Slice
Supplies:
- Happy Thanksgiving Sunflowers Craft Stamp — Simply Stamps
- Rustic Basswood Country Round, Small Wood Slice — Walnut Hollow
- StazOn Ink Pad in Stone Gray — Tsukineko
- FolkArt Pickling Wash in Soleil and Champignon — Plaid Crafts
- Paint brush
- Lint-free cloth or old t-shirt
- Colored pencils
- Stickles Glitter Glue in Diamond — Ranger
- Patricia Nimocks Clear Acrylic Sealer Spray, Matte Finish — Plaid Crafts
Tutorial:
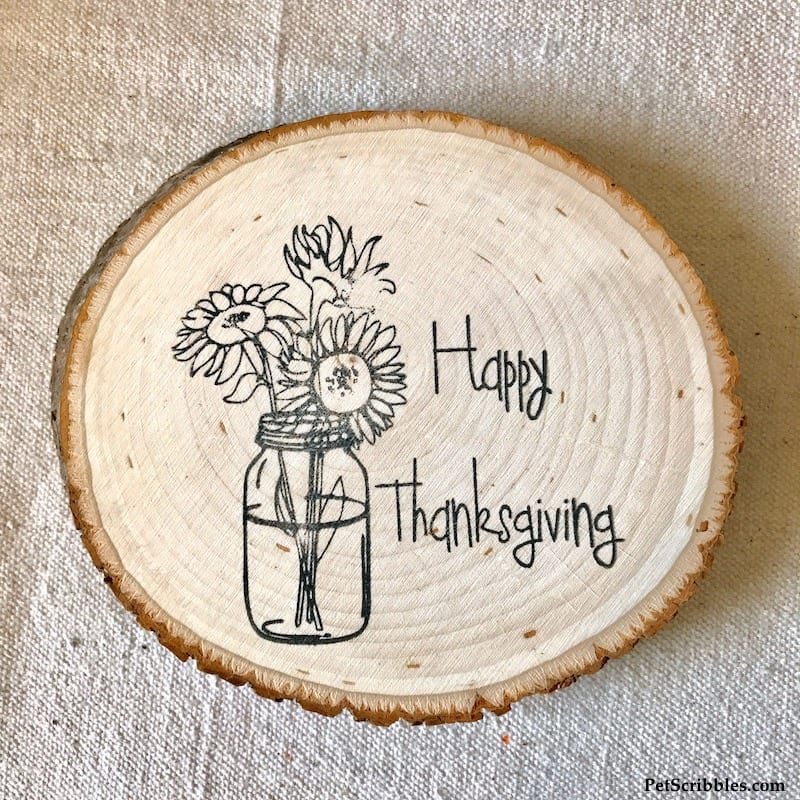
Step One: Make sure the wood slice surface is smooth.
Gently sand if needed then wipe with a damp cloth and let dry.
I love using Walnut Hollow slices as they are already super smooth, so all I have to do is gently wipe the surface of any dust.
Step Two: Stamp the Happy Thanksgiving Sunflowers Stamp onto the wood slice.
I used a dark gray permanent ink instead of black, so that the stamped image appears softer and more muted.
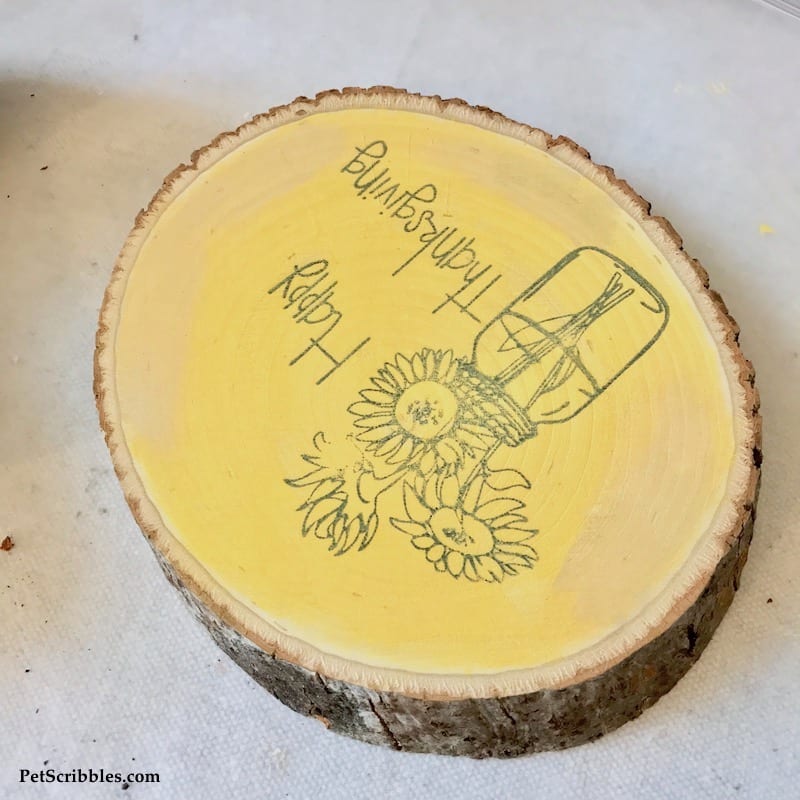
Step Three: Stain the front of the wood slice with yellow (Soleil) pickling wash, avoiding the edges of the slice.
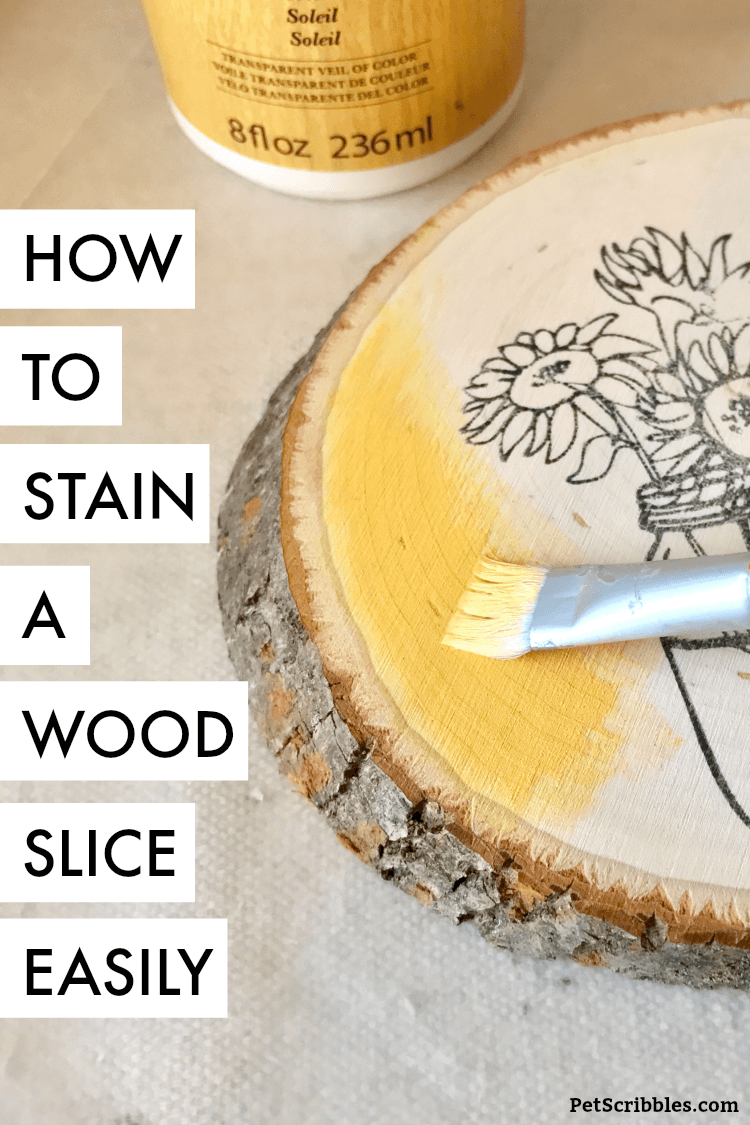
First apply the pickling wash with a paint brush to a small section of the wood slice.
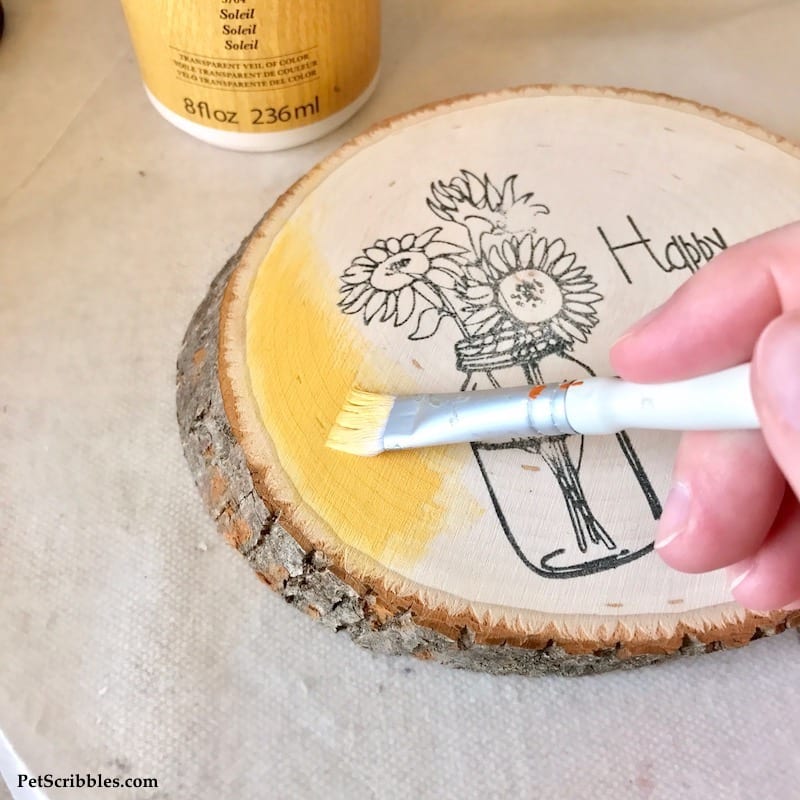
Then immediately wipe the pickling wash with a lint-free cloth.
Continue section by section until the surface is covered.

You could leave the wood slice as is, if you want.
The sunny yellow color is very pretty by itself!
But I like to age things and make them look time-worn, so I did one more step . . .
Step Four: Paint a tan (Champignon) pickling wash over the yellow color.
The process is the same as Step Three: apply to a small section then wipe with a lint-free cloth.
Continue section by section until the yellow is covered.
Work quickly so that the tan pickling wash doesn’t have time to darken the color too much.
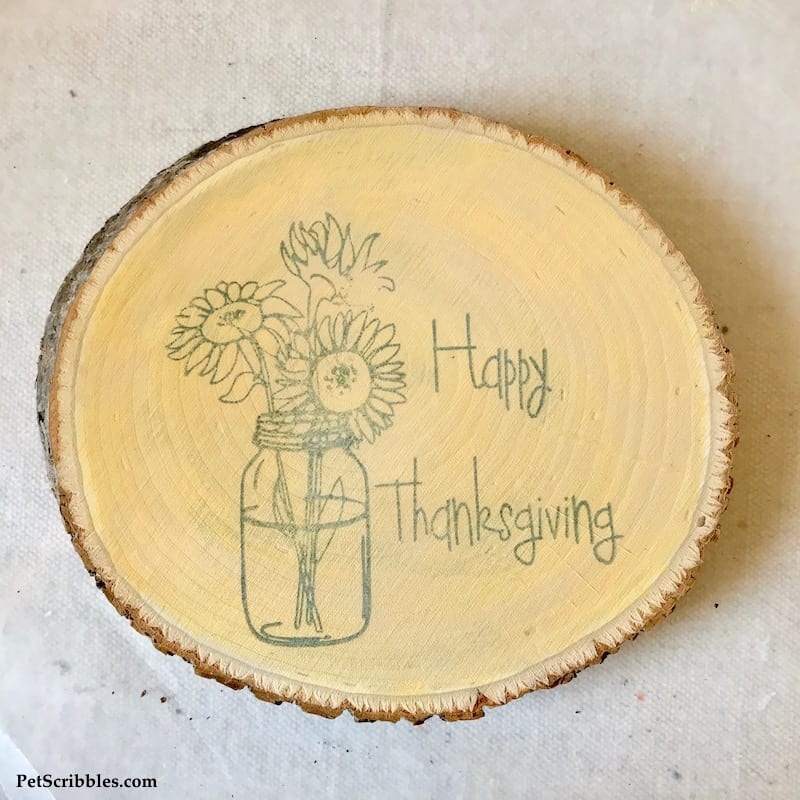
I love this weathered, aged look so much!
Step Five: Color the Happy Thanksgiving Sunflowers stamped image with colored pencils.
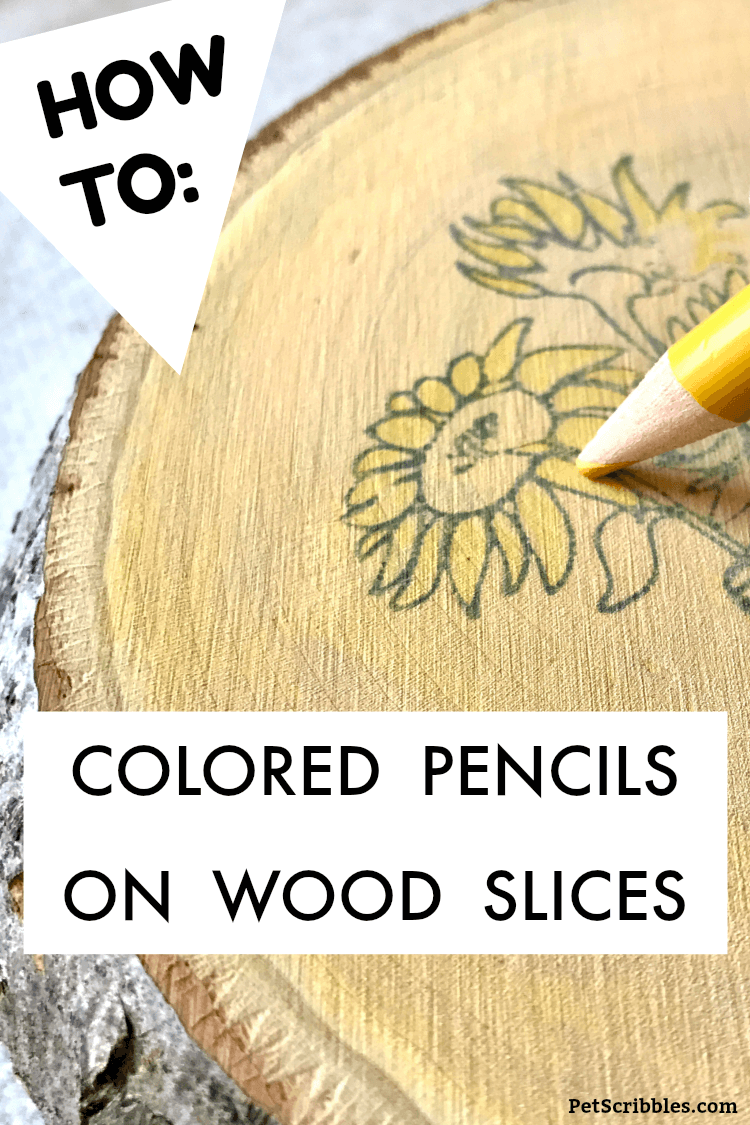
Helpful Tip: If you’ve never used colored pencils on unfinished wood before, practice first. I usually buy an extra piece of whatever I’m coloring just to get the feel of how the colors will look.
This step is fun as it’s like adult coloring only you are coloring on wood instead of paper.
As such, it’s up to you how much or how little of the stamped image you color.
You don’t need to press hard at all. In fact, I always start lightly to see how the color shows up first, then go back over it a few times for a more saturated, deeper color.
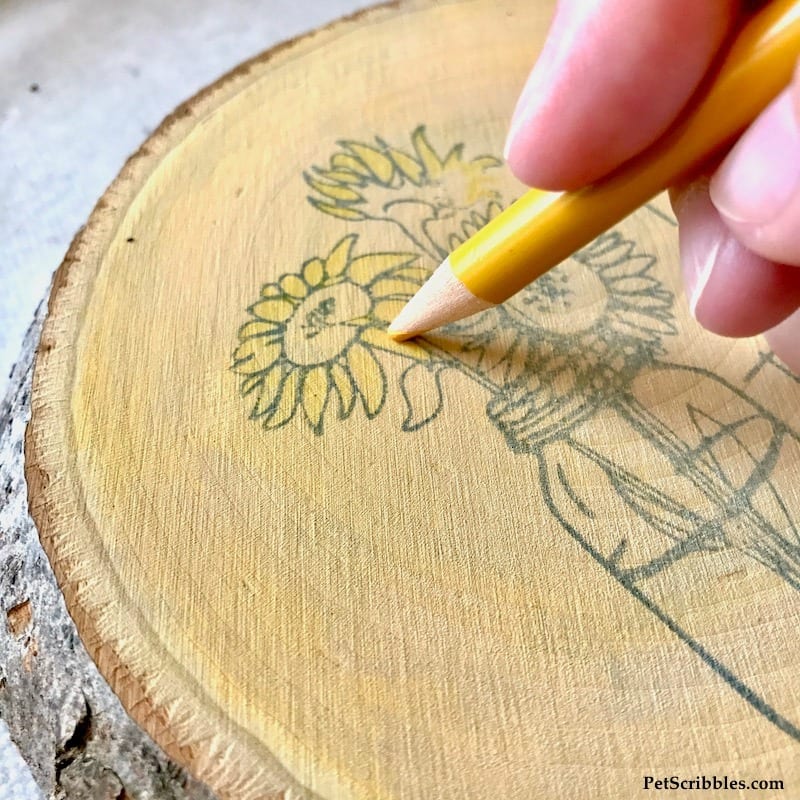
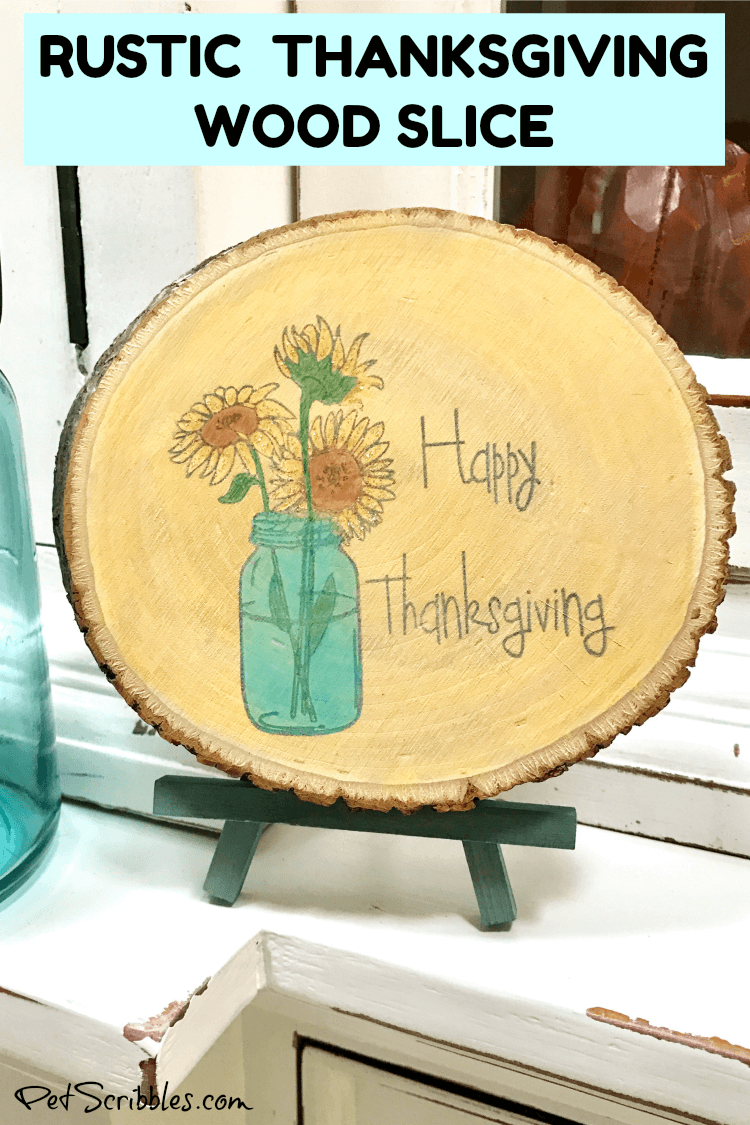
After I colored the sunflowers in, I used an aqua colored pencil for the mason jar, to match the vintage jars we have displayed in our home.
Step Six: Spray on an acrylic sealer to protect and seal the surface of the wood slice.
I used a matte finish acrylic sealer so that there was no change in the look of the natural wood surface, versus using a glossy sealer.
Helpful tip: Make sure you use a spray-on acrylic sealer, as using a brush-on sealer might smear the beautiful coloring you just spent so much time on!
There are many spray-on sealers out there, and I love the ones that Plaid makes, such as the Mod Podge Clear Spray-on Acrylic Sealer and the Patricia Nimocks Acrylic Sealer that I used on this wood slice. Either one works great!
Spray on two or three light coats, letting the surface dry in between each coat.
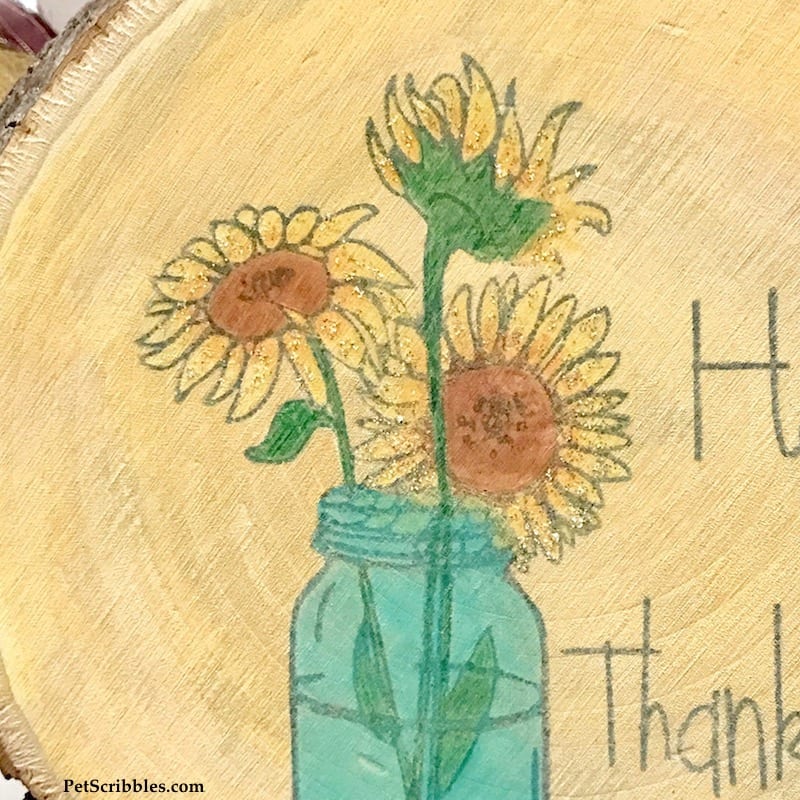
Step Seven: Apply glitter glue to the sunflowers. Let dry.
Adding just a bit of glitter to a small part of the design gives it a touch of sparkle and makes the flowers pop out a bit more.
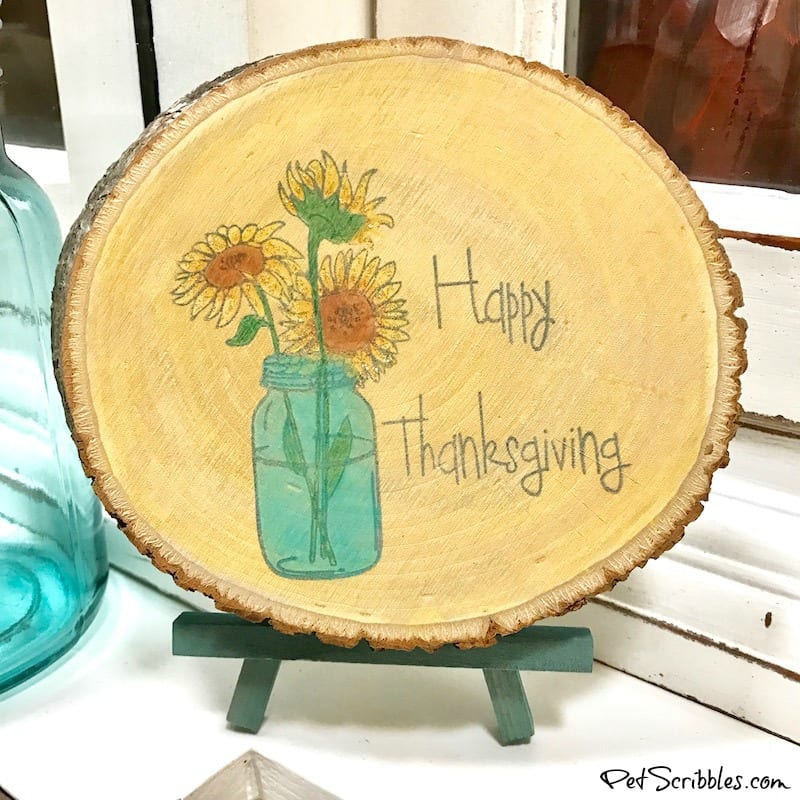
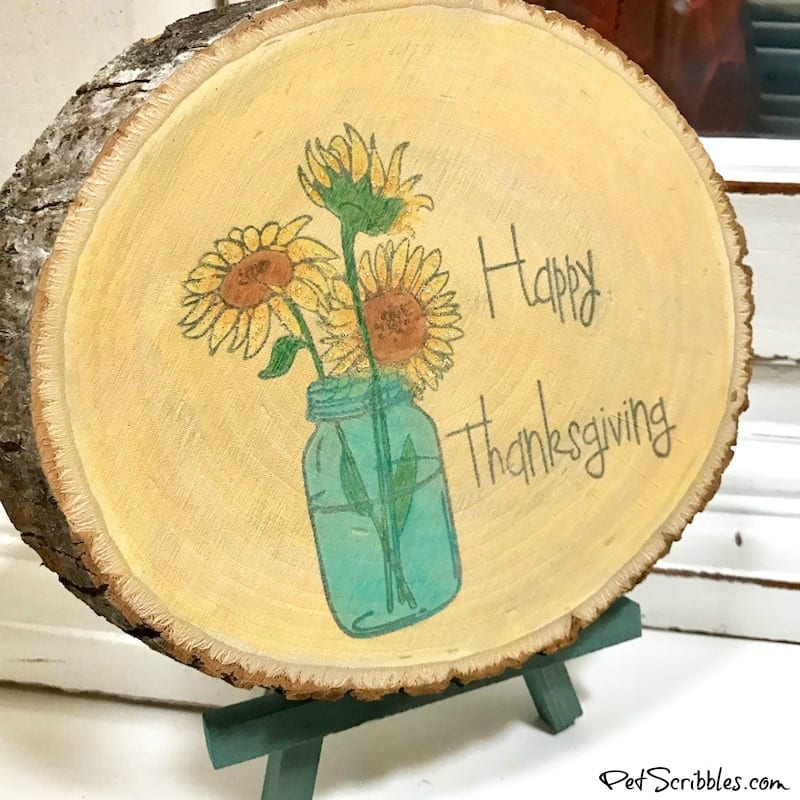
Here’s the finished wood slice!
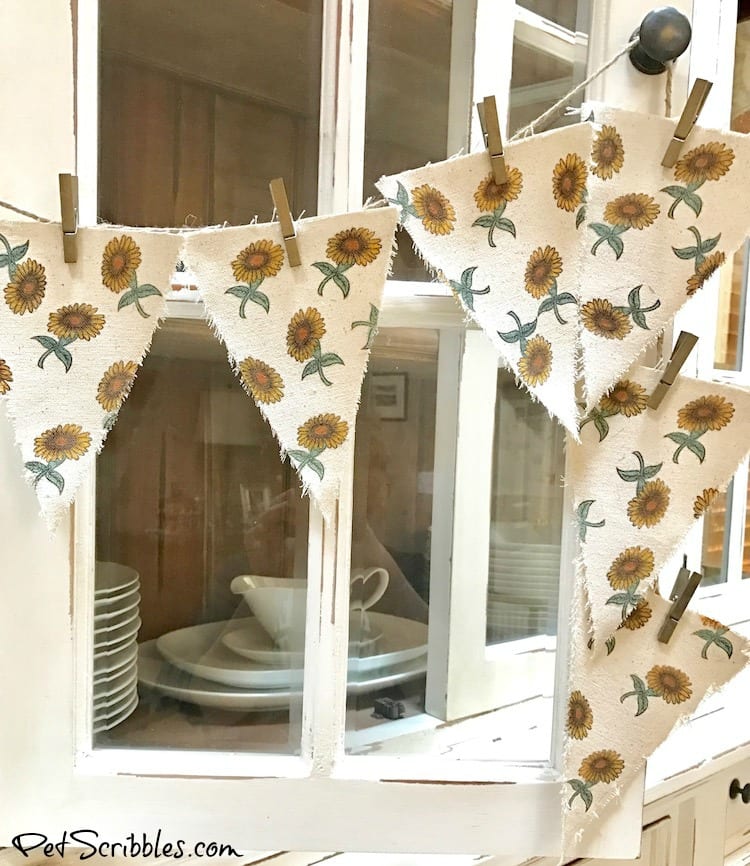
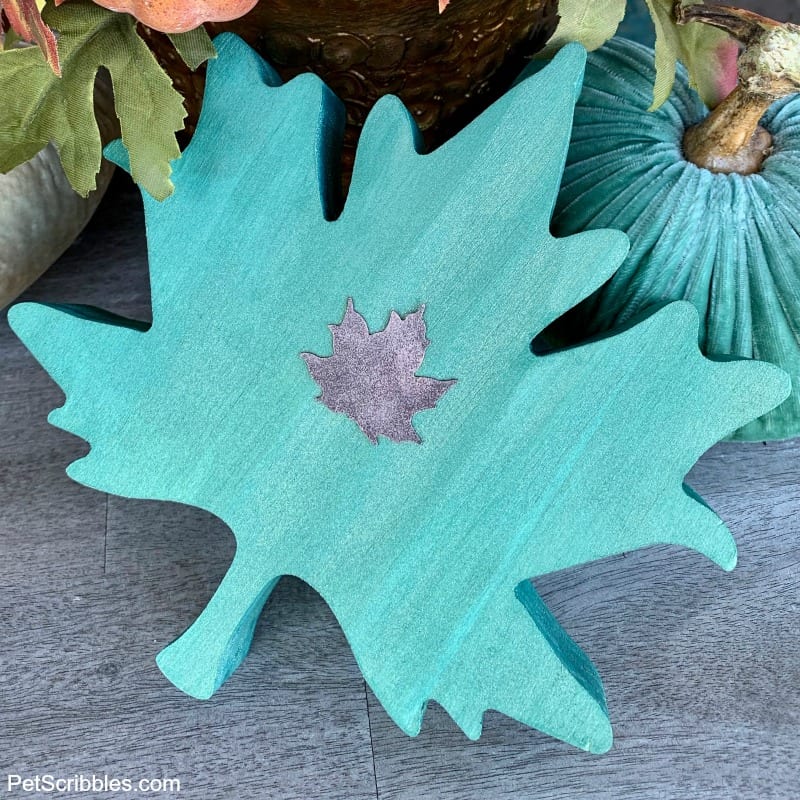
More Easy Fall Decor DIYs
Farmhouse Fall Sunflower Fabric Banner:
Paint an Unfinished Wood Leaf:
I hope I’ve inspired you to craft up something special for Thanksgiving this year!
Happy crafting!
Leave a Reply