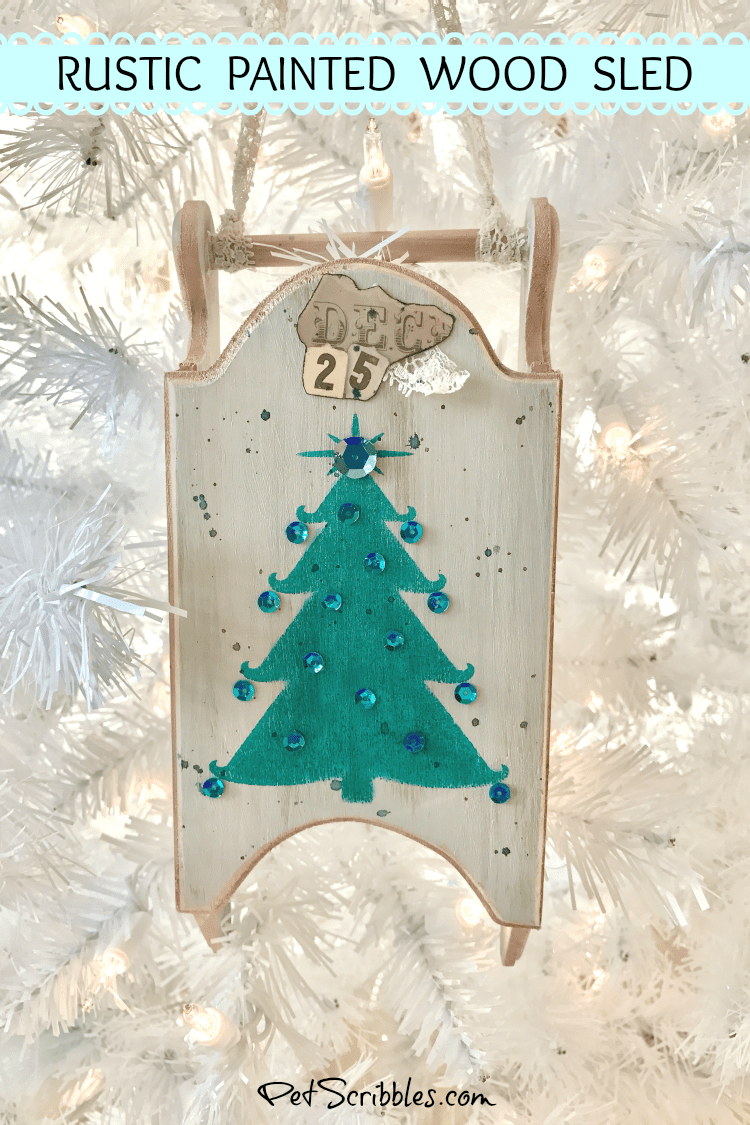
This rustic wood sled is easy to make for Christmas. Stain an unfinished sled and use a large stamped image for artwork. Embellish and enjoy! This tutorial has helpful step by step images.
FTC Disclaimer: I’ve received products/compensation as part of the Simply Stamps Design Team. This Rustic Wood Sled is 100% my own project!
I’m crafting again!
Although I’m still recovering from my double hip replacement surgery, I’ve been enjoying getting back into my craft room!
Sure, I need to craft in shorter spurts of time, followed by lots of laps in my walker to stretch out my legs, followed by rest — but — it feels really great to forget about all of this rehab and recovery while stamping and painting!
Use a stamp for easy artwork on your projects!
Today I’m using a solid color stamp for my rustic wood sled: the Curled Christmas Tree craft stamp from Simply Stamps.
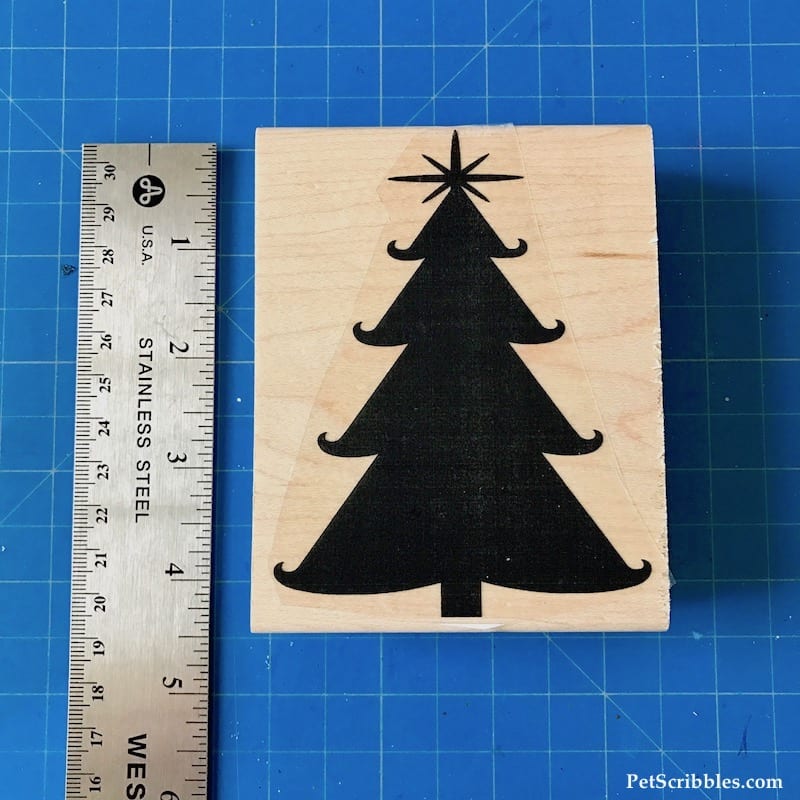
This stamp — like all of the Simply Stamps craft stamps — comes in multiple sizes:
- XS = 1″
- S = 1.75″
- M = 2″
- L = 3″
- XL = 4″
I chose the XL size so I can show you how easy it is to use when you need a good-size Christmas tree image.
Supplies:
- Curled Christmas Tree Craft Stamp — Simply Stamps
- Dazzling Metallics Rose Gold Paint — DecoArt
- FolkArt Pickling Wash in Cottage White and Driftwood — Plaid Crafts
- StazOn Midi Ink Pad in Emerald City — Tsukineko
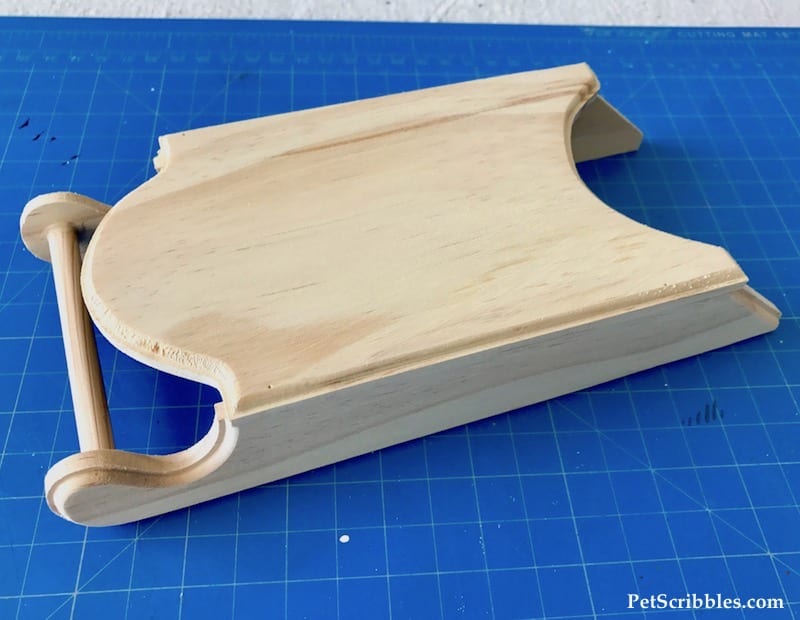
- Unfinished wood sled
- Sponge daubers
- Emery board
- Mini Glue Dots
- Sequins
- Tattered Angels Glimmer Mist in Snowy Pine — Canvas Corp Brands
- Paintbrushes in various sizes include tiny detail brushes
- Lace trims and ribbons
- Lint-free cloth
- Wax paper
Tutorial:
Painting the rustic wood sled
Step One: If needed, sand any rough edges of the unfinished wood sled with an emery board. Wipe with a damp cloth and let dry.
Step Two: Stain the unfinished wood sled with Driftwood pickling wash.
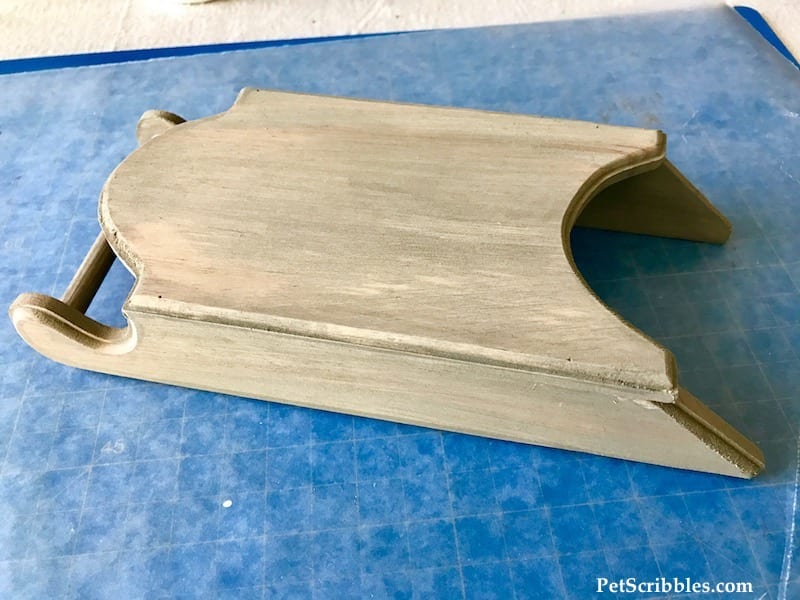
Step Three: Roughly stain the wood sled with Cottage White pickling wash, letting some of the Driftwood color peek through for a rustic look.
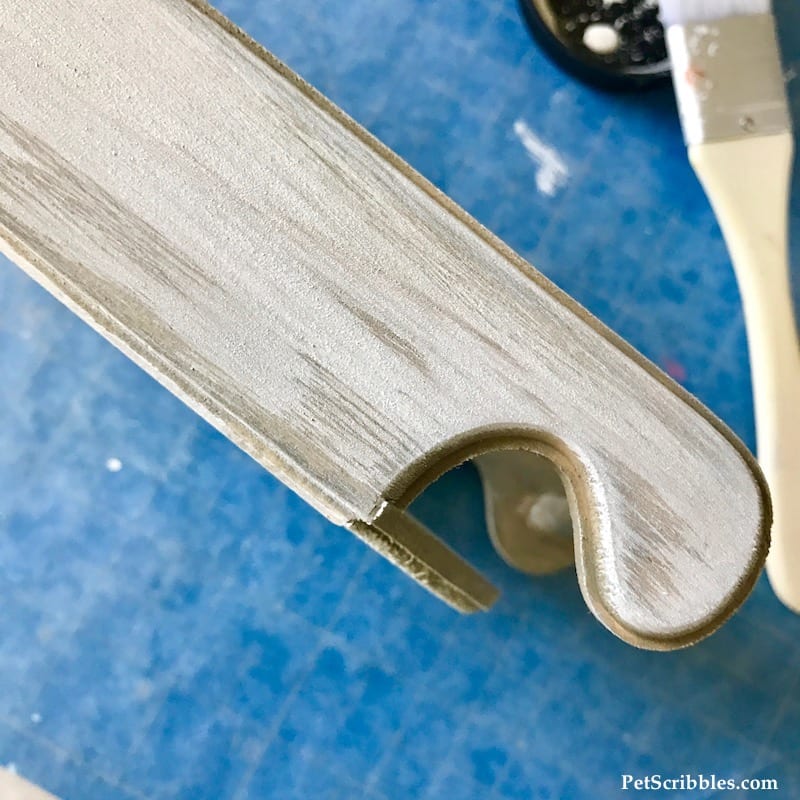
Let dry.
Adding the Christmas Tree design to the sled
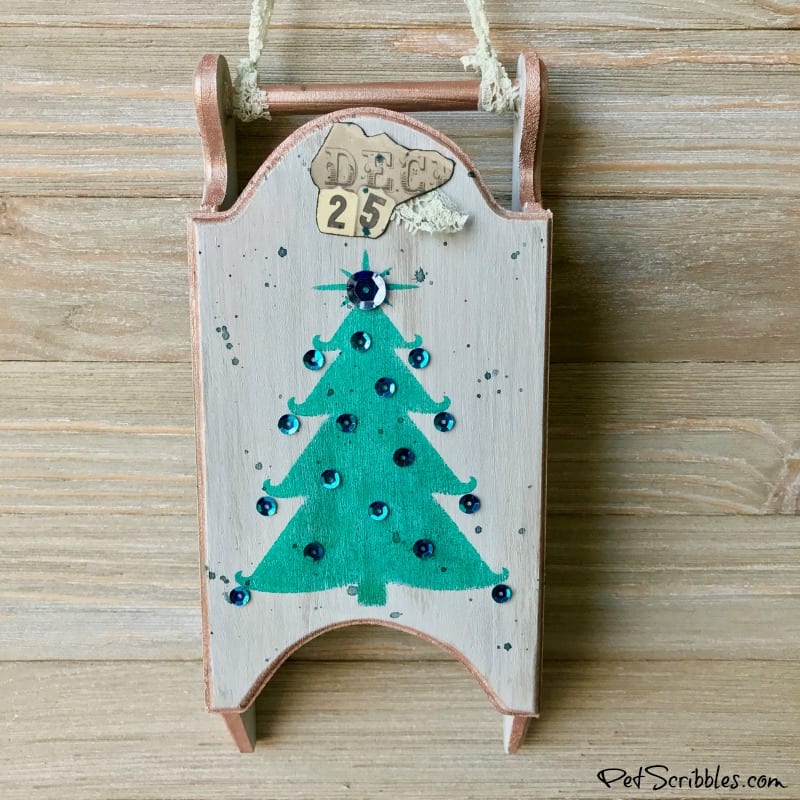
Step Four: Stamp the Curled Christmas Tree craft stamp onto the top of the wood sled using green permanent ink.
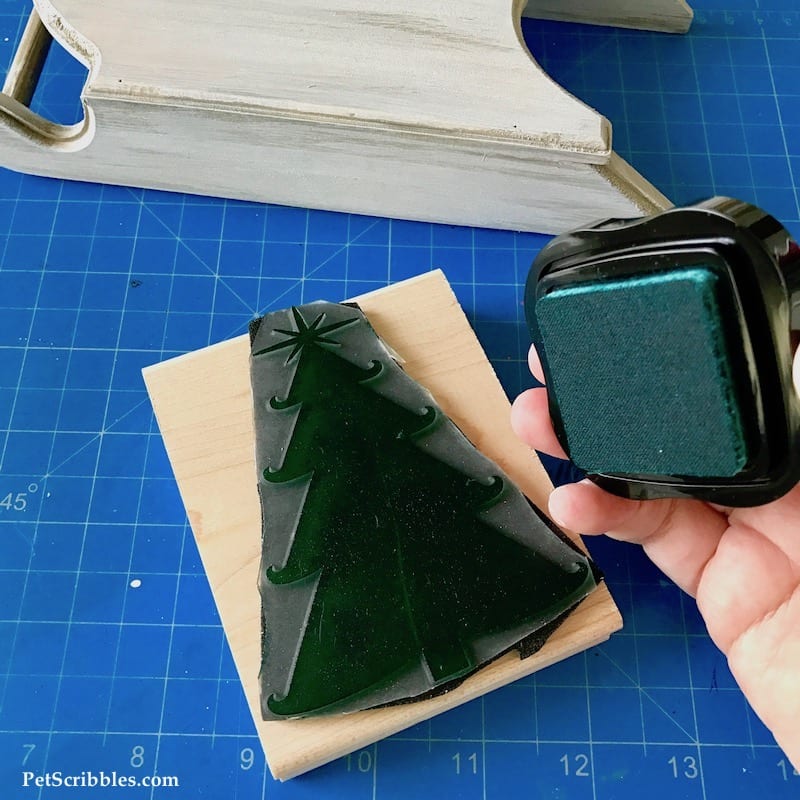
Helpful tip: I like to use solvent permanent ink when stamping onto painted or stained wood. This ink gives very crisp, clear stamping results. My favorites are the StazOn ink pads from Tsukineko.
Step Five: If any part of the Christmas tree stamped image needs to be touched up, use a small sponge dauber with the same ink pad.
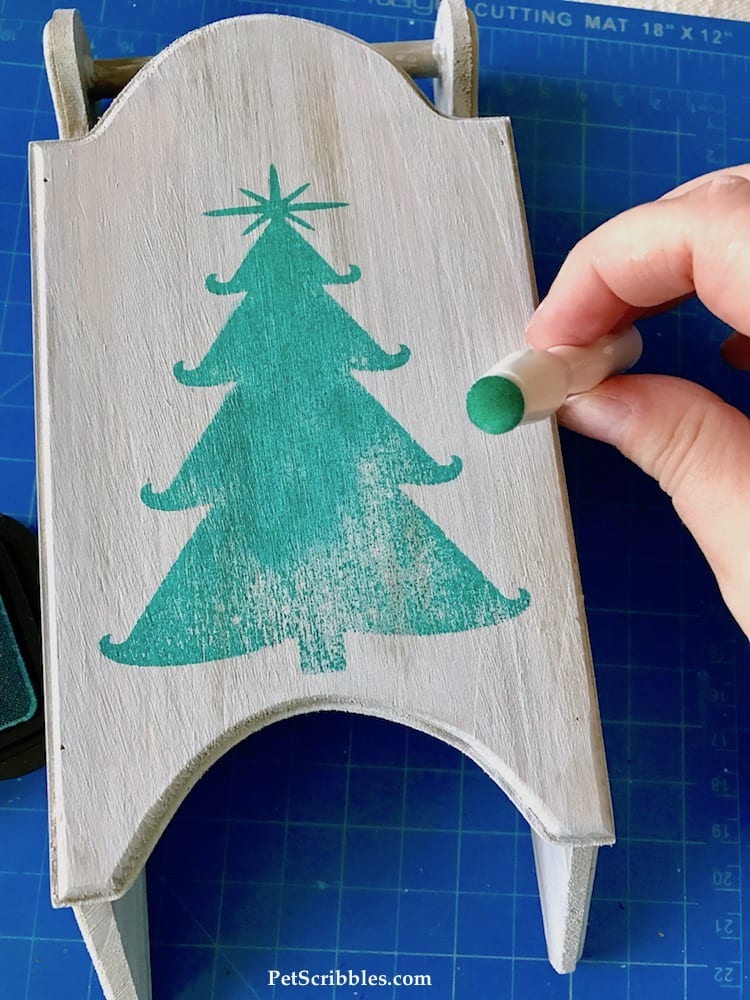
There are lots of sponge daubers available at craft stores and online. I like this package of sponge daubers from Martha Stewart because of the tiny sizes included.

Let dry.
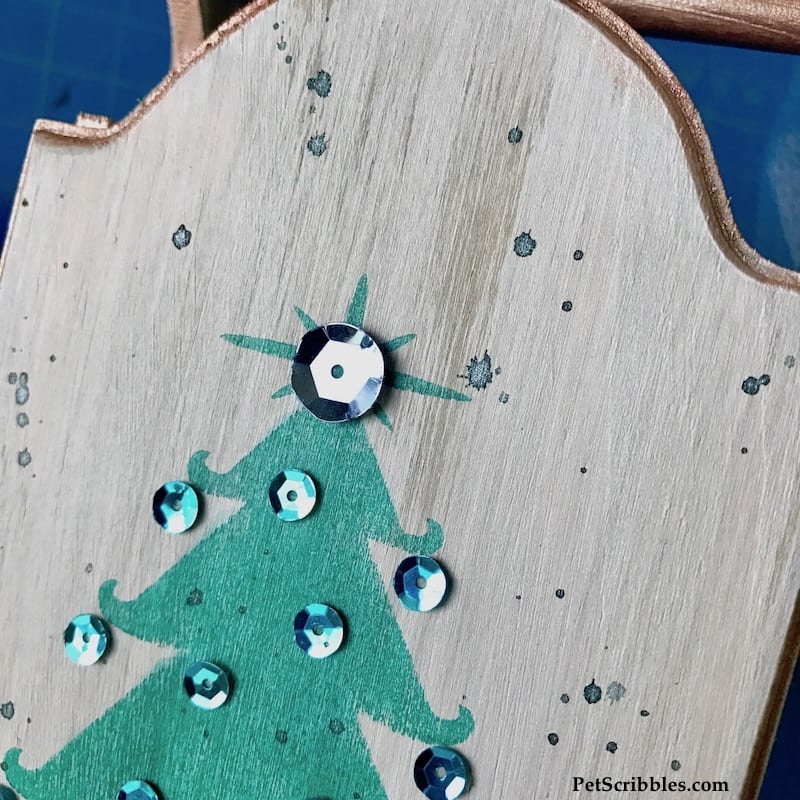
Add rose gold paint to the rustic wood sled
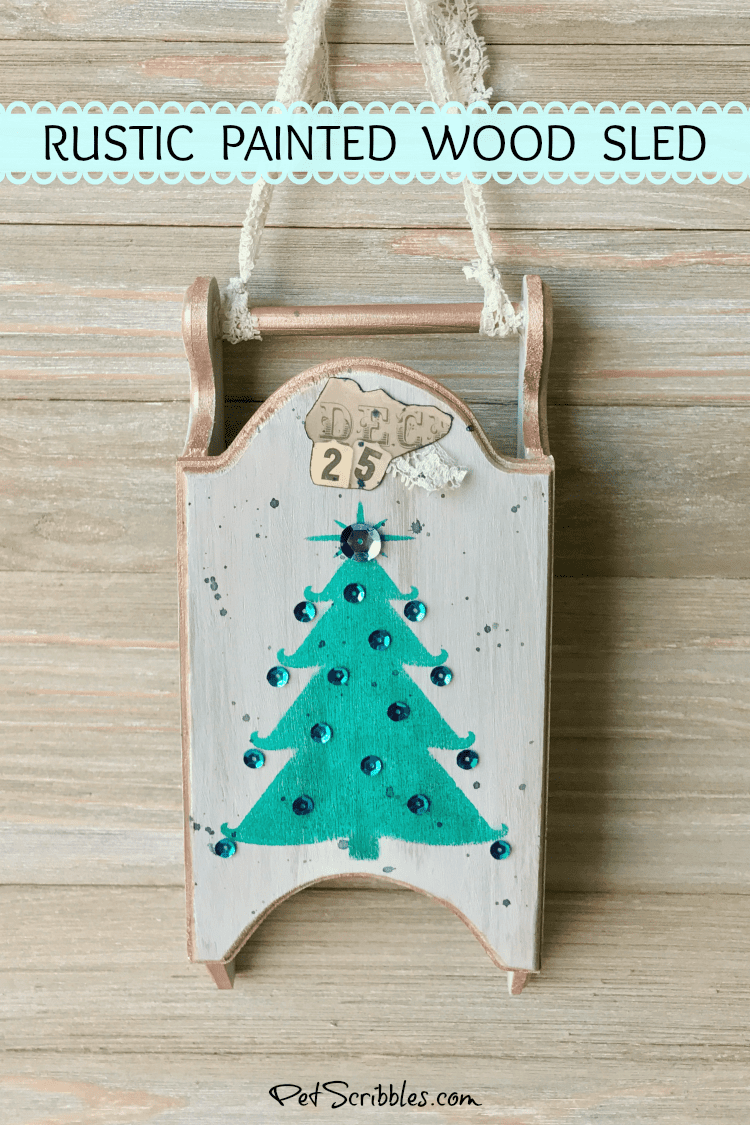
Step Six: Paint the front bar on the sled with rose gold metallic paint.
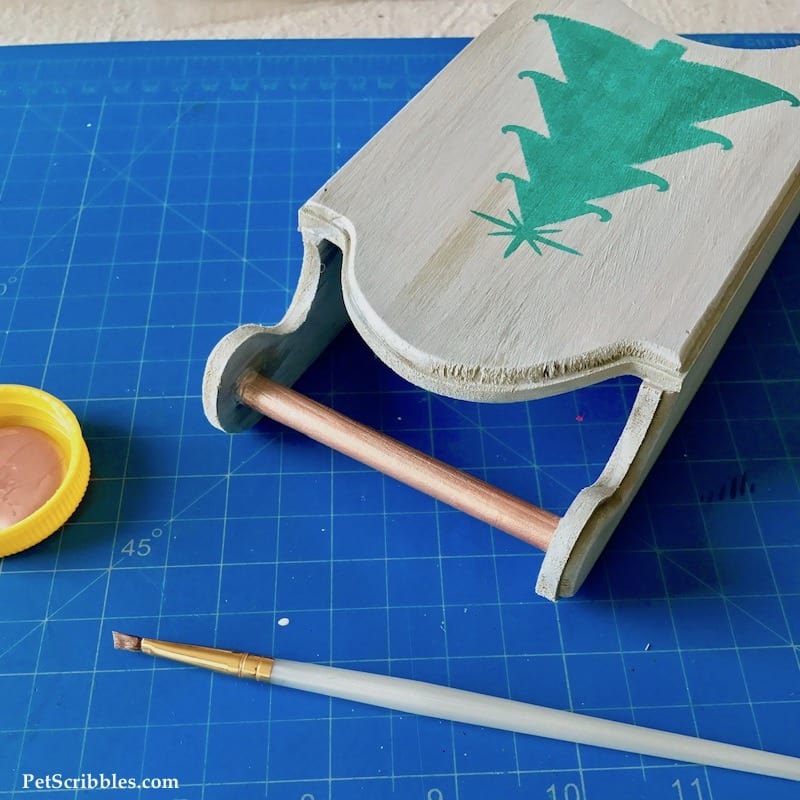
Let dry.
Step Seven: Paint all of the edges and trim on the sled with rose gold metallic paint.
Let dry.
Add sequins
Step Eight: Using mini glue dots, apply individual tiny sequins as ornaments to the Christmas tree stamped image. Attach a larger sequin to the star.
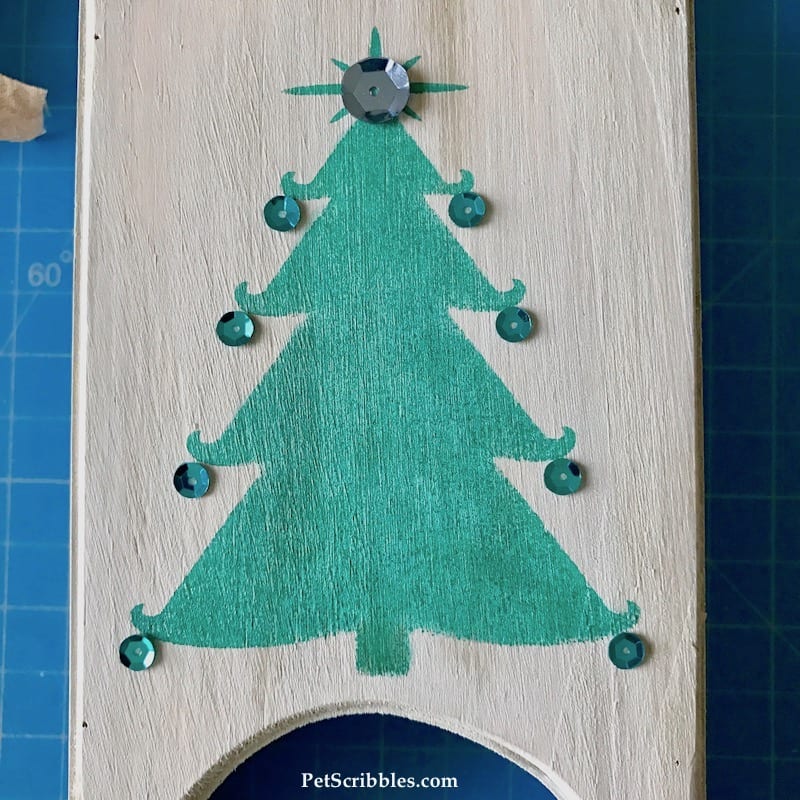
First I placed sequins underneath each “curl” of the Christmas tree. Next, I filled in the tree with more sequins as ornaments.
Add paint splatter
Step Nine: Add tiny droplets of Tattered Angels Snowy Pine Glimmer Mist to the front and sides of the sled.
Helpful tip: Use wax paper or scrap paper underneath the sled to catch any wayward splatters while you’re doing this step.
To do:
- Carefully take the spray cap top off of the bottle.
- Hold the spray cap so that the attached tube is horizontally over the sled.
- Gently tap the cap with a small paintbrush stick.
- Tiny droplets of the glimmer mist will splatter onto the sled.
Let the sled dry extremely well, and make sure not to touch the mist while it’s drying so you don’t smear it.
Once dry, you’ll see that each of the dried droplets has a silvery sheen to it. It’s a really pretty effect! (See below.)
Final embellishments . . .
Attach a piece of vintage lace to hang the sled up.
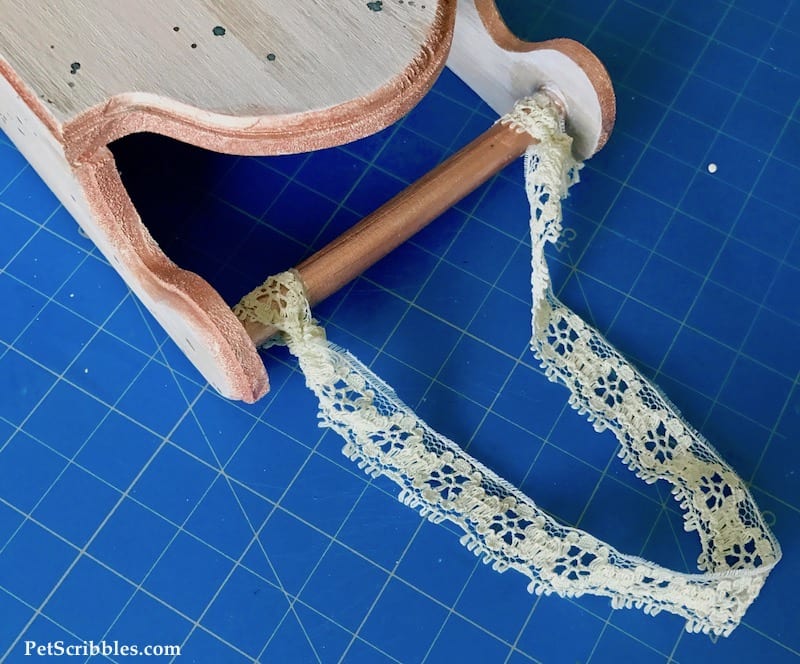
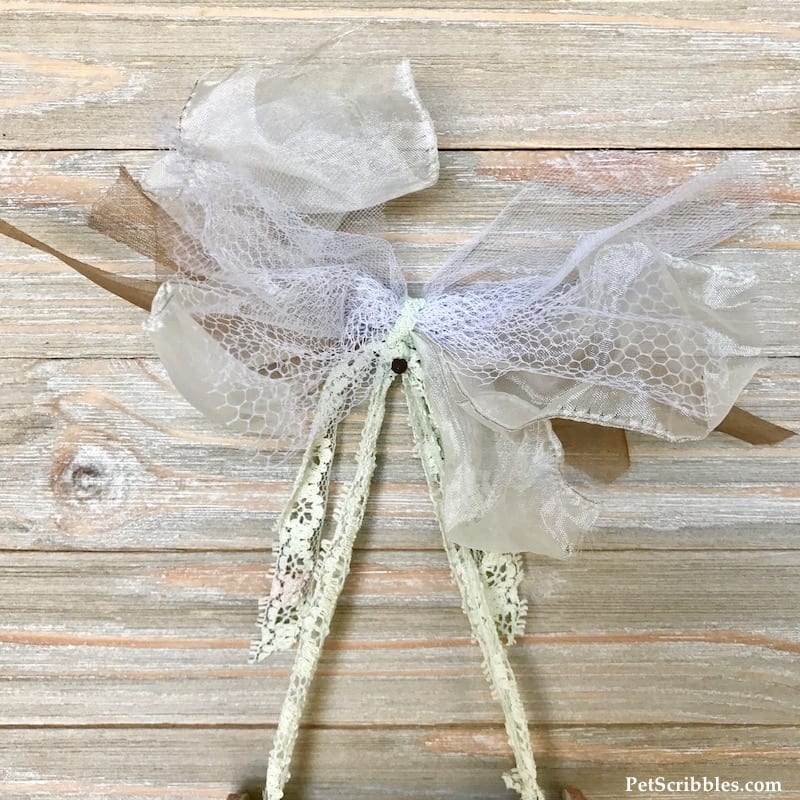
Add vintage trims, laces, seam binding and/or ribbon into a large bow at the top of the lace hanger.
After everything was finished, I felt like I needed to add one more thing, so I used a bit of vintage ephemera with a lace scrap to finish things off:
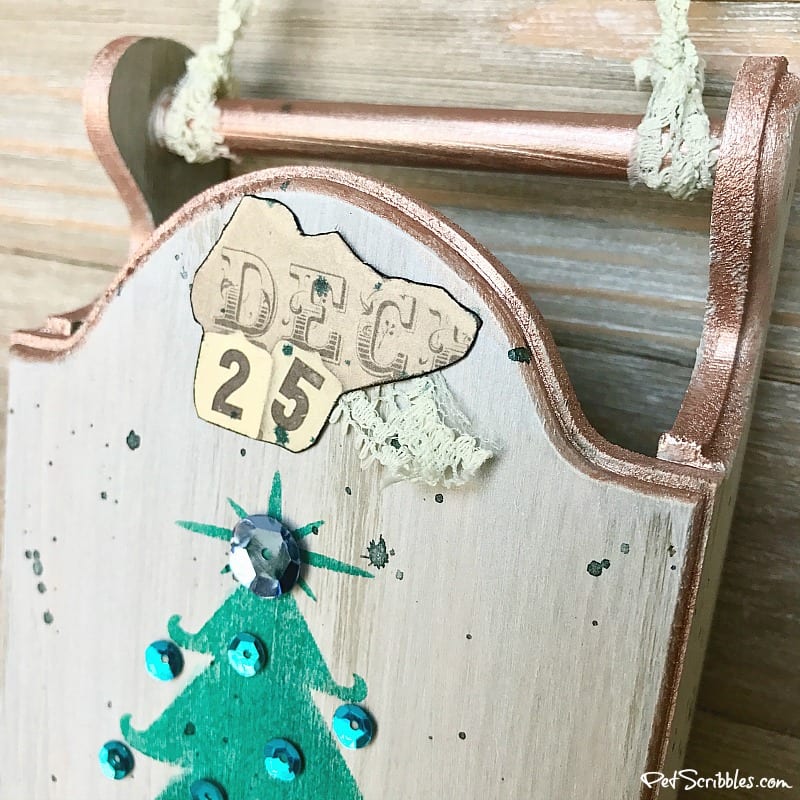
I outlined the “Dec 25” scrap with a brown marker, then used mini glue dots to attach it to the sled.
And that’s it!
Hang up your beautiful rustic wood sled and enjoy!

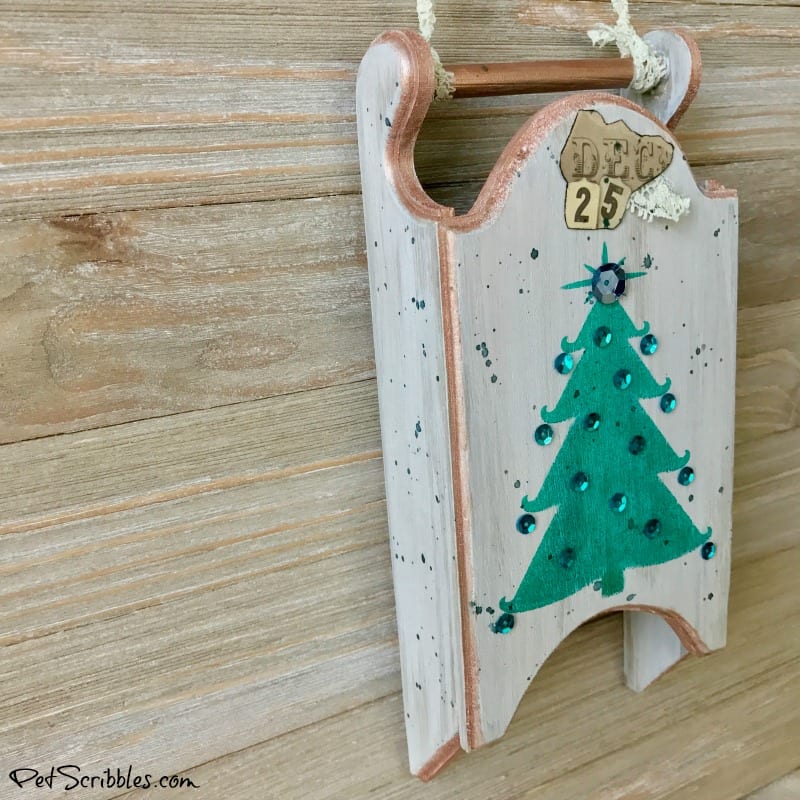
Here’s another angle so you can see the sideview:
And if you have a large Christmas tree, you could even hang it as an ornament!
Two more stamped ideas!
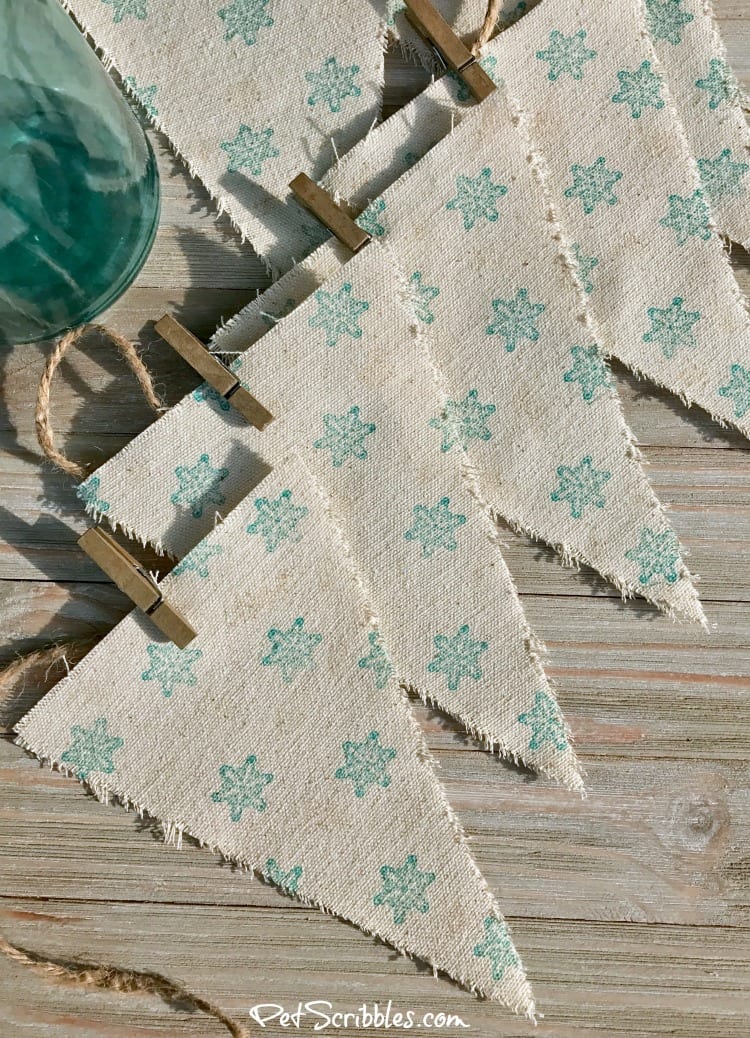
Easy Snowflake Banner
Create this Snowflake banner with a simple snowflake stamp on canvas triangles. Fray the edges for a vintage look. Click here for tutorial.
Dove Wood Slice Ornaments
After stamping doves on painted wood slices, color in the doves with pencils, then add clear glitter glue for sparkle. Click here for tutorial.

I hope you’ll try adding pretty stamps to your Christmas projects!
Happy holiday crafting!
Where can I buy the unpainted wooden sleds.
Hi Heather, Since supply chains from overseas have been problematic for the past few years, it’s sometimes difficult to find certain craft items. Your best bet is to do an online search of the major craft stores such as Michaels, Joanne, Hobby Lobby and others including Target Ebay and Walmart which also carry unfinished wood products. Sometimes these are only carried in stores and other times only sold online. The ones I used in this craft tutorial were available back in 2017. I hope this helps!
Thank you for answering my question, Laura.
I am still searching with no results for the type I want.
Looking into having them made locally, but if If I do find any online, I’ll be sure to let you know.
Have a great crafting day!
Heather