Learn how to add more Dappled Willow shrubs to your landscape by propagating Dappled Willow cuttings from your original plant. It’s easy to do whether you propagate the Dappled Willow cuttings in soil (pots) or in water! Plus you save money by not purchasing more shrubs! Includes helpful images and video.
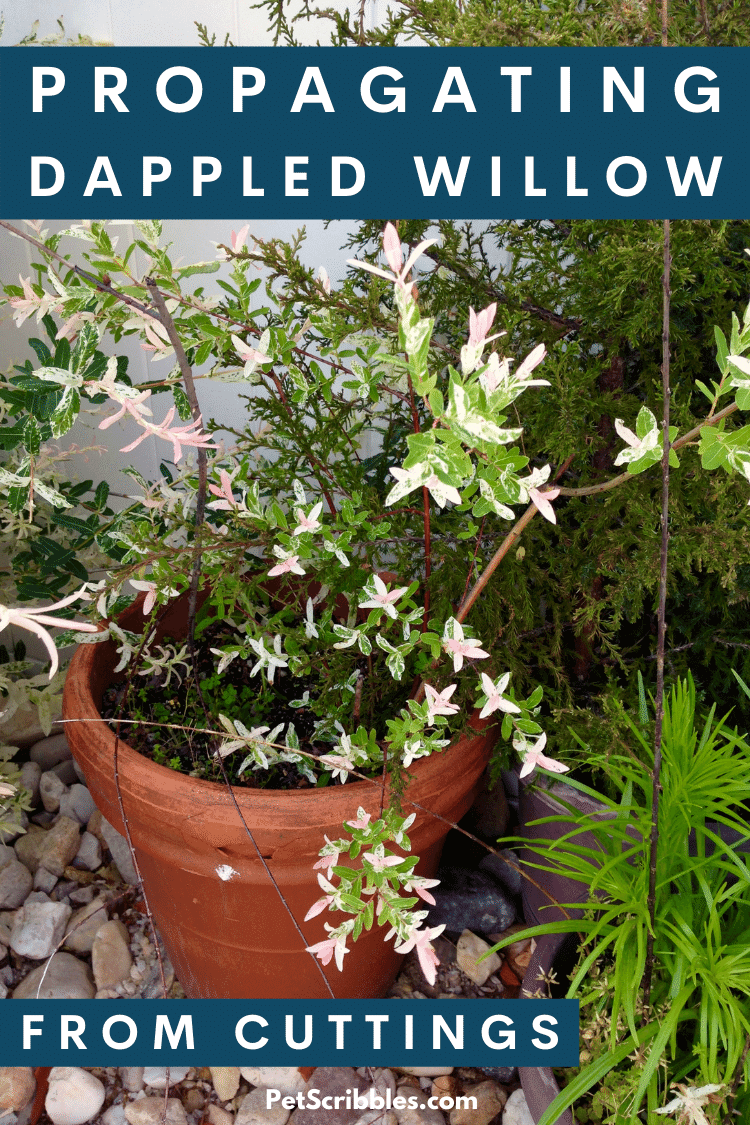
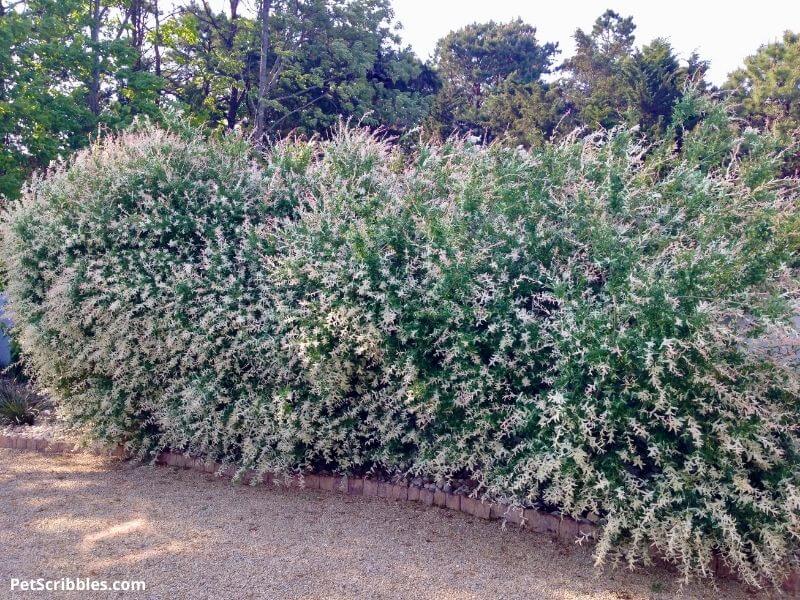
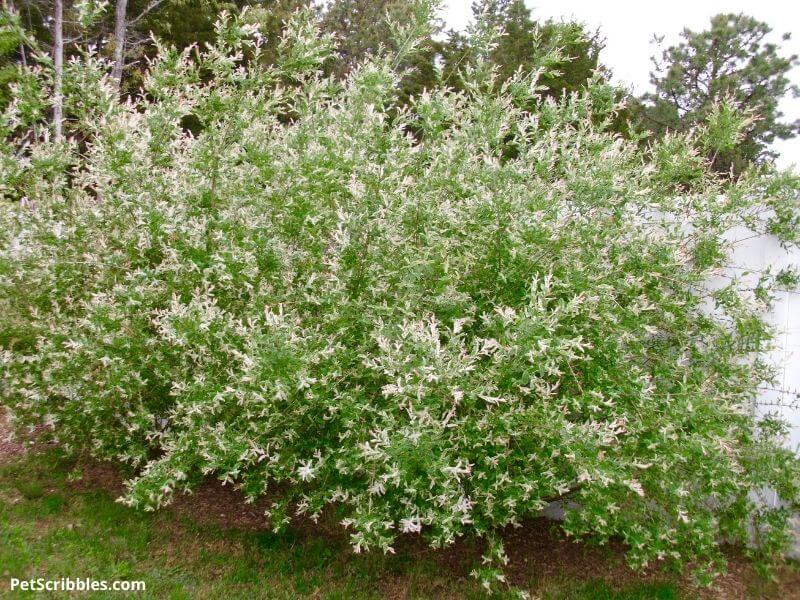
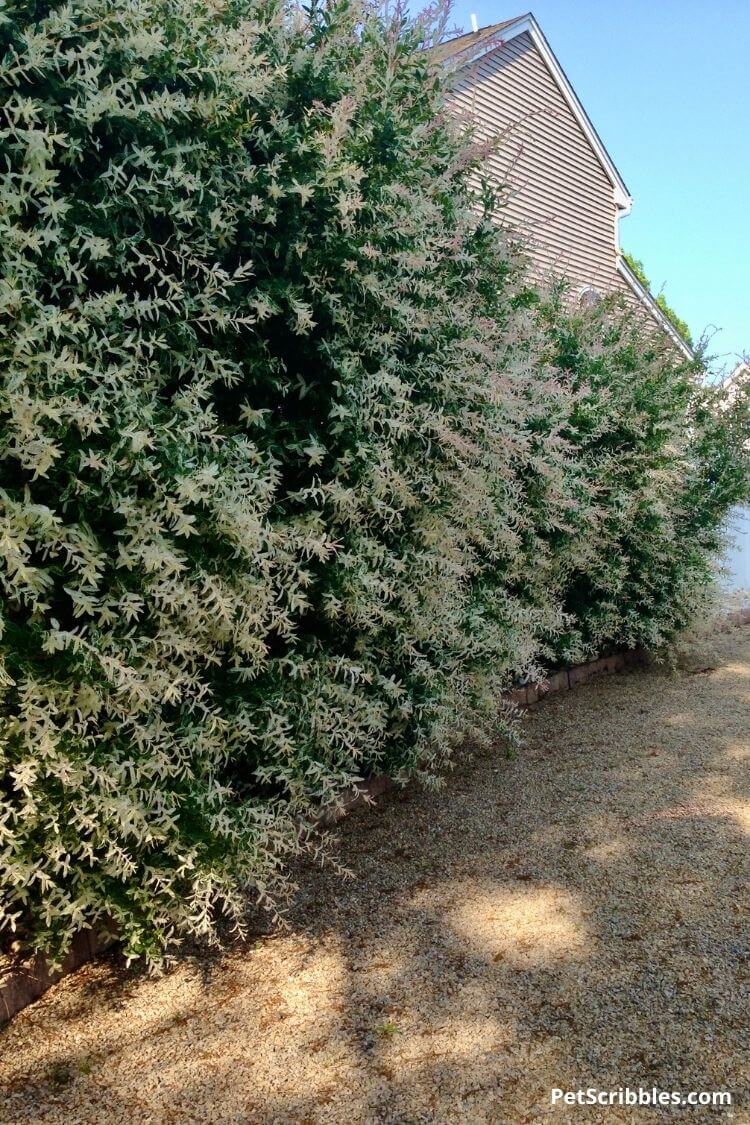
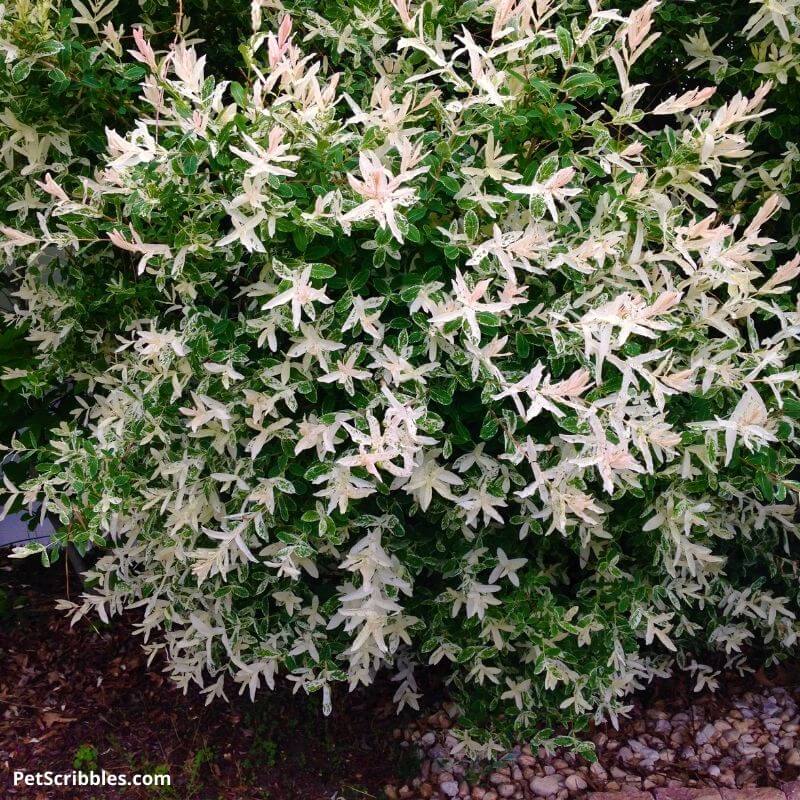
We have a living wall of Dappled Willow in our back yard, and it’s so much nicer than staring at a blank fence. This entire wall (below) was grown from just one shrub. Each additional Dappled Willow shrub we planted began from cuttings taken from the original shrub.
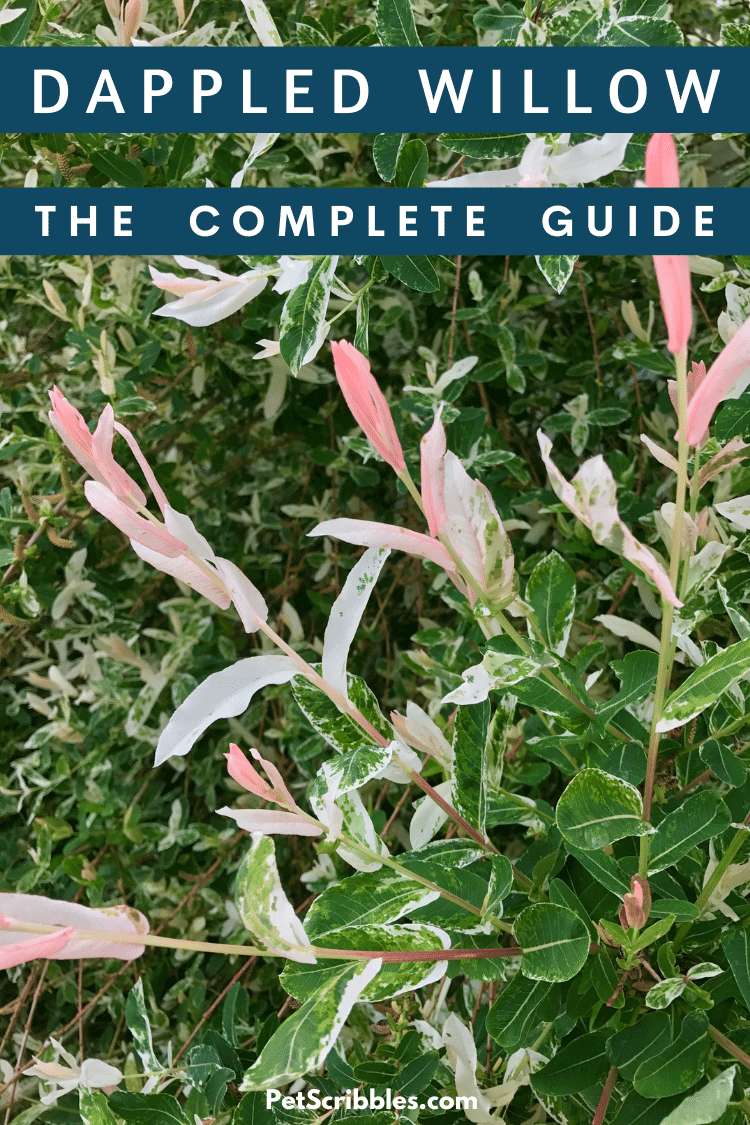
Please note: You can find growing information for Dappled Willow in my Complete Guide to Dappled Willow. (Just click on the link — it’s free!)
Table of Contents
- What is propagation?
- How I accidentally learned how to propagate Dappled Willow
- How do you propagate Dappled Willow?
- When do you propagate Dappled Willow?
- Will Dappled Willow cuttings root in water?
- When to plant Dappled Willow cuttings
- A word of caution about planting
- Conclusion
- Free resource: Dappled Willow, The Complete Guide
What is propagation?
Propagation is the technical term for growing new plants from cuttings or seeds of the parent plant.
Have you ever taken a cutting from one of your houseplants and stuck it into a glass of water to make another plant? That’s propagation.
The way to do this varies from plant to plant, as does the amount of success. Some plant cuttings benefit from a rooting hormone to help stimulate growth. While some cuttings do better forming roots in water, others do better in soil or a similar planting medium.
Propagating Dappled Willow is very easy and no special rooting hormone is needed.
How I accidentally learned how to propagate Dappled Willow
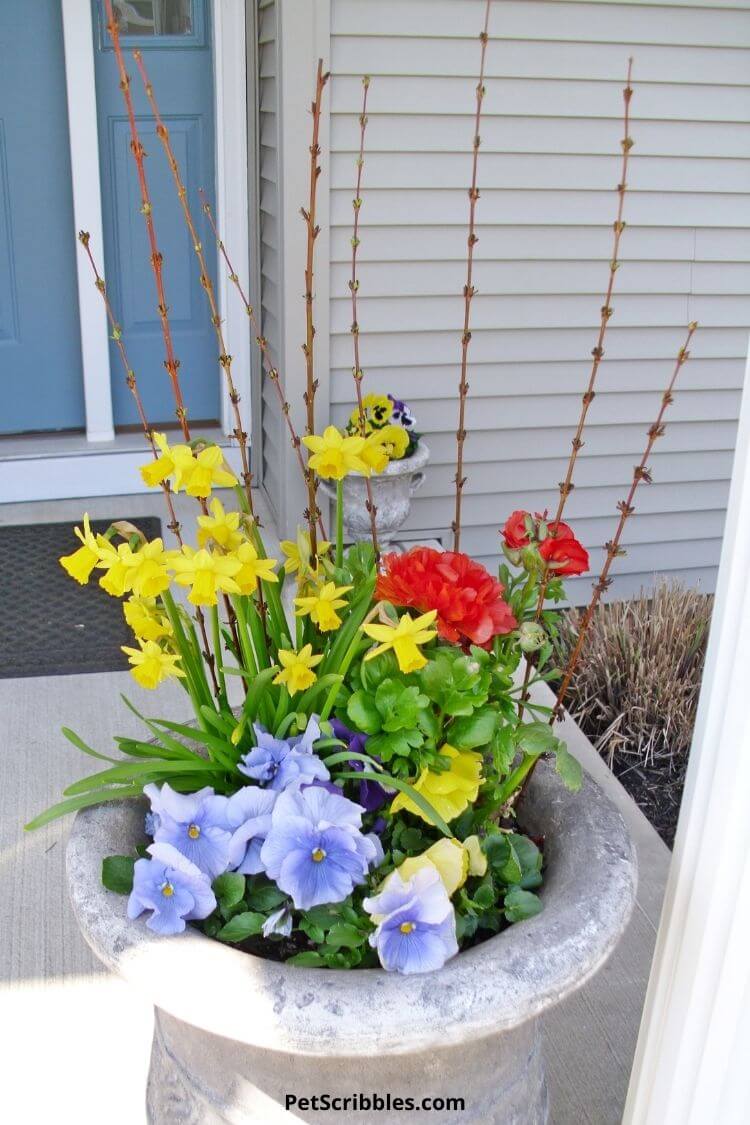
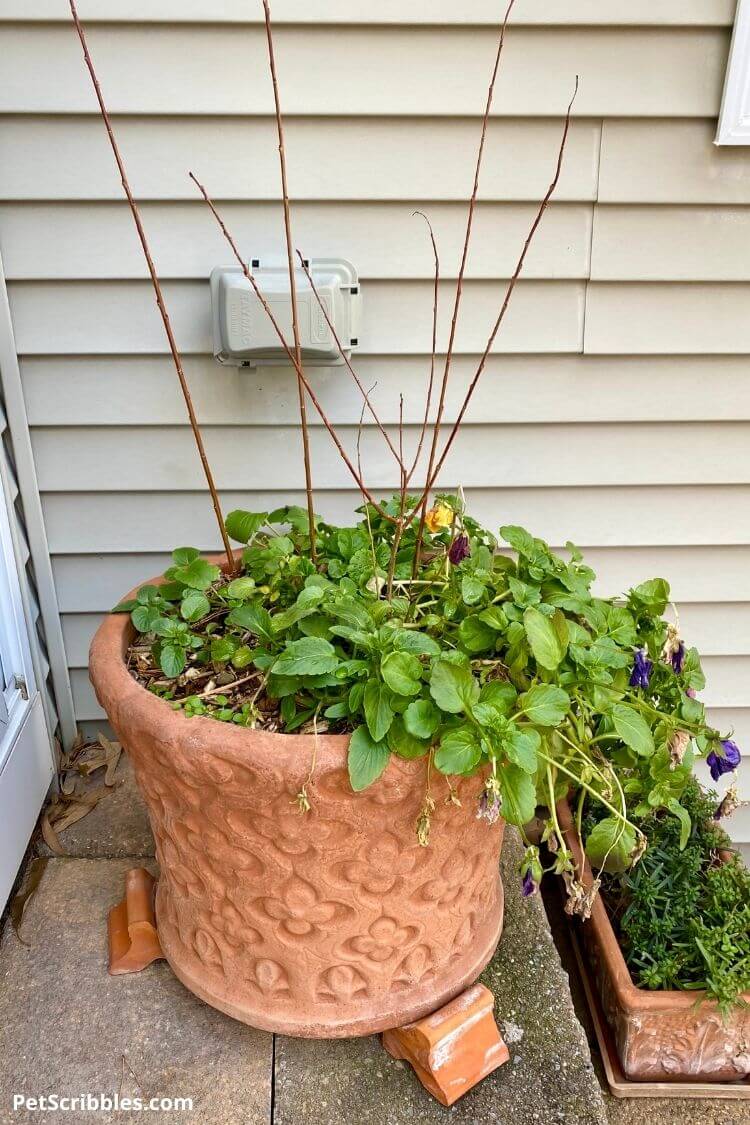
The first Winter after planting our original Dappled Willow shrub, I needed something to put into the urns flanking our front entrance. All of the Christmas decorations were put away and those urns looked so sad.
Standing in front of the urns, I looked around and noticed the red stems on the Dappled Willow. Perfect solution! After cutting off several stems, I stuck them into the frozen dirt in the urns. They looked so pretty. Instant Winter decor!
Fast forward to the Springtime, and we were surprised to see these red stems sprouting leaves! Instead of tossing the stems, I carefully planted Spring flowers around them.
In early Summer, I transplanted the stems into pots and they continued to grow. At the end of that Summer, we planted two of the cuttings that looked the best. One year later — after a complete growing season in the ground — these new Dappled Willow cuttings easily reached the same size of the original Dappled Willow shrub!
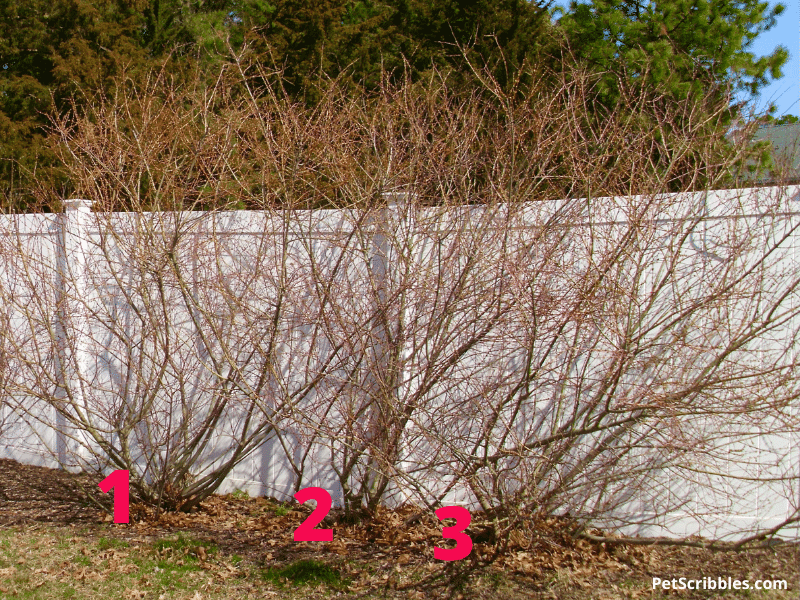
In the photo below:
1 = the original plant we moved from our front yard to the back yard.
2 and 3 = single stems stuck into dirt that grew into full-size shrubs.
Even more Dappled Willow cuttings!
We repeated the process again, and over time developed our living wall of Dappled Willow, all from one shrub!
If you’ve ever seen the prices of one Dappled Willow shrub, you know this idea is a great way to save some money.

Our white vinyl fence — which you can’t really see anymore when the Dappled Willow is leafed out — is 6 feet tall. Our Dappled Willow shrubs are between 10 and 15 feet tall. The length of this living wall is approximately 40 feet long. Each shrub is planted 3 feet away from the fence so that it has room to grow.
So that was my rookie success, but let’s start back at the very beginning of the process . . .
How do you propagate Dappled Willow?
- Cut several stems from a larger branch.
- Stick stems into a container filled with soil.
- Add water.
- Put your container in the right spot.
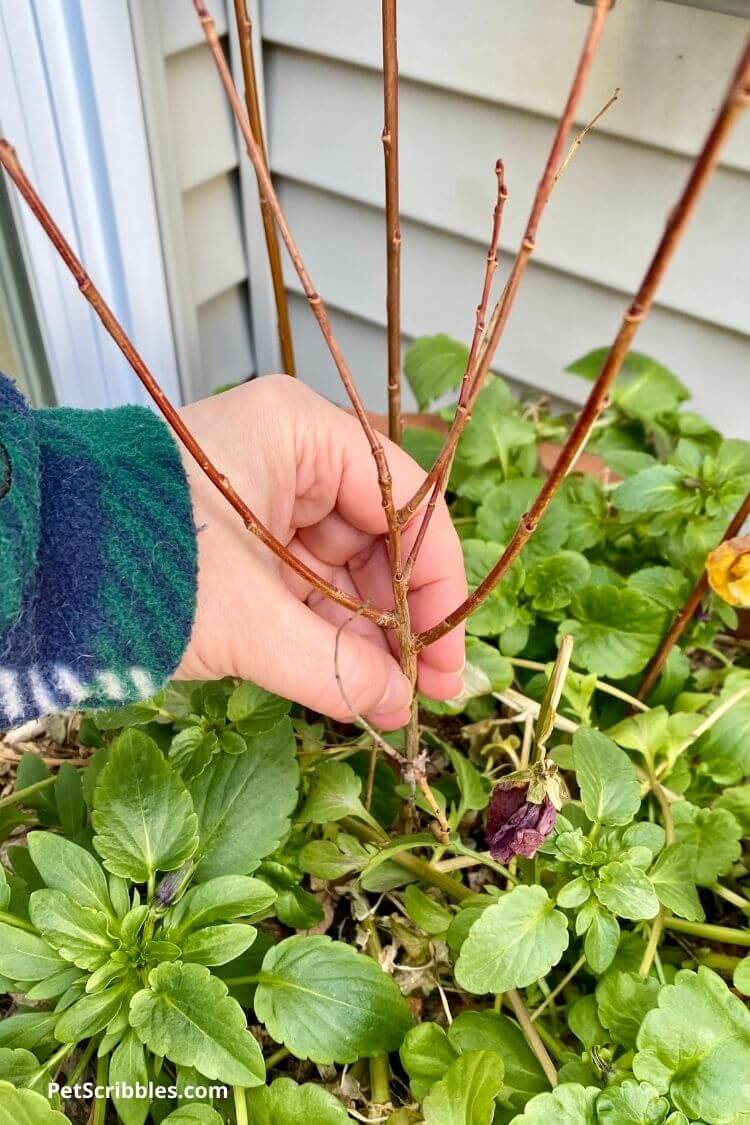
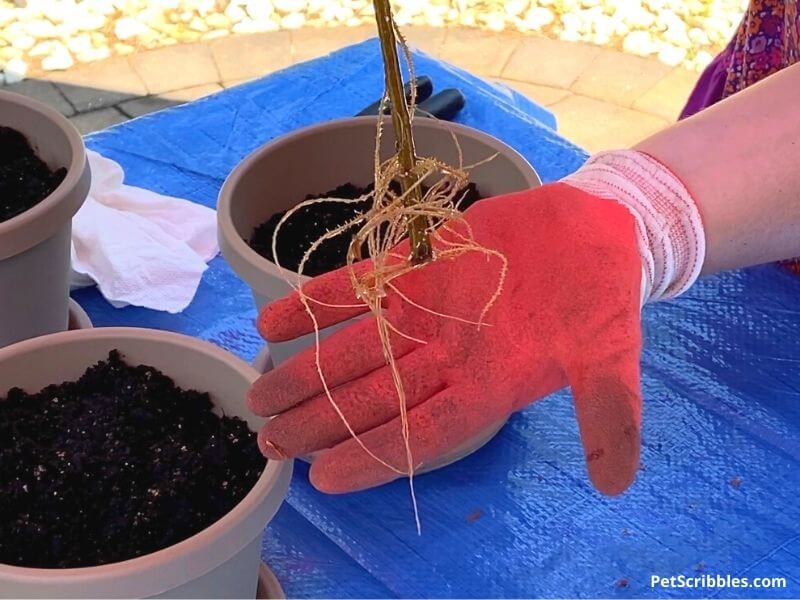
Cut several stems from a larger branch
First, cut stems that aren’t too thick or too small. I use these pruners from Fiskars. Look for stems around 6 to 8 inches in length, since at least two or three inches will be pushed into the soil.
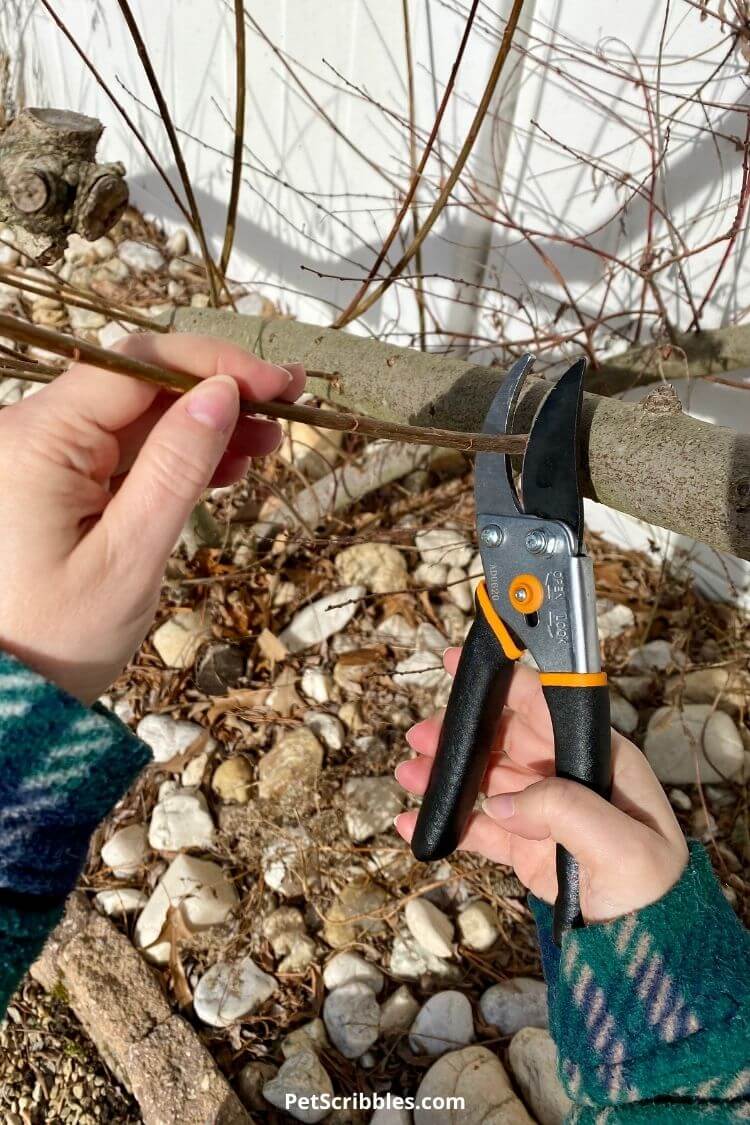
My latest cuttings are single stems, but I also chose a cutting that has multiple stems. Either type of cutting will work.
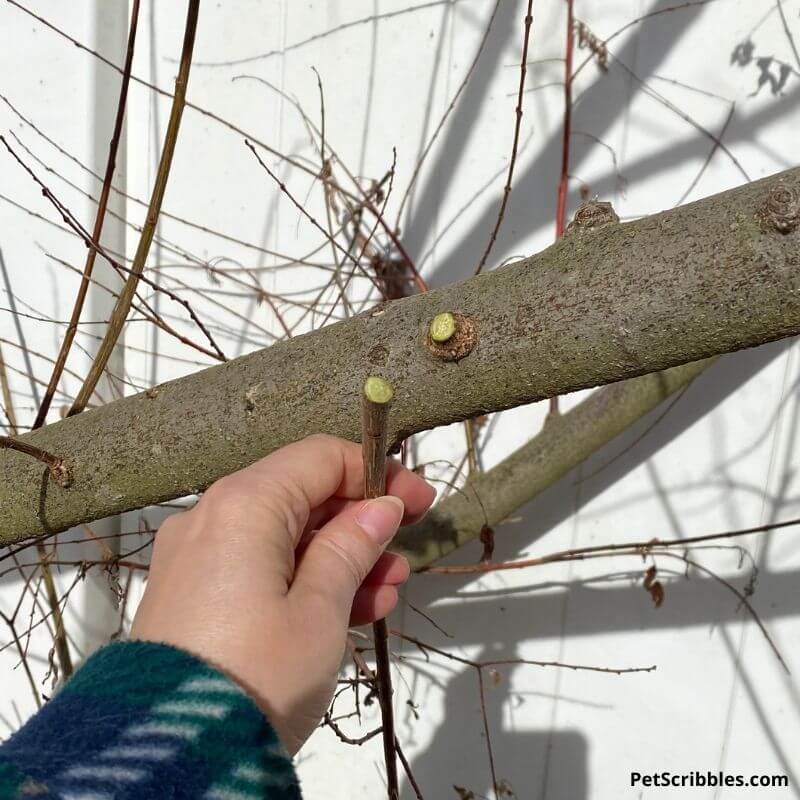
You can see in the photo below how green the end of the stem is, where I cut it off from the larger branch. Despite it being Winter when I took these cuttings, the green shows that this shrub is still very much alive!
Stick stems into a container filled with soil
Next, stick each of the stems into a pot or container filled with potting soil. No other additives or rooting hormone is needed. Gently push each stem into the soil, making sure that at least two or three inches of the stem go down underneath the soil line.
You can use any type of container — I’ve used both terra cotta and plastic resin containers with success. Your pot can already have plants in it, or you can start a fresh container just for your Dappled Willow propagation.
I’m using a container of potted pansies. I like the idea of using the pansies to keep the soil covered, although I also have some wood chip mulch on top of the soil as well.
Add water
Finally, give the container a decent amount of water, just like you would water new plantings. Keep the pots moist but don’t overwater. Dappled Willow loves moisture but you don’t want to drown any new roots as they start to form.
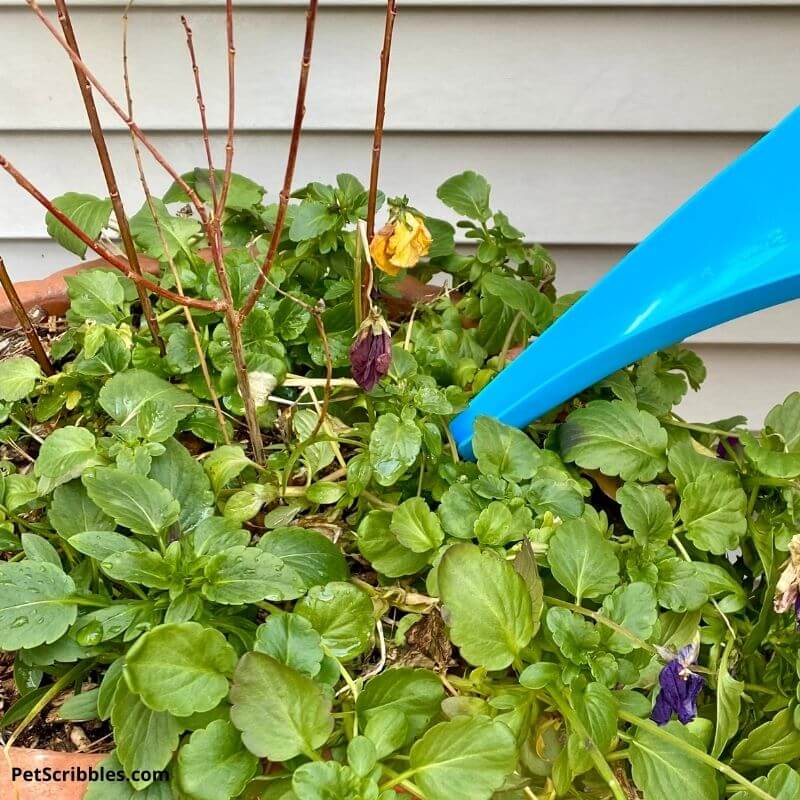
During the Winter months, if there’s no snow or rain for weeks, add water to the pots occasionally if temperatures are above freezing. In Spring there is usually enough rain to provide water naturally.
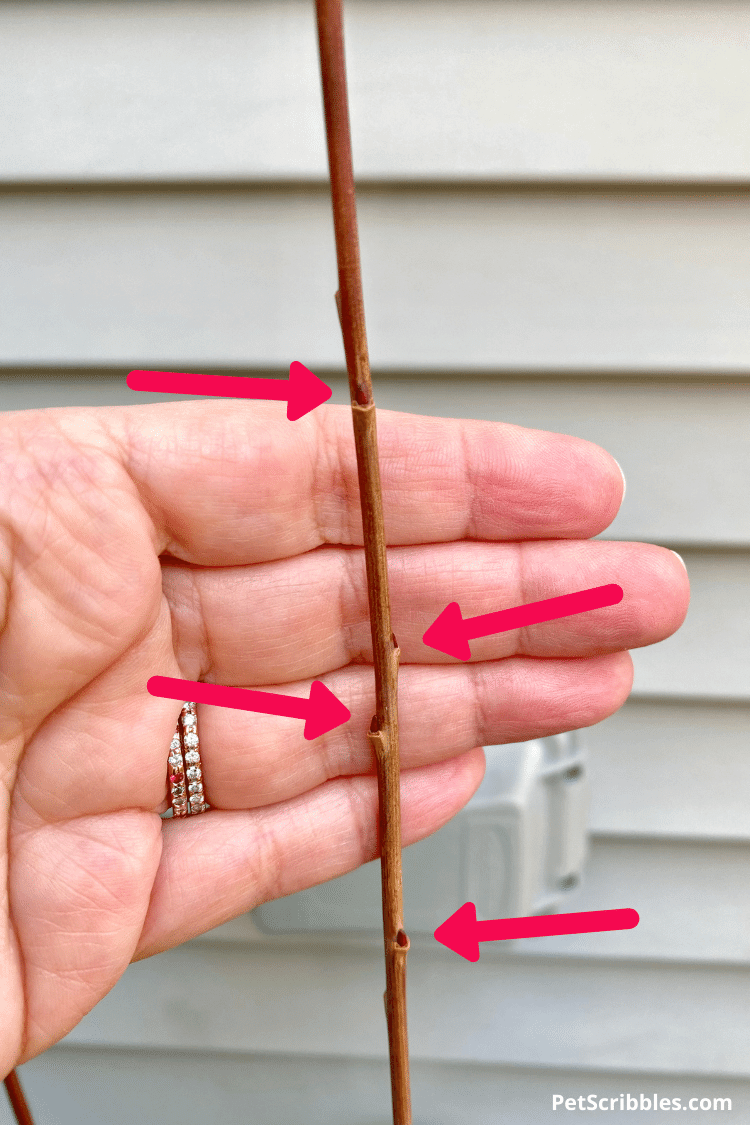
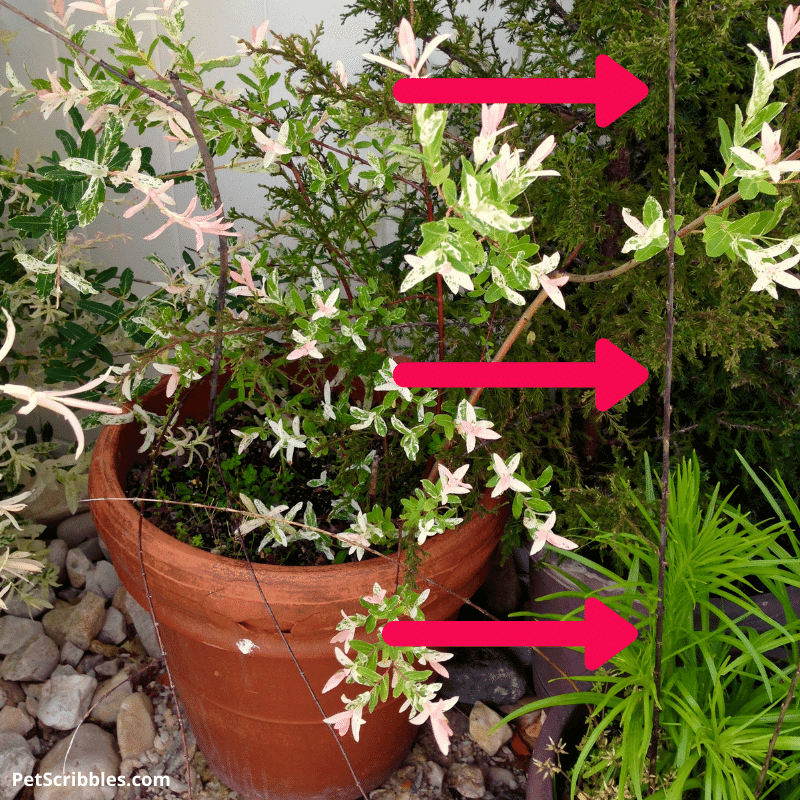
As the arrows show in the photo below, these cuttings already have buds on them. Yes, even though it is January, you will see tiny buds on many shrubs if you look closely. From a distance, it all just looks like twigs, doesn’t it?
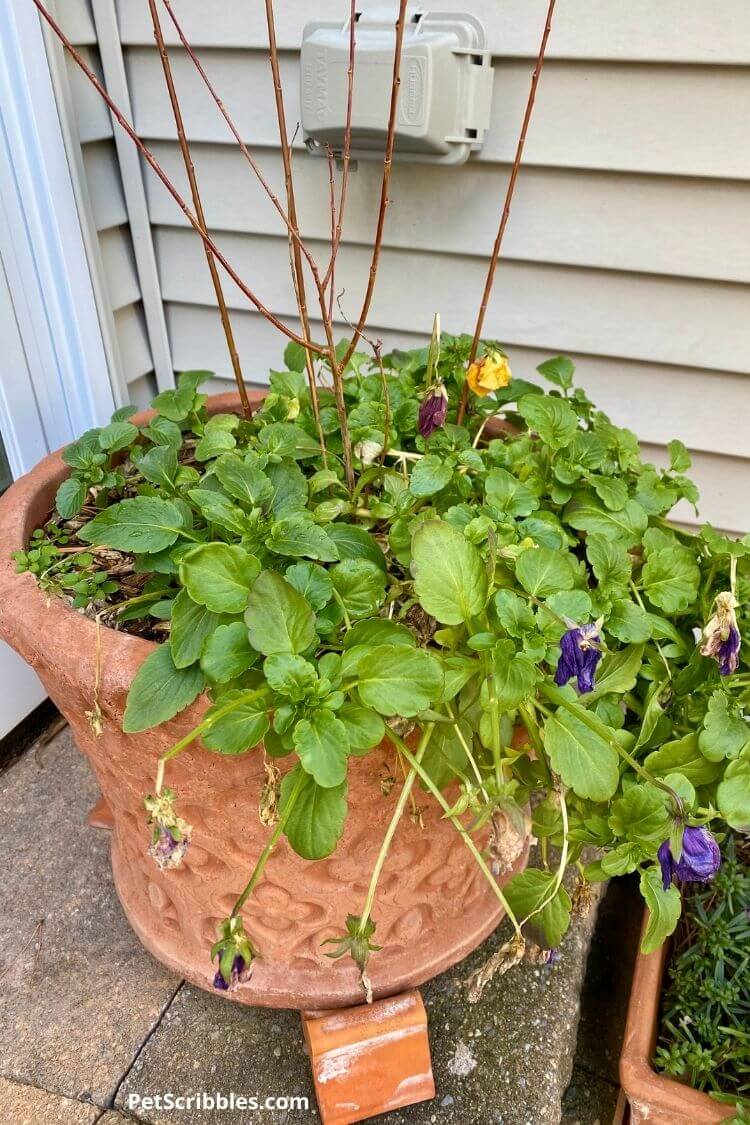
Put your container in the right spot
Place the pots in a shaded area, yet make sure the shade is bright shade. You want these cuttings to have light, but not direct sun when they start out — especially if you’re doing this during the hot Summer months.
This planter always stays on our patio steps. Because it is in a little nook, the planter is protected from strong winds. The temperature is also a bit warmer since it is so close to the house.
In general, during the Winter months I leave the potted stems outside. No special care, no protection from the elements like snow or freezing temperatures. I’m in zone 7, near the shore in southern New Jersey.
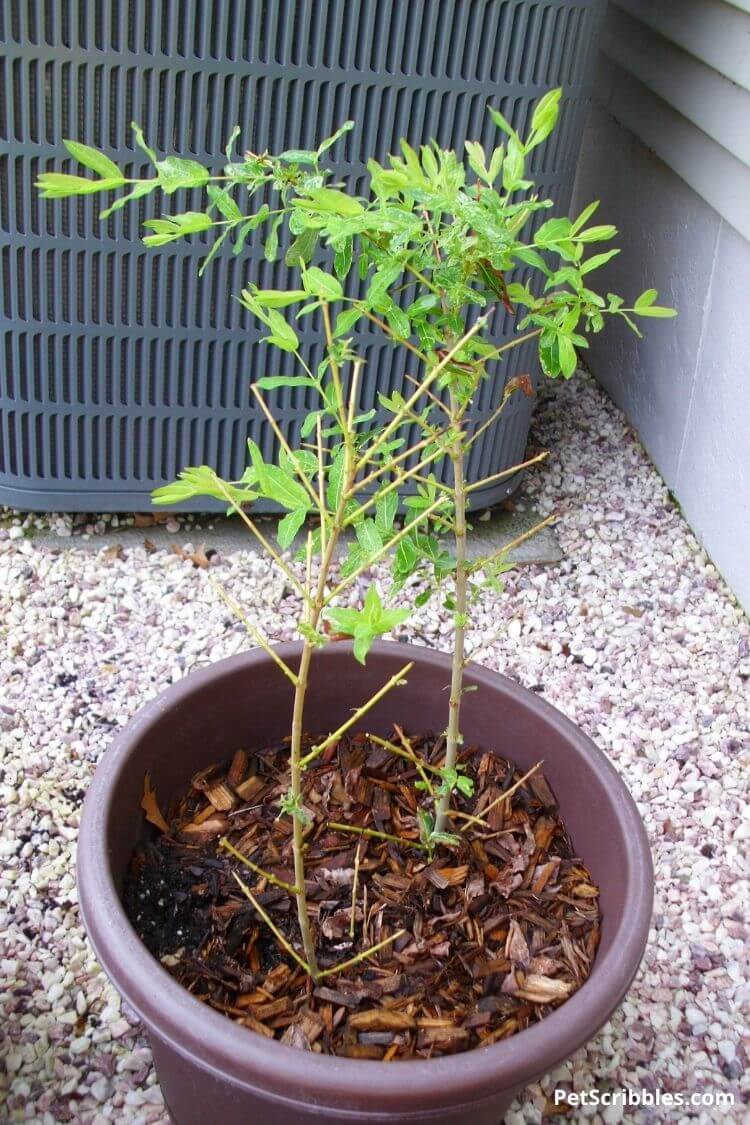
What does the new growth look like?
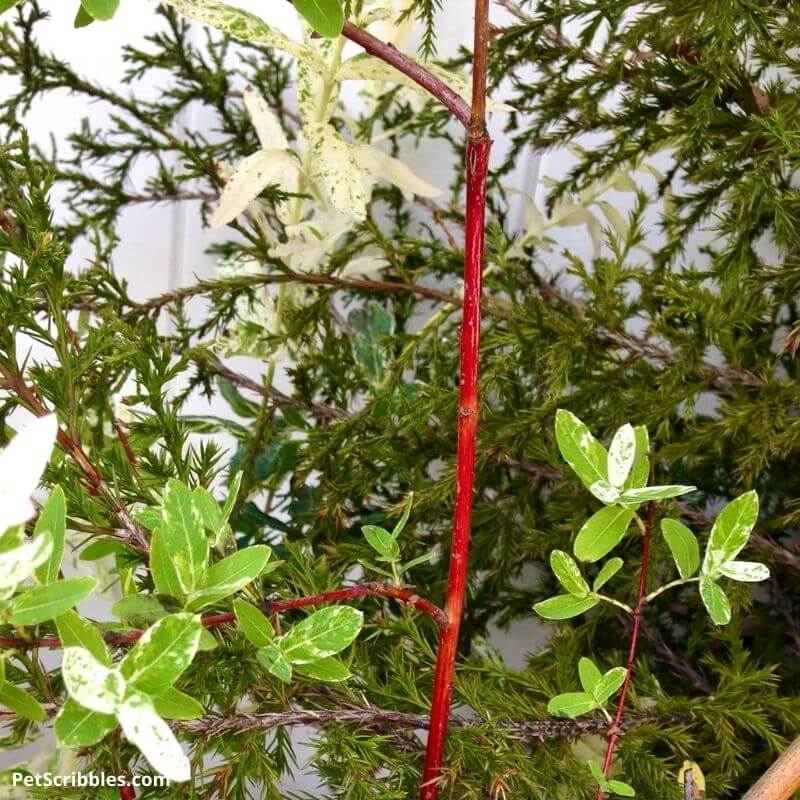
The photos below are good examples of what Dappled Willow cuttings look like after being in a pot for almost a year.
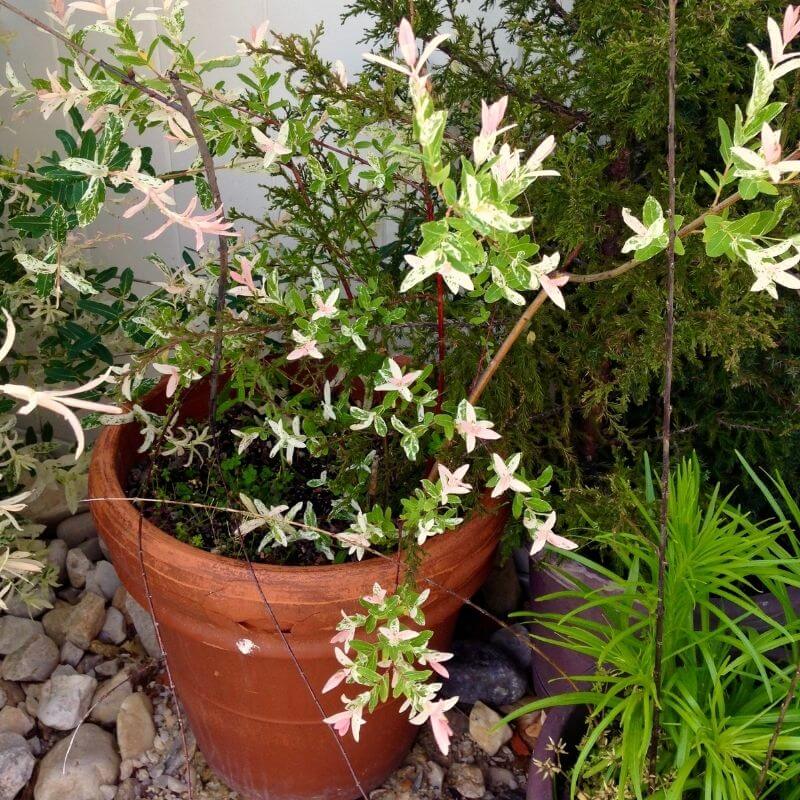
Some of the new growth occurred at the bottom of the red stems.
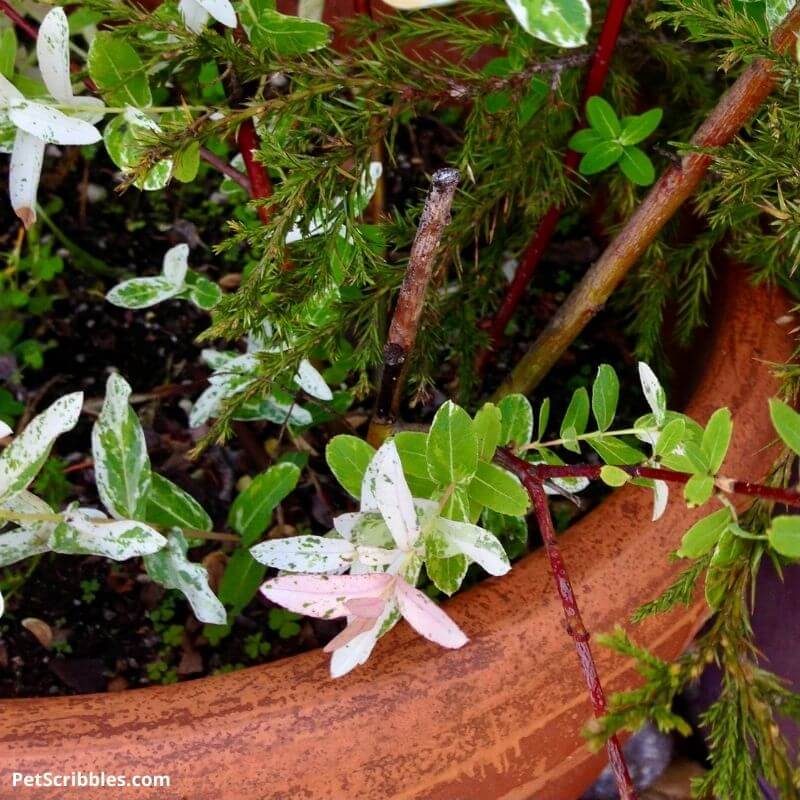
Additional new growth sprouted further up the stems as well.
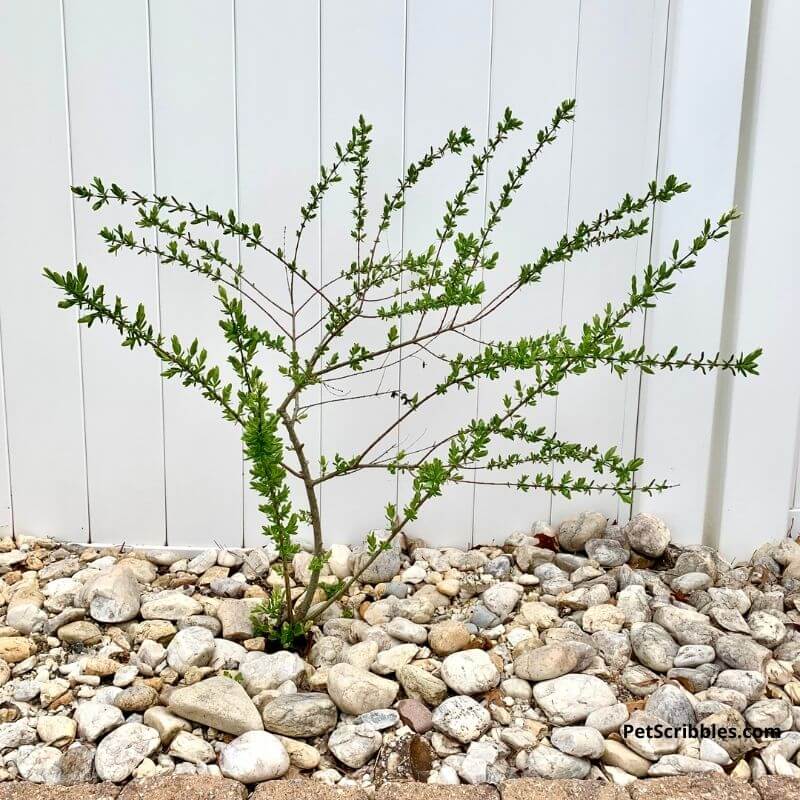
Most of the stems will sprout, and a few of them won’t. It depends what Mother Nature decides to do. The arrows below show you one of the stems that died. It happens.
When do you propagate Dappled Willow?
You can take cuttings from your Dappled Willow any time of year, however in my own experience, the best time to propagate Dappled Willow is anytime during the Winter and Spring seasons — all the way to the end of May.
Why are Winter and Spring best for propagating Dappled Willow?
Winter is the dormant season, when there’s not as much daylight and temperatures are cold. My experience is this dormancy seems to help the cuttings. If there is snow in Winter, it will help insulate your potted cuttings. (I love how Mother Nature works!) If there’s no snow to be found, don’t fret as your cuttings should still be fine, just keep the pots in a sheltered spot close to your foundation where it’s warmer than out in the middle of the garden.
In the Spring, your cuttings will enjoy cool temperatures and the usual Spring rain showers, which will give them a great start to the growing season. Just as all shrubs and trees begin to leaf out and bloom, so will your Dappled Willow cuttings, although it may seem slow at first. Those roots need to develop before the cutting can turn into a viable seedling.
What about during the Summer or Fall?
Your cuttings may not do as well in hot Summer temperatures getting started as they will in cooler temperatures. You may have to check on them more often, making sure the soil is moist, and any new leaves are not drying out. All it takes is one scorching day where you forgot to check on those seedlings for them to fail. And the stress on those seedlings of bouncing back can sometimes be too much for success to occur.
Early Fall is also ok, but your cuttings won’t have enough time to establish roots before the season goes dormant. Roots may begin to form and then die off when Winter sets in. Propagating Dappled Willow in Fall doesn’t mean they won’t sprout the following Spring, but you might not have as much success.
Will Dappled Willow cuttings root in water?
Yes, they will. Propagating Dappled Willow in water is as simple as placing the freshly cut stems into a jar or vase of water. Place where it will get indirect light. And just like with soil propagation, no special rooting hormone solution is needed.
Doing this in Winter or Spring is best because you won’t get intense sunlight like you do in Summer. For Summer propagation in water, keep the jar or vase away from long periods of direct sun.
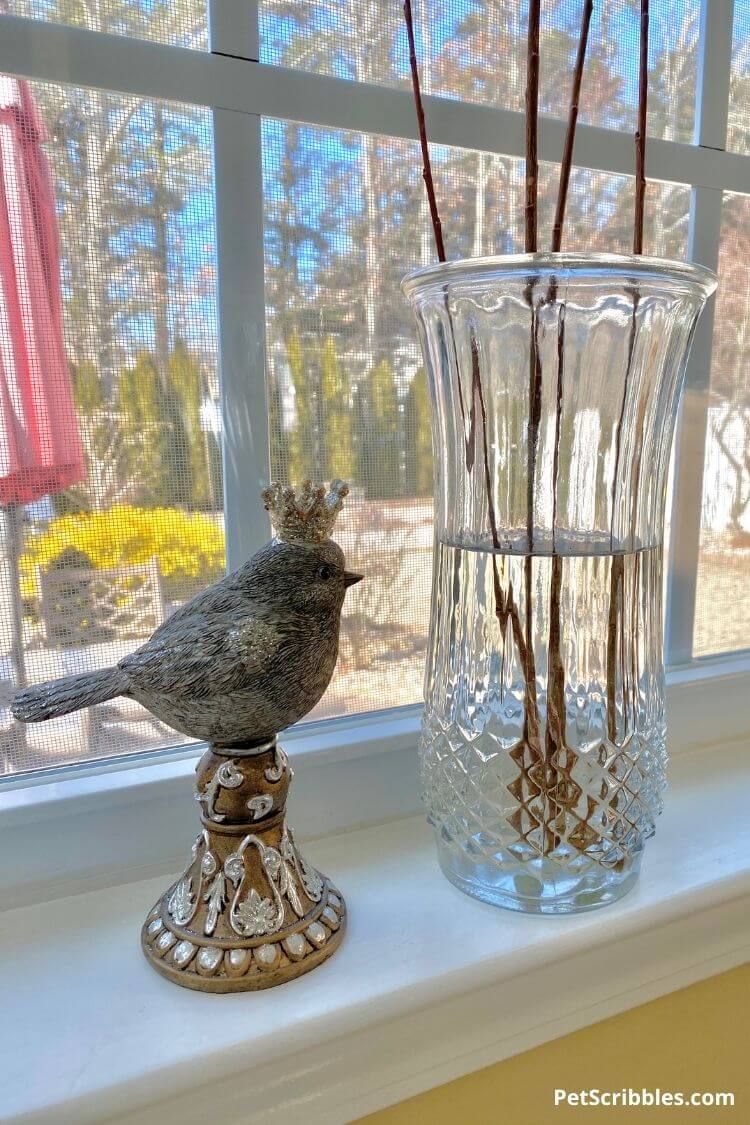
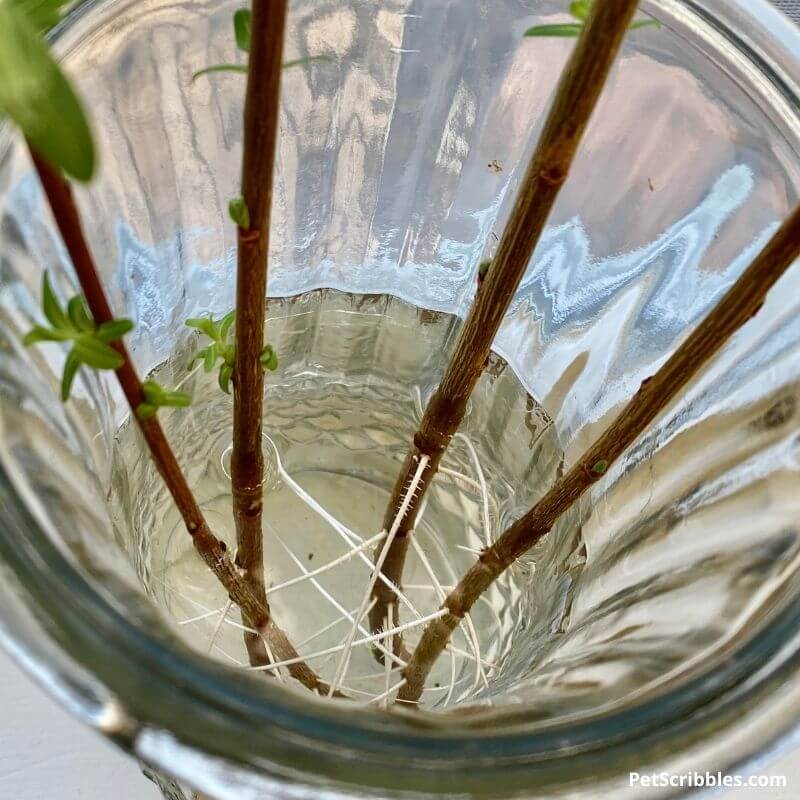
I stuck the cuttings — shown above — into the vase on January 28th. By February 24th, good roots were growing:
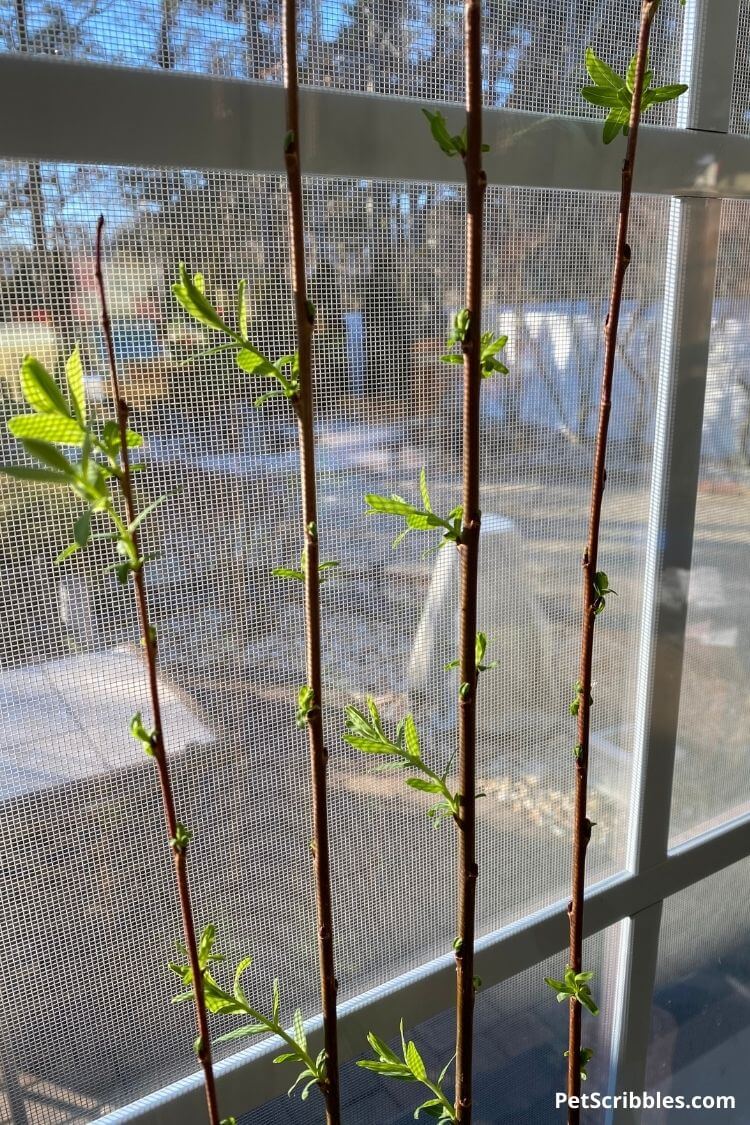
Leaves also popped open from the buds as well:
After leaving the stems in water for a few months, the roots looked wonderful!
After the Dappled Willow cuttings rooted in water, and developed for a few months, I potted them up in containers shown above. Make sure to place those containers in the shade at first, in order to get them acclimated to the outdoor temperatures and more sunlight. Depending on the season, you can move them into the sun as long as they continue to receive plenty of water during dry spells. (Dappled Willows love moisture, and you’ll be surprised at how much water these young developing seedlings take in.)
I go much more in-depth about these cuttings in my video, further below in this article.
Willow Water
The water that these cuttings root in is rich with nutrients. There’s actually a term for it: Willow Water, and this type of water has been used to fertilize plants. So make sure you choose some favorite plants and water them with this Willow Water once your cuttings have been potted up. Free liquid fertilizer!
When to plant Dappled Willow cuttings
The final step of successfully propagating Dappled Willow is adding the new plants into your landscape. Usually it takes about a year until the cuttings are ready to be planted into the garden. However, it depends on when you begin the cuttings.
For cuttings started when dormant in Winter, you may be able to plant them at the end of the Summer. For cuttings taken in early Spring, you could most likely plant them also at the end of the Summer or very early Fall.
The main question to ask yourself is: what do these cuttings look like? Is there a good amount of healthy leaves and shoots? Are there several stems?
You want to plant your cuttings when they resemble small seedlings or small plants. Be patient, and you will be rewarded with strong seedlings that have developed good roots. When I see those things, I know I can plant my Dappled Willow cuttings with a good degree of confidence.
A word of caution about planting
When it comes time to plant your Dappled Willow cuttings, remember to space them at least 6 feet apart from each other. It will seem like a lot of empty space, but trust me: these plants will fill in that space quickly as they turn into gorgeous shrubs.
Conclusion
Remember: When propagating Dappled Willow, I don’t bother with any special rooting solution or anything else. Just cut, stick in a pot of dirt, then wait and see what happens. Keep them in the shade and keep the soil moist.
This is a fun project, and really satisfying when you see a skinny twig eventually become a full-size shrub.
If you have a Dappled Willow shrub, I hope you’ll try this for yourself. And let me know if you do.
VIDEO: Propagating Dappled Willow From Cuttings
Dappled Willow: The Complete Guide
Make sure to read my free Dappled Willow Guide for help with growing requirements, planting, fertilizing, pruning and more.
I put together this guide based on years of growing Dappled Willow and answer many questions I’ve received from readers over time.
Happy gardening!
This is such a pretty bush and I am going to try to propagate so I can have a few more since I have a large yard. I’m wondering if I can take clippings when there are leaves on them since it is May ( Ohio) and it is in full bloom. Thanks for your input.
Hi Penny, Yes you can. No worries — in fact now is a great time of year to do so, before the super hot weather kicks in. I’m working on a video for my YouTube Channel about propagating Dappled Willow, which hopefully will be up in the next two weeks. The key to propagating when the stems are already in full bloom is to make sure they get enough water, whether you plant them into pots or put them into a jar or vase to have those stems root directly in the water. I’m currently doing both ways and am amazed at how much water they “drink” every day!
I am doing the water method and it is amazing that within a week, I have “roots” 1 – 1.5 inches long. I just used some new growth cuttings and they welted at first but are strengthening as the roots form. I will pot them in the next week or so.
Isn’t it amazing how quickly they root? I’m sure potting them up now will be fine. I’ve waited a lot longer for the roots to develop more before potting them up, partly because I wanted to see how quickly the plant rooted and developed compared to potted cuttings I did at the same time. The water cuttings developed into actual small plants (while in water) so much quicker!
I started mine 2 weeks ago and already see some growth. Will be trying the water method as it will make a lovely feature in my driveway.
That sounds like a great idea Rickey! I’m just finishing up editing my video on propagating Dappled Willow in both soil and water — to go along with this article — and wait until you see how big the stems got and the healthy roots using the water method!
J’ai un terrain avec beaucoup d eau ns somme en train de l irriguer donc si il est planté près des faussaient il aura toujours de l eau proche ses correct pour les boutures je vais l essayer car il est très beau, il est environ 30 pieds de la maison ses tu correct?
Yes, Dappled Willow love water, so they should do well on your land. Yes, my Dappled Willow is quite a distance from my house, but I’ve never measured the exact distance.
I bought and planted 6 Dappled Willows the same time. They are all doing great but I have 1 that is a lot smaller than the others. Any idea why?
That’s an interesting one, Patty. Did all 6 shrubs start out the same size? How long ago did you plant them, i.e. last year, this year… I’m assuming you have them all planted in the same area? Is the one that is smaller than the others located at one end of the shrubs, or in the middle of the 6 shrubs? If it is on the end, my guess is perhaps it isn’t getting enough water or sun? However, as long as the shrub looks healthy just like the other 5 shrubs, then I think you will be ok. Once the growth really kicks in, it might not be that easy to tell if one is smaller. Keep me posted!
How long did it take your dapple willow wall to get that big?
Hi Dominic, I planted the first Dappled Willow in the backyard in 2010, and then took cuttings over time and eventually ended up with our giant living wall — which I coppiced down to the ground in March 2021. Just one year later, we have beautiful 5-to-6 foot shrubs again! You can check out my Dappled Willow Guide to see pictures of how the tall Dappled Willow started out…and I also have a video playlist on my YouTube channel where you can see several videos all about these wonderful shrubs! I hope this helps!
Thank you for the detailed I formation.
I have had my bushes for over ten years and noted that unless I vigorously cut back the shrub, the leaves are just green, not dappled. Why is that? What can I do to assure I get variegated leaves?
Hi Renee — Your best bet is to trim out from the very end of any green stems so that the plant doesn’t think it needs to revert to all green. It isn’t uncommon to get some green stems here and there — but — if your bushes are mainly green, it might be a good idea to start them over and coppice them with a hard pruning. However, it also sounds like you’re doing that as well. After I coppiced mine, I was able to have the shrubs put out mainly variegated leaves. It has been quite a multi-year process, but I think it was worth it. I hope this helps!
I am so glad you posted this. New plant for me. I’m in zone 6a and just got my first dappled willow today. I can’t wait until I can propagate and have a lot of these shrubs in my large back yard. Save money on plants? YES!
Hi Carla! You’re glad I posted this, and I’m glad you bought your first Dappled Willow! You will love this shrub and enjoy making more shrubs! So glad to hear this and please keep me posted too! (And yes — the money saving aspect is great! Especially as maybe that money can go to purchasing other plants! Hah!)
I have a few of these, rooted in water now. I am a bit nervous about planting them in my yard , as the roots grow fast and seek water, and have been known to destroy water systems underground.
Hi Angie, Definitely don’t plant them near your water systems and you’ll be fine! You are correct that the roots grow fast and seek water, but if you keep your Dappled Willow well watered — whether with drip irrigation or sprinklers — the plants will have their water! And if you’re still not confident — you can plant Dappled Willow in containers! They look lovely in pots! I hope this helps!
My dappled willow was pruned in a topiary and I battle branches growing on the lower part all the time. Can I cut those and use to propagate new bushes? Any special instructions on cutting?
Hi Cindy, I think you will be successful using those small branches to propagate new shrubs. There’s really no special instructions other than what I outlined in my article. Take the longest branches/stems you can, as I imagine when they grow out of the trunk, they aren’t that long. The good news is they don’t need any rooting hormone, since the Willow family contains a lot of auxins which are essentially what rooting hormone is. So whether you start them out in a glass jar, or stick them directly into a pot, you should be fine. Just be patient, and if starting in a pot — make sure to keep them out of direct sun and that they get enough water but not too much to drown the delicate roots as they begin to form. At this point of the Summer, the heat can do a number on them. I hope this helps! Keep me posted!
We’ve started 7 pots of cuttings, one cutting per pot. We’re wondering, do we prune while in the pots to make them bush out, or plant them in the ground, in their twiggy state, & let them grow more and then prune?
Whoo-hoo Beth — that’s awesome to start seven cuttings! I’d let them grow a bit before doing any trimming or pruning. Let them establish some roots first. The ones that I started in water — which you can see on my Dappled Willow Cuttings video — I trimmed once I potted them, since I already had decent roots on them. But they were slow to begin growing again. If starting cuttings in pots, perhaps wait until even Spring before cutting them at all. Waiting that long won’t damage the plants at all. I hope this helps! And keep me posted on how the cuttings are doing!
Hello… Thank you for this great information! I was so happy to see that you live in NJ as I usually find a lot of information available from people outside of our planting zone! I’ve always loved the look of the tricolor willow – both as a living wall, and as a small tree. I couldn’t believe my eyes when I walked into Lowes one day a few years back and found one for 17.99!! I snatched it up and quickly planted in front of my home. I hoped to shape it into a small tree, but all my pruning and shaping did, was make it grow massively! I’m wondering if it’s too late in the season to prune it down now – could you please advise? I am in Long Island, NY, and plan to experiment with propagation with the branches that I cut off. Your help is much appreciated!!