Peat Pot Wedding Favors DIY
These peat pot wedding favors can be displayed at each reception table place setting or gathered together in the center of each table as part of a centerpiece. Another idea is to feature these DIY wedding favors with placecards on a separate table for guests, which would make an eye-catching display.
Fill each one with a pretty succulent — or whatever else matches your wedding style!
DecoArt supplied me with the Chalky Finish Paint colors you see below, and I’m also a DecoArt Blogger, but my opinions are 100% my own. Some of the links in this post are affiliate links. I explain more here.
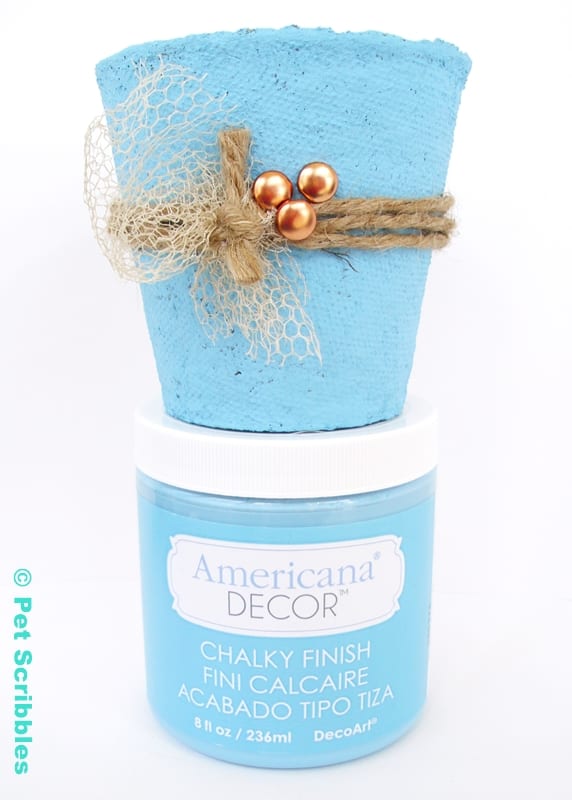
DecoArt Chalky Finish Paints
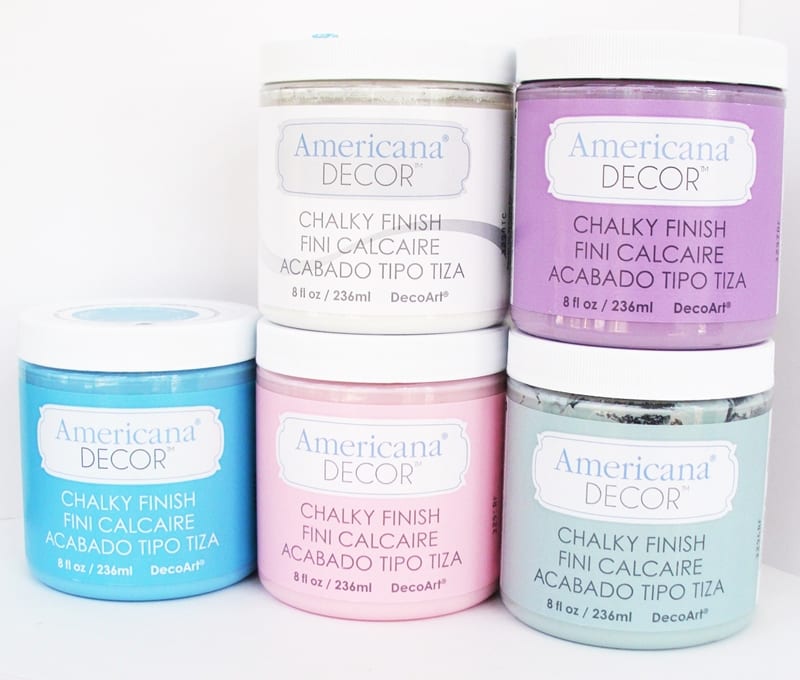
I adore these paints! I will walk you through each color in a short video, below. (Yes, you read that correctly! I made a video! More on that in a moment…) These are only some of the many colors offered by DecoArt, and you can see the entire color chart by clicking here.
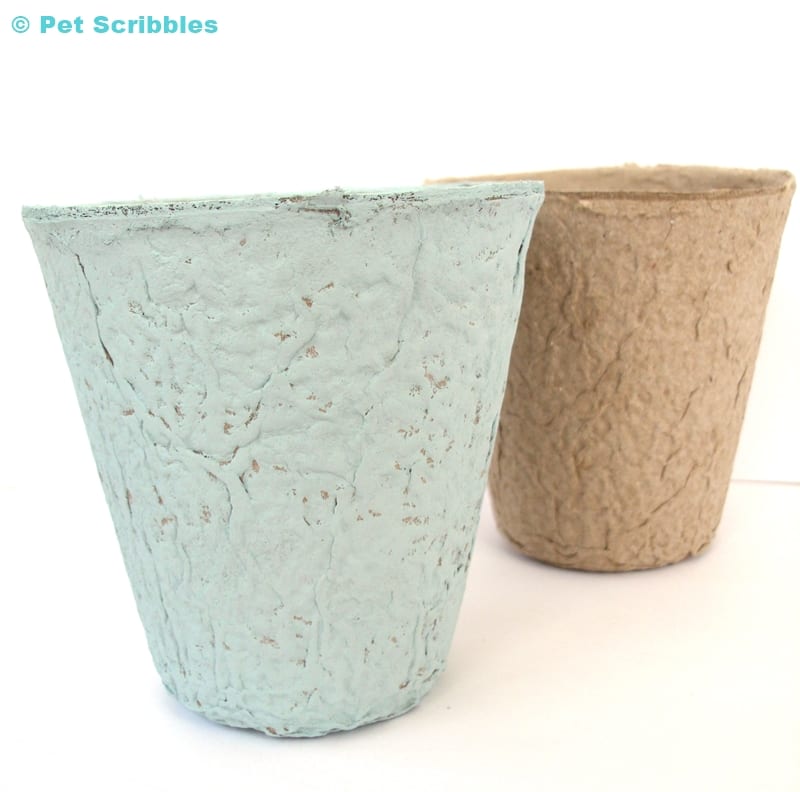
Peat Pots
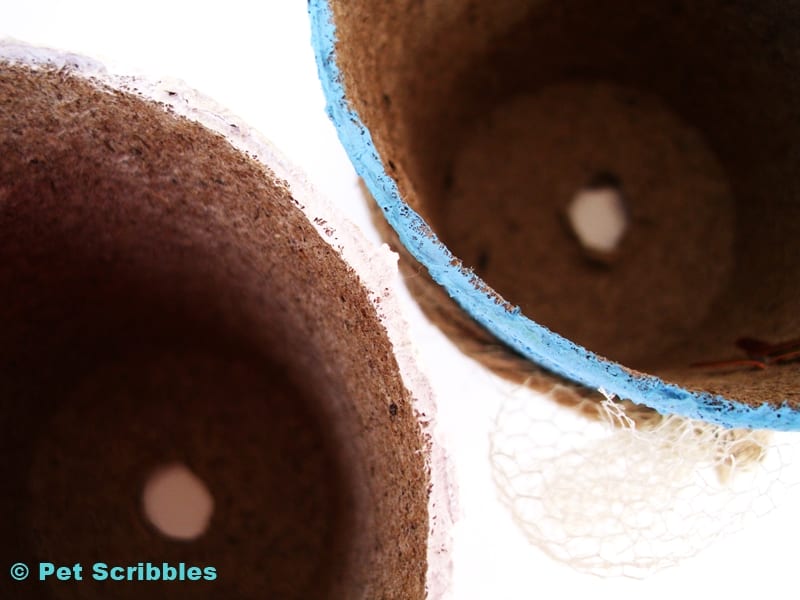
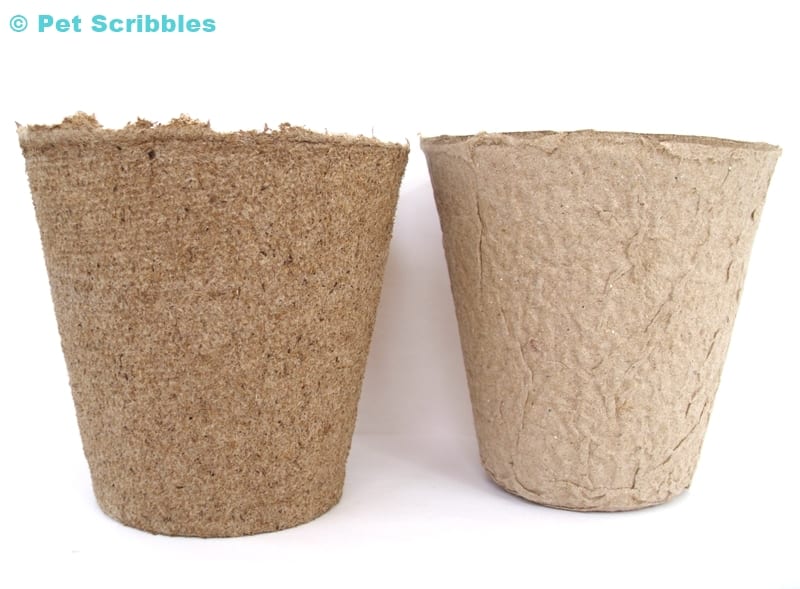 Peat pots are what gardeners use to either start plants from seed, or to help little seedlings get a good start before planting outdoors in the garden. That’s what I usually use them for, but lately I’ve been crafting with them too! The two types that I seem to keep running across are pictured above. (I don’t know if there’s more styles than these.) The one on the left has a look of burlap and a natural deckled edge. The one on the right has lots of ruffled nooks and crannies.
Where to Purchase Supplies
Peat Pots
I’ve found the best prices for peat pots on Amazon — especially because they have so many varieties and quantities to choose from. Click here to see all of your options.
Chalky Finish Paints
My suggestion is to hit your local craft stores for the best prices on DecoArt chalky finish paints. However, I’m including this Amazon link to see all of the color options easily.
Other Supplies
I used simple twine and secured them with mini Glue Dots. You can also use small dabs of a super strong adhesive too — like Aleene’s Turbo Tacky Glue — however I find using the glue dots to be easier because there’s no mess. Glue Dots also makes a product called Glue Lines, which could work even better for this project.
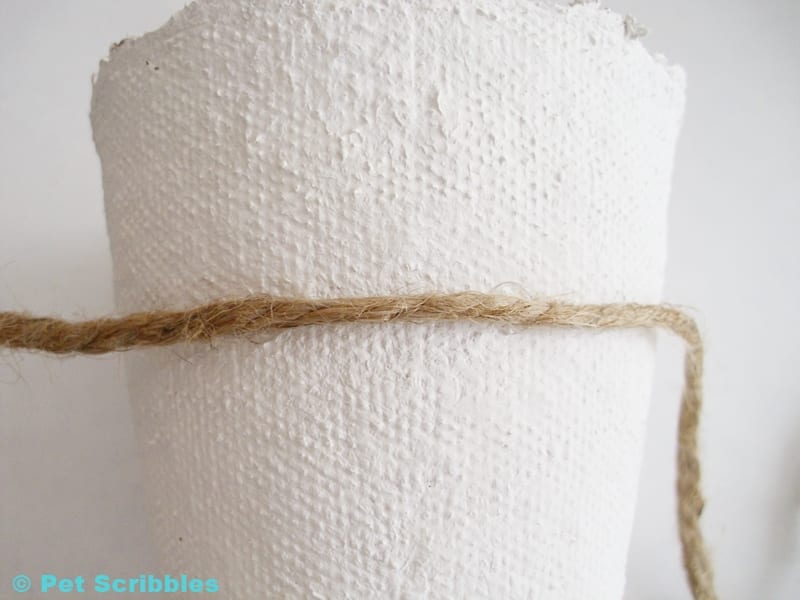
Attaching Twine to Peat Pots
In the video, I mention using little dots of glue to help secure the twine. Here’s what they look like:
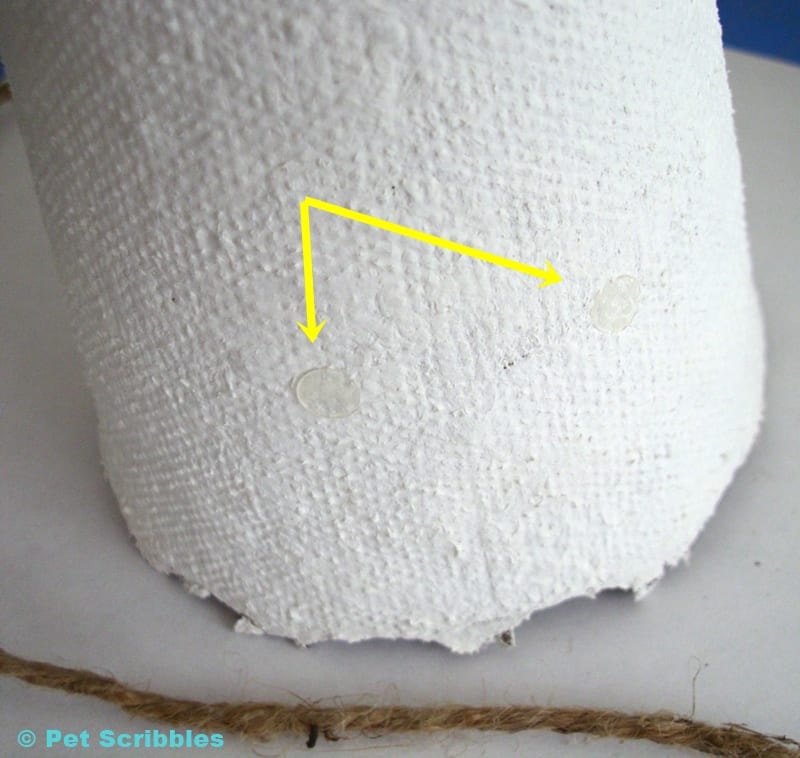
Once you put them on, then simply place the twine over the glue dots like so, before you begin to wrap the twine around your pot:
Chalky Paint Examples on Peat Pots
Vintage (color) Chalky Finish Paint on the peat pot with all the nooks and crannies:
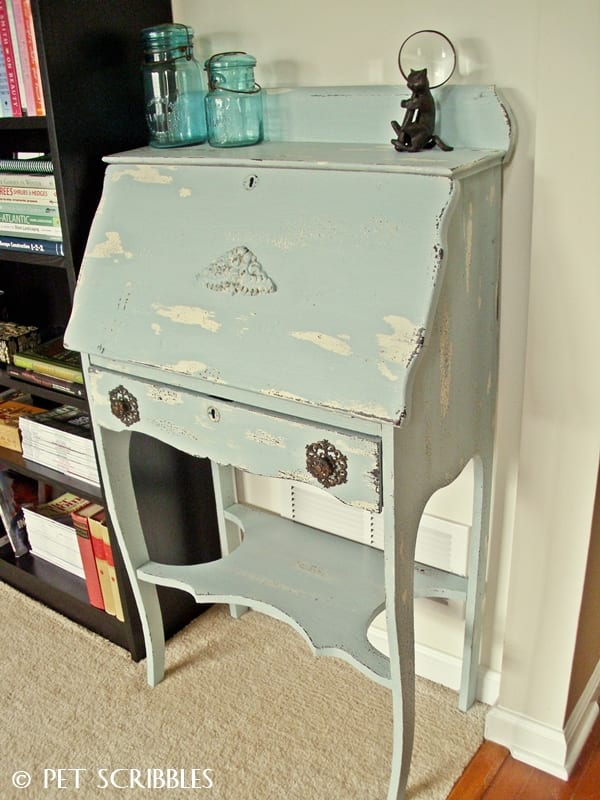
I am in love with the Vintage shade – so much so, I recently made over our antique secretary desk using Vintage as the final color.
Escape (color) Chalky Finish Paint on the peat pot with the burlap look:
And a detail shot of the painted edges, which I show you how to easily paint in the video:
Peat Pot Wedding Favors Video Tutorial
All of the details are in this YouTube video that I made, below. Yes – I made a video! My first one, so I hope you’ll stop by and watch – and maybe even “like” the video or subscribe to my YouTube Channel!
Before I share the video link, don’t forget to scroll down this page to see several pictures of the peat pot wedding favors that I discuss in the video.
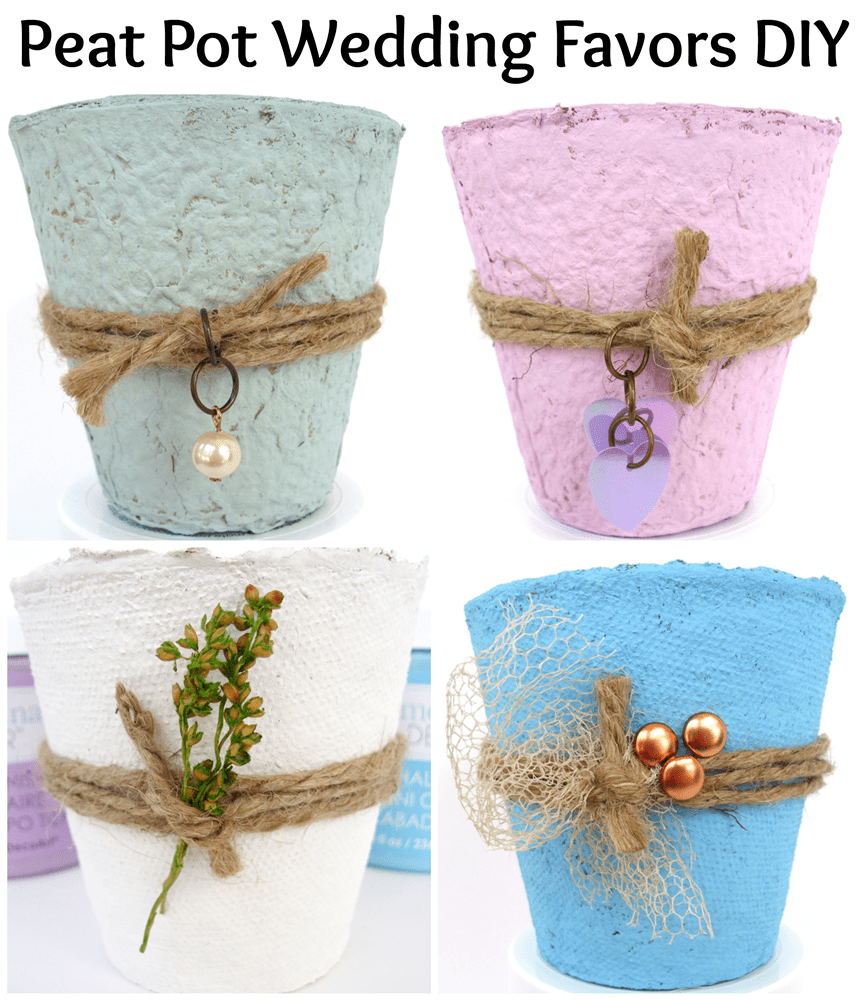
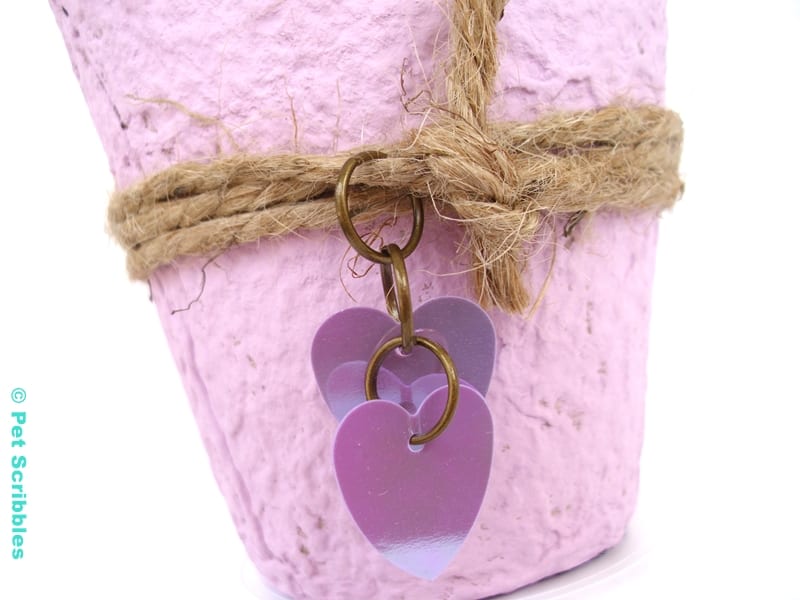
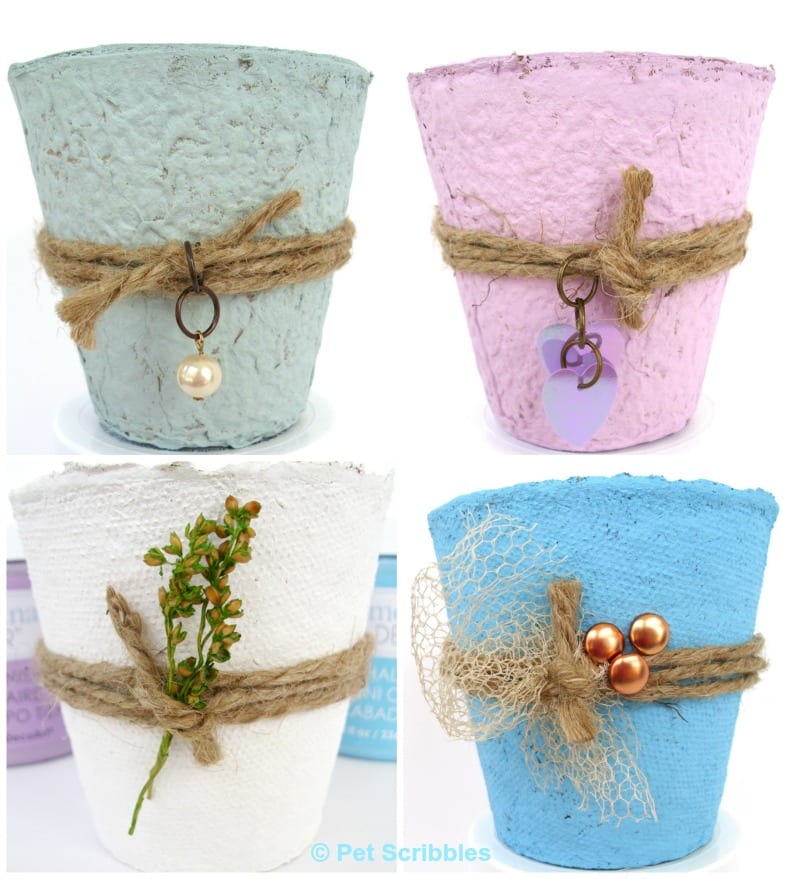
Lavender Peat Pot Wedding Favor:
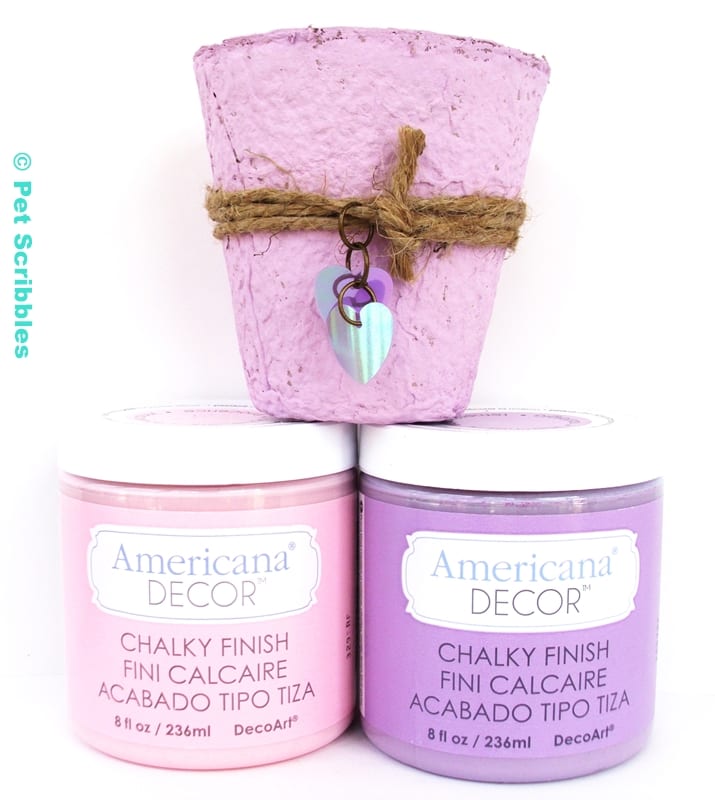
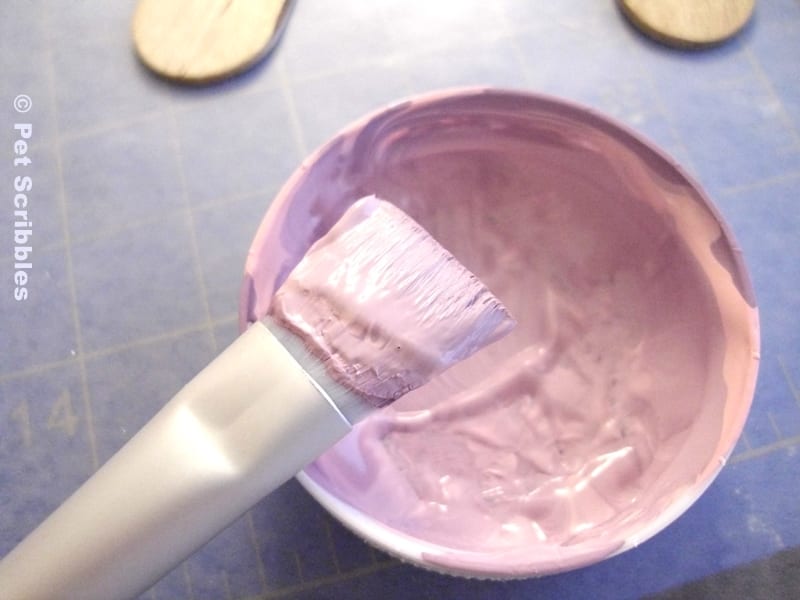
I mixed together two Chalky Finish paint colors – Innocence and Remembrance – to get this lavender shade:
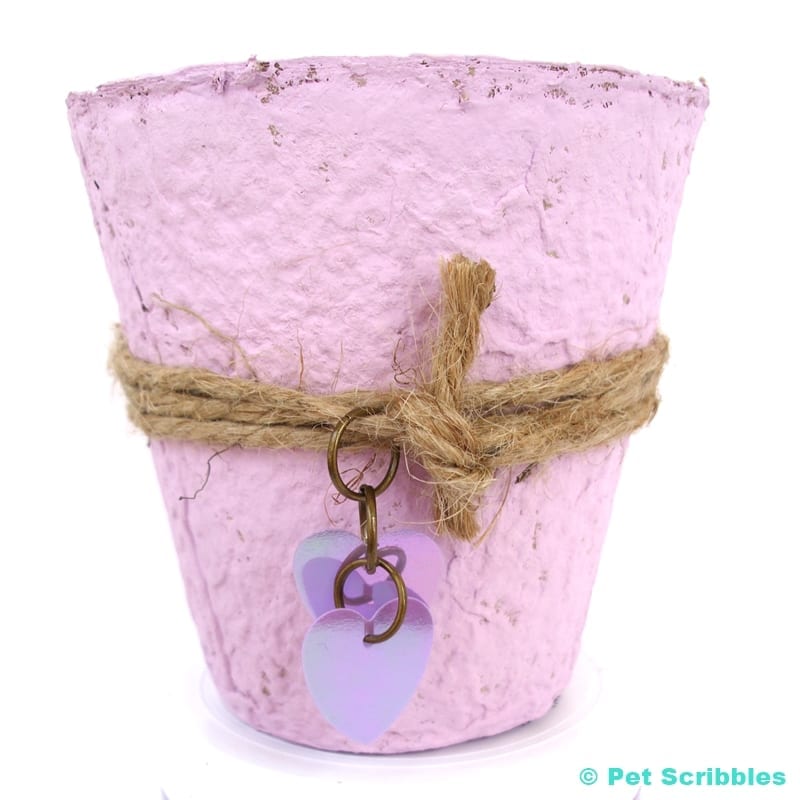
Detail of two heart sequins attached with three jump rings onto the twine:
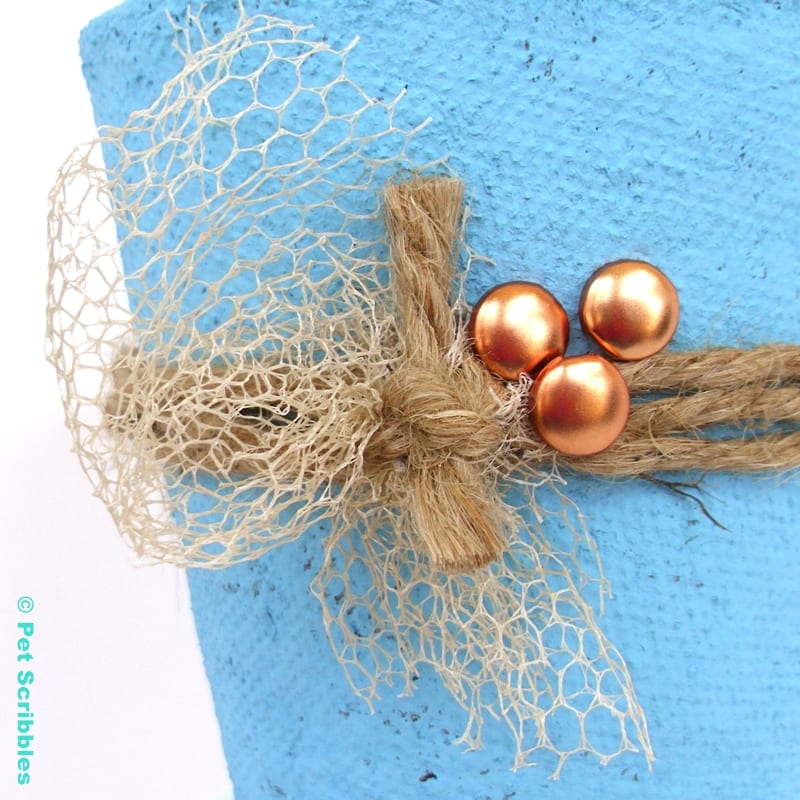
Escape (color) Peat Pot Wedding Favor:
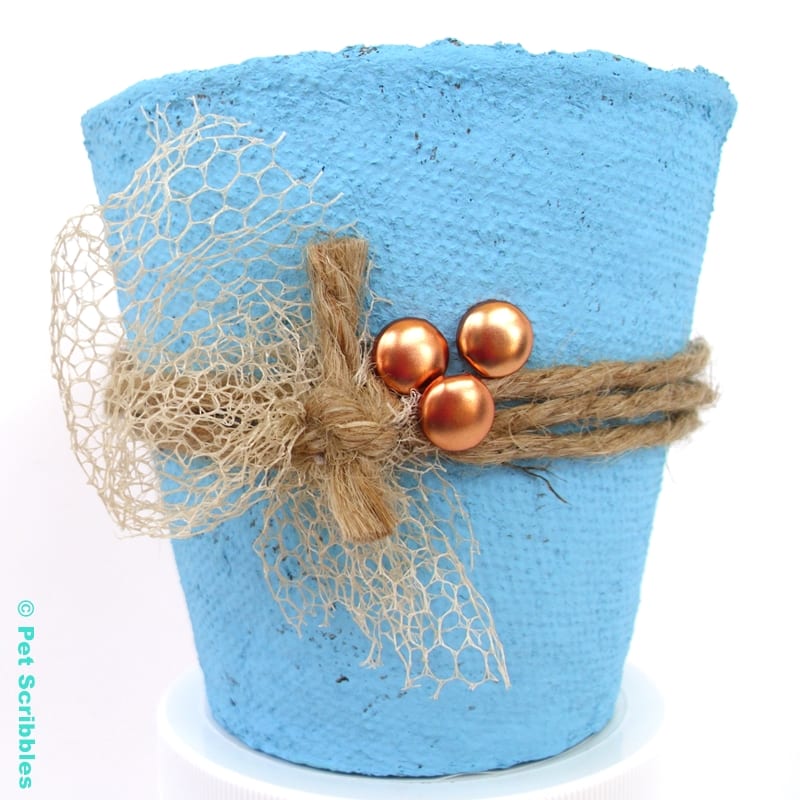
Detail of vintage netting and copper brads with twine:
White Peat Pot Wedding Favor:

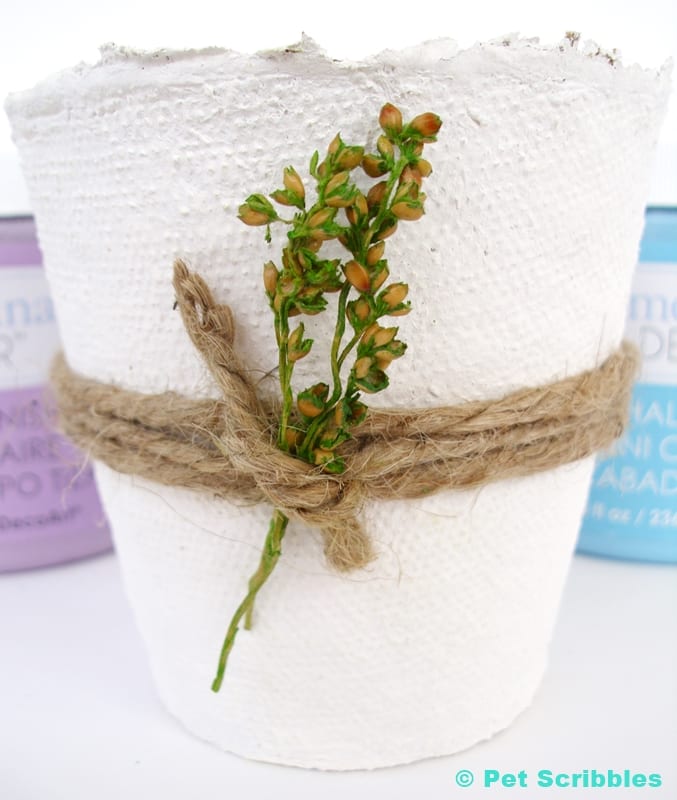
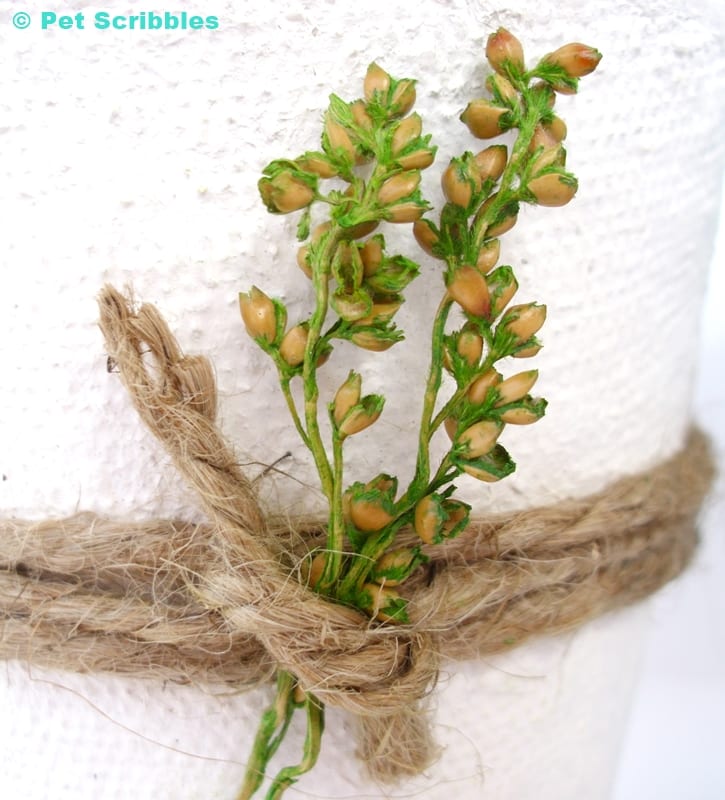
Detail of tiny dried flower sprig with twine:
Vintage (color) Peat Pot Wedding Favor:

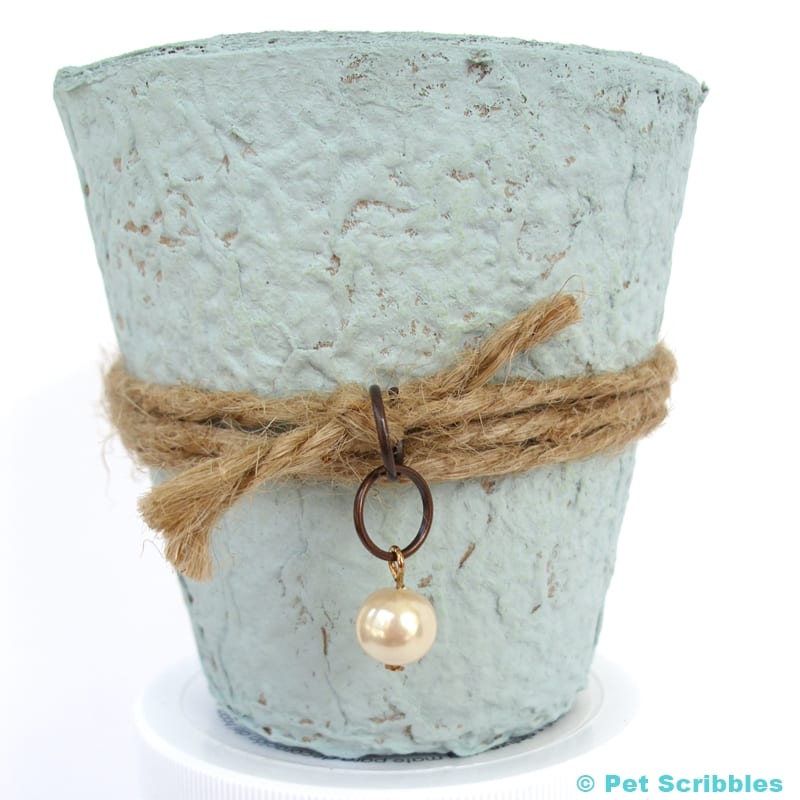
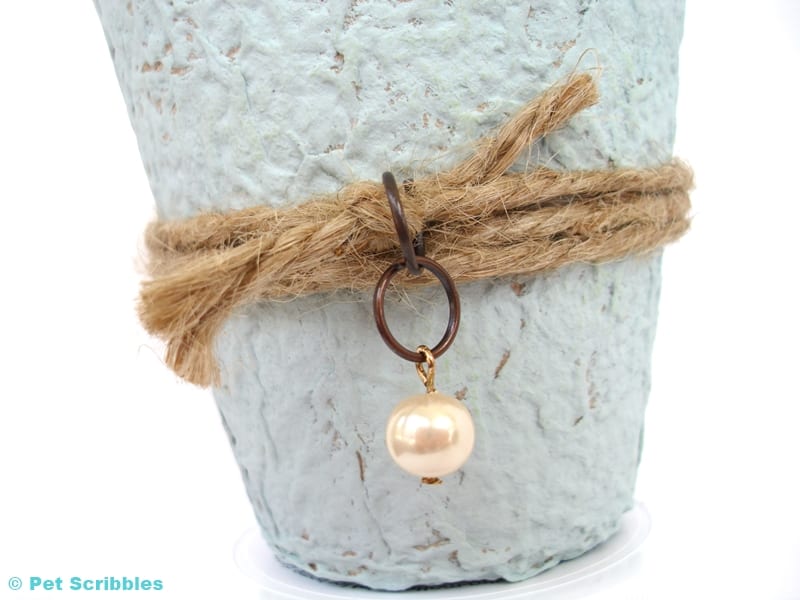
Detail of pearl embellishment attached with two jump rings onto the twine:
I hope I’ve provided you with some creative ideas to design your own wedding favors!
And if you have any questions after watching my video and viewing these pictures, please leave them in the comments.
Happy crafting!
Very sweet Laura.
Thank you so much Kerryanne!
So, I ended up making these pots for our wedding favors and they look great!! Our one problem, is what to put in them? I originally thought that I would plant cute little annuals in them, but that is turning out not to work well, because I am worried about how to keep them well watered during the day of the wedding. Any other thoughts on what I can put in there?
I agree about not wanting to worry about watering them. If I was doing this for my wedding — and I wish I had when we got married 8 years ago — I would put faux succulents in each painted pot. Because the pots are lightweight, I’d probably put a rock in the bottom of each to weigh them down. (Not sure if you’re wedding is outdoors, but if it is, you don’t want anything blowing away!) Then a small piece of floral foam, stick it into the pot. Stick a faux succulent in it, maybe surrounded by some moss. You can find the materials for this at major craft stores like Michael’s or AC Moore, or online. You could also choose small faux silk flowers, instead of the succulents — perhaps putting just a few stems in each little pot, surrounded by the moss. If you don’t want to spend any more time on your favors — which I can totally relate to, as we were still working on our favors the night before our wedding with some of our friends — you could use some lace or netting and fill up the pots with candy, tie it with a pretty ribbon. Don’t even worry about making a pretty bow, just tie the ribbon in a knot and cut the ends so that all pots have ribbons of a similar length. (Trust me – bows are overrated when you have so many other wedding details to do!) Best of luck and I’d love to see some pictures too! 🙂
Laura – these are fantastic! I love them. Gotta get me some peat pots!!!
Thanks Carolyn! 🙂 Yes, YOU will create some awesome peat pots, so I can’t wait to see what you come up with!
LOVE that chalky finish paint! These look great!!
Thank you Cheryl! Yes, I’m in total love as well with Chalky Finish paint! 🙂
Such a great idea, especially for an outdoor wedding!
Thanks Rachel! I love outdoor weddings – that’s what ours was! Great idea!
These are really cute! what a great idea. I love the white paint!
Thanks Virginia! Yes, the white color (Everlasting) is such a warm and pretty white! I think it’s the perfect wedding color! 🙂
These look great! Love how the finish turns out! : )
Thanks so much Ashley!
How cute and what a great DIY idea for a wedding, I’m married so I am thinking put a plant in it and make it a great teachers gift!
What a great idea for a teacher’s gift, Kelley! Thanks! 🙂
These are so pretty, Laura! I love them and your video rawks!
Thanks Mary Beth! It was my very first time doing a video tutorial – and as a live Google+ Hangout no less, so I really appreciate your compliment!
Wow, brave lady that does videos, I am impressed and terrified of doing one myself! 😀 Even more so now, seeing how natural and smooth you are!
LOL Brave and terrified went hand-in-hand during the week leading up to this video, Laurie! That first “Hi, I’m Laura…” was hard, but once I got going, it became easier. 🙂 You’re next! LOL
Painted peat pots are my favorite container for small gifts. Yours are quite lovely. I like the twine idea.
Thanks so much Donna! I think they are becoming my favorite for small gifts too! There’s so much you can do with them! (Just hope I keep enough around to actually use for gardening! LOL)