Pet Scribbles

A crafty blog with a vintage vibe. And cats.

  • Home
  • About
    • About Me
    • Why “Pet Scribbles”
    • Featured On
    • Work with Me! Hire Me!
    • Contact
    • Copyright
    • Privacy Policy
  • Crafts & DIY
    • Winter
    • Spring
    • Summer
    • Fall
  • Holidays
    • Valentine’s Day
    • St. Patrick’s Day
    • Easter
    • Mother’s Day
    • Father’s Day
    • Patriotic
    • Halloween
    • Thanksgiving
    • Christmas and New Year’s Eve
  • Gardening
    • My Favorite Plants
    • Easy Pruning Tips
  • Life
    • Cats
    • Personal
    • Books
    • Blogging
    • Beauty
    • Food

Chippy Paint Antique Secretary Desk

April 1, 2014 By Laura

Share17
Tweet
Pin4.8K
Yum
4.8K Shares
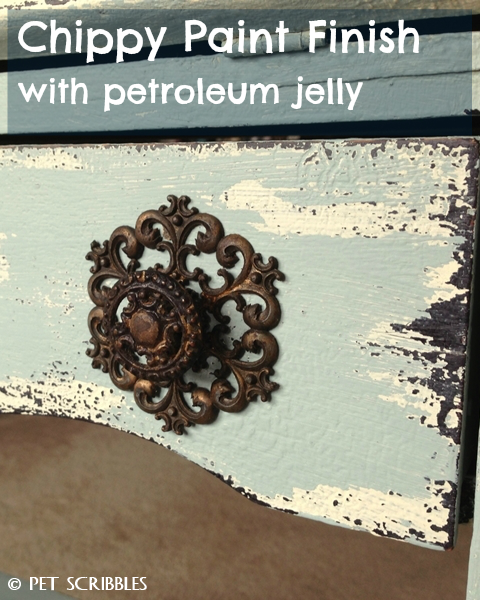
Chippy Paint Antique Secretary Desk using petroleum jelly and chalky finish paints

The paints mentioned in this post were provided to me by DecoArt. All opinions and projects created – as always – are 100% my own!

I recently shared my Chippy Paint Cigar Box Tutorial over on Deja Vue Designs where I’m the Creative Contributor. The chippy paint effect was done using candle wax as the paint resist. But that’s only one of many ways you can achieve the popular chippy paint look. Another way is using petroleum jelly. Yes, there’s so many uses for petroleum jelly and now you can add distressing painted furniture to its list of attributes!

I love shopping for antique and vintage furniture, especially pieces that are in sad shape and need lots of love. Last Fall, at an awesome antiques store just south of us, this antique secretary desk cried out to me for help. I instantly knew this would be my first Chalky Finish paint makeover on a large scale!

Behold . . . 

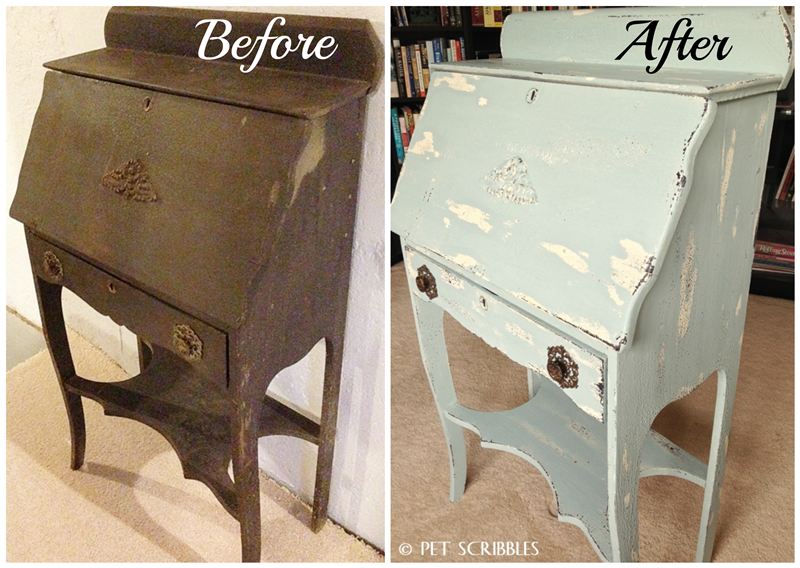
My Chippy Paint Antique Secretary Desk!

Chippy Paint Antique Secretary Desk before and after

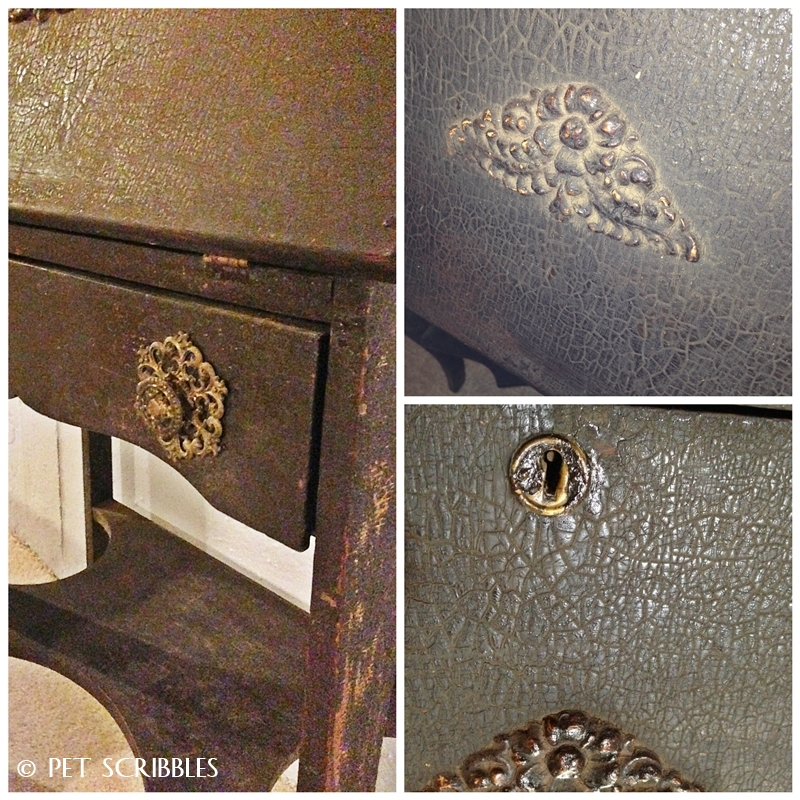
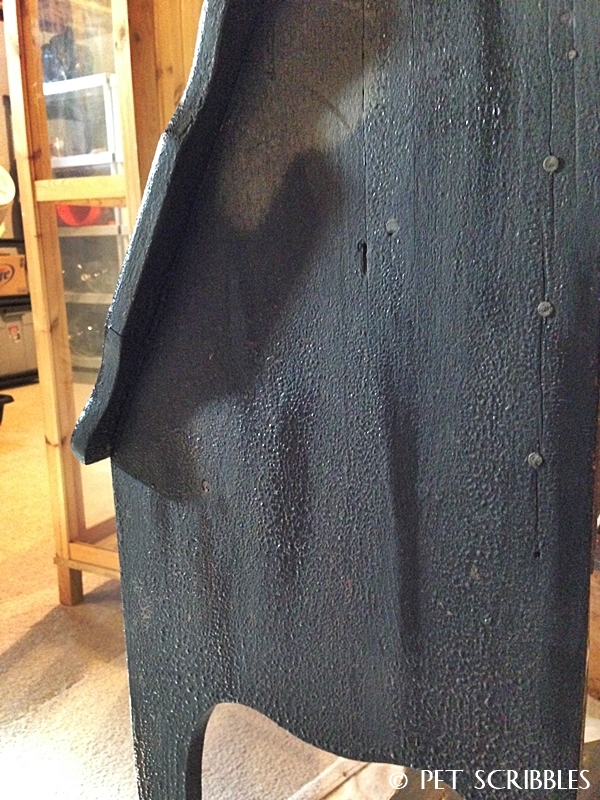
The desk is early 1900s, and I could see the beautiful lines beyond its sad outward appearance. The vendor just thought I was crazy, I think because I was passing up similar antiques in much better condition. I mean, just look at how bad this piece was. There were layers of paint and other things that I’m not sure I even want to know about!

Antique Secretary Desk in really sad shape...
Doesn’t it look like a crackle finish? Or maybe cracked leather? I had big plans for this, and I knew it would fit perfectly in our new library room. (Actually, I didn’t know because I never remember to take a tape measure with me, but I lucked out and you’ll see later how well it fits!)
Chippy paint faux finish using petroleum jelly…
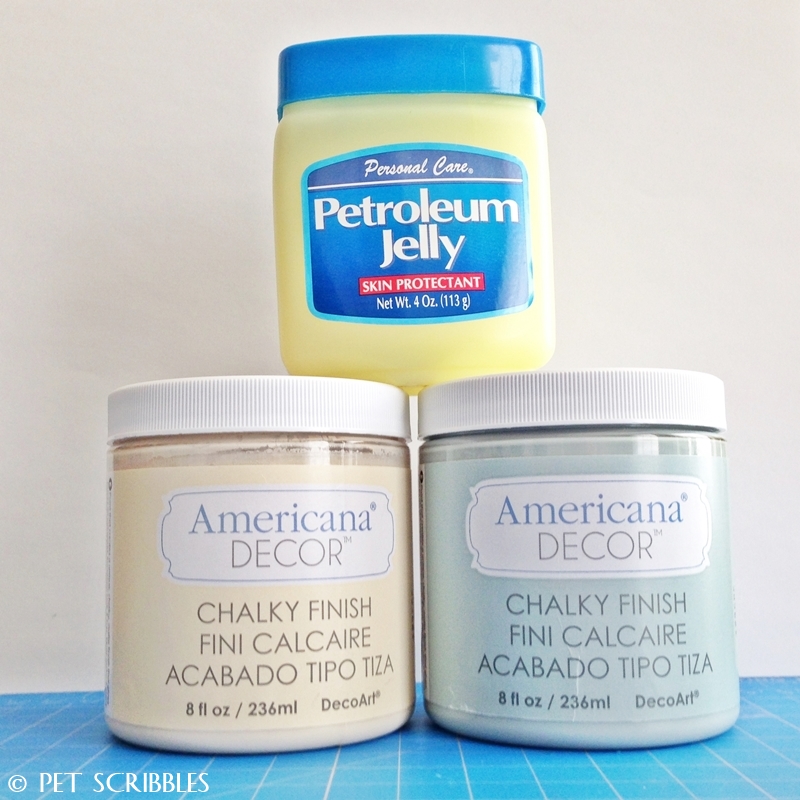
The main supplies needed for this are Americana Decor Chalky Finish paints and a small tub of petroleum jelly.
Petroleum jelly acts as a resist, so any paint that is applied over the petroleum jelly will not adhere to the frame, thus showing off the base color(s) instead. This gives you the time-worn, chippy paint finish.
Create a chippy paint finish on furniture easily with chalky finish paints and petroleum jelly!

SUPPLIES:

Americana Decor Chalky Finish Paint
     Whisper (ADC03)  (a pretty ivory shade)
     Vintage (ADC17)   (a soft, pale blue-green shade – my favorite color in this line!)
Americana Decor Creme Wax
     Clear (ADM01)
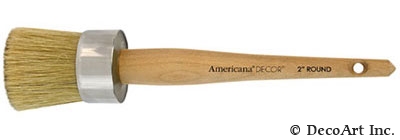
DecoArt Americana Decor 2″ Round Waxing Brush
     (ADB01)
Other Supplies:
 
1″ chip brush
2″ chip brush
Palette or plastic plate
Water container
Petroleum jelly
Sanding block
White rags or old t-shirts
Paper towels
NOTE: The antique secretary desk was already painted black. If you want the same look, paint your desk in Carbon Chalky Finish (ADC29) before proceeding.
INSTRUCTIONS:

Step One: With your finger, spread petroleum jelly over areas you’d like the base color (Carbon) to show through.
Petroleum jelly applied to furniture before the first coat of paint goes on.
Step Two: Using a 2” chip brush, and the 1” chip brush for the smaller areas, coat entire surface with Whisper. Let dry.
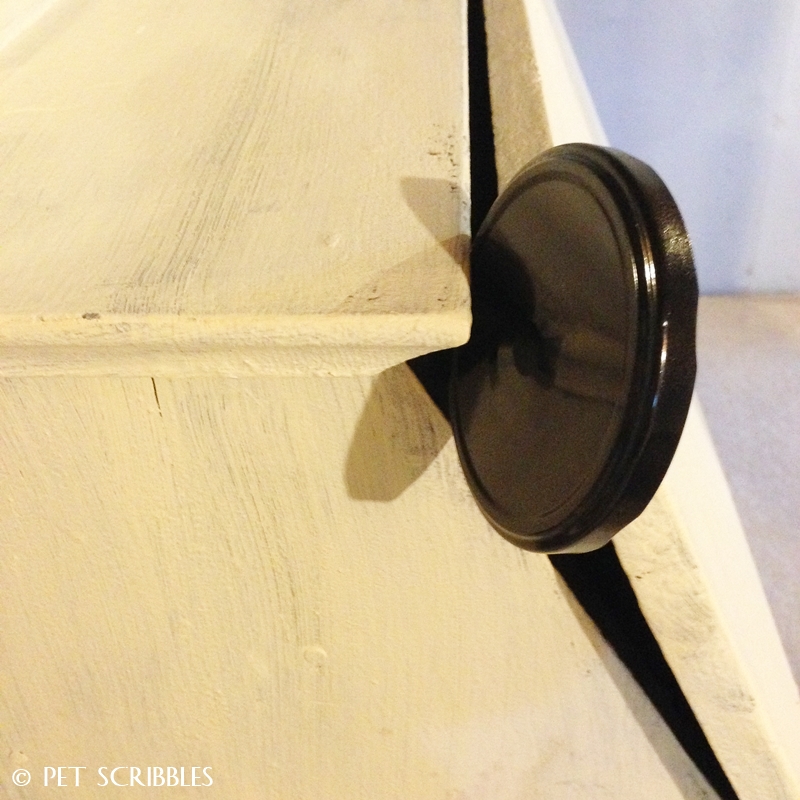
Jar lids come in handy when painting furniture and needing to prop something open.
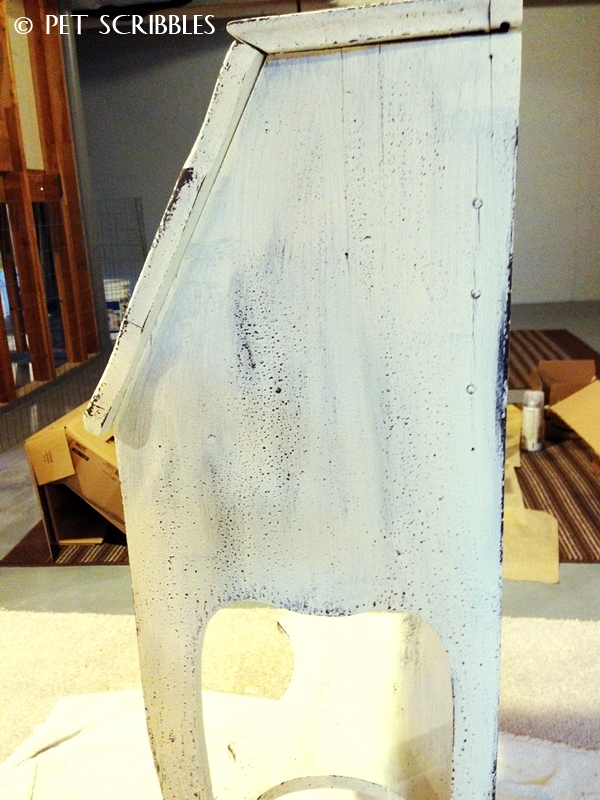
Step Three: Using a sanding block, gently rub and sand over areas where you placed petroleum jelly. (It will appear darker in these areas.) Wipe dust away with a white rag.
Antique secretary desk in early stages of painting and distressing...
(My husband’s expression was priceless when he came upon the desk looking like this!)
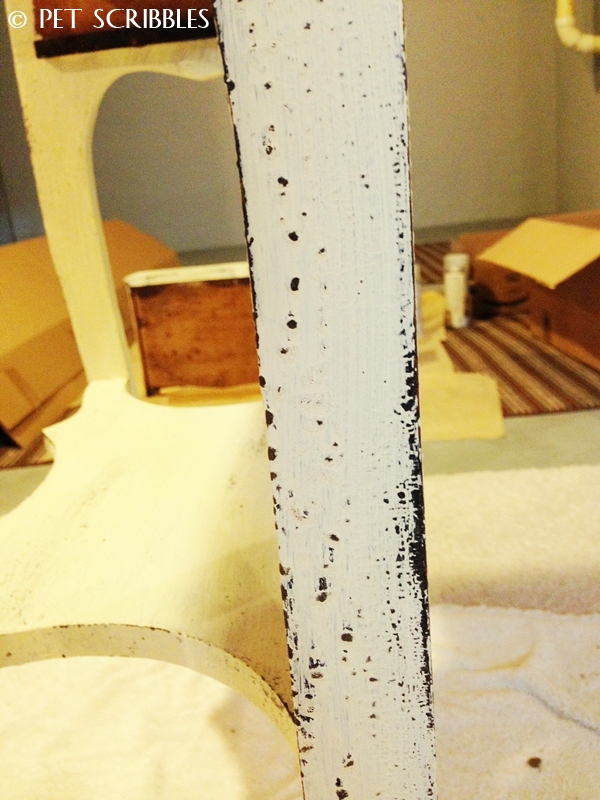
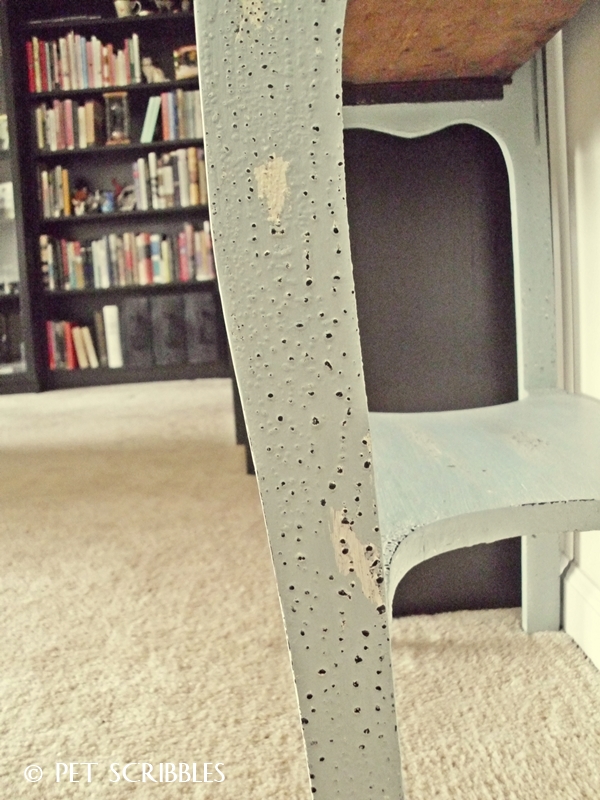
Detail shot of antique secretary desk leg, in early stages of distressing...
Step Four: With your finger, spread petroleum jelly over areas you’d like the two base colors (Carbon and Whisper) to show through.

Step Five: Using the 2” chip brush, and a 1” chip brush for the smaller areas, coat entire surface with Vintage. Let dry.
You can see the petroleum jelly (darker shades) underneath the top layer of paint before sanding.
Step Six: Using the sanding block, gently rub and sand over areas where you placed petroleum jelly. (It will appear darker in these areas, as shown in the picture above.) Wipe dust away with a white rag.
Step Seven: Using the waxing brush, apply Clear Wax over entire surface. Let wax dry and then buff gently with a soft white rag.
DecoArt Americana Decor 2" Round Waxing Brush

This waxing brush makes applying the wax very easy. I love this brush!

HELPFUL HINTS:
  • Let paint dry between coats.
  • Don’t apply petroleum jelly too thin, but also don’t use large chunks of it. The ideal amount is somewhere in between.
  • When painting over petroleum jelly, clean your brush often to avoid spreading petroleum jelly to other areas.
  • DecoArt has several technique how-to videos that you can watch. Learn and get inspired!
  • Paint can always be painted over! Don’t worry about mistakes. Enjoy the process!
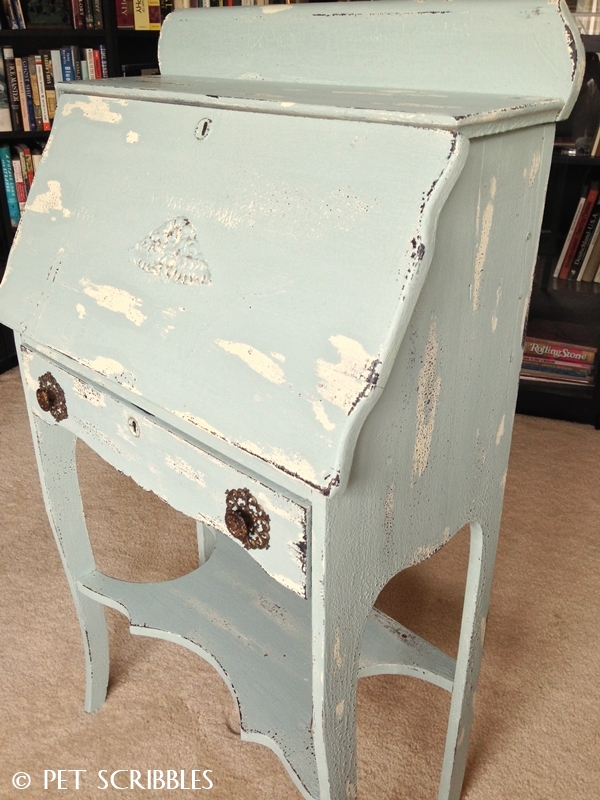
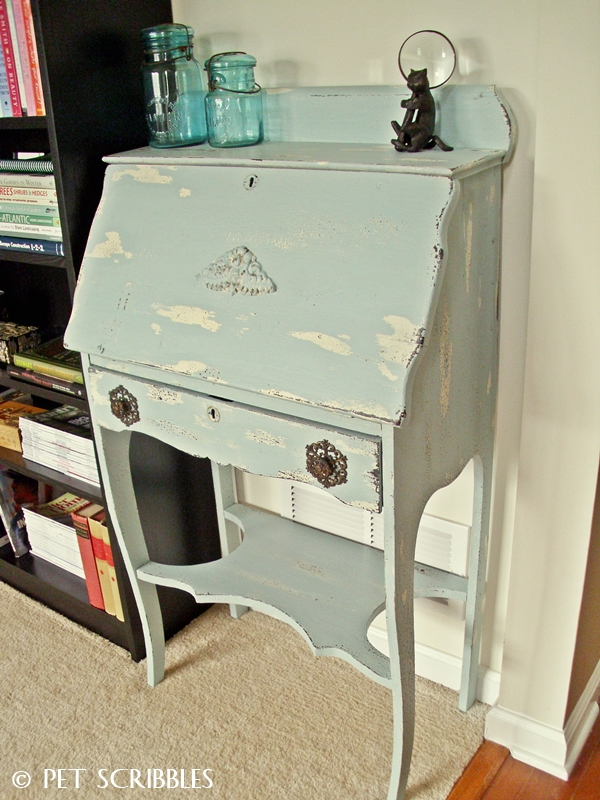
Ta-Da! The finished piece!
Chippy Paint Antique Secretary Desk


Chippy Paint Antique Secretary Desk - front view


Having this desk in a pretty sad condition to start with, i.e. truly in distress rather than distressed, made for really cool results, like on the legs of the desk…
Chippy Paint Antique Secretary Desk leg
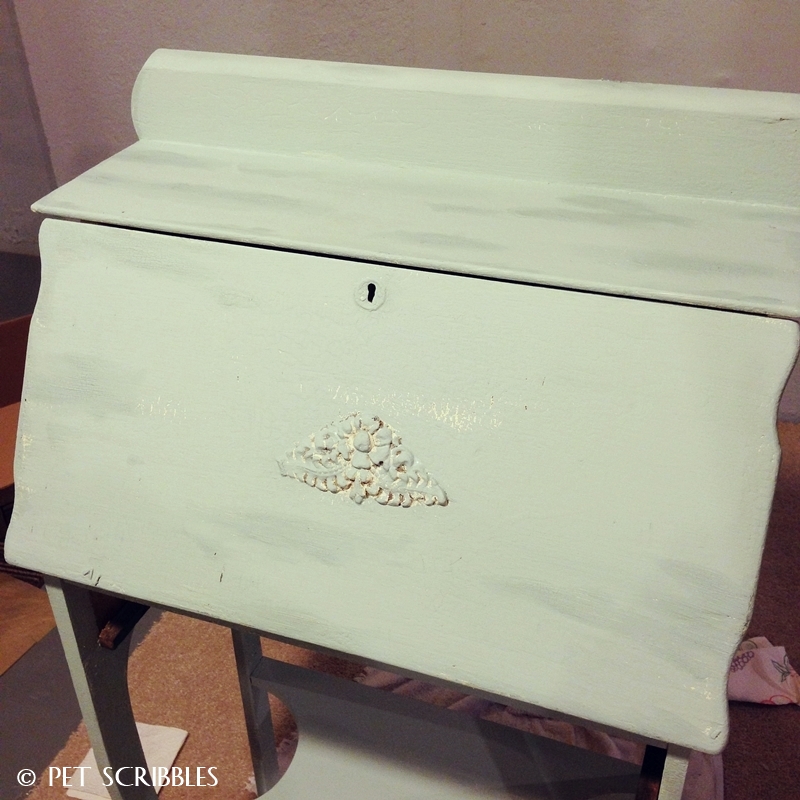
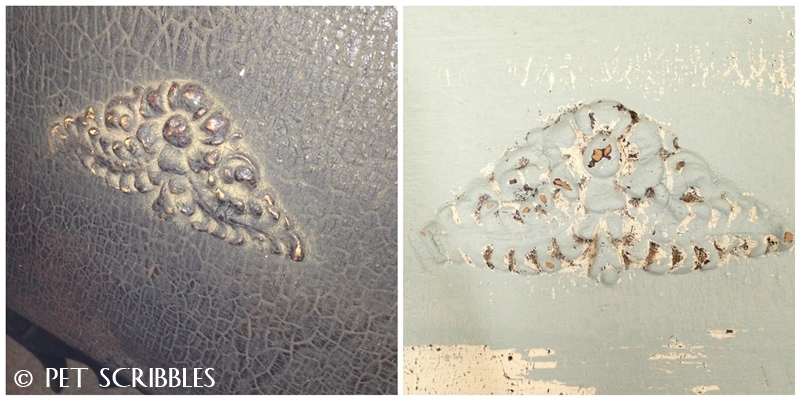
Here’s a before-and-after look at the medallion on the front of the desk…
Chippy Paint Antique Secretary Desk medallion before and after

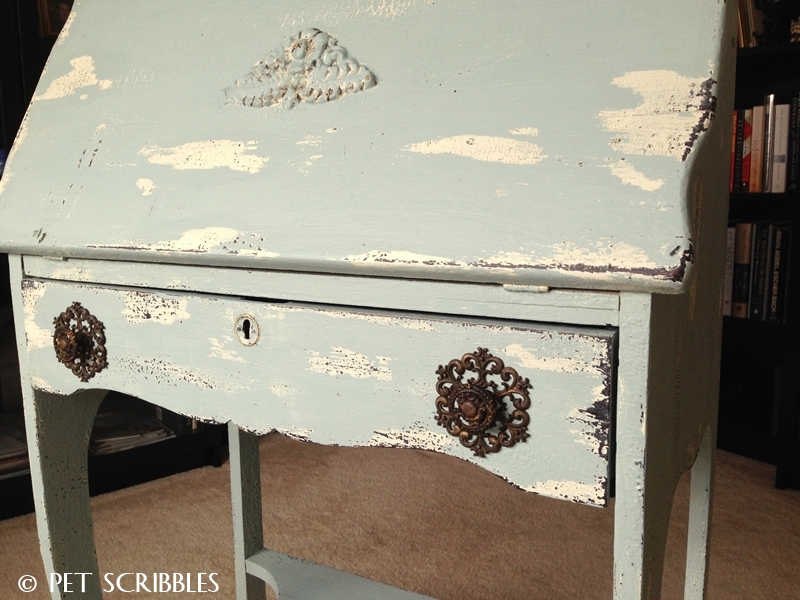
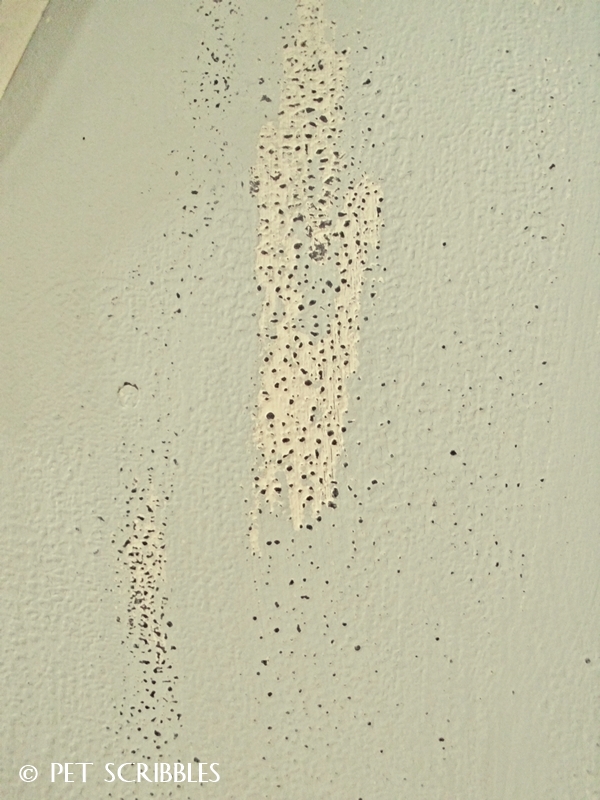
Yes, I’m a DecoArt Blogger, but I choose to work with DecoArt products because I honestly love how good they are. Chalky Finish paints produce fabulous results! Here’s a zoomed in shot of the desk’s side:

Chippy Paint Antique Secretary Desk - zoomed in distressed paint finish

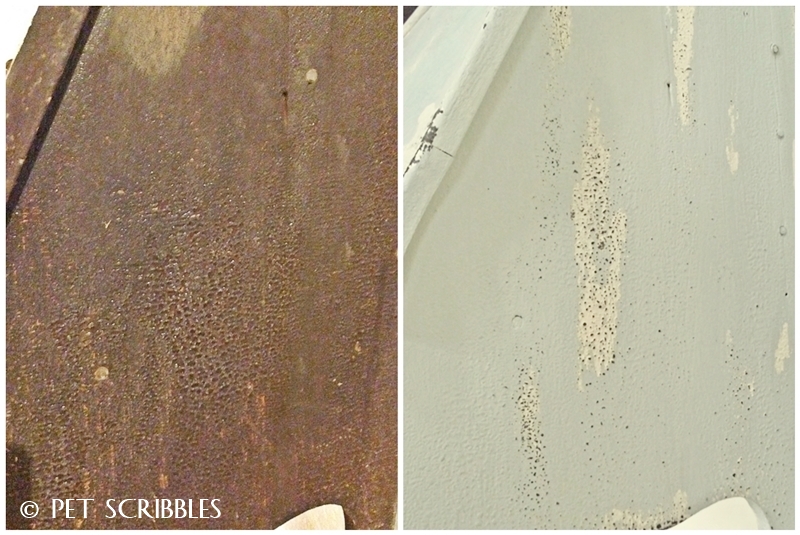
There are many types of similar paints out there, but the Chalky Finish paints are affordable, made in the USA, very low odor, and water-based so cleaning up is a breeze. The paints glide on smoothly and are much easier to distress than other acrylic paints. (And if you’re a reader of my blog, you’ve seen me try many paints!) 

Chippy Paint Antique Secretary Desk - side view before and after

And as I mentioned earlier, this secretary desk fits perfectly in our library! We installed IKEA bookcases along two walls – yes, my husband and I are avid readers – and I wanted something to make the room feel less modern.
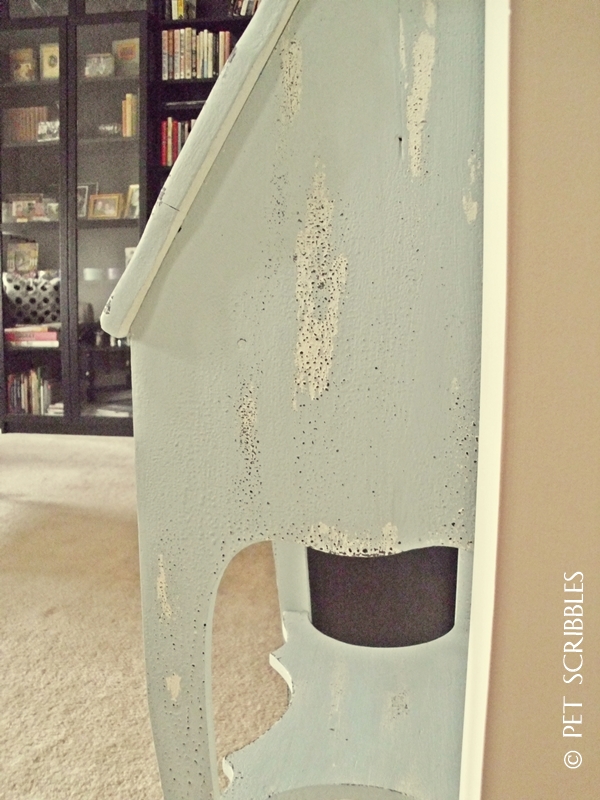
Chippy Paint Antique Secretary Desk - side view in library room
The desk goes nicely with our unique taupe-brown wall color in our entryway (right).
The brown-black shade of the modern bookcases is nicely toned down by the playful chippy painted finish of the antique desk. And with the original black color peeking through, it ties the different looks together!
I breathed a huge sigh of relief when my husband brought the finished desk up from the basement and it fit with just a few inches to spare!
Chippy Paint Antique Secretary Desk makeover using Chalky Finish paints and petroleum jelly!

You can view the complete line of Chalky Finish paints on DecoArt’s website. And you can see and purchase these paints for yourself at Home Depot stores as well as HomeDepot.com!

Stay tuned, because I’m just beginning to redo our kitchen table and chairs using the Chalky Finish paints, and I can’t wait for you to see!

Happy painting!

~Laura


More from my site

  • Chippy Paint Altered Cigar BoxChippy Paint Altered Cigar Box
  • How to: a chippy paint finish that always looks authentic!How to: a chippy paint finish that always looks authentic!
  • Art Supply Caddy MakeoverArt Supply Caddy Makeover
  • How to make a colorful chippy paint look you’ll love!How to make a colorful chippy paint look you’ll love!
  • How to: Charming Rustic Dresser MakeoverHow to: Charming Rustic Dresser Makeover
  • How To Paint Brass Hardware To Look Like RustHow To Paint Brass Hardware To Look Like Rust
Share17
Tweet
Pin4.8K
Yum
4.8K Shares

Comments

  1. Pat C. says

    April 2, 2014 at 8:19 pm

    Wow! What a beautiful desk, Laura! I can see why you fell in love with it right in the store. Look at the ornate filigree work around the drawer pulls! I am SO glad that you didn’t paint over them, because they look stunning against the background of the light-colored paint.

    Despite its original sad-looking appearance, the desk looks as if it is actually in very good condition for its age. What fun you must have had as you worked on it and began to appreciate its fine lines (and curves – hehe!). It looks just perfect all dressed up in its new home, where it will be much loved.♥ Congratulations, Laura!

    • Laura Kuhlmann says

      April 3, 2014 at 2:41 am

      Oh thank you SO much Pat! I was thrilled with how the desk looked – you’re right – even at the store. The drawer pulls were so pretty, and I’m also glad I didn’t paint over them: they were the only part of the desk still in decent condition! 🙂

  2. malia says

    April 3, 2014 at 1:57 am

    Laura this desk is a masterpiece! Seriously thanks for this– I am going to do a project myself and use your technique! Really stunning!

    • Laura Kuhlmann says

      April 3, 2014 at 2:43 am

      Thanks Malia, and I can’t wait to see what you paint because you have such creative ideas! 🙂

  3. Jacque n Matt Knowlton says

    April 3, 2014 at 2:59 am

    Very cool! I love the effect!

    • Laura Kuhlmann says

      April 3, 2014 at 3:28 am

      Thanks Jacque! It was fun to do!

  4. Randi~Dukes and Duchesses says

    April 3, 2014 at 4:59 pm

    I love the finish on that … such a great natural distressed look!

    • Laura Kuhlmann says

      April 4, 2014 at 2:10 am

      Thanks so much Randi! 🙂

  5. Courtenay@Creek Line House says

    April 3, 2014 at 6:47 pm

    What a cool technique! I had no idea! My mind is swirling with the possibilities right now. 🙂

    • Laura Kuhlmann says

      April 7, 2014 at 12:49 am

      Thanks Courtenay! Let me know if you try these paints, or this technique! 🙂

  6. Johnnie says

    April 4, 2014 at 12:28 am

    Laura, GREAT job!! Love it. Kinda want to steal it.

    • Laura Kuhlmann says

      April 7, 2014 at 12:50 am

      Thanks Johnnie! I’m definitely keeping this one! 😉

  7. Michele {The Scrap Shoppe} says

    April 4, 2014 at 2:33 pm

    Beautiful makeover, Laura! And great tips, too. I’m itching to try out some Chalky Finish!

    • Laura Kuhlmann says

      April 7, 2014 at 12:51 am

      Thank you Michele! You’ll LOVE this paint! 🙂

  8. margaret says

    April 6, 2014 at 1:43 am

    Did you wash the desk first? It looked like it needed cleaned.

    • Laura Kuhlmann says

      April 7, 2014 at 12:56 am

      Thanks for your question Margaret! I wiped the desk down with a damp white cloth to remove dust and surface stains. The “before” pictures were taken after the desk was wiped down. It was in really bad condition, to say the least!

  9. Heather SettingforFour says

    April 6, 2014 at 5:19 pm

    Gorgeous! I love the distressed finish and the colors you used!

    • Laura Kuhlmann says

      April 7, 2014 at 12:57 am

      Thank you Heather! 🙂

  10. Betsy@My Salvaged Treasures says

    August 12, 2014 at 11:09 pm

    What an amazing save! This tired old desk had such great bones and you turned it into something beautiful again. Love the color and the tutorial. Thanks so much for sharing at Vintage Inspiration Party.

    • Laura Kuhlmann says

      August 13, 2014 at 1:14 am

      Thanks so much Betsy! The bones of this desk are precisely what caught my eye! Glad to join up with your new linky party! 🙂

  11. Darrielle Tennenbaum says

    August 13, 2014 at 3:00 pm

    Gorgeous! I love the chippy finish and thanks for the tip

    • Laura Kuhlmann says

      August 27, 2014 at 4:15 am

      Thanks so much Darrielle! Isn’t chippy-painted furniture the best? (I know you agree, as I’ve seen your gorgeous work on your blog!)

Trackbacks

  1. Library Room Makeover with IKEA Bookcases says:
    November 27, 2014 at 1:35 am

    […] I added an antique secretary desk to the room as well. This desk was in sad shape when I bought it. I gave it a makeover using DecoArt’s Chalky Finish Paints. You can see the complete tutorial here: Chippy Paint Antique Secretary Desk […]

  2. Top Ten Craft and DIY Posts for 2014 by Pet Scribbles says:
    December 31, 2014 at 3:51 pm

    […] Chippy Paint Antique Secretary Desk […]

Pet Scribbles is where I share my craft tutorials, home and garden projects, and occasional stories about my cats. I can never have enough pretty craft paints to work with, and I love to make things look time-worn with distressing and aging. Gardening is my therapy!

  • Email
  • Facebook
  • Google+
  • Instagram
  • Pinterest
  • RSS
  • Twitter
  • YouTube

Subscribe to our Newsletter

Pet Scribbles is a participant in the Amazon Services LLC Associates Program, an affiliate advertising program designed to provide a means for sites to earn advertising fees by advertising and linking to Amazon.com.

Archives

Looking for Something?

Categories

COPYRIGHT © PET SCRIBBLES LLC • PRIVACY POLICY