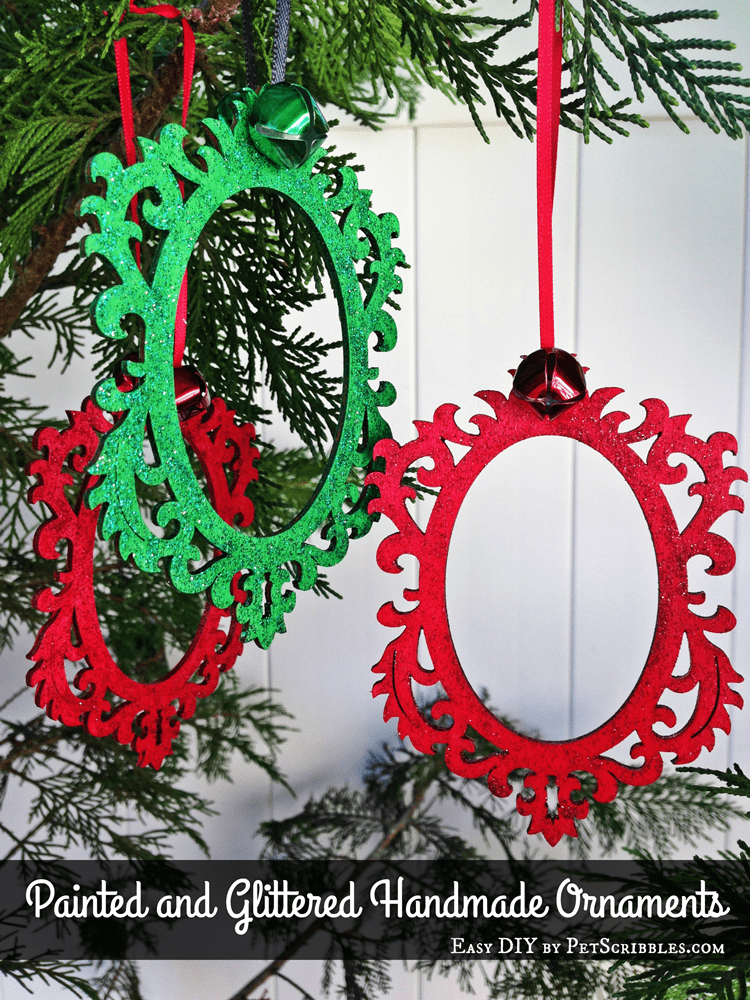
Today I’m sharing my easy DIY for Painted and Glittered Handmade Ornaments. Yes it’s only mid-October, but today it’s my turn as part of the 31 Days of Handmade Christmas Ornaments Blog Hop: an entire month featuring a new handmade DIY for you!
Yes, I’ll be returning to Halloween and Thanksgiving crafts and projects this week, but now is the perfect time to begin thinking about making handmade Christmas ornaments! And these days, especially with all that’s available at the craft stores, it’s easier than ever to create something pretty.
There is a complete list of the other handmade ornament tutorials at the bottom of this post.
Painted and Glittered Handmade Ornaments!
FTC Disclaimer: Some of the links in this post are affiliate links. I explain more here.
Supplies needed:
- Unfinished wood scroll ornaments – Michael’s
- Americana Multi-Surface Acrylic in Lipstick and Turf Green – DecoArt
- Craft Twinkles Glitter Paint in Christmas Red and Christmas Green – DecoArt
Heads up! If you want perfect, traditional Christmas colors for your glitter needs, these two shades are perfect! Guess that’s why they named them as such! - Recycled plastic lid for a palette
- Paint brushes
- Wax paper
- Twisty ties
- Thin ribbon to hang
- Jingle bells (2 per ornament)
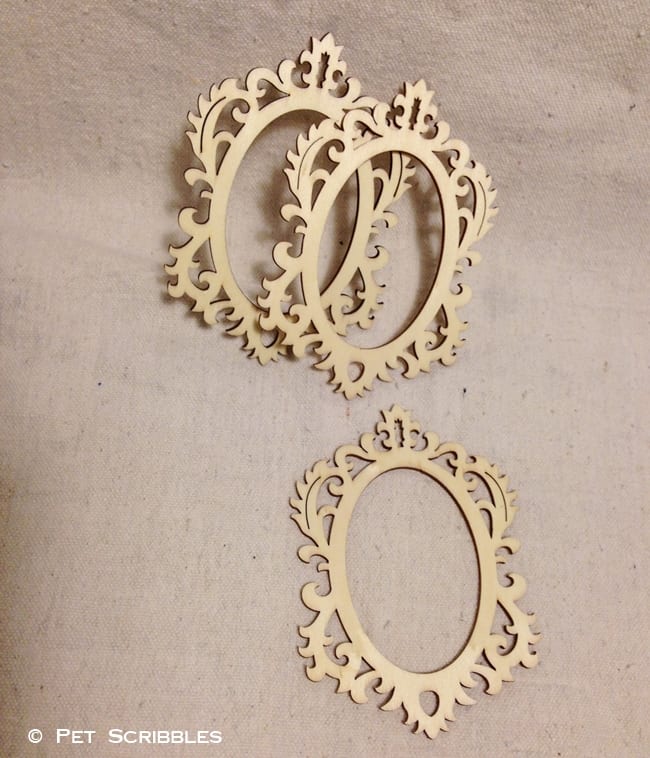
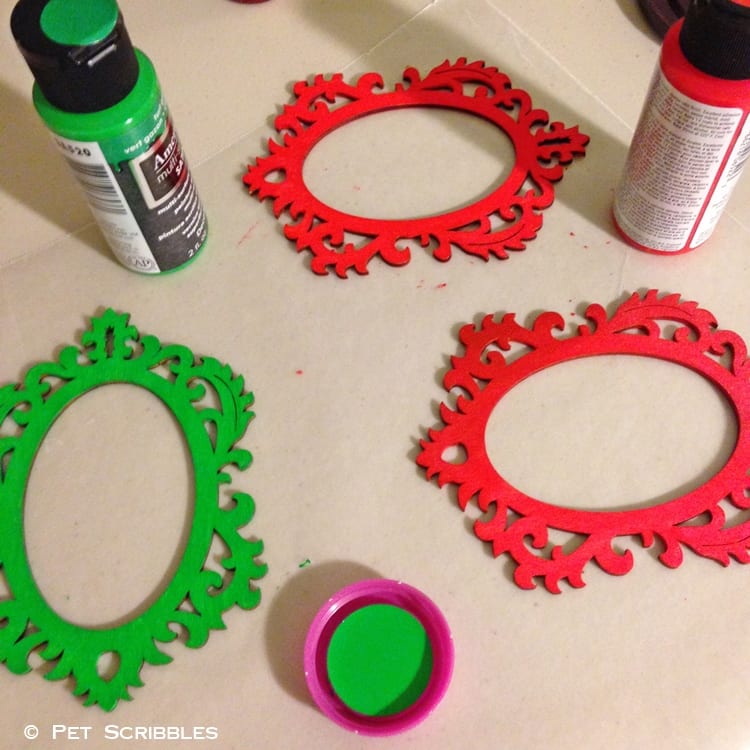
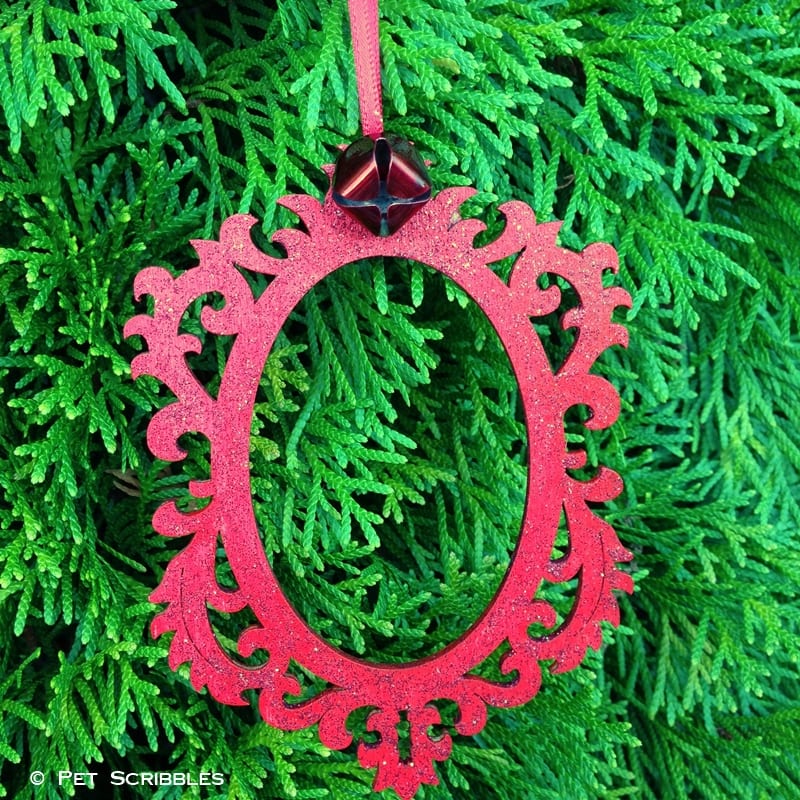
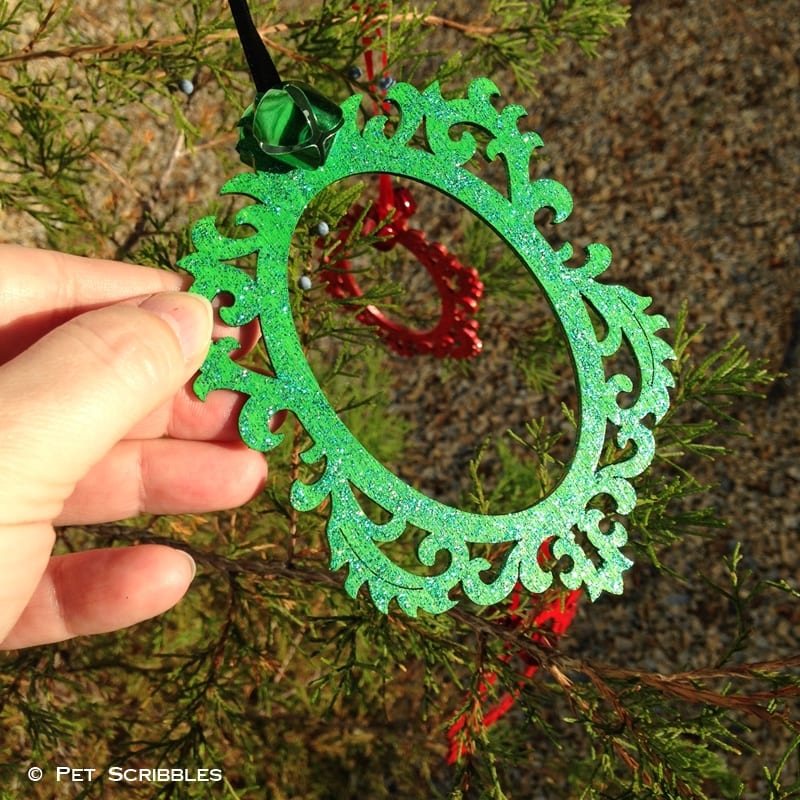
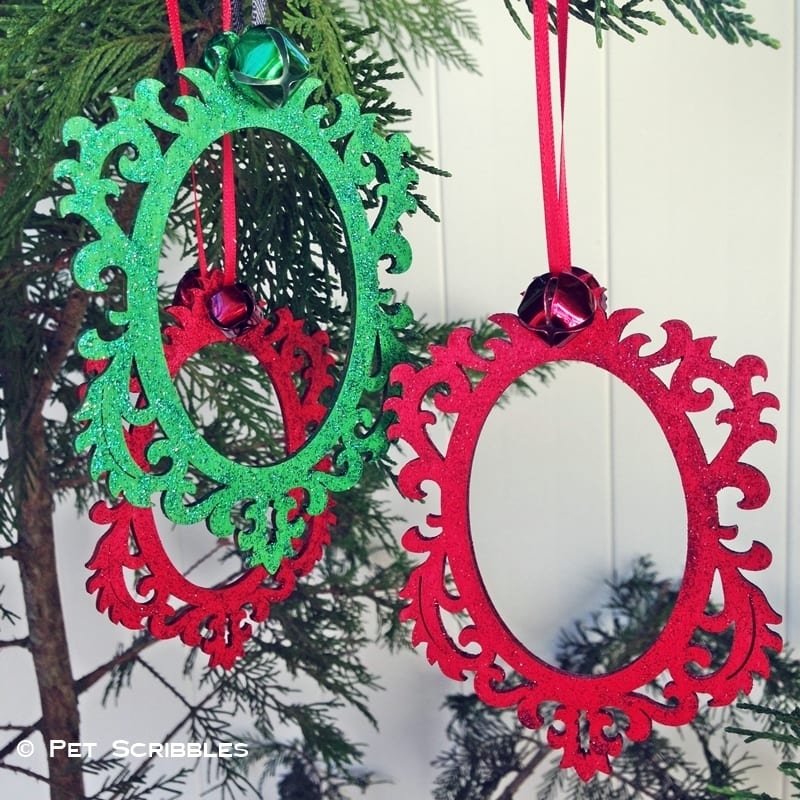
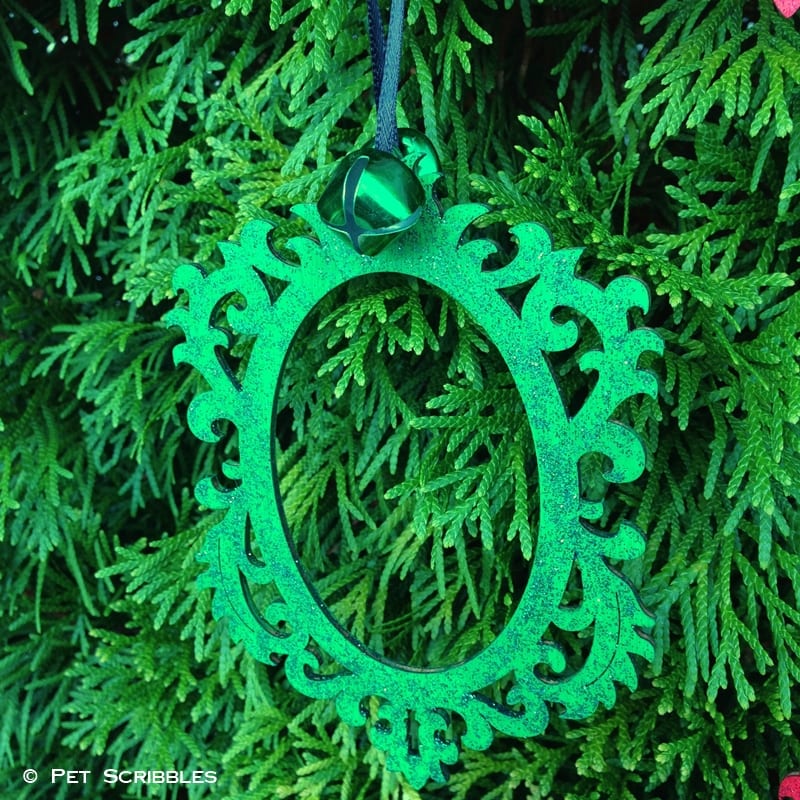
Step One: Paint both sides of each ornament with your chosen colors. One coat is all you need on each side of the ornaments. I painted two of the ornaments in Lipstick (red) and one in Turf Green. Let dry.
Helpful Tip: Use a sheet of wax paper on your work surface to make quick work of painting ornaments. Why? The ornaments will dry fairly quickly — something I love about the Multi-Surface Acrylics — and when you put them down onto the wax paper, the ornaments won’t stick! Such a time saver!
Step Two: Paint both sides of each ornament with a decent coat of Craft Twinkles in your chosen colors. Again, one coat is all you need for each ornament. I used a paintbrush and more or less blotted and splotched this glitter paint onto the ornament, versus just painting it on. This guarantees me a nice coating of glitter once dry!
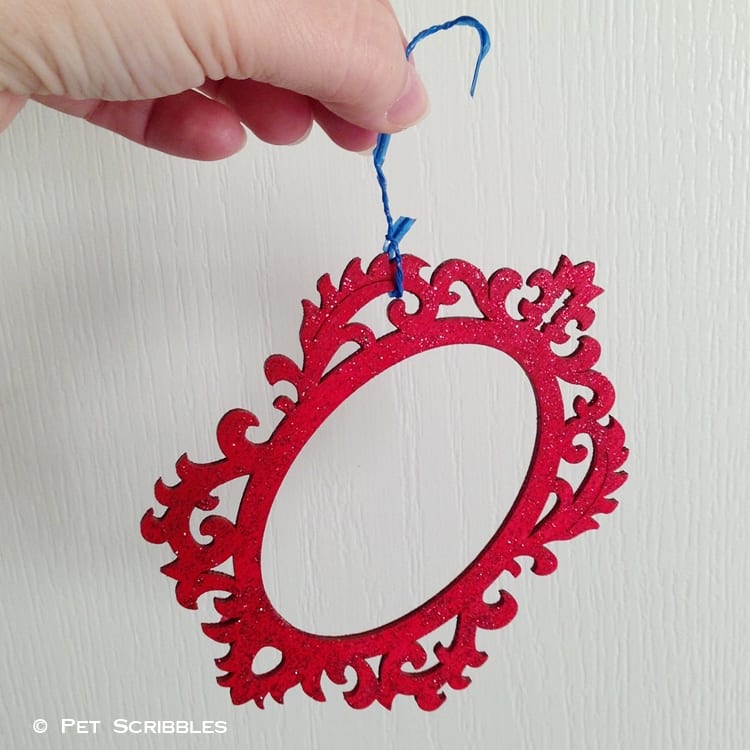
Helpful Tip: When applying the glitter paint, hold the ornament by one edge. Paint both sides of the ornament except for the area that you’re holding. Thread a twisty tie through one of the scroll openings – see image above – and hang up to dry. Once dry, simply paint the rest of the ornament and repeat hanging it up to dry. Easy peasy!
Step Three: Add embellishments (optional) and thin satin ribbon to hang. I added some jingle bells in matching colors to my ornaments for a little extra something!

How long did this take?
Just about 90 minutes, minus the drying time. I let the glitter paint dry overnight, then finished the glitter edges (that were left unglittered) the next morning. Once dry, just add your embellishments!
Because these don’t take long to make, they are a great handmade gift idea! Think of all the many reasons you need little gifts for the upcoming holidays: hostess gifts at Thanksgiving and holiday parties, little thank-yous for special people like your awesome hair stylist, teacher gifts, and so on!

What will I do?
This set will be displayed in our own home, as my husband loves the traditional red and green Christmas colors!
31 Days of Handmade Christmas Ornaments Blog Hop
Please visit my bloggy friends below to see the ornaments each of them made. And stop back here to revisit this section, because we’re only halfway through our month-long ornament extravaganza!
Happy crafting!
~Laura
Ooooh this is so cute!!!! What a clever and easy idea!!… Love the jingle bells detail!!! I can’t wait to start decorating for Christmas!!! Pinning!
XOXO
Thanks Camila! My cat Lulu loves the jingle bells too! That could be good or bad. LOL
I so love those laser cut frames and this idea is perfect! I’m picking some up next time I see them! Brilliant xo
Thanks Robin! You’ll find SO many uses for them too!
C-U-T-E!!! What a clever idea Laura! And thanks for all the glitter tips…. so helpful people like me who are glitter challenged. (That is unless you count wearing more glitter than your craft. Heehee)
Thanks for joining us for the blog hop! So glad to have you along.
Thanks Diane! This month-long blog hop is SO much fun! Next time you find yourself wearing more glitter than your craft, just say that you’re a sparkly work in progress! 😉
I love your twisty tie tip for not getting glitter fingers – brilliant! The sparkly frames are so pretty and so simple to make, they would look great in any colour scheme.
Thank you Julie! You’re right about the colour scheme! I love to do a lot of creams and teals and browns and ivories in ornaments and Christmas decorations…but my husband still gives me hints that he prefers the traditional red and green colors for Christmas, so… I told him this trio of ornaments was inspired by him! 🙂
I saw the same wood cutouts at Hobby Lobby and thought they had such a pretty shape. Now I know what to do with them! Pinning!
Thank you Angie! I love all of the scrolly (is that word?!) shapes of these ornaments too! So many possibilities for crafting with them!
What a great idea, Laura! The glitter and tiny bells make this extra special! Pinning!
These are so cute! I’m seriously ready to play hooky from all the stuff I have to get done and just make some ornaments! The creativity in this group is so great!
Cute project! I need to check out DecoArt’s Twinkle Paint. I love the ideas of being able to add glitter without having to sprinkle it on making a huge mess.
Love the green and red! That paint sounds awesome!
Debbie
So cute! My kind of project, easy and sparkly!
These are so pretty, Laura! I love the traditional and sparkly look.