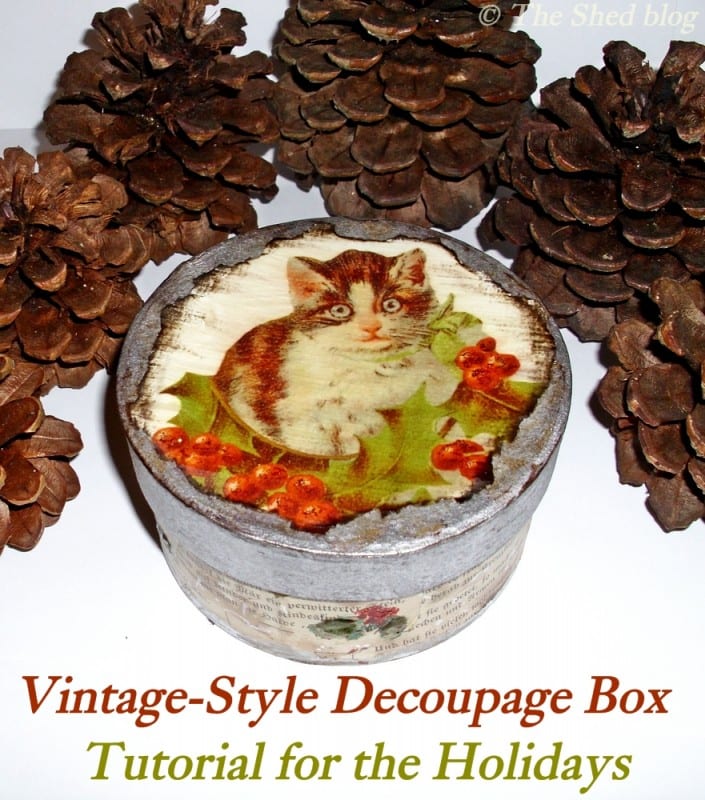
I was asked to head to Walmart and purchase some Elmer’s Painters Opaque Paint Markers, try them out in a holiday craft and to share the craft here with all of you. I love Elmer’s, so this was going to be fun!
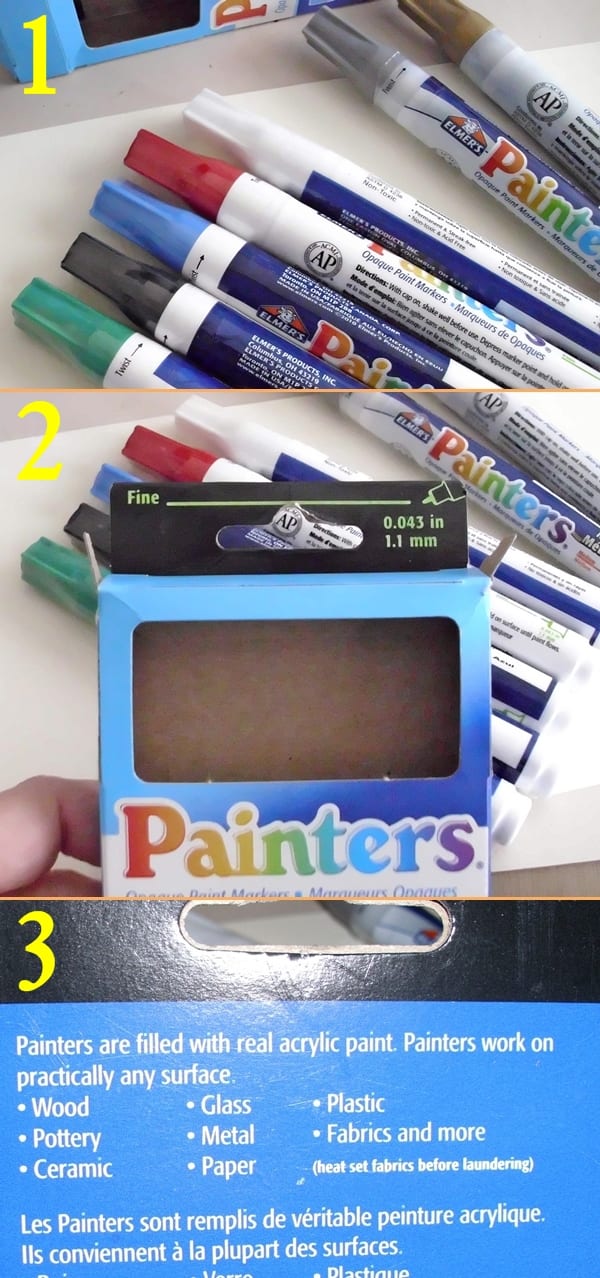
I was very excited to try the Elmer’s paint markers, as I have seen some of my craft blogger friends use them in projects. You can purchase them either as 5 in a box, or individually. I purchased one box of basic colors and also two metallic paint markers in silver and in gold. (Image 1) The box has the width of the paint markers on the front of the box. (Image 2) The back of the box lists the surfaces these markers work on. (Image 3) Helpful info right on the box!
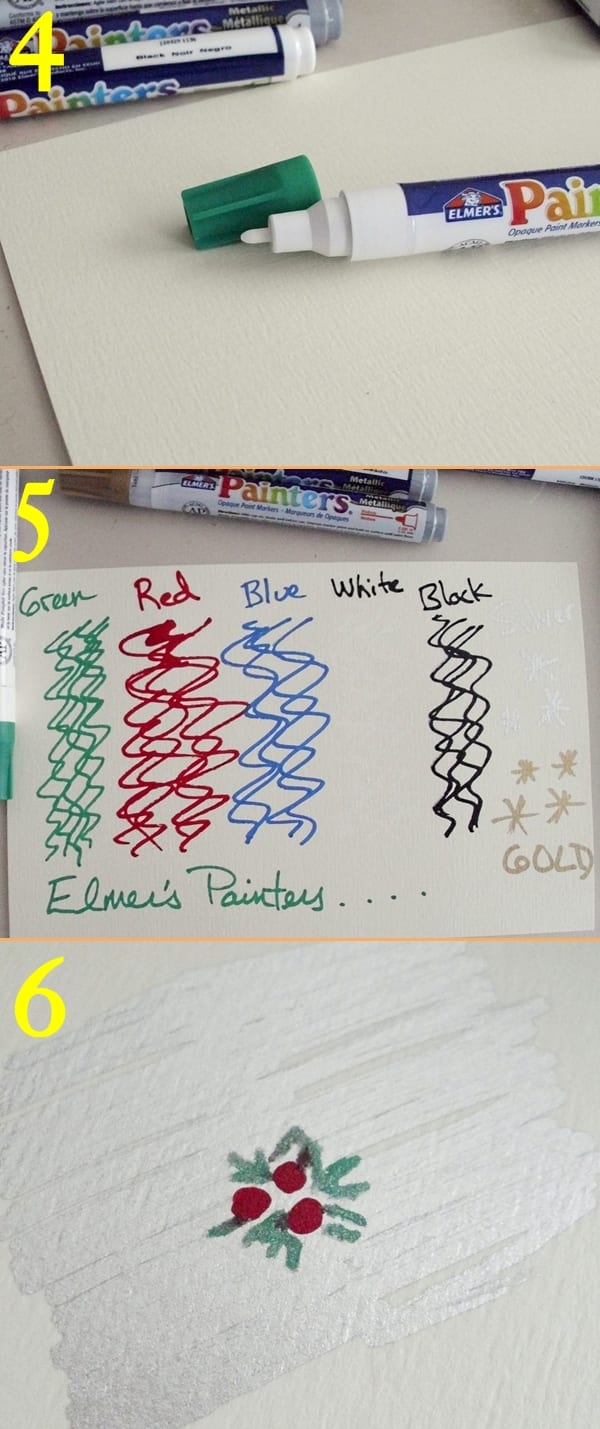
First thing I wanted to see is what their true colors were. I used a standard piece of ivory cardstock to try out each color. Each marker has a white tip (no color) when you first open it. (Image 4) To begin the flow of paint, you simply depress each marker and wait for the paint to begin to flow. I love how “true” each color is. The red is a true red, not a pink-red, or an orange-red. (Image 5) And the the names of the colors are your basic red, green, blue, black, white, etc. They aren’t something fluffy like “sunburnt apple on a tree” where you are left trying to figure out exactly what color that phrase is describing. You want a red paint marker? You got it! Easy!
I also tested out if the regular paint markers would easily color “over” the metallic shades. I’m happy to show you that yes, they do! (Image 6)
Supplies:
Paper maché box
Vintage image of your choice
Vintage book pages of your choice
Elmer’s Paint Markers in red and green and white
Elmer’s Metallic Paint Markers in silver and gold
Brown ink pad
Decoupage medium
Glitter in red and olive green
Directions:
Please read through all of the directions before proceeding with this project.
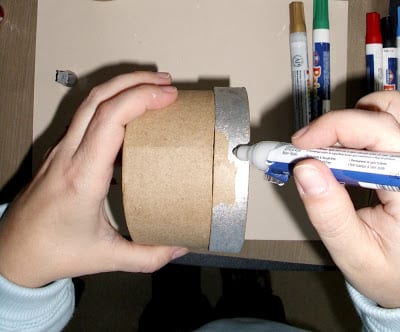
Using the silver metallic paint marker, color the side of the box lid as well as the edges. Place the lid onto a flat surface and color around the top of the lid on the outer edges about half-an-inch in from the edge. If you keep the lid on the box, you’ll have something to hold onto while painting around the box lid. (See image below) Let dry.
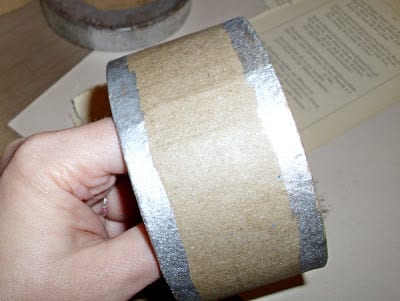
Take the other half of the box and color in about a half-an-inch at the top and at the bottom all the way around, as shown in the image below. Let dry.
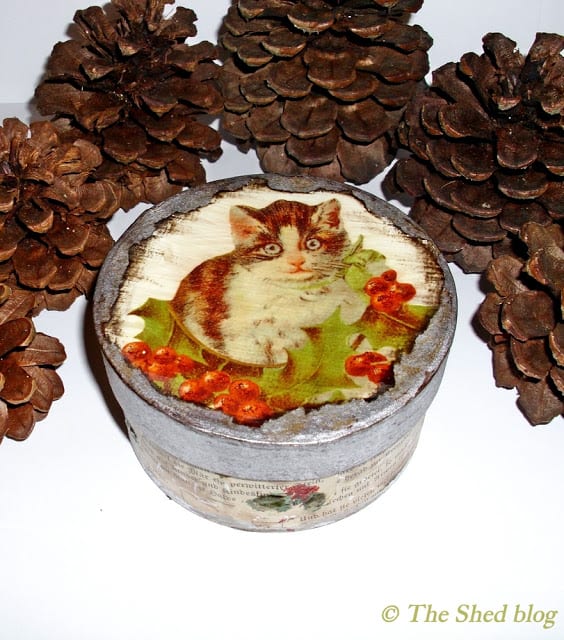
Take your vintage image (Image 7) and figure out the placement of the image on the lid, then draw a circle around the outside of the lid on the back of the image. (Image 8) This circle will be your guide.
Using a pair of scissors, cut a small slit near the circle’s edge, about only a quarter-of-an-inch long. You will use this slit to begin tearing out the image. Using the circle as your guide, gently begin tearing along the path of the circle. When you finish tearing, you’ll have what looks like a sad attempt at ripping out a perfect circle. (Image 9) And that’s exactly what you want! (Stay with me here!)
Using the dark brown ink, swipe it along the edges of your image to age and distress it. Next, use the dark brown ink and swipe it along the edges of the box lid, top and side, then rub it off with a paper towel in spots to give it an aged look. Do the same with the other half of the box, distressing over the painted silver sections. (Image 10)
Decoupage time!
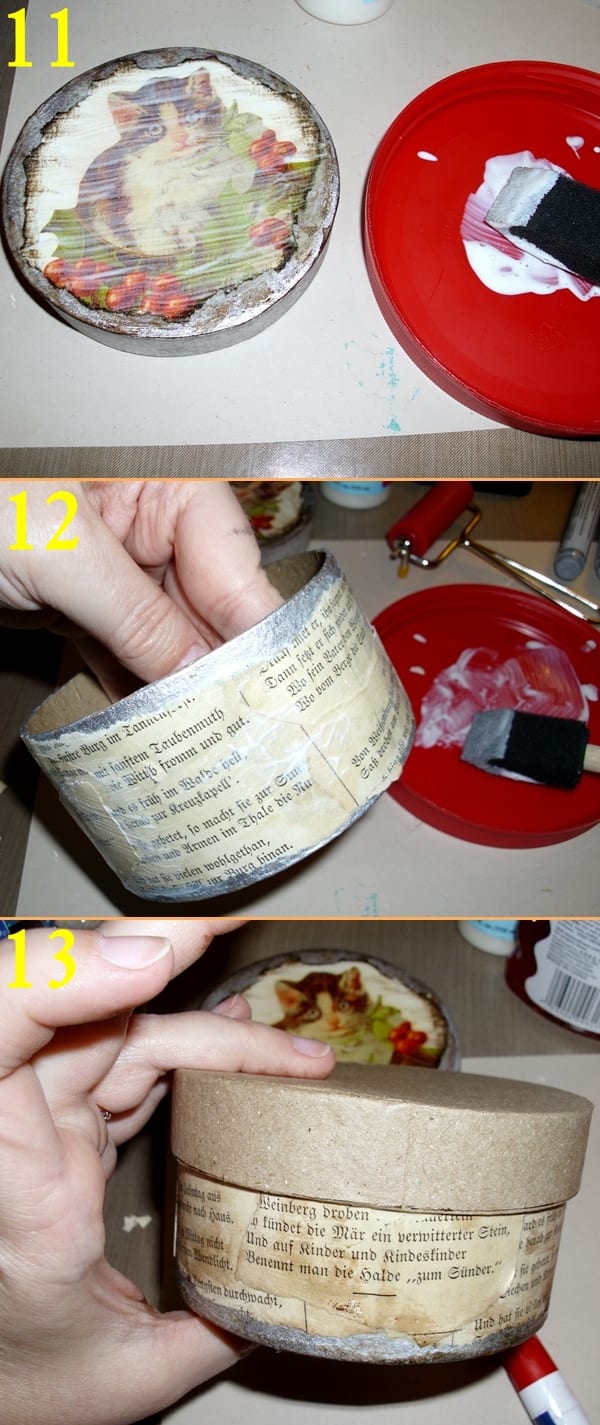
Using decoupage medium and a foam brush, apply the medium onto the box lid, but not quite all the way to the edges. If you do get near the edges, some of the metallic paint might begin to come off with the foam brush. I happen to like that look, as it adds to the distressed character. (Image 11) Place your image onto the lid and gently press down. I use a piece of wax paper to smooth it out. Place the wax paper over the image, use your brayer to roll back and forth over the image, and you’re good to go. Let dry. Once dry, apply the medium over your image.
Repeat the above steps for the other half of the box. Take the vintage book pages of your choice, rip into small sections, and cover the perimeter of your box. Let dry. Once dry, apply the medium over the torn paper. (Image 12) Once that’s dry, take the brown ink pad and swipe some ink in various spots on the decoupaged paper to give it an aged look. (Image 13)
Embellishment time!
Before you begin adding embellishments to the box itself, put the lid onto the box. (Image 13, above) This helps you see the actual area to be embellished. There’s no reason to embellish part of the box covered up by the lid. And yes I’ve needlessly decorated previous boxes in places unseen once the lid was on. I speak from experience here! Since I had multiple boxes, I used an extra lid instead of the box lid that was still drying.
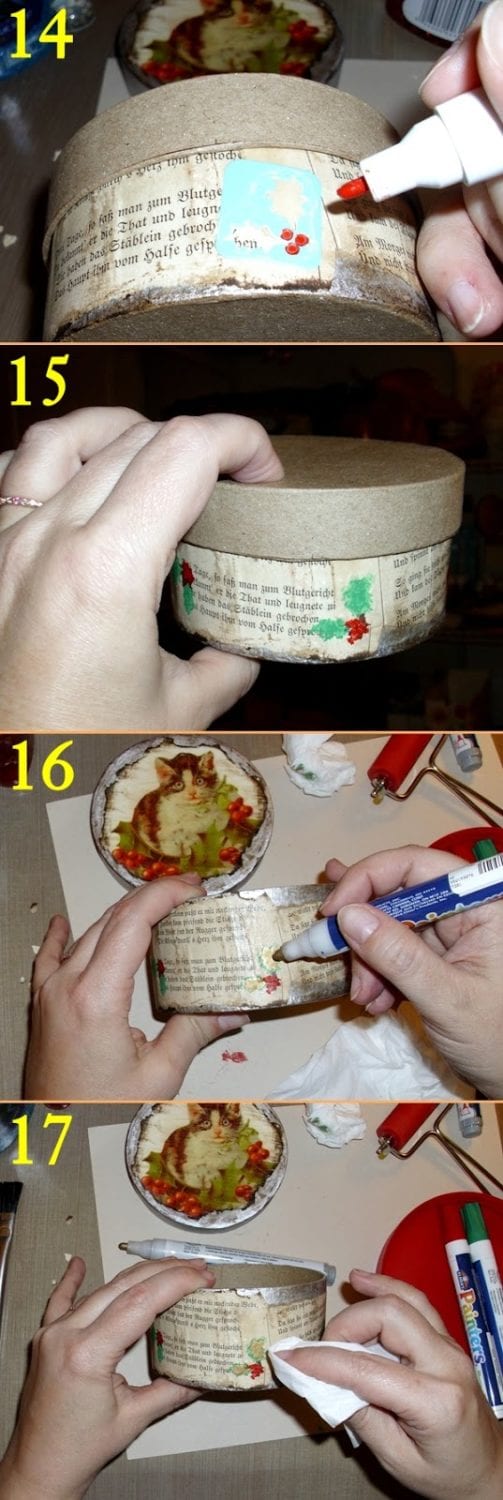
I wanted to mimic the holly and berries in my vintage image, so I used an adhesive stencil (Image 14) and the red and green Elmer’s Paint Markers to make some holly and berries around the box. I was able to do this quickly and wasn’t concerned with getting an “exact” stencil. I liked the way they came out, a bit “blurry” almost. (Image 15)
As the Elmer’s Paint Marker in green didn’t match the chartreuse green in the vintage image, I took the Elmer’s metallic paint marker in gold and colored on top of the green paint (Image 16), then wiped some of it off with a tissue. (Image 17) This matched up the greens much better.
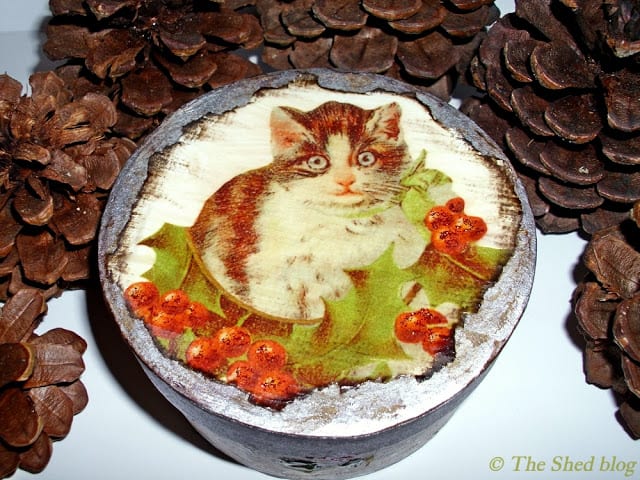
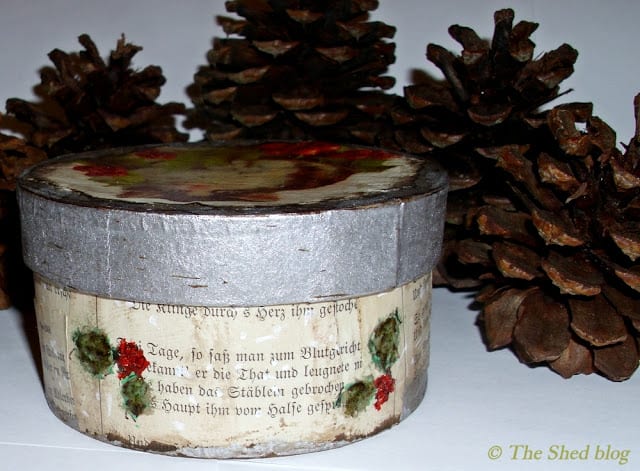
To finish off the box, I outlined the berries with a black permanent ink pen, applied red glitter to the berries on the side of the box and the vintage image on top, and applied olive glitter to the holly leaves on the side. I took the white paint marker and drew some random dots and marks all over the side of the box. This could be snow. I love the way the white paint marker shows up on top of the aged decoupaged book pages.
Let dry. Spray with a sealer if you want to. (I usually do.) And that’s it!
Elmer’s Paint Markers!
I really like how easy it is to paint with these markers. These are not markers in the traditional sense. This is actual paint and flows onto the surface easily, making quick work of covering a surface or just drawing in a small section. Using the paint markers is a lot easier – and less messy – when you want to use craft paint on a small project. And if you’re crafting with kids? These paint markers would be perfect. Any paint that might get on your hands washes off easily with soap and water.
I’m so glad I got the opportunity to try the Elmer’s Paint Markers on a holiday project. I’ll definitely be using these in more holiday craft projects.
Happy crafting!
~Laura


That is so cute! Love it 🙂
Thanks so much Lyuba! 🙂
Oh Laura, I love this sweet box. The paint pens make a huge impact.
Thanks Carol, and I agree about the huge impact!
So cute! Would make a great gift this season.
Thanks Shannon! I had originally intended this to be a gift (maybe have a small gift card inside) but now I sort of want to keep it as a decoration. LOL I’ll just have to make another one, right? 🙂
This is so cool! What a creative project.
Thanks Angela!
So cute – I have seen these pens and have wondered about them. I think I will have to pick up some next time I am at the store. Thanks!
That’s what happened to me, Summer: I saw other bloggers mention them and finally had to try them myself! You’ll really like them!
I love the vintage look of this ~ and the kitty is so cute!
Thanks so much Mary Beth!
Ok this is too cute! And I love the Painters markers too.
-Erin @ DIY On the Cheap
Thanks Erin! I remember your painted vases that you made with the Elmer’s Painters markers back in May, which I totally love! 🙂
I’m not surprised to learn how much you enjoyed using the Painters Pens – I fell in love with them, too! Your box turned out so lovely. Thank you so much for sharing your process!
Thanks Terri, yes I fell hard for these Painters pens and will definitely be on the lookout to purchase some of the other sets and colors to craft with!
That is cute! I love how you added the paper around the sides. 🙂
Thank you Amanda! I tried not to think about the paper on the sides too much while I was ripping and decoupaging, otherwise I knew I’d end up starting to be “too” careful, which always backfires on me, and then everything just looks way too neat and tidy for what I’m trying to create! LOL
This is super cute. You are all over holiday projects. I have not gotten into my Painters Pens yet. Maybe I will give them another shot!
Why thank you Johnnie! 🙂 Yes, definitely try the Painters Pens out – you won’t be disappointed! Spread easily, dries quickly, not messy, washes off hands easily for those times when you start drawing on yourself rather than your craft and don’t realize it right away… Yes, that happened. LOL
Super cute!
Thanks Vivienne!
Love this vintage box!
Thank you Katie!
What a cool project and I enjoyed reading about the process! I never know how to create something like this. Lovely!
Thanks Malia! I know what you mean: I never knew how to do it either, until I just sort of started winging it! 🙂
I love paint pens. Your vintage box is cute. Come link up sometime with me @ DearCreatives.com
Thanks Teresa – I’ve enjoyed hearing how many people love the pain pens! 🙂 (And thanks for the invite to link up, too!)
Laura, this is so beautiful! I love the vintage look. And thanks for showing the pens over pen look. I haven’t tried that yet, but will now for sure! Thanks also for linking up to my DIY Gift Idea party.
Thank you so much Brittany! Loved your DIY Gift Idea party: so many ideas for this year and next!