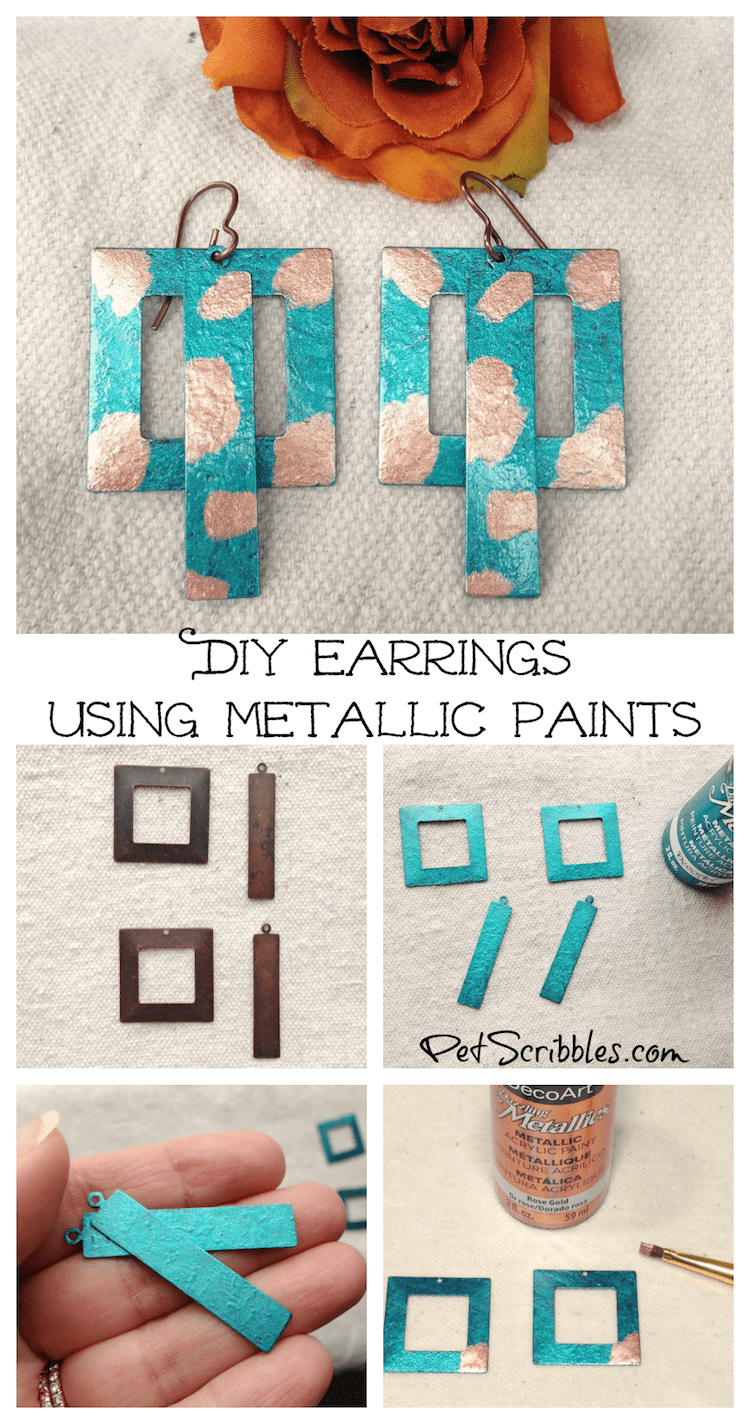
Today I’ll show you how to use metallic paints to make colorful metal earrings! This is a great beginner jewelry-making project and doesn’t require a ton of supplies.
Are you like me when you go to a craft store and kind of just walk by all of those “things” in the DIY jewelry aisle?
I have purchased beads and cool jewelry findings in the past to use as embellishments for DIY projects, like when I made my Steampunk-Inspired Rusty Magnets.
And I made a super-cool leather cuff bracelet awhile ago too, but I’ve yet to make a pair of earrings.
FTC Disclaimer: This is a sponsored DIY project for DecoArt. This DIY Earrings project idea and tutorial are 100% my own. Some of the links in this post are affiliate links. I explain more here.
When DecoArt asked me to create a simple jewelry tutorial, I knew this was just the push I needed to finally make some earrings!
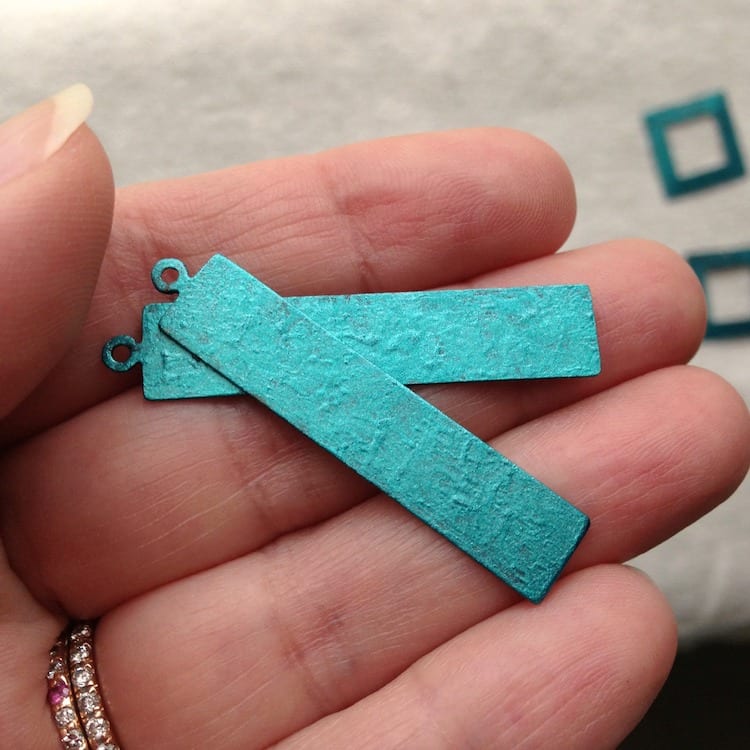
I started out using Vintaj jewelry blanks, because I love how they look right out of the package.
What are jewelry blanks?
They can look like these right here:
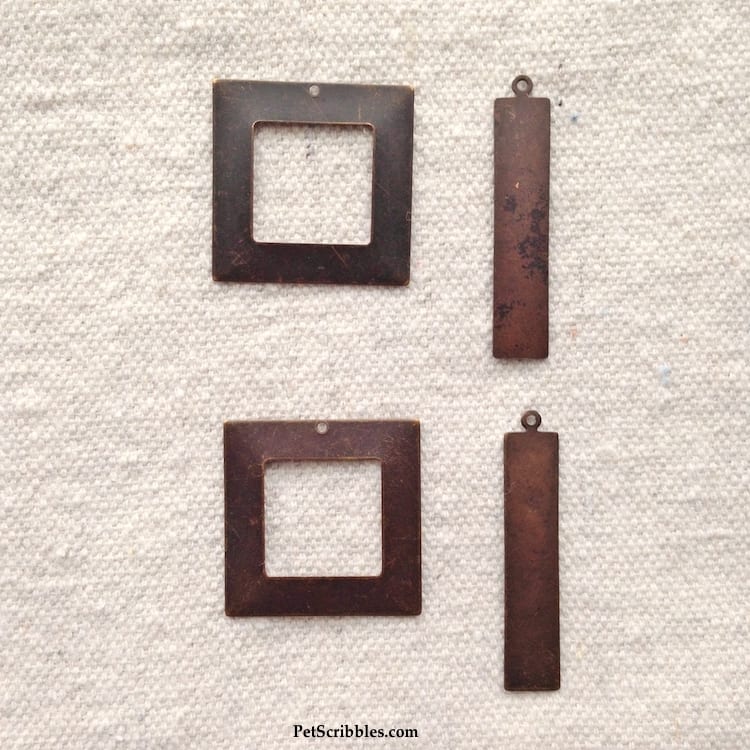
The cool thing about jewelry blanks is you can totally use them “as is” to create a piece of jewelry, in my case a pair of earrings. As you can see above, these metal pieces have a distressed look to them already.
I purchased the skinny rectangle jewelry blanks and the open square jewelry blanks on Amazon. I swear they sell everything and anything these days! (I even found the ear wires there too.)
Use metallic paints to make colorful metal earrings!
But…this is a tutorial to show off DecoArt paints, so I decided to use DecoArt’s Dazzling Metallics paint line to create a fun pair of earrings.
I began by tracing the earring blank shapes onto paper several times, cutting those shapes out.
Next I simply played with the various colors of metallic paints until I liked A) the color combination and B) the design.
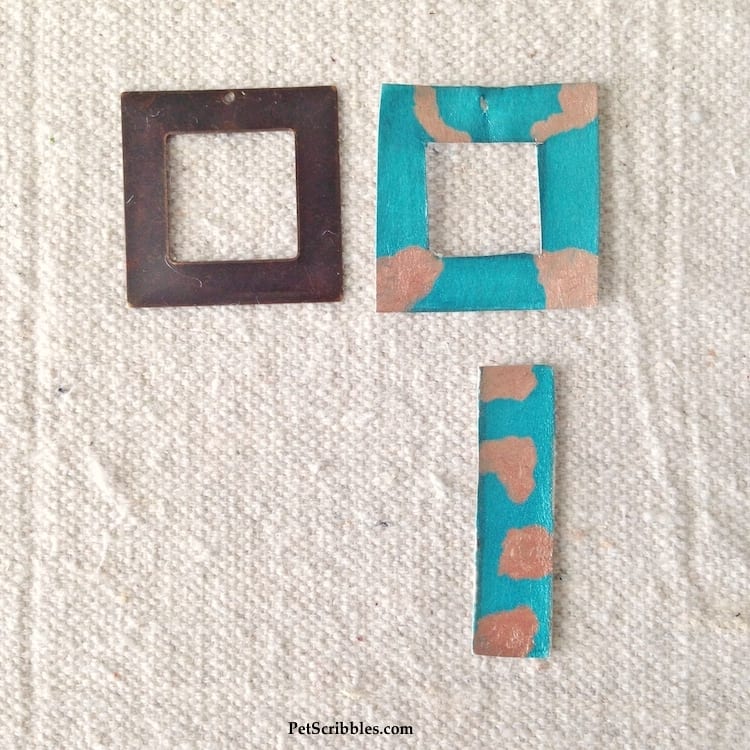
Above left is a jewelry blank, while on the right are the two painted papers that I finally chose as my earring design.
I planned on layering the skinny long piece on top of the open square piece for a really cool layered look with minimal effort!
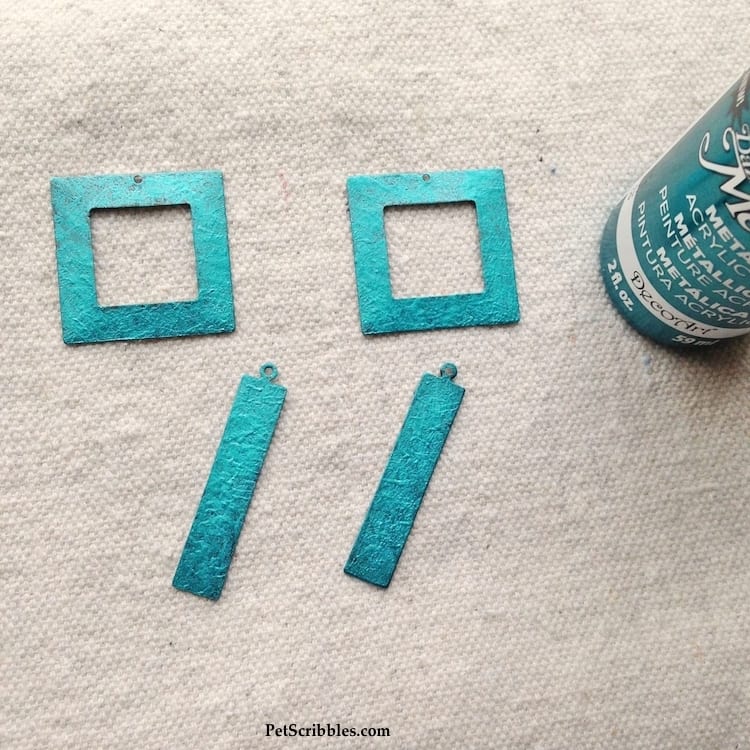
The first step was to give them a coat of teal-colored metallic paint . . .
After painting the base coat, I then went back and dabbed on more color here and there to build up some texture . . .
Once the earring blanks are dry, it’s time to add in the second color, which is a rose gold metallic paint.
Since I had practiced on several of my paper cut-outs, I was able to just follow my own pattern.
And once everything was dry, I added some simple earring wires.

See? I told you it was simple and a great beginner project!
And when you paint your own earrings, you can get the perfect color(s) to match whatever outfit you choose!
For my complete tutorial — including supplies, more pictures and step-by-step instructions — head over to the DecoArt website:
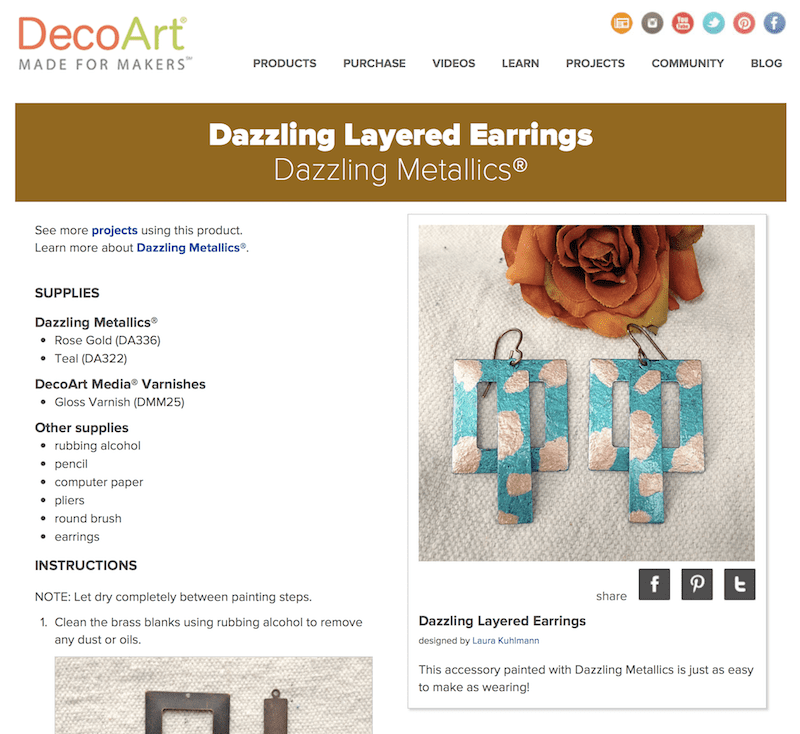
Click on the website image above — or click on the text below:
Dazzling Layered Earrings featuring Dazzling Metallics Paints
So I’ve finally created my own pair of earrings!
Am I jewelry designer?
Not even close.
But I love knowing how to create a simple pair of earrings.
And when people compliment me on my earrings, I’m kind of happy to say I made them myself!
Happy crafting!
~Laura
Came for the cats. Stayed for the earrings. These are gorgeous!