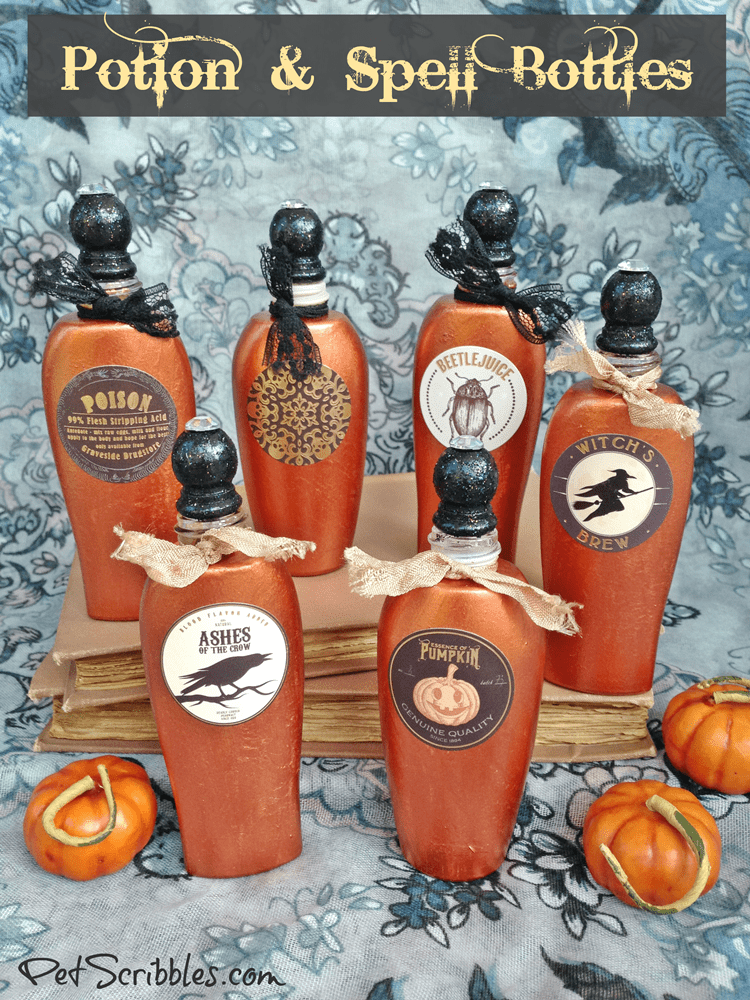
Make pretty potion and spell bottles for Halloween with empty skin cream bottles. Yes, once your skin cream has done its magic, have the bottles do the same!
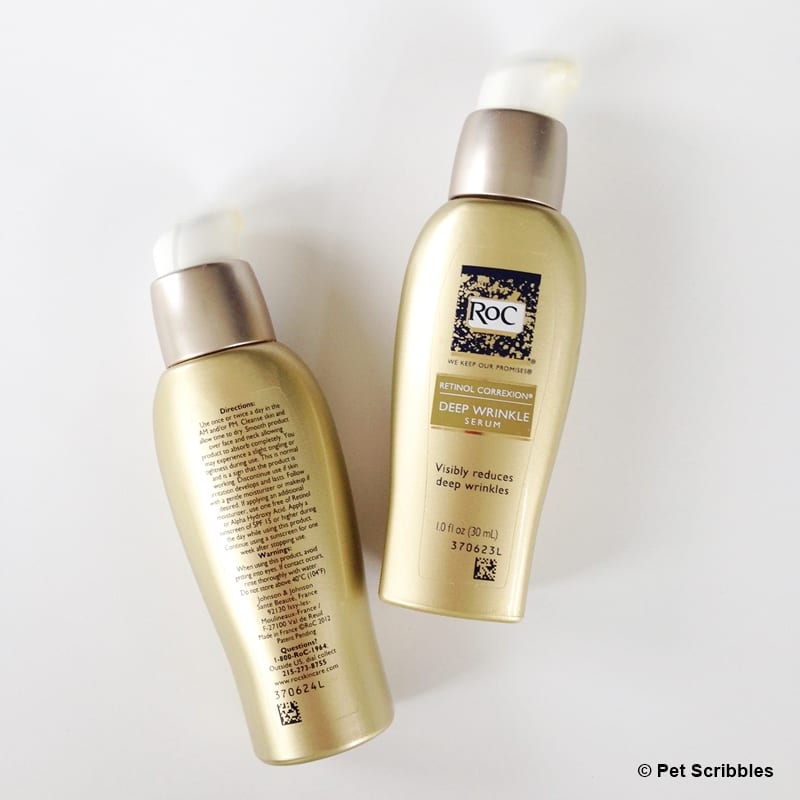
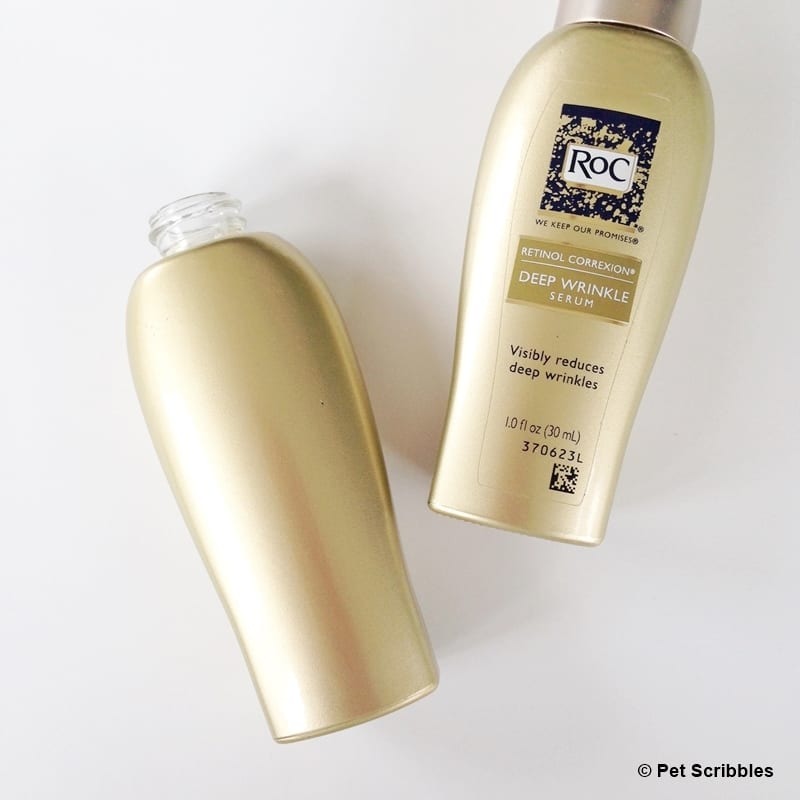
I swear by Roc® products, especially their Deep Wrinkle Serum. As such, I end up collecting their gorgeous bottles once they’re empty.
These bottles are perfect for crafting!
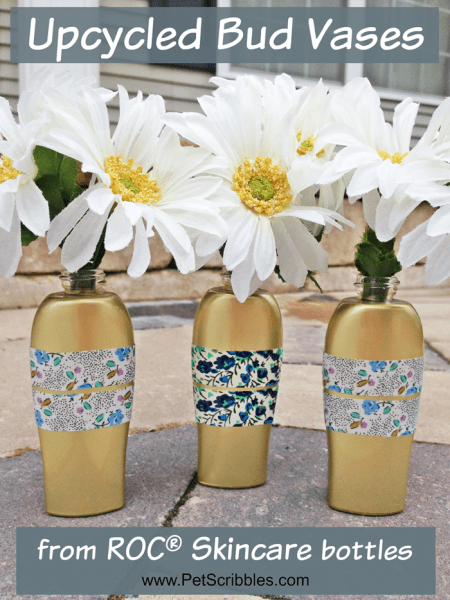
Last year, I showed you this easy way to turn Roc® bottles into bud vases:
Now it’s time to craft for Halloween, especially since I’ve built up quite a collection again!
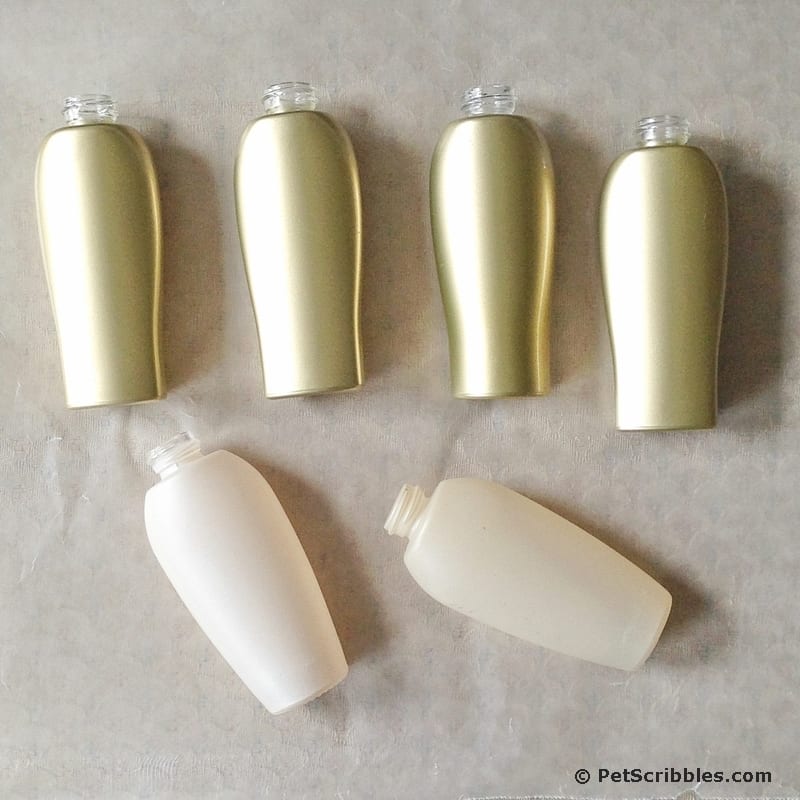
You’ll notice two ivory bottles in the above image. That’s because I stupidly tried a generic version of Roc® sold at the drugstore.
Bad move.
Not the same at all.
At. All.
But on the bright side? I got two pretty bottles for my troubles! (Win-Lose? Lose-Win?)
Something pretty for Halloween . . .
I knew I wanted to make a miniature set of potion and spell bottles for Halloween.
I made a set years ago that is still very popular on Pinterest:
Vintage Potion and Spell Jars for Halloween
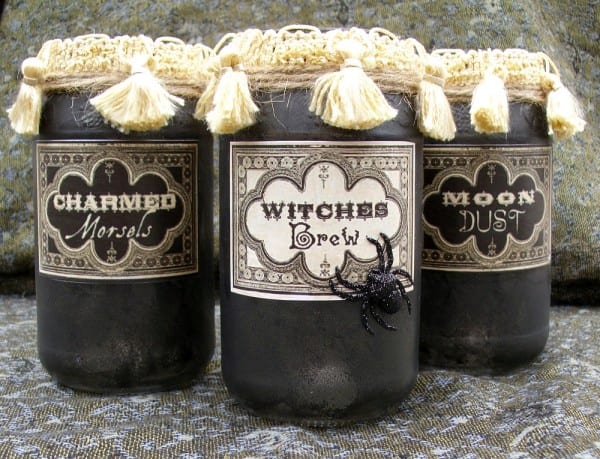
Back then, I actually downloaded the graphics, sealed them, decoupaged them onto the hand-painted jars. It was time-consuming, but I loved that I have inspired so many people with this project.
Fast forward to Fall 2016 . . .
Now you can buy labels almost exactly like the vintage ones I used, which means making your own potion bottles just got that much easier!
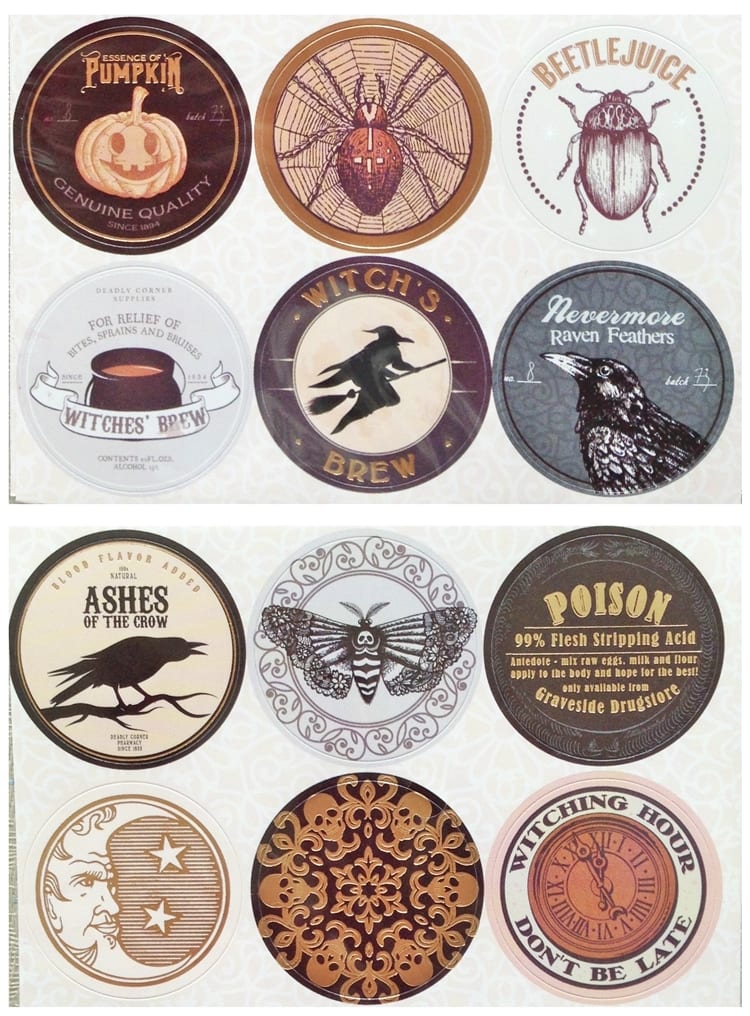
I found these labels at Michaels and almost did a dance right in the aisle where I found them!
Why? Because I knew they were perfect for this project! These labels are spooky but overall these labels are very pretty and vintage-looking.
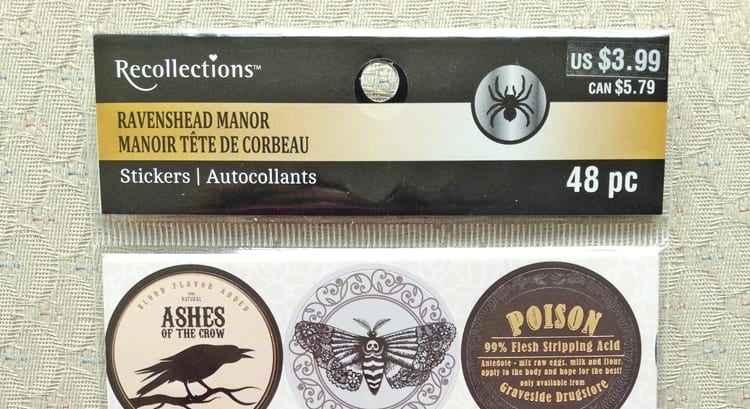
Here’s a close-up of the packaging, so you can easily find them or ask someone at Michaels where they’re located in the store…
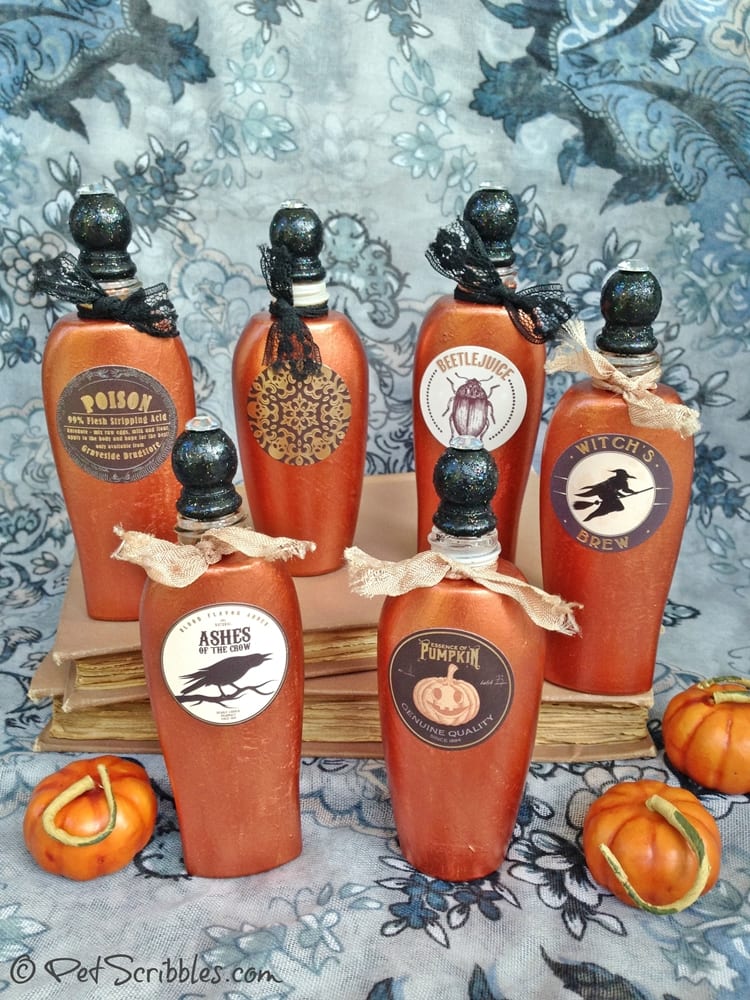
Make pretty potion and spell bottles for Halloween!
FTC Disclaimer: Some of the links in this post are affiliate links. I explain more here.
Supplies:
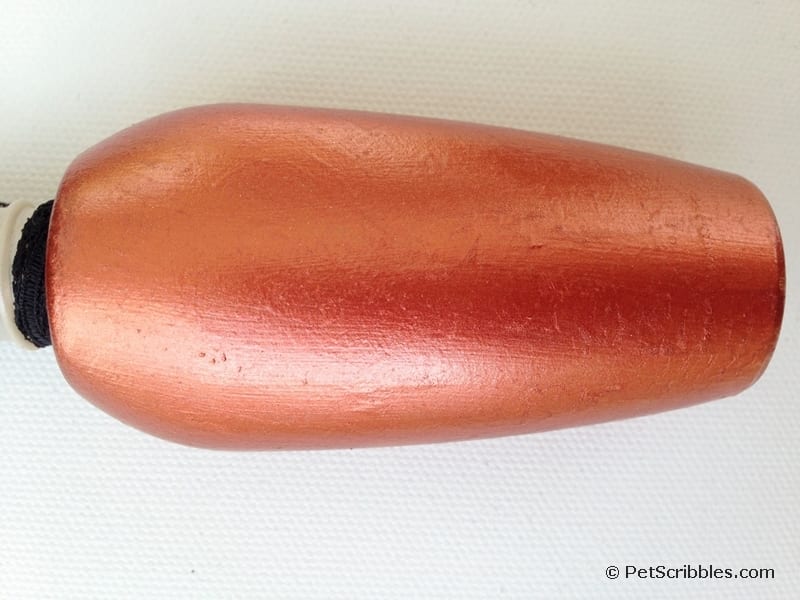
- Empty skincare bottles (I used Roc® bottles)
- Copper metallic paint (DecoArt Metallics)
- Black multi-surface craft paint (DecoArt “Black Tie”)
- Paintbrushes
- Mod Podge, matte finish (Plaid Crafts)
- Paper towels
- Wax paper
- Miniature Glue Dots
- “Ravenshead Manor” stickers (Recollections from Michaels)
- Stickles glitter glue in Black Diamond
- Miniature unfinished wood finials (hardware store)
- Vintage lace seam binding
- Clear flat-backed craft gems
All set? Here we go!
Tutorial:
Step One: Carefully peel off the labels on the front and back of each bottle. This is easy to do — no worries of fighting with sticky labels!
Step Two: Wash the empty bottles well, rinse and let dry upside down on paper towels.
Step Three: Paint the Roc bottles with copper metallic paint. You may need to do multiple coats to get complete coverage like I did. Let dry on wax paper in between each coat.
Helpful Tip: I found that the paint adhered better to these bottles by applying “rough” coats of paint. Instead of smoothly painting on each coat, I used my paintbrush to tap and spread the paint a little at a time, which left a really cool textured effect. This will add to the vintage look I’m going for.
Step Four: Adhere a sticker to the front of each bottle. Smooth down with your fingers.
Step Five: Apply a quick coat of Mod Podge over the bottles to give the stickers extra holding power, so they don’t peel off the metallic painted surface.
Step Six: Paint a miniature unfinished wood finial with black multi-surface paint. I used two coats. Let dry.
These little finials come in handy for so many crafts, whether you use them as I’m doing here or use them as the “feet” of a decorate little pot or box.
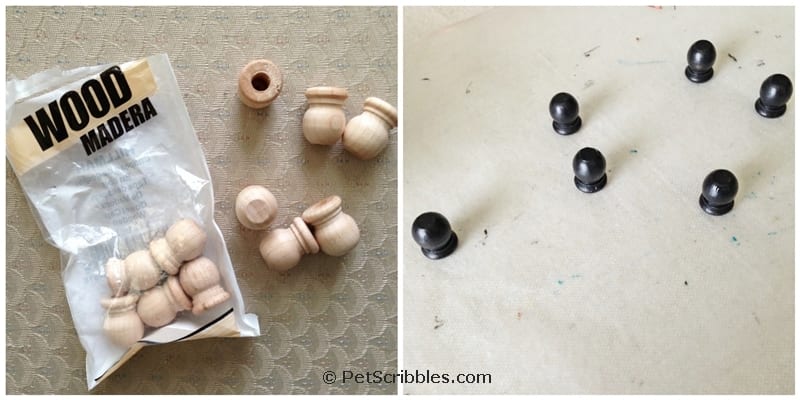
Step Seven: Cover each finial with a thick coat of black glitter paint. Let dry.
Step Eight: Adhere a flat-backed crystal to the top of each finial using Glue Dots. Gently press and hold for a few seconds.
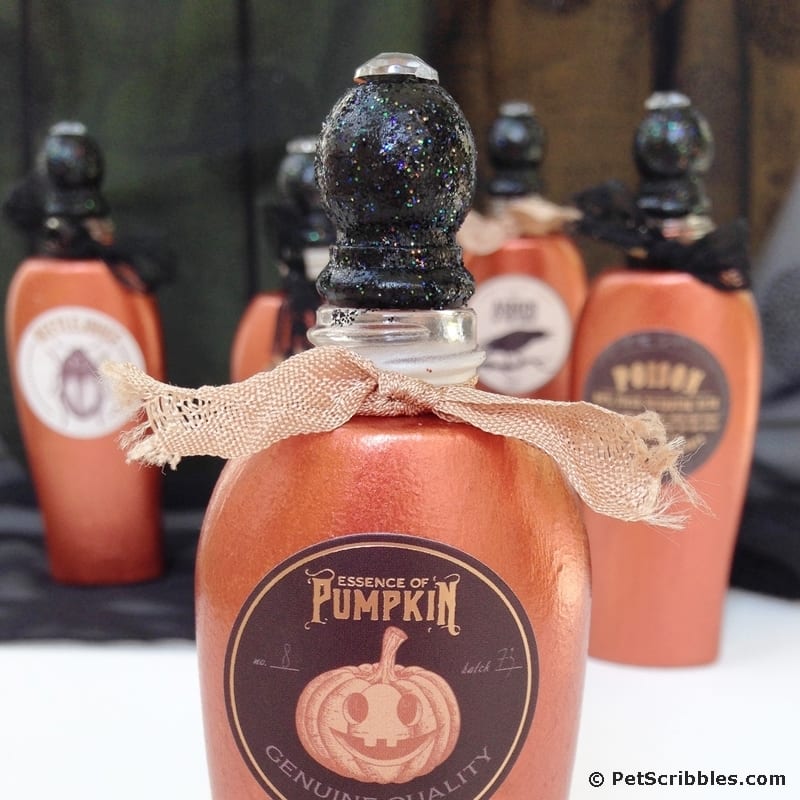
Step Nine: Cut a small piece of vintage seam binding or lace ribbon and tie around each bottle. Distress the edges of the seam binding with your fingers to make the ribbon look old.
And now you have a pretty set of potion and spell bottles for Halloween!
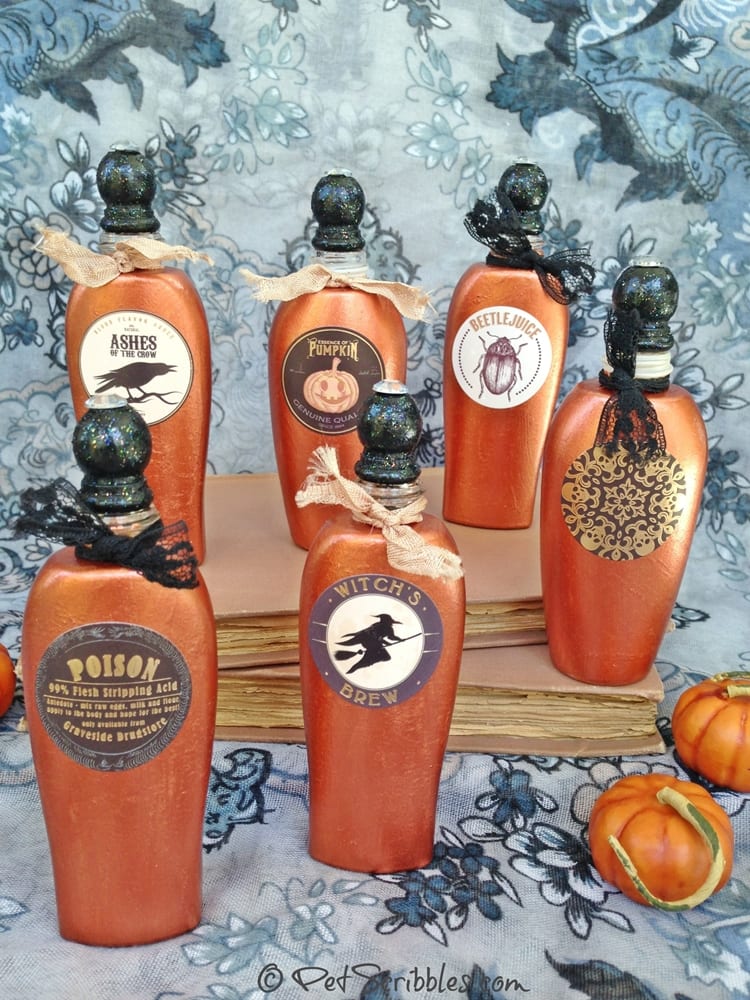
And you upcycled your empty skin cream bottles too.
That’s definitely a Win-Win!
Happy crafting!
So very cool! Well done my friend. 🙂
Thanks Jennifer! xo