How to dye unfinished wood so that you can easily have beautiful color both inside and out. Dye, unlike paint, easily gets into all of the cracks and crevices, without jamming any paintbrush into a tiny section to make sure the color gets on there!
Does anyone remember the Christopher Lowell show? It was an awesome decorating show on the Discovery Channel, back in the ’90s when that channel showed quite a few fantastic crafts and decorating shows.
Well, on one particular episode, Christopher had someone demonstrate how to dye a wood table, and although I never tried it myself, it obviously stuck in the recesses of my mind ever since. (It’s amazing what’s stored in there…)
I’m happy to say that after so many years have passed since I watched that episode, I have dyed my first batch of unfinished wood items!
FTC Disclosure: Some of the links in this post are affiliate links. I explain more here.
Where to find unfinished wood products
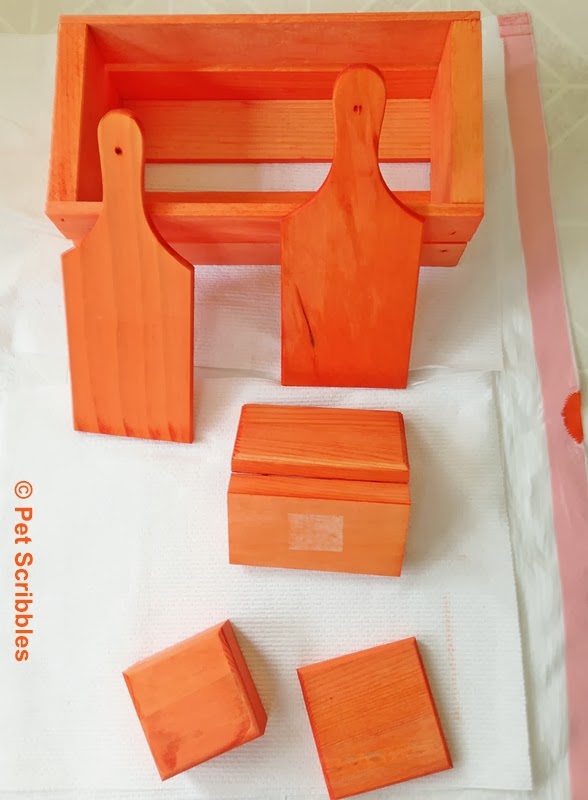
These days, you can easily find unfinished wood products to craft with. From small boxes to large pallets, from crates and birdhouses to full size furniture — there are so many options to choose from.
Major craft stores like Michaels and A.C. Moore have entire sections filled with unfinished wood pieces ready for your special touch. Home improvement stores are also a good place to find unfinished wood items.
Amazon has a huge selection as well. I typed in “unfinished wood” and the selection was amazing. (Click to see for yourself!)
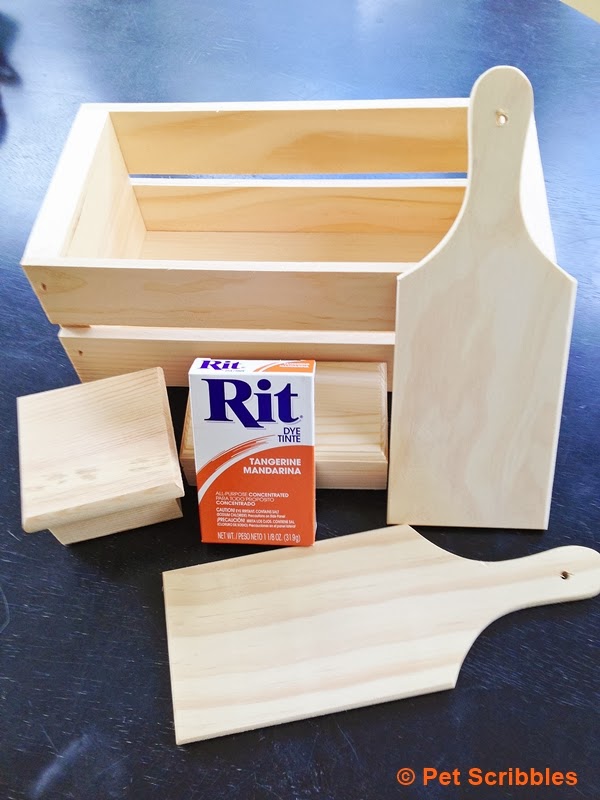
I purchased an array of items to dye, as you can see in the image above.
How to dye unfinished wood using Rit Dye
Supplies:
- Unfinished wood product(s)
- Large all-purpose bucket
- Rit Dye powder in Tangerine
- Large plastic bags to cover your work area
- Disposable latex gloves
- Wooden skewer
- Paper towels
- Acrylic sealer
Prepare and protect your work area!
Before you learn how to dye unfinished wood, you must protect any work surfaces such as floors and tables.
Rit Dye — just as the name says — will dye just about anything, including your kitchen counters, floors, tables, clothing. You don’t want this dye going anywhere but on your items, so cut open large plastic bags and spread them out. Also make sure you wear gloves too.
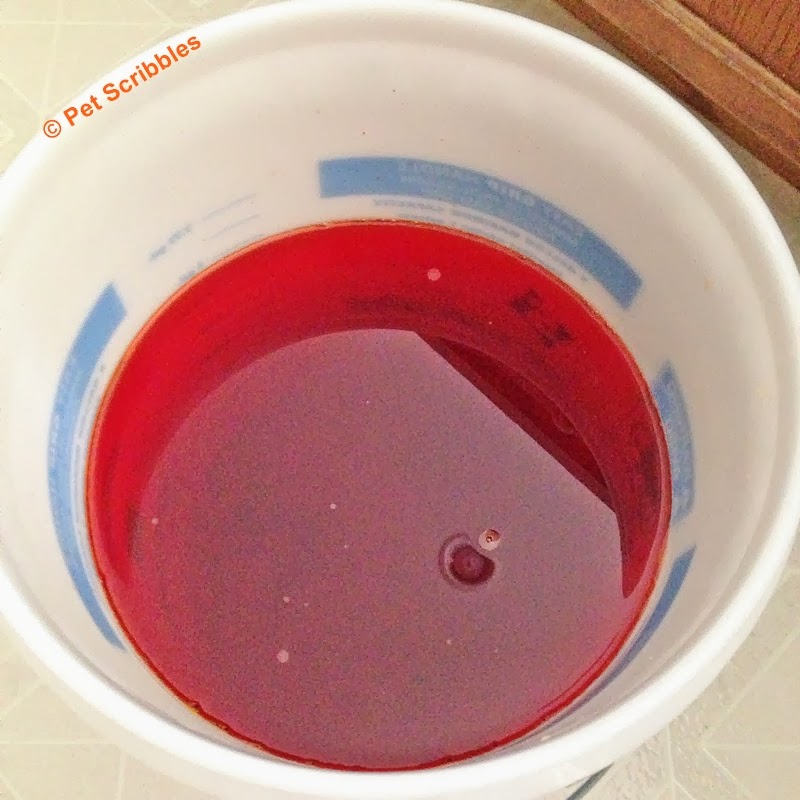
Step One: Make the dye bath
Following the package directions on the box of Rit Dye, I mixed in the entire package of powder with two quarts of hot water. You want the water to be hot as the wood will absorb the dye better. I mixed the powder into the water using a wooden skewer.
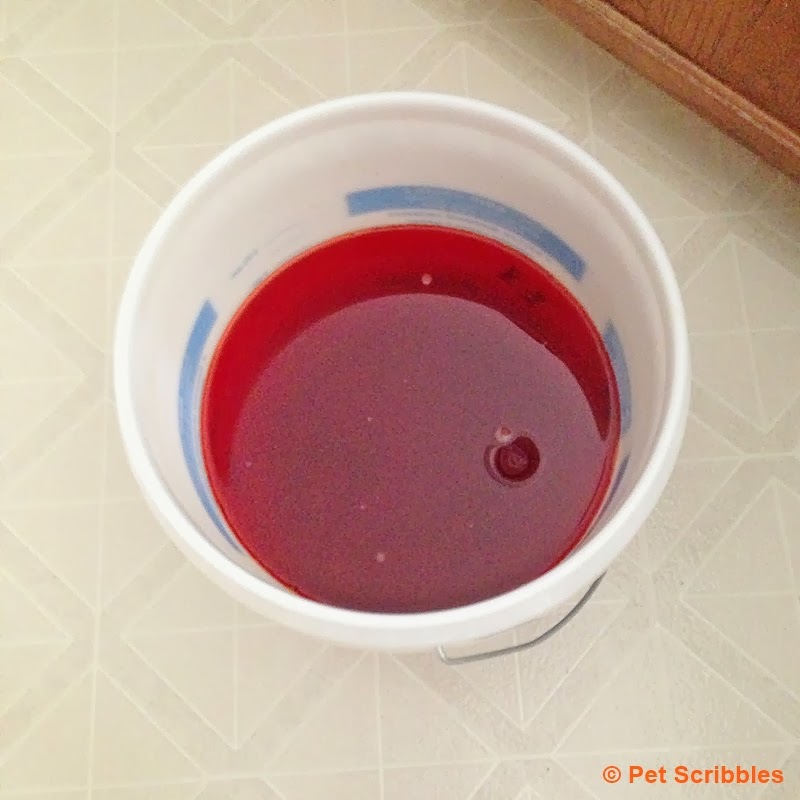
Here’s a picture of the dye bath, ready to go.
Oh wait – what’s missing in this picture?
Let’s pan out a bit for a better look, shall we?
I forgot to cover the floor with plastic bags.
Not good.
Step Zero: Prepare and protect your work area
Yes, this is Step Zero on purpose, because I forgot to put any type of protective covering underneath the bucket and around my work area.
This could have been a disaster!
Luckily my husband was nearby and saved me big-time, helping me get the plastic bags underneath the bucket and elsewhere!
Make sure you have your area properly protected against any dye spills. Even a speck of dye powder, once wet, can dye whatever surface it’s on.
Step Two: Immerse the wood pieces into the dye bath
I put all of the wood items into the bucket, and used the wooden skewer to keep pushing the top items down so they would be fully immersed in the dye. I did this for 15 minutes, making sure all areas of the wood were being dyed.
Step Three: Remove the wood and set aside to dry
After 15 minutes, I carefully took the wood pieces out, one at a time, being careful not to splash any of the dyed water around. Here they are drying nicely on some white paper towels on top of a garbage bag:
Step Four: Seal the wood
Once fully dry – I actually let them dry for 24 hours just to make sure – I sealed them with an acrylic sealer.
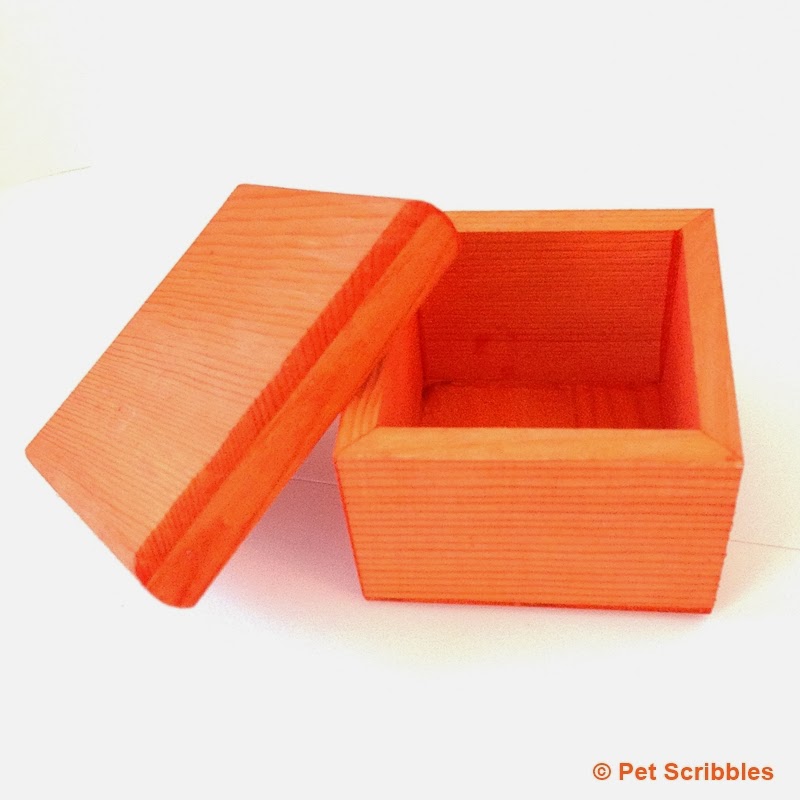
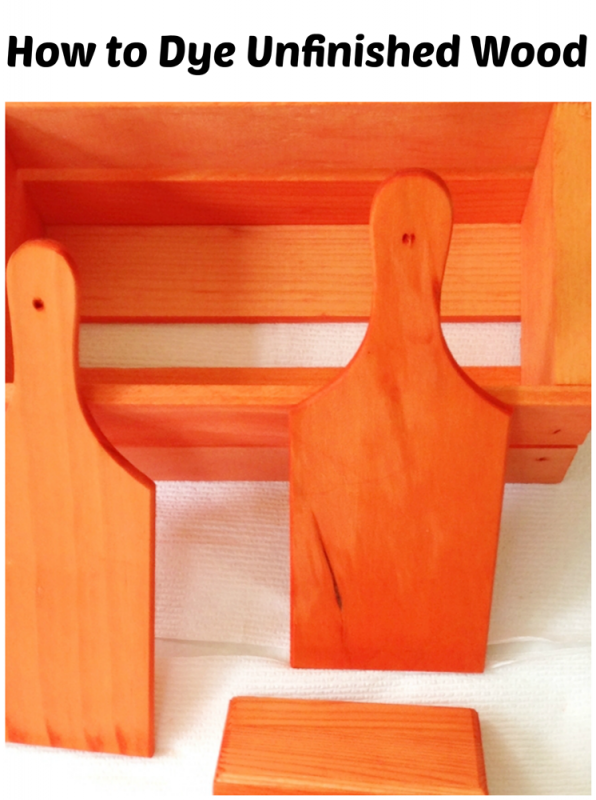
And that’s all there is to it! It really is that simple. And quick. I especially like how the dye covers everything, including the insides of the boxes and lids.
Step Five: Decorate and embellish further as desired!
There’s so many ways you can decorate your dyed wood items.
Here are some projects I created . . .
Halloween Plaque
Here’s a look at a cute decoration I made for Halloween. You could adapt this for other occasions or seasons.
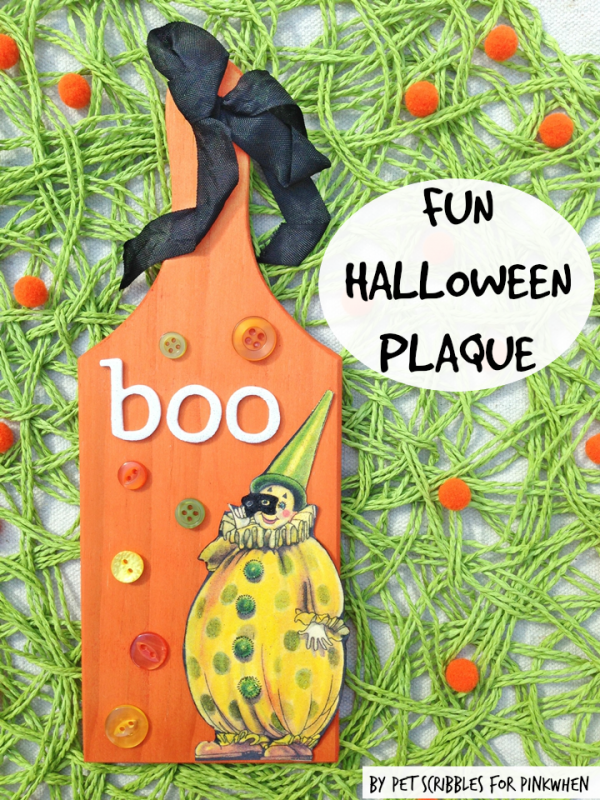
I simply glued on a vintage image I had previously printed out, glittered, and sealed. Then I used glue dots to attach the buttons. The letters were adhesive-backed already. I tied some black vintage seam binding through the handle’s hole to hang it up.
I think clowns are usually creepy, but this Victorian one didn’t seem so bad! And I love the brightness of the wood as the background for all this color too! (See the complete tutorial here.)
Fall Decor: Stenciled Wood Crate

I used a matte metallic black paint to stencil a design onto the crate. Easy Fall and Halloween decor! (You can see how I stenciled the crate by clicking here.)
Decorative Box to store buttons
To decorate this box, I used washi tape, white craft paint, small stamped letters and of course buttons! (Click here for the tutorial.)

Decorative Box perfect for gift-giving
For this box, I wanted to use purple with the orange color. First, I dyed the box again using purple Rit Dye, but brushed it on with a paint brush instead of using a dye bath.
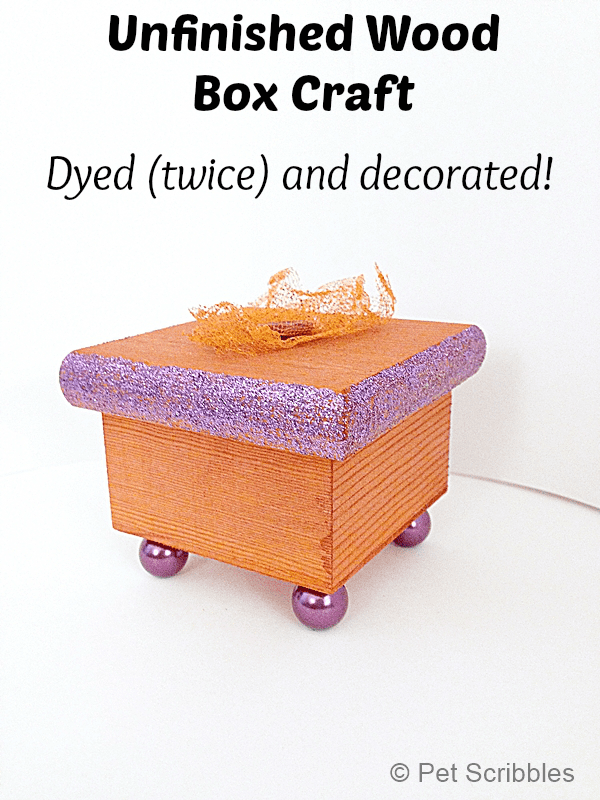
Next, I attached purple beads for the feet, then used purple glitter paint around the lid. The top of the box was embellished with a piece of orange tulle netting and a purple button. (You can see the full tutorial here.)
I hope I have helped you learn how to dye unfinished wood!
Happy crafting!
That is really cool Laura!
Thanks so much Bonnie and Trish! 🙂
I never would have thought to do that…..how clever!
Thanks for joining our Twirl and Take a Bow party! We would love to have you join us again…every Tuesday we go live!
Thanks Trina! Glad to join up this week… and the next one… and the next one… 🙂
OK I so never would have thought about this, genius and so easy! Thanks for the great inspiration!
You’re welcome Kelley! Stay tuned for more dyed wood projects…as now I need to dye everything in sight!
This is so clever! I would never have thought to use fabric dye on wood. I might have to try this on a few small pieces! 🙂
Small pieces are the perfect way to try this technique, Laura! Can’t wait to see what you create!
Wow, I never would have thought to do this. So clever! Thanks for the tips.
You’re welcome Emily! Hope you try it!