Today I’m sharing how to create charming Summer Shelf Art. By using beautiful retro-vintage style papers and layering them together, your bookshelves will be styling all Summer long!
Whoo hoo!
All this week, our Xyron Design Team is sharing projects made with some of the amazing paper collections and products from Simple Stories.
If you aren’t familiar with Simple Stories, you really should be! They have some of the best paper and sticker collections — around so many different themes — perfect for your planners, scrapbooks and journals!
Have a look for yourself at their extensive collections for holidays, seasons, sports, family, parties and more: click here to see!
FTC Disclaimer: I’ve received products/compensation as part of the Xyron Design Team. This Summer Shelf Art, however, is 100% my own project! Some of the links in this post are affiliate links. I explain more here.
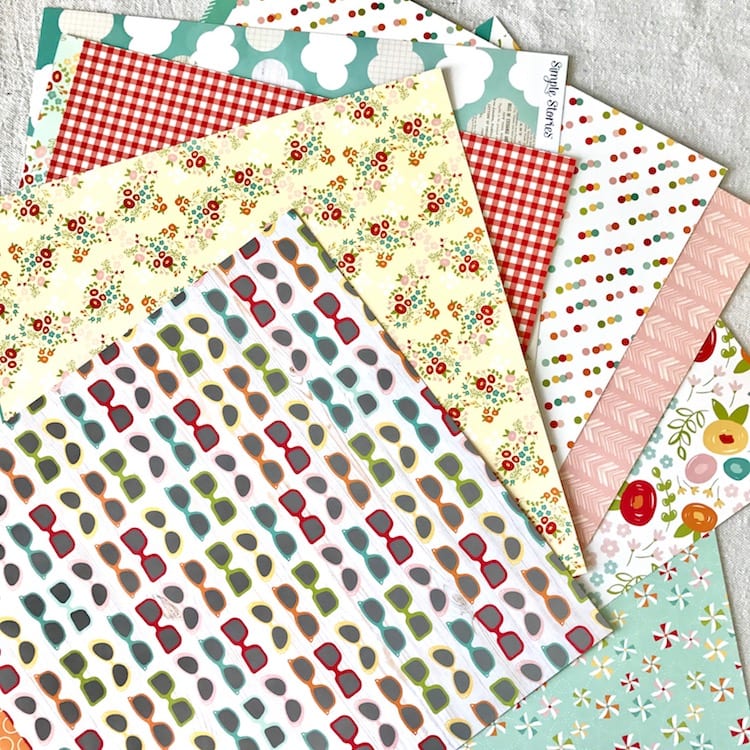
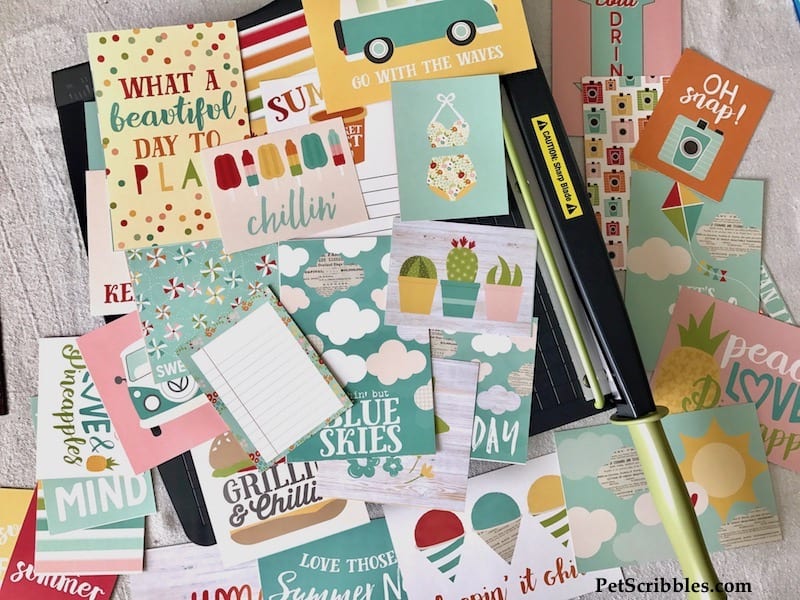
I received the Summer Days collection by Simple Stories…and Wow! Just Wow!
There are gorgeous 12 x 12 cardstocks . . .
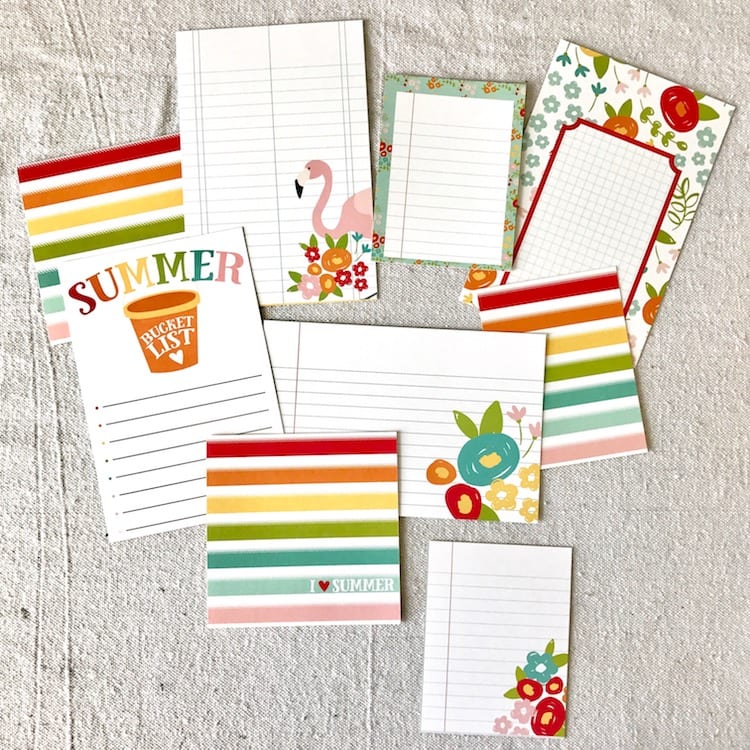
There are several journaling cards . . .
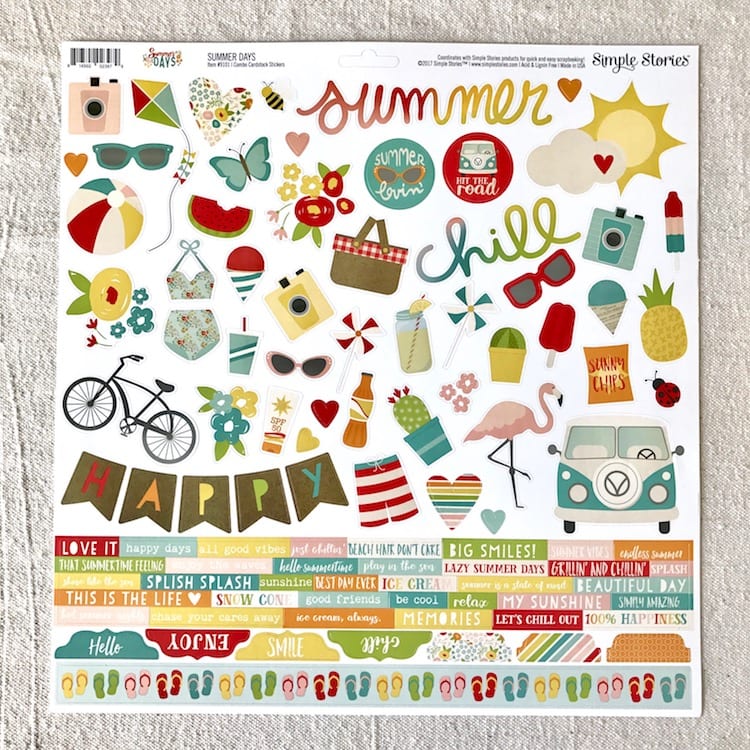
And there are so many fun stickers!
But wait, that’s only the beginning!
You want Summer? You got it!
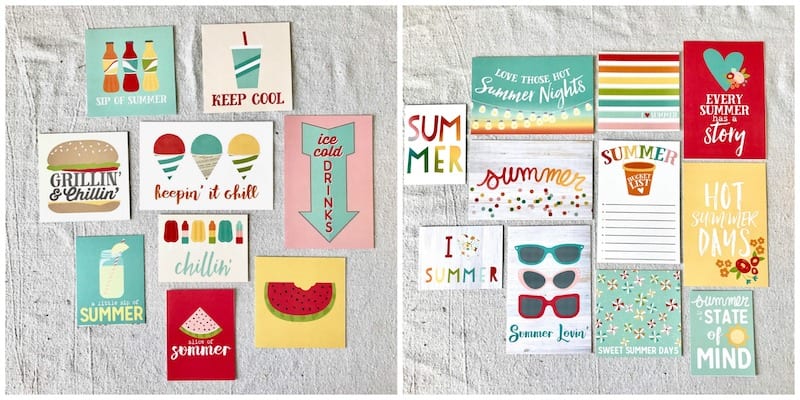
Picnics, BBQs and Summer . . .
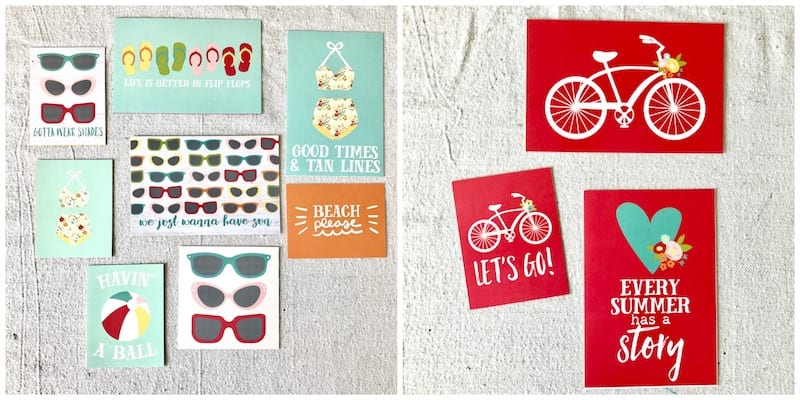
Beach time and Bicycles . . .
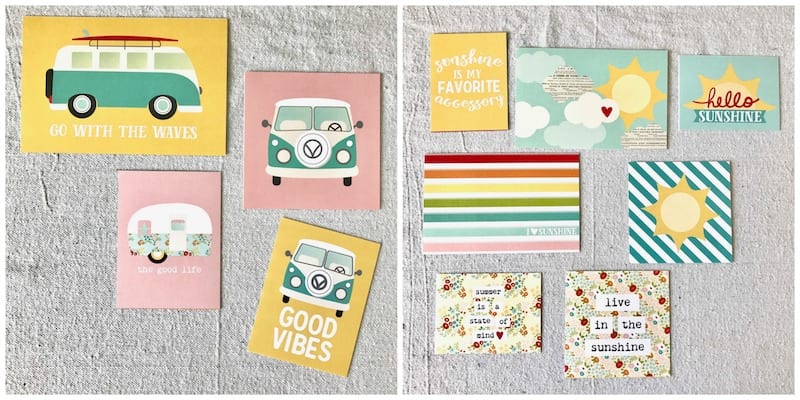
Campers and Sunshine . . .
And that’s still only a fraction of the themes within the Summer Days collection!
You’ll see a few more themes in my three sets of Summer Shelf Art I created below.
How to create charming Summer Shelf Art
Supplies:
- Xyron® Creative Station
- Xyron® Permanent Adhesive Refill, 9-inch
- Simple Stories Summer Days 12 x 12 Collection Kit
- Swingline Paper Trimmer
- Artist’s Loft Necessities Canvas Panels, 5 x 7 Value Pack – Michaels
- Artist’s Loft Necessities Canvas Panels, 6 x 6 Value Pack – Michaels
- FolkArt Color Shift Paint in Red Flash, Aqua Flash, Orange Flash
- Ranger/Tim Holtz Distress Ink Pad in Antique Linen – Michaels
- Tonic Studios/Tim Holtz Paper Distresser Tool
- Flat-back adhesive gems
- Sequins
- Liquid adhesive
Tutorial:
Step One: Choose artwork and coordinating background papers for each canvas. Measure and cut out using a paper trimmer.
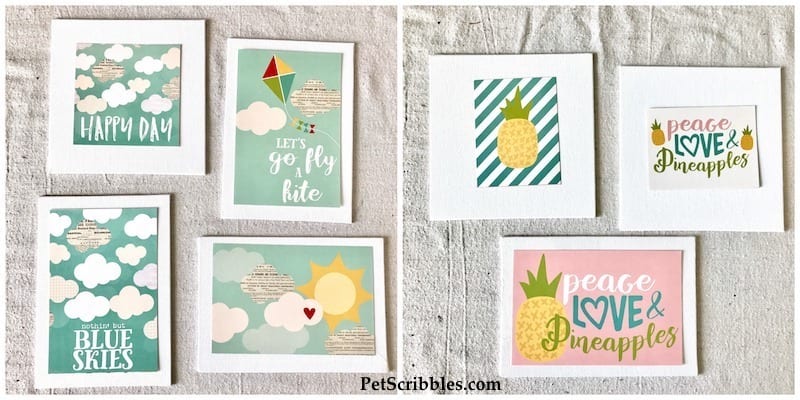
The vintage-retro style of the sky jumped out at me, and I admit is my favorite! But I also spotted the on-trend pineapple theme, and also a popular succulent-cactus theme, which you’ll see below.
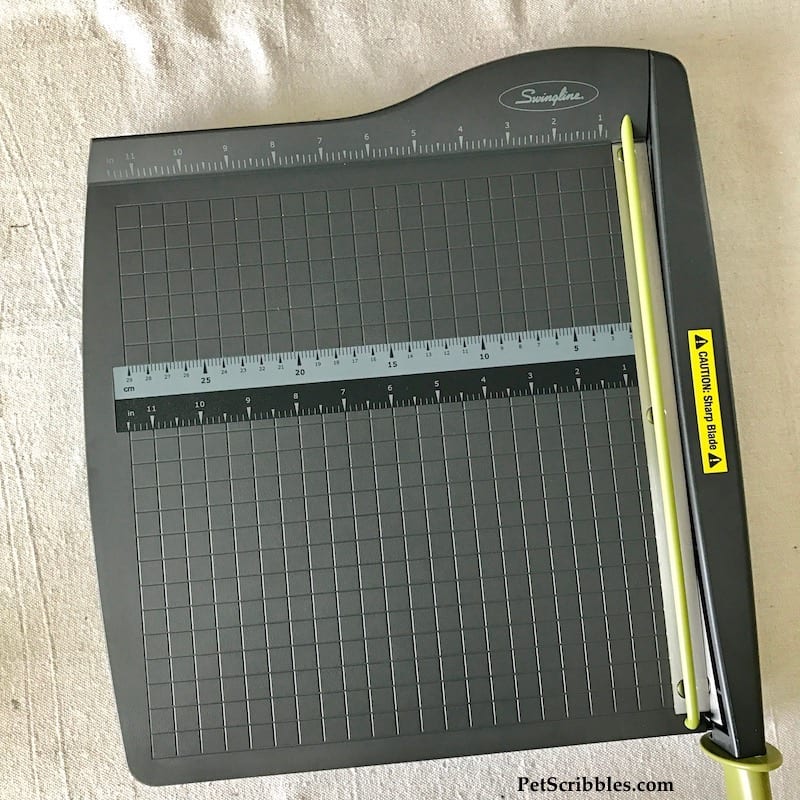
Can I just tell you that this paper trimmer blew me away! Who in the world gets excited about a paper trimmer, especially after using paper trimmers forever in her crafting? Me!
I’ll be sharing an in-depth review of this Swingline Paper Trimmer soon. Game changer!
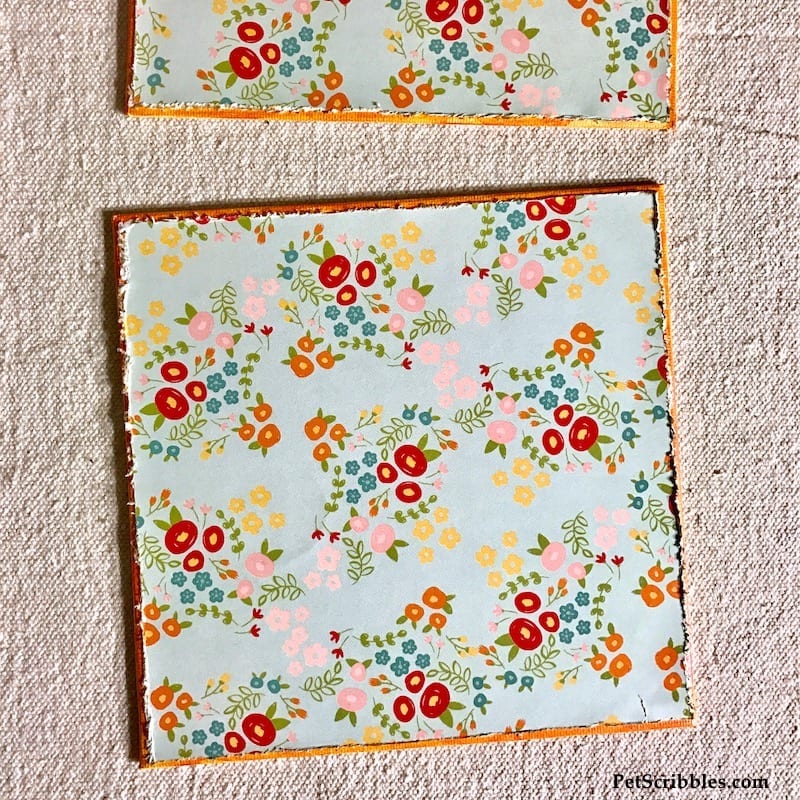
Once I cut out the papers to the dimensions of each canvas, I went back and cut an additional 1/4-inch off each edge of the papers. I did this so that the painted borders would be visible once each background paper is adhered to each canvas.
Step Two: Paint the edges and outer borders of each canvas with paint of your choice.
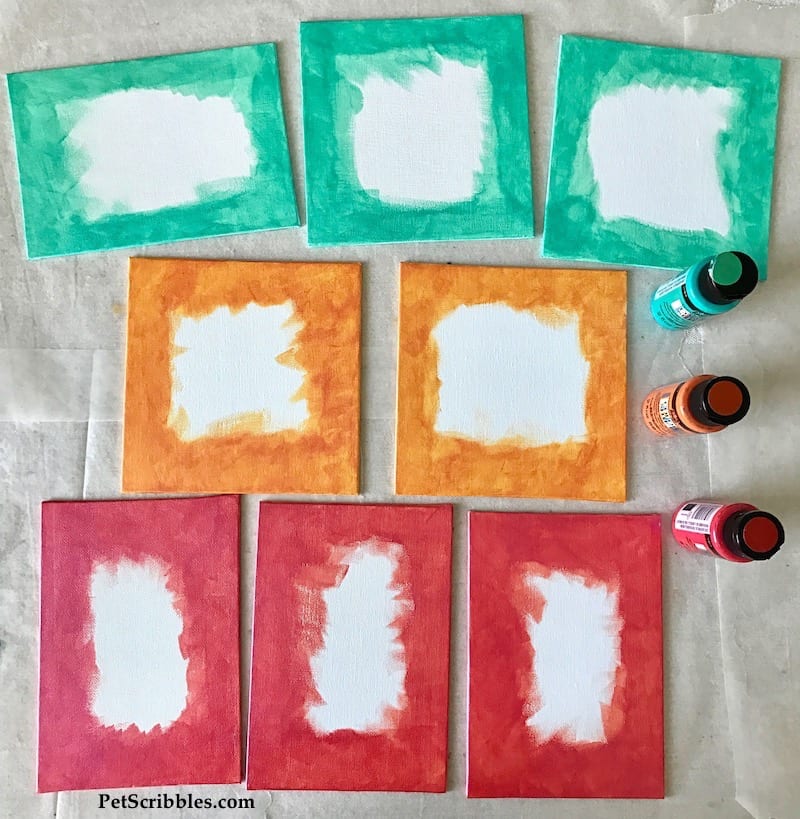
I used FolkArt Color Shift paints because I like the contrast of vibrant, shiny color with the muted colors in the artwork.
I used two coats.
Let dry.
Step Three: Distress edges of each background paper.
I used the Tonic Studios/Tim Holtz Paper Distresser Tool but you can use sandpaper or even an emory board.
Step Four: Lightly ink the distressed edges of the background papers.
Step Five: Lightly ink the edges of each piece of artwork.
I used Tim Holtz Distress Ink in Antique Linen for Steps Four and Five.
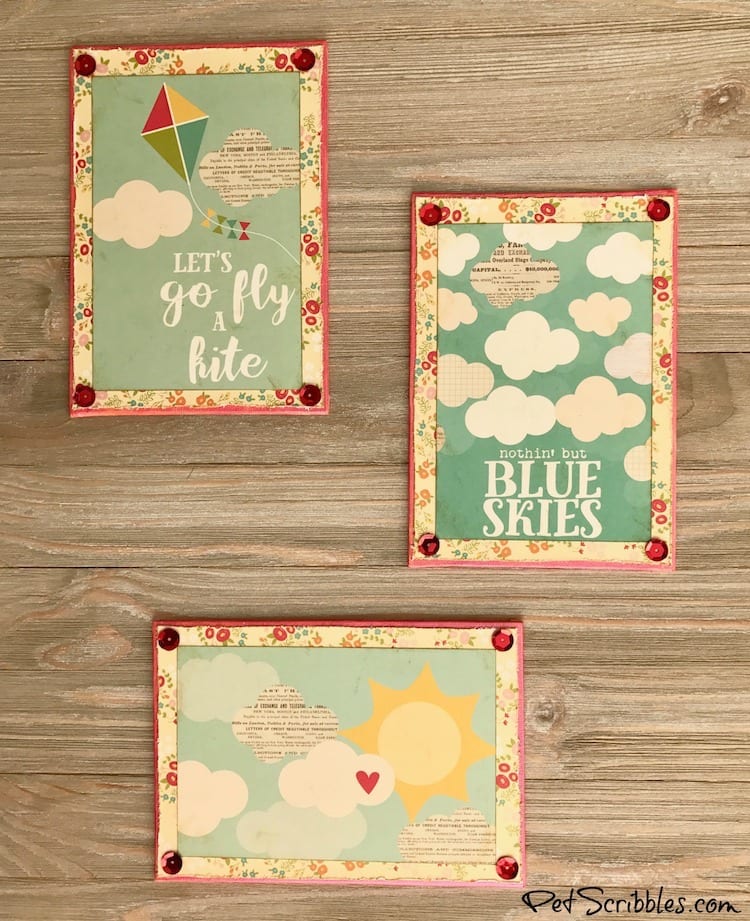
For the “sky” artwork, I distressed those three papers more, to add to the retro vintage look.
Step Six: Run the background papers through the Xyron Creative Station to add permanent adhesive to the backs of each one.
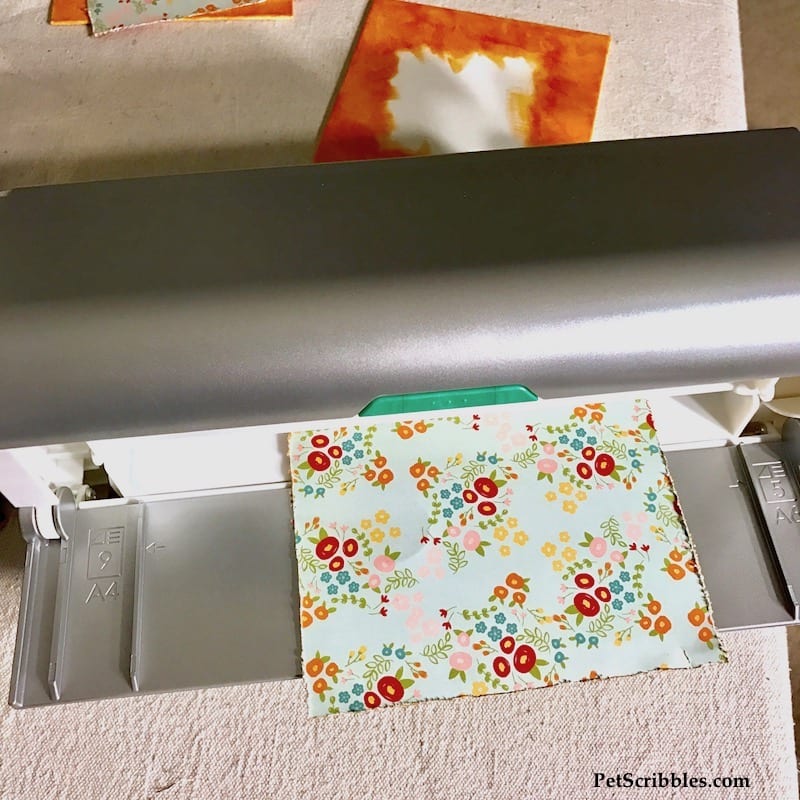
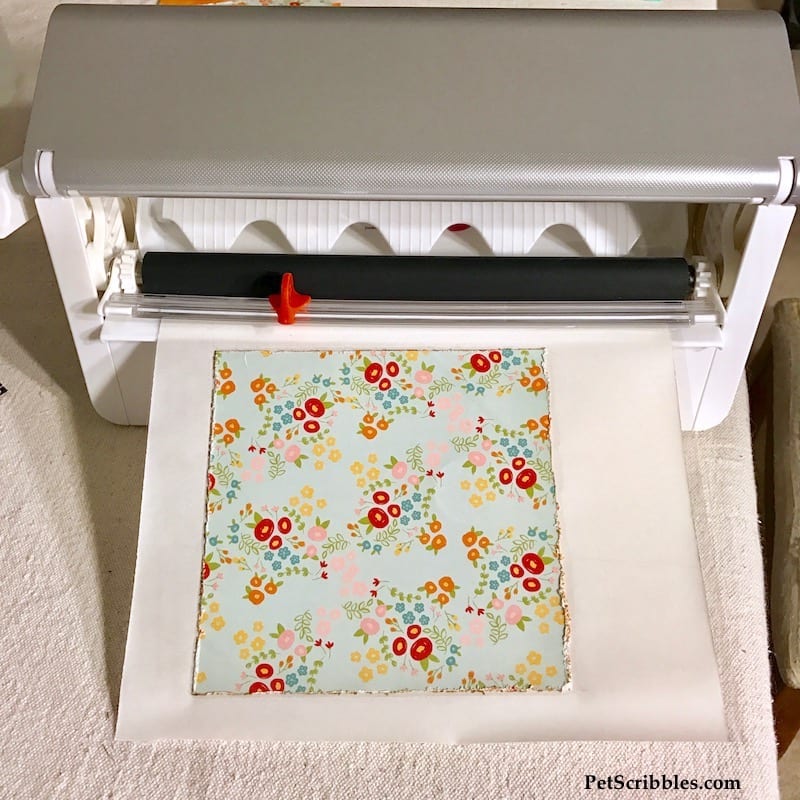
Step Seven: Remove the protective covering and gently peel off the background paper. Adhere to the chosen canvas.
Rub and press the paper to the canvas to stick together.
Repeat for every background paper and canvas.
Step Eight: Run the artwork through the Xyron Creative Station to add permanent adhesive to the backs of each one.
Step Nine: Remove the protective covering and gently peel off the artwork, then adhere to the chosen canvas.
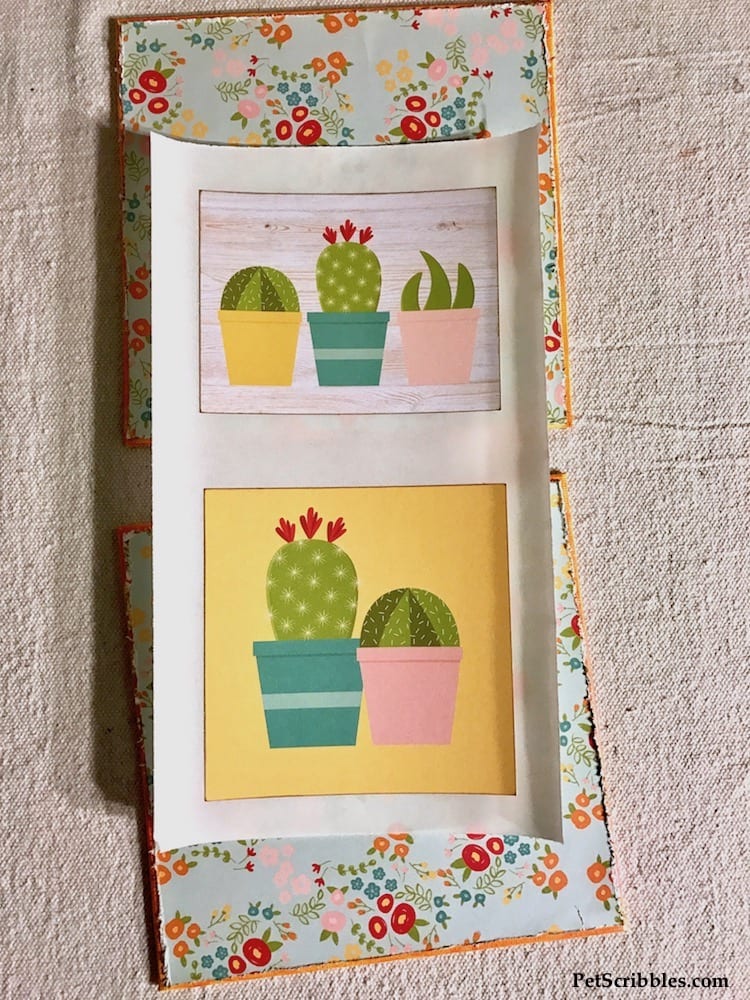
Rub and press the artwork to the mounted background paper to stick together.
Repeat for every piece of artwork for each canvas.
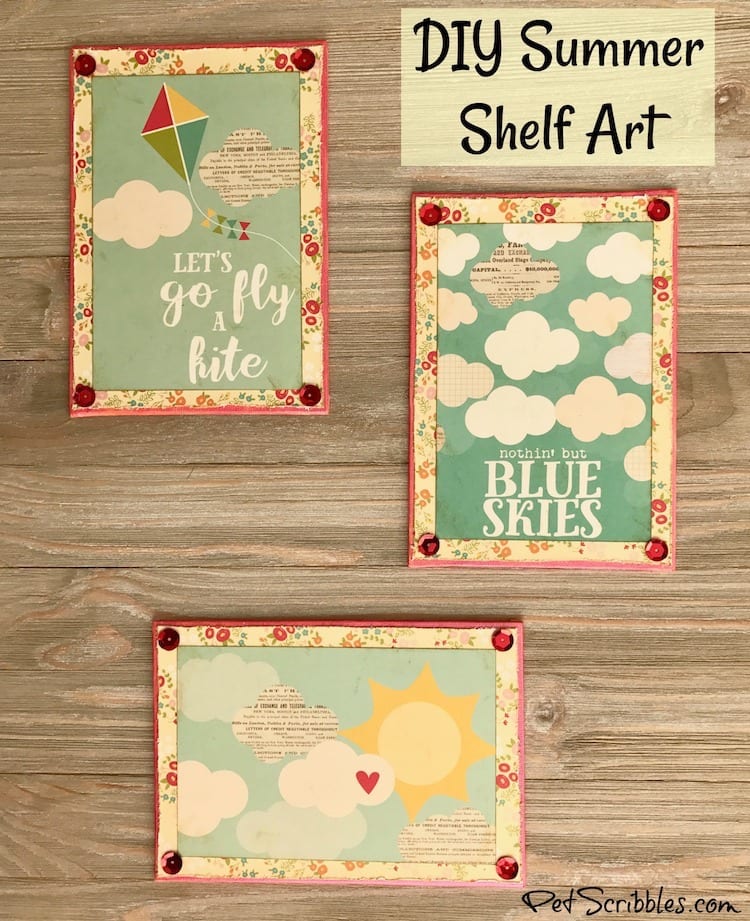
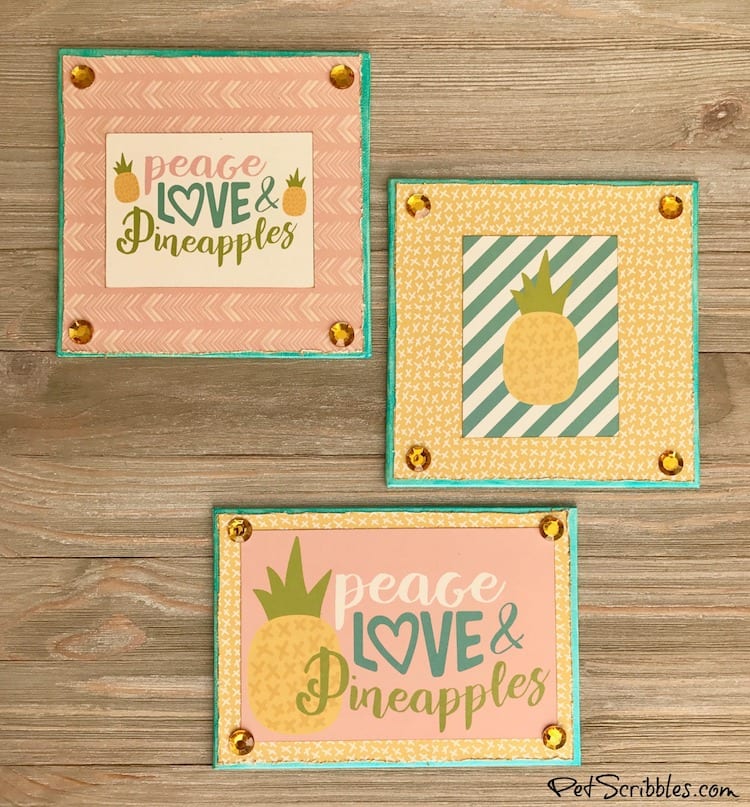
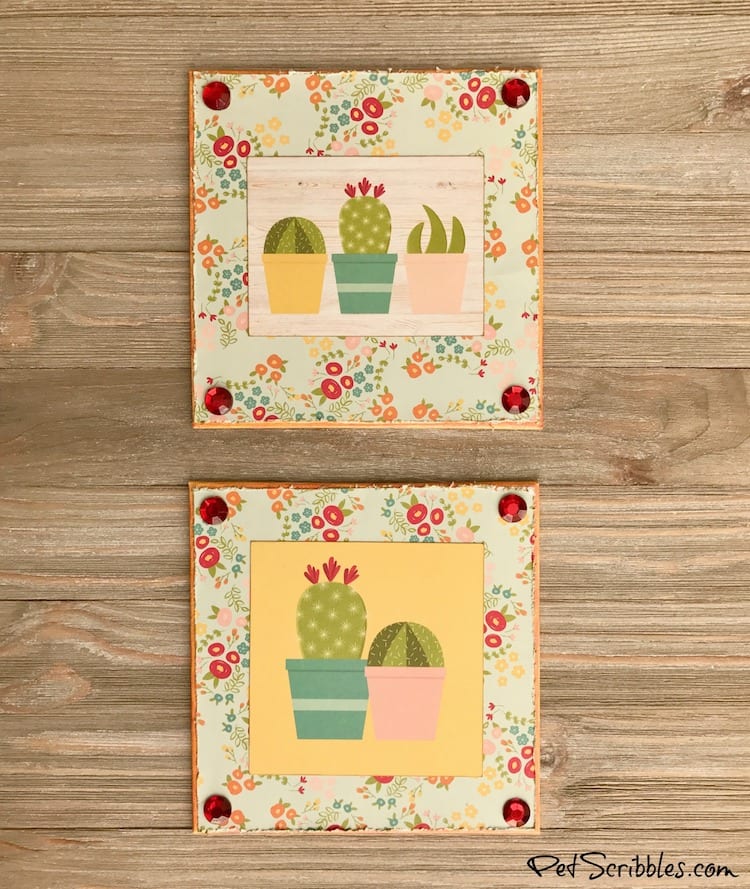
Step Ten: Adhere matching flat-back gems to the corners of each canvas using liquid adhesive.
Use sequins in place of the gems for the “sky” canvases.
All finished!
First up, is my Summer Pineapple Shelf Art Trio!
Next is my Summer Succulent Cactus Shelf Art duo!
And finally, my charming Summer Sky Shelf Art!
I hope I’ve been able to show you two things:
- You can use decorative paper collections to create your own shelf art.
- You can find just about any theme you need or want via Simple Stories!
Simple Stories
I hope you’ll visit Simple Stories to see their fun collections!
If you’re looking for a certain theme, chances are very good they have just what you want!
And visit our Xyron Facebook page all week long for more amazing projects using Simple Stories papers and more!
Happy crafting!
Leave a Reply