How to make a beach memory display, for a unique way to capture and share your special beach finds like shells, sea glass and sand!
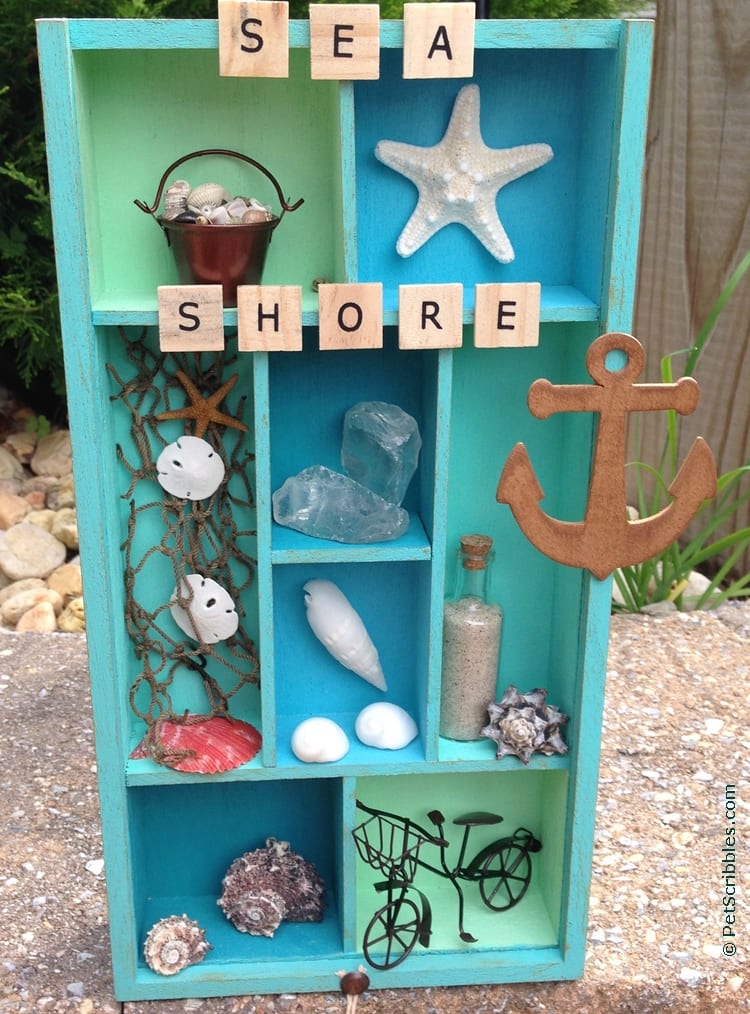
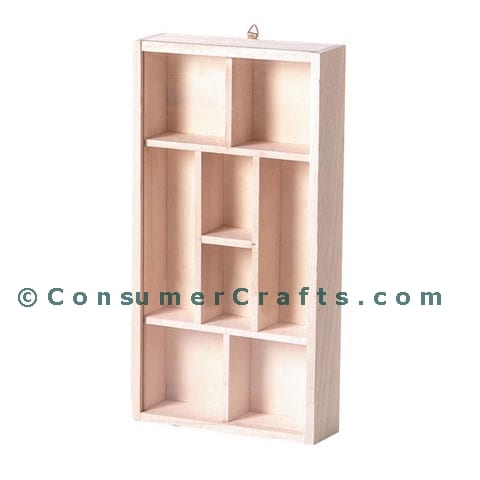
A fun way to display special beach finds is with a printers tray.
These trays are basically like shadow boxes with compartments or shelves.
You can find them in the big-box craft stores, in both square and rectangular shapes. Some are already stained and finished, and others come in unfinished wood — perfect for you and me to get creative!
Here’s the printers tray that I used:
Supplies: (includes Amazon affiliate links – see my disclosure here)
- Unfinished wood printers tray (ConsumerCrafts.com)
- Unfinished wood small shapes (anchor, crab, tag)
- Americana Multi-Surface Satin Paint (DecoArt)
colors used: Coastal Waters, Deep Turquoise, Turquoise Waters, Soft Jade, Waterfront, Brown Sugar, Coffee Bean - E6000 Adhesive
- Americana Stick On Stencil “Anchors Aweigh” (DecoArt)
- Wax paper
- Paper Towels
- Small paintbrushes
- Stencil brush or cosmetic sponge
- Recycled plastic lids (to hold the paints)
- Beach-themed embellishments: seashells, starfish, sea glass, miniature bike, fishing net, glass vials, sand, miniature bucket
How to Make a Beach Memory Display
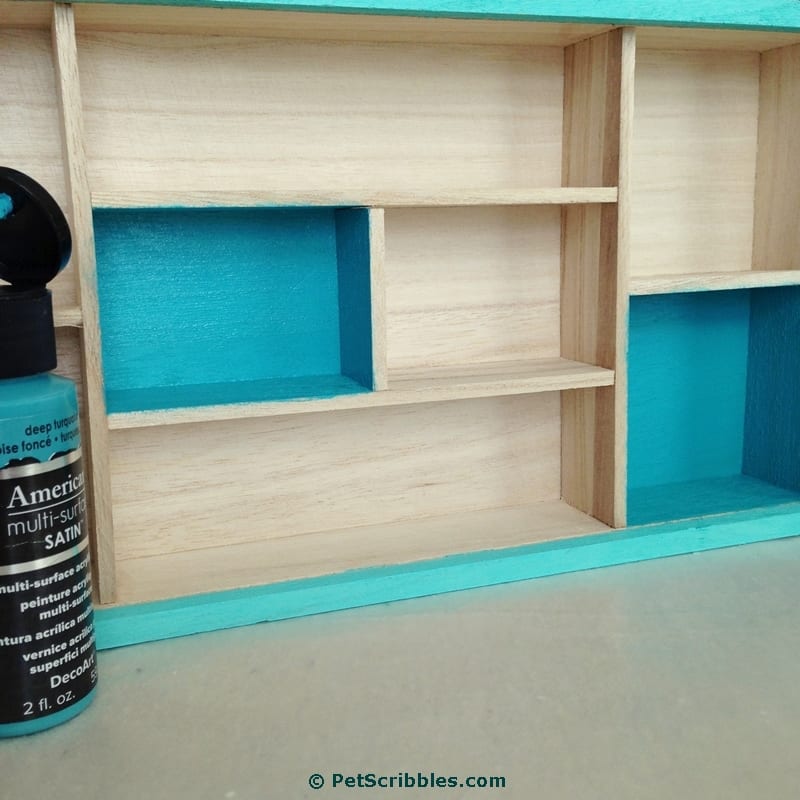
Step One: Gently sand any rough edges of the unfinished wood printers tray and wipe away dust with a slightly damp paper towel. Let dry.
Step Two: Paint the outer surfaces of the printers tray with two coats of Coastal Waters multi-surface paint.
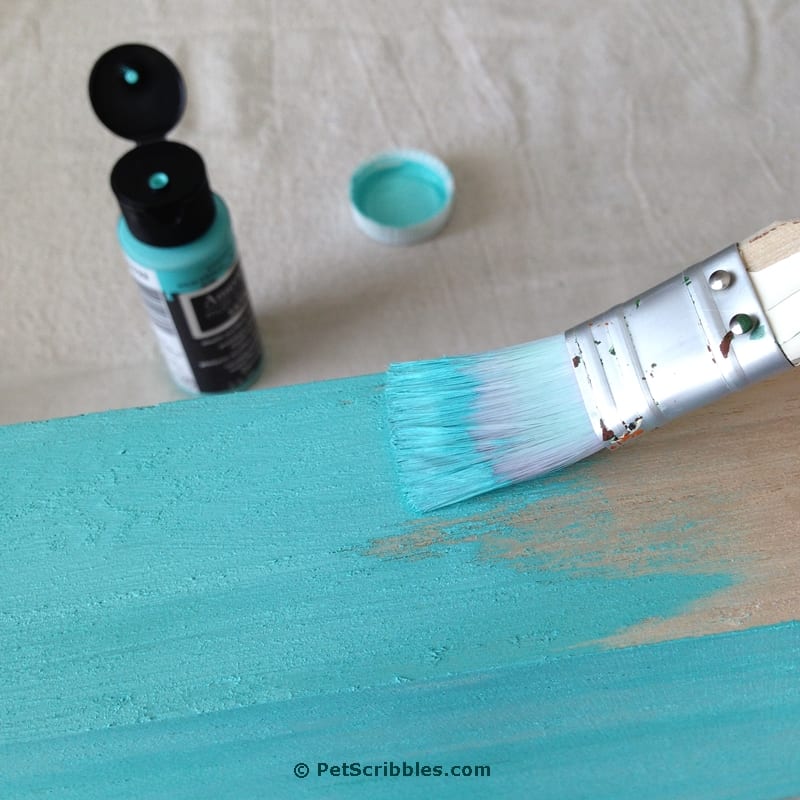
Step Three: Paint the outer rim of the printers tray as well as the inside edges with two coats of Coastal Waters.
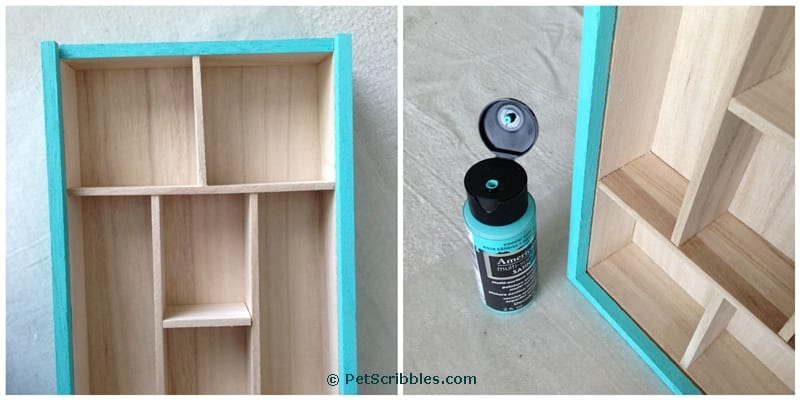
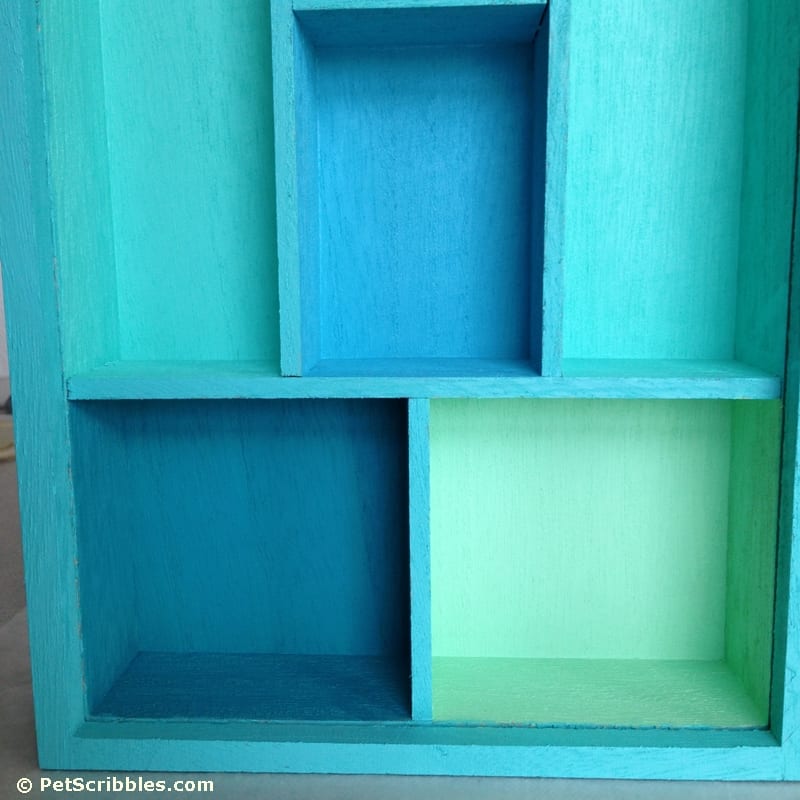
Step Four: Choose two of the tray compartments — not next to each other — and paint them with two coats of Deep Turquoise multi-surface paint.
Step Five: Paint the two longer compartments in the printers tray with two coats of Waterfront multi-surface paint.
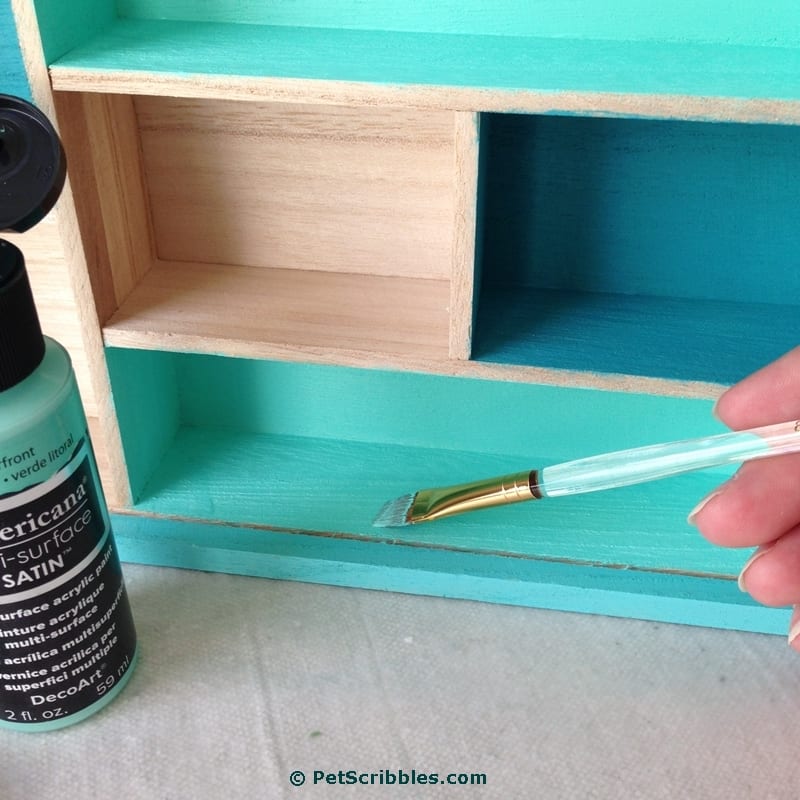
Step Six: Paint two of the tray compartments — again, not next to each other — with two coats of Soft Jade multi-surface paint.
Step Seven: Paint the remaining two tray compartments with two coats of Turquoise Waters multi-surface paint.
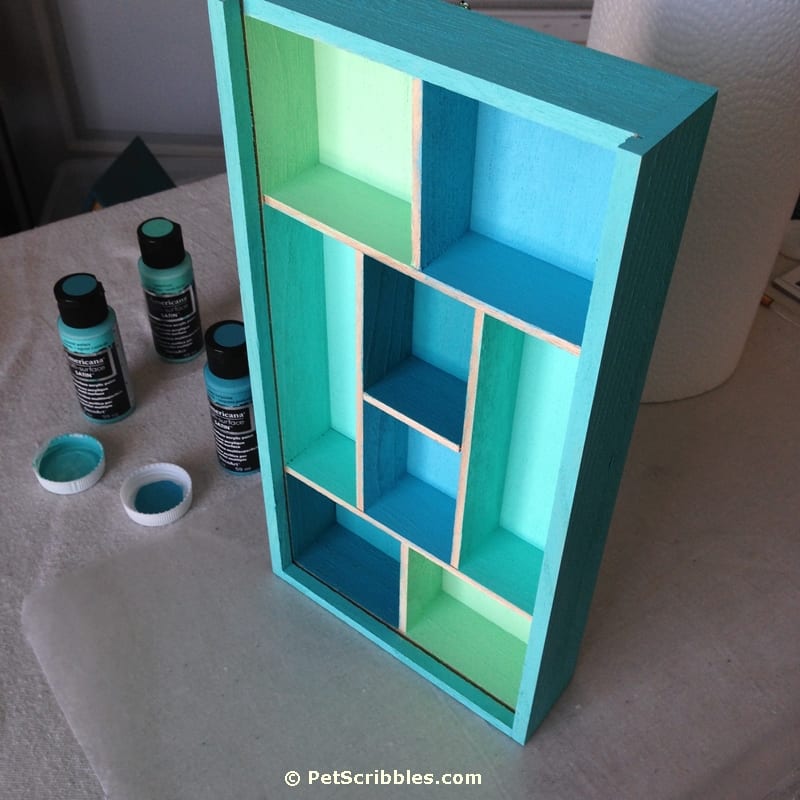
Here’s what it will look like so far:
Step Eight: Paint the top edges of each compartment with two coats of the Coastal Waters shade you used in Steps 2 and 3.
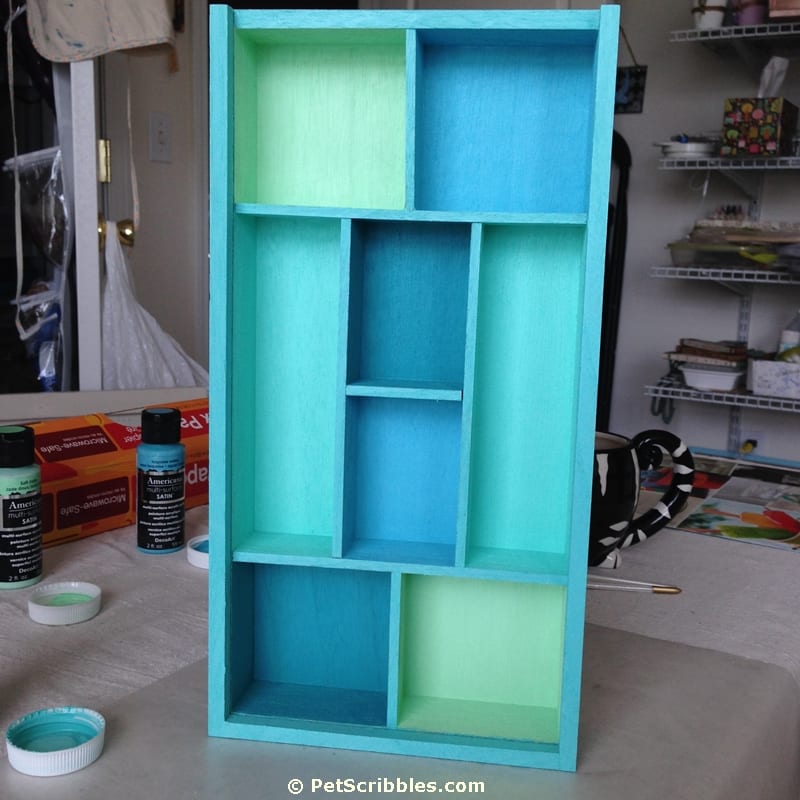
Here’s a closer look at the different shades and how they go together nicely for that beachy, coastal look:
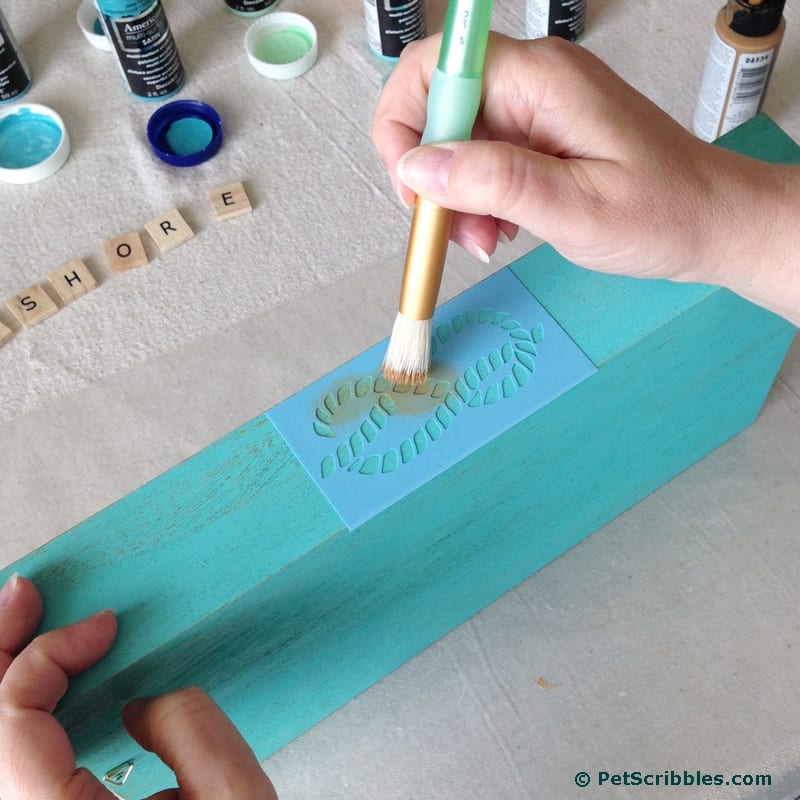
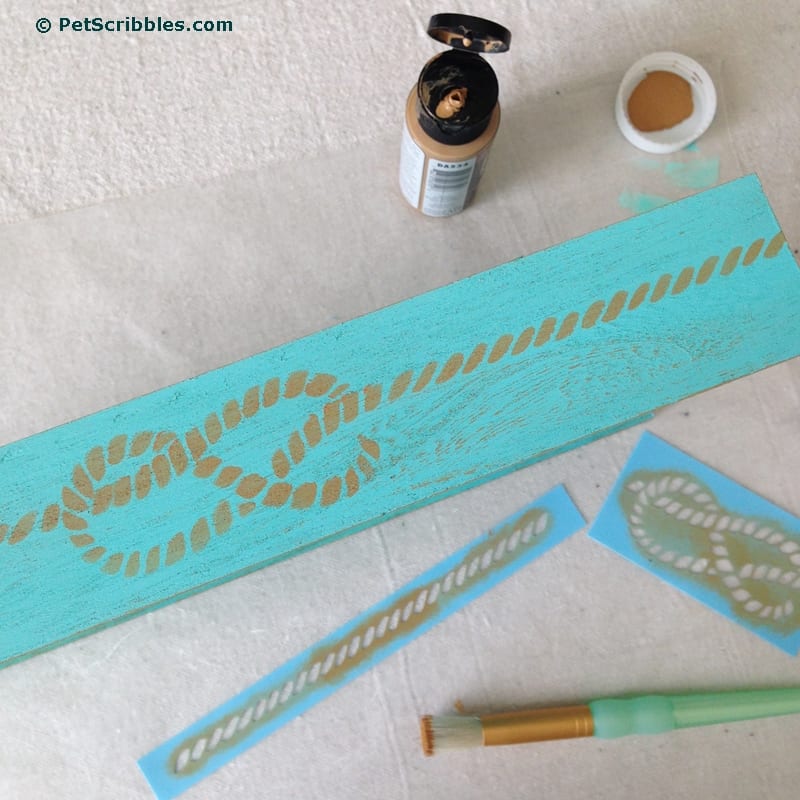
Step Nine: Using Brown Sugar multi-surface paint, apply a very light distressing to the outside of the printers tray using a dry brush technique. This gives a more weathered look.
How to dry brush:
- Load a small amount of paint onto the tip of your paint brush.
- Wipe most of the paint onto a paper towel.
- Holding the brush almost horizontal, very lightly drag the paint brush tip over the painted wood.
- If you’ve never dry brushed before, try this out on a clean paper towel first to get the hang of it.

Don’t forget to lightly go over the edges too.
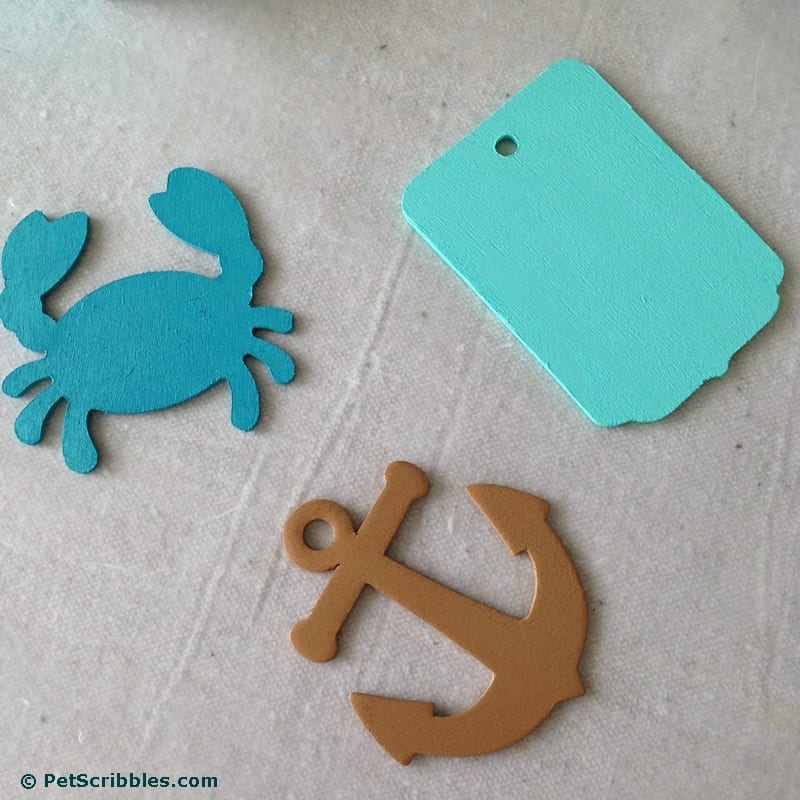
Step Ten: Paint the anchor, crab and tag wood shapes with two coats of Brown Sugar, Deep Turquoise and Waterfront, respectively.
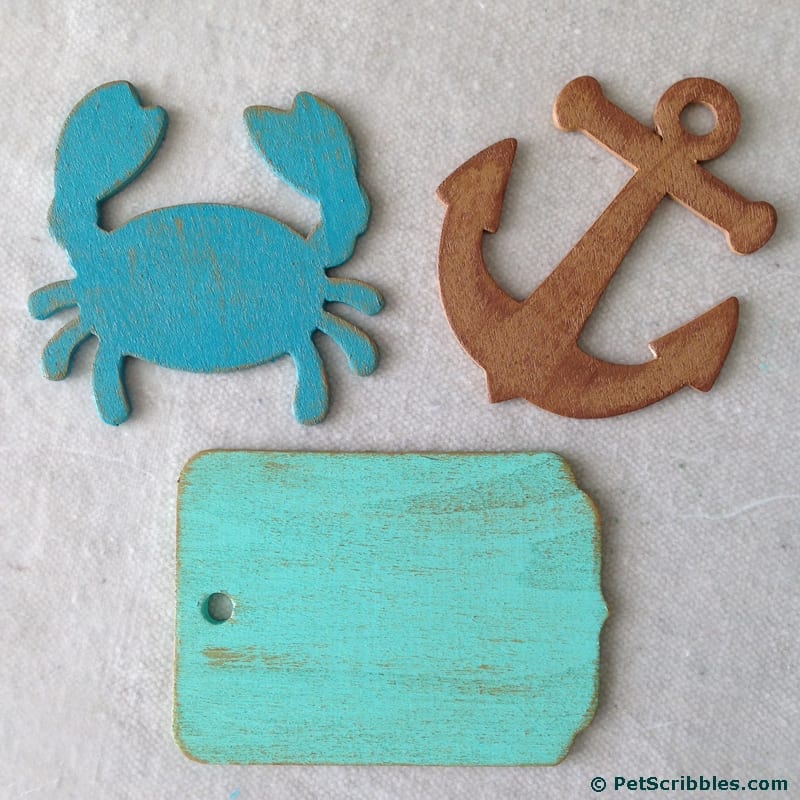
Step Eleven: Dry brush a very light bit of Coffee Bean onto each wood shape to give a weathered look.
Step Twelve: Stencil on the knotted rope design (from the Americana “Anchors Aweigh” Stick On Stencils) onto both sides of the printers tray.
Step Thirteen: Stencil on the long rope design (from the “Anchors Aweigh” collection) onto each end of the knotted rope (from Step 12) onto both sides of the printers tray.
And now comes the truly fun part . . .
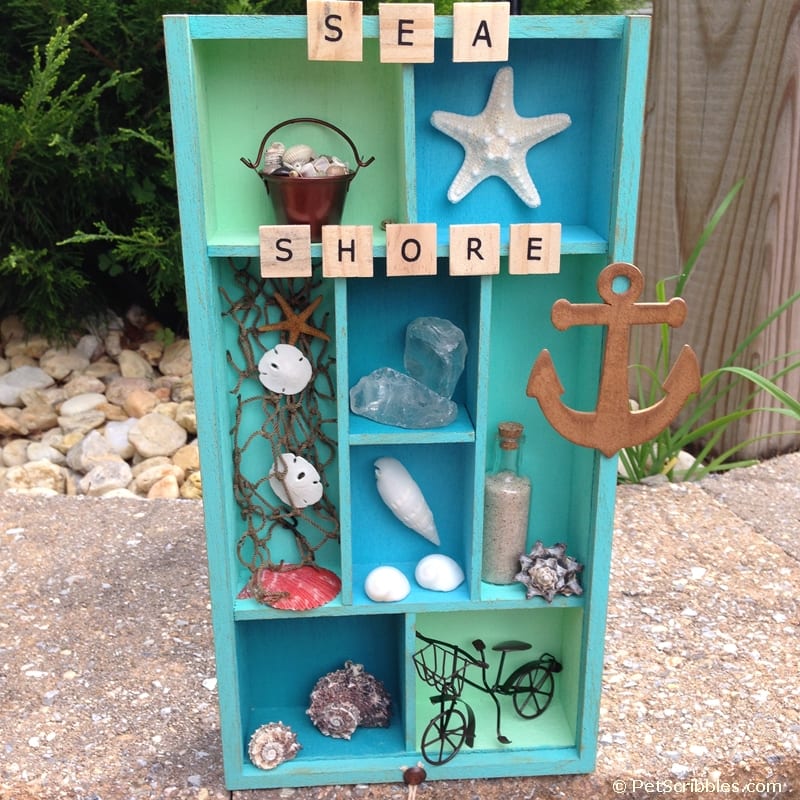
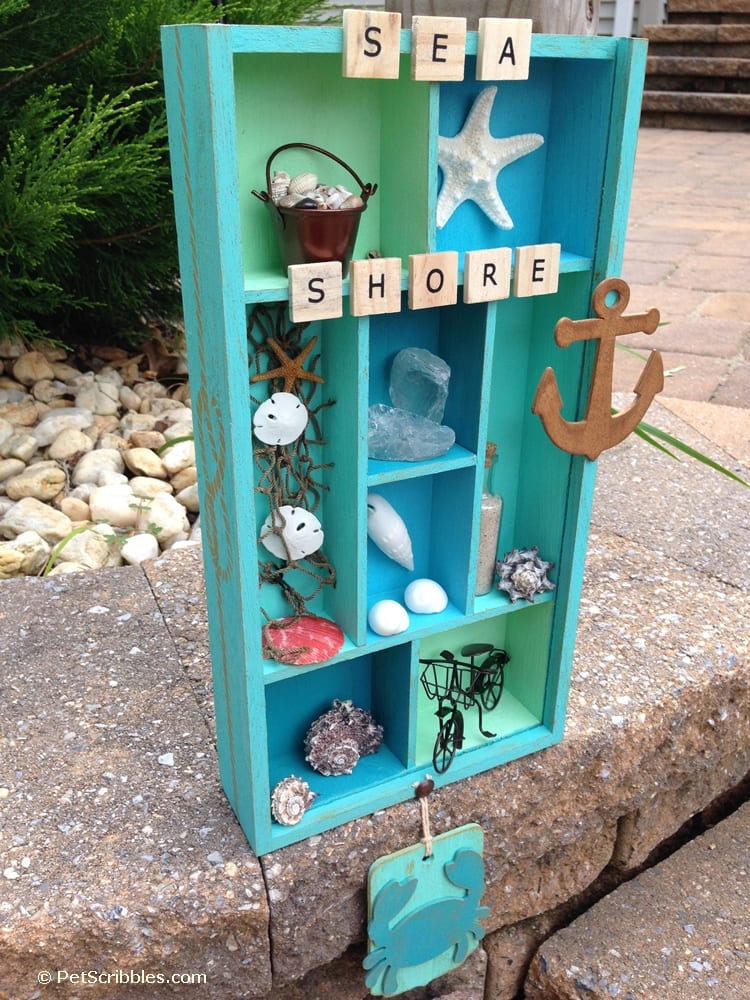
Step Fourteen: Decide on the placement for each of your special memories from your beach vacation!
If this was a family trip, have your kids help you choose which special items you’ll feature in each compartment.
Helpful Note: To keep everything secure, I attached almost everything with E6000 — a strong, clear adhesive.
I chose special shells, sea glass plus sand from Long Beach Island — which is a stone’s throw away from where we live.
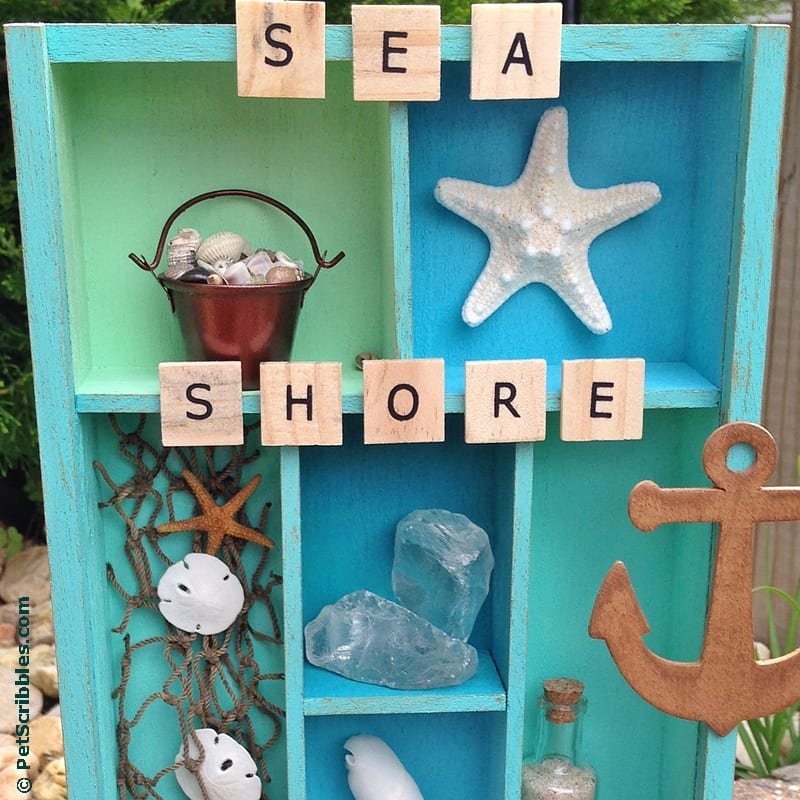
- Scrabble tiles spell out “seashore”and are attached to the front.
- A rusty-looking beach pail is filled with teeny tiny shells.
- A white starfish really pops against the cool blue paint colors, as does the white sea glass.
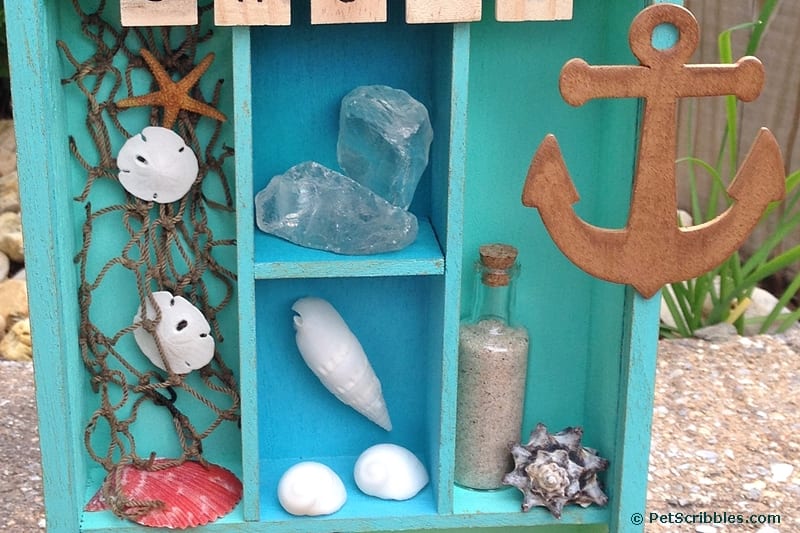
- Fisherman’s netting (found at the craft store) holds a starfish and sand dollars.
- A miniature glass vial is perfect to decoratively display sand.
- Special shells are grouped together as miniature collections.
- The painted anchor adds dimension and interest.
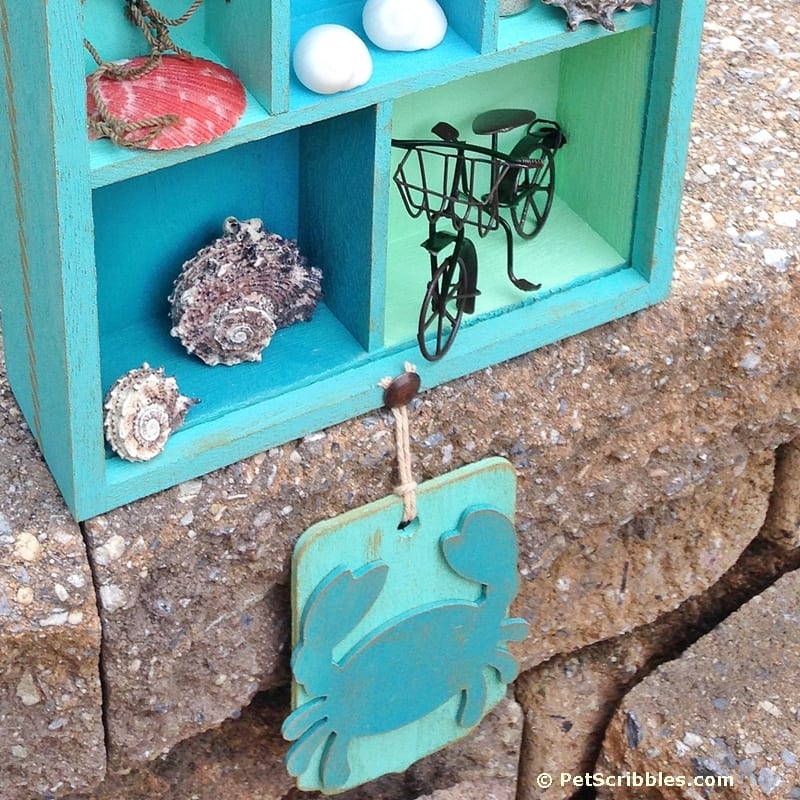
- The rusty-looking beach cruiser bike reminds us of another favorite local beach (with a fabulous boardwalk) just a bit south: Ocean City, New Jersey.
- The crab shape is glued onto the wood tag. Twine and a copper furniture tack attach the tag to the bottom of the display.
It was a bit of trial and error until I was satisfied with the overall arrangement, but again — that’s part of the fun!

I hope this inspires you to display your special beach vacation memories in a unique way!
Happy crafting!
~Laura