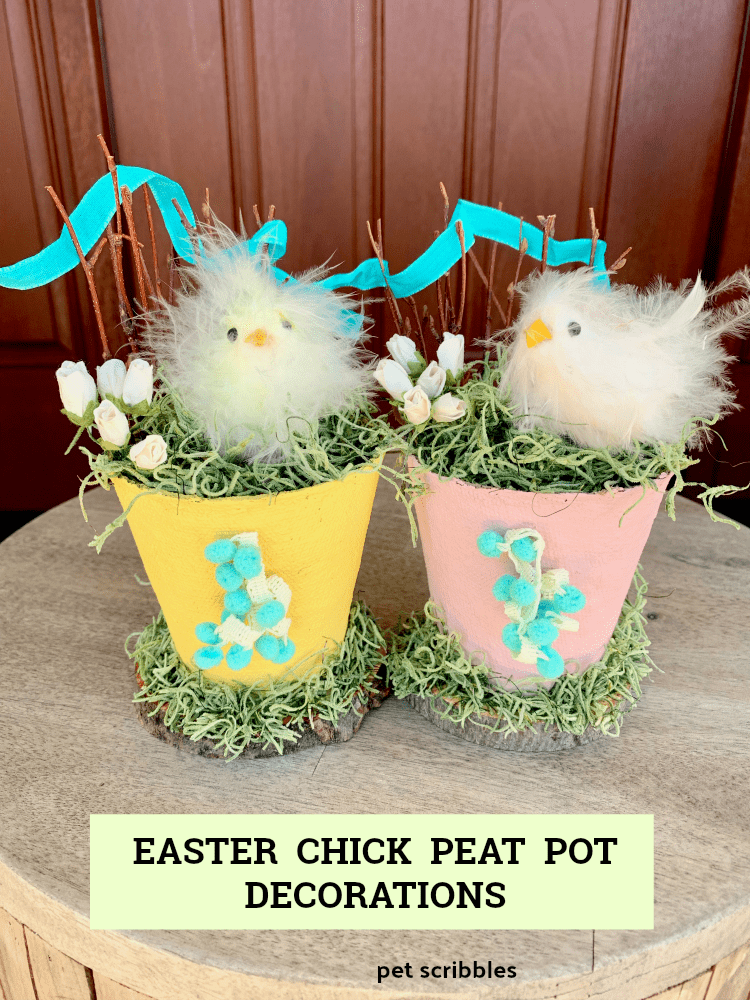
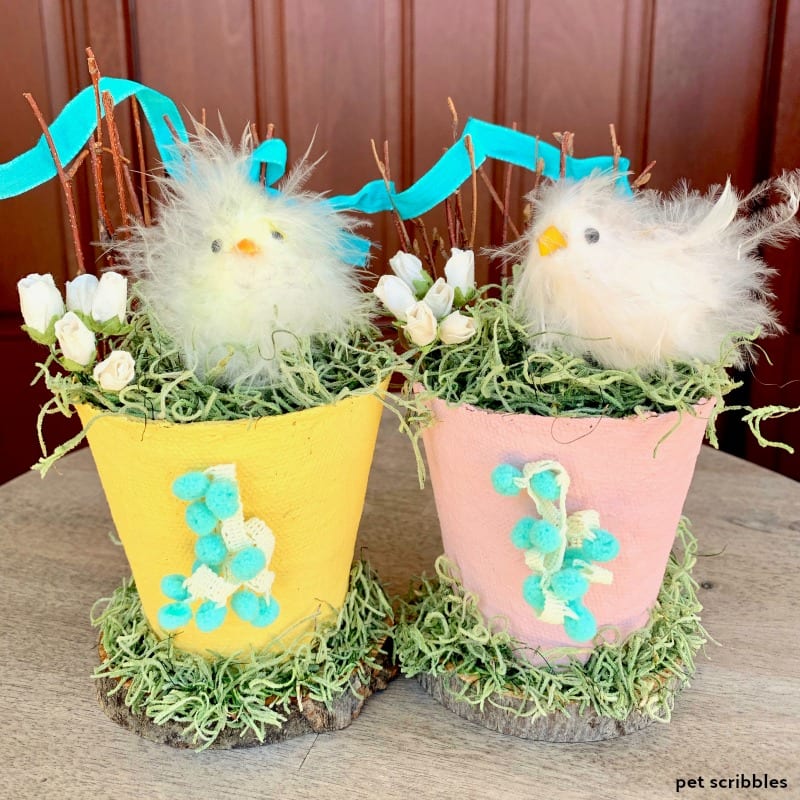
These Easter Chick Peat Pot Decorations are easy to put together. Paint the peat pots, then glue and add pretty touches for a sweet Spring display!
Although peat pots are mainly used for gardening, they are also a popular crafting item. It’s easy to see why, as they can be painted and decorated in so many different ways!
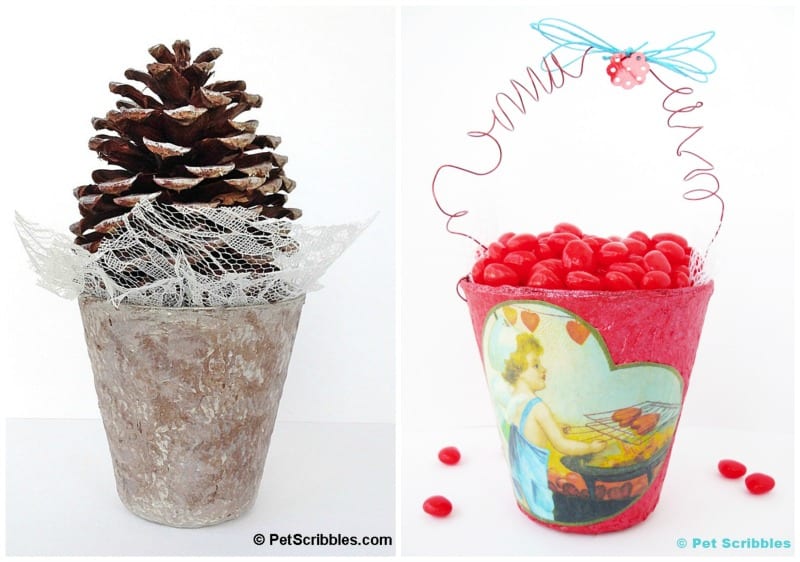
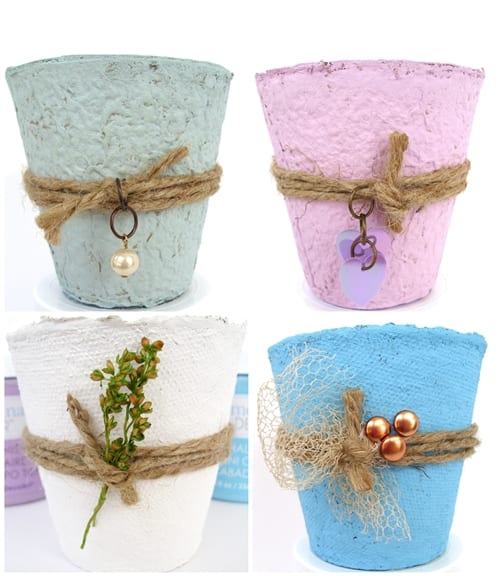
Here are two examples of how I painted peat pots previously for holiday decorations. On the left is a Winter pinecone “tree” in a pot. The Valentine candy container on the right — complete with Cupid grilling up some hearts — holds red hots.
Several years ago, I created Easter Peat Pots for Parade Magazine, and realized this year I wanted to do another Easter set.
This time I created matching peat pots for two adorable fluffy, feather Easter chicks that I have in pale yellow and pale pink!
You can easily create similar Easter chick peat pot decorations too, and here’s how to do it . . .
Supplies:
FTC Disclaimer: As a Plaid Crafts Ambassador, I primarily use their products, which I sincerely love and recommend. These Easter Chick Peat Pots are 100% my own project. Some of the links in this post are Amazon affiliate links. I explain more here.
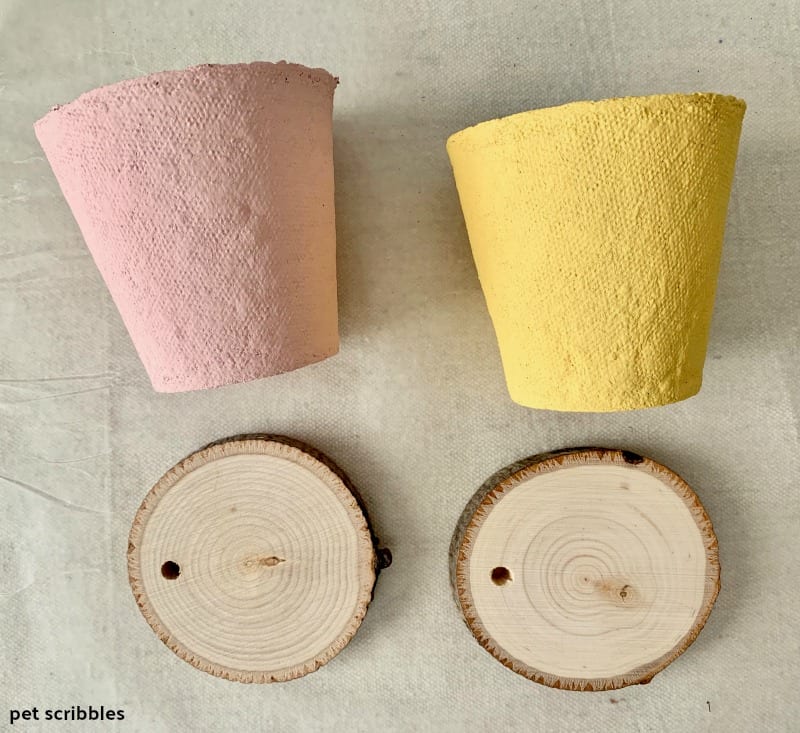
- Peat pots
- Small wood slice ornaments
- Feather Easter Chicks
- Waverly Inspirations Chalk Paint in Maize and Ballet Slipper — Plaid Crafts
- (I got a fabulous mini set of these paints at Walmart,
but you can use similar colors in this set from FolkArt)
- (I got a fabulous mini set of these paints at Walmart,
- Small paintbrush
- E6000 Craft Adhesive
- Aleene’s Clear Gel Tacky Glue
- Mini Glue Dots
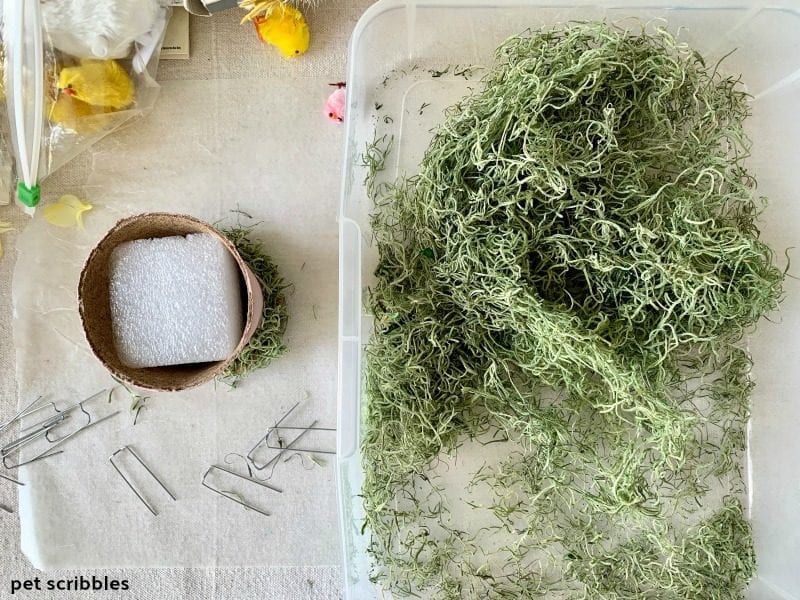
- Spanish moss for crafting
- Floral pins (also called greening pins)
- Tiny mulberry paper flowers
- Very small twigs
- Scissors
- Wax paper
- Embellishments: ribbon, vintage trim, tiny paper flowers
Making the Easter Chick Peat Pot Decorations Base
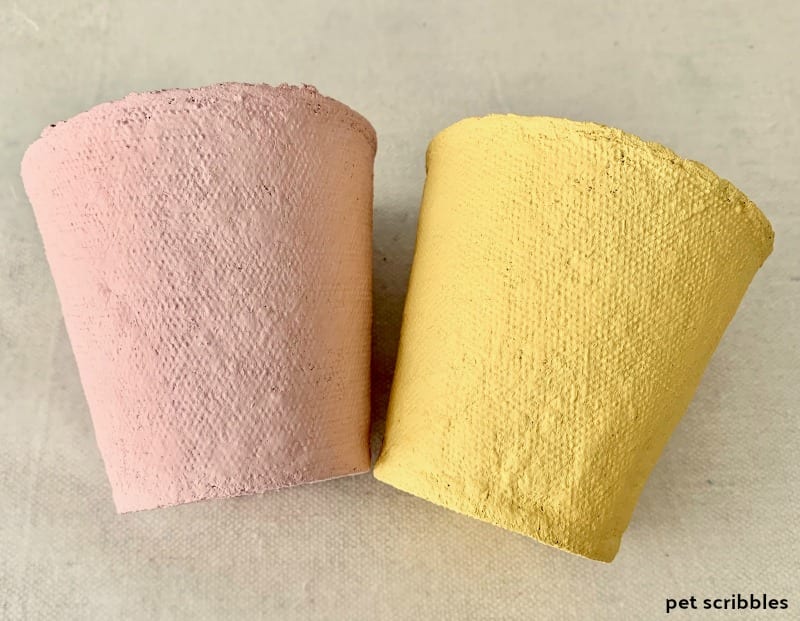
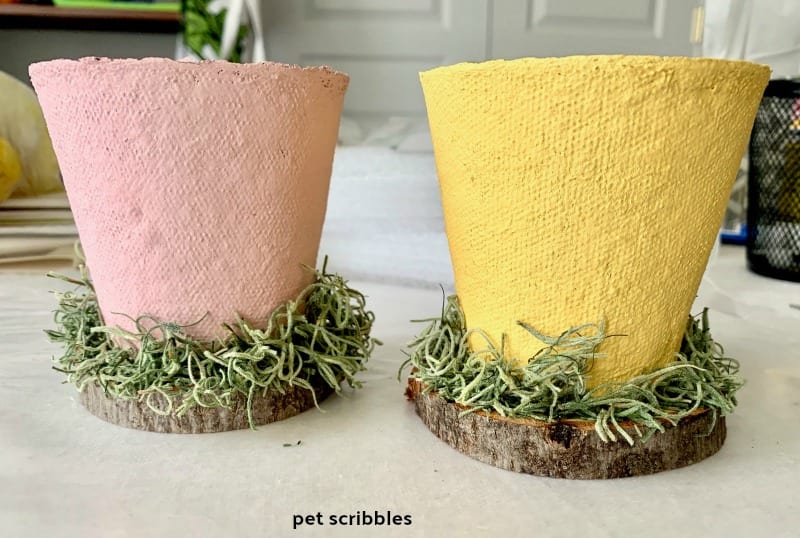
Step one: Paint the peat pots with two coats of chalky finish paint in your choice of colors. Let dry.
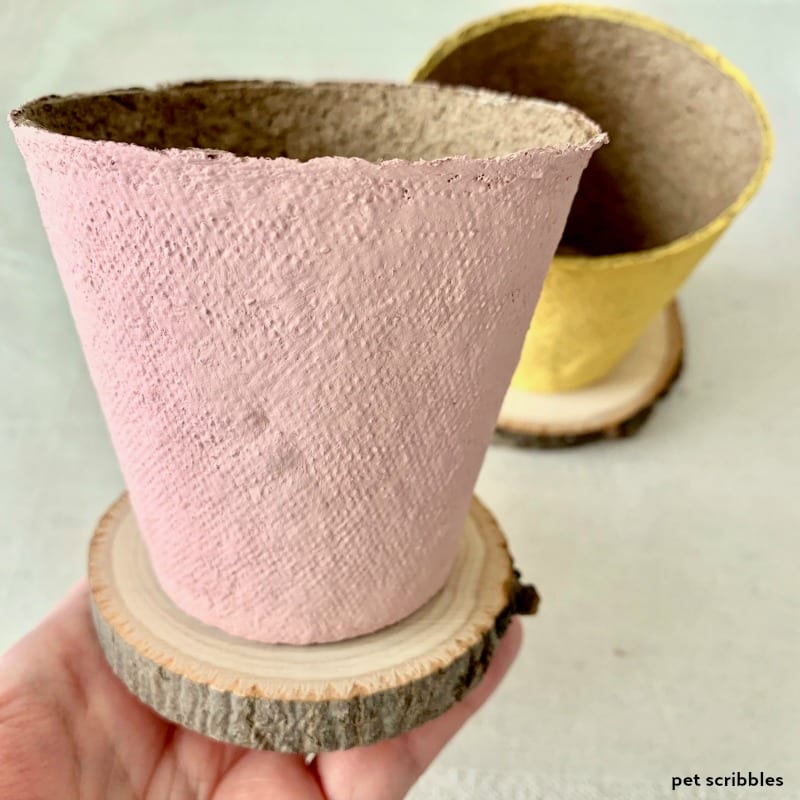
Step Two: Glue each peat pot to a small wood slice using E6000 craft adhesive. E6000 is super strong, and perfect for this purpose.
Don’t worry if your wood slices have holes (as many do for use as ornaments) because we will be covering those holes up in a short while.
Once glued together, let these dry overnight before proceeding to the next step.
Adding Spanish Moss
Step Three: Attach Spanish moss around the base of each peat pot. Apply Aleene’s Clear Gel Tacky Glue onto the wood slice and attach the moss.
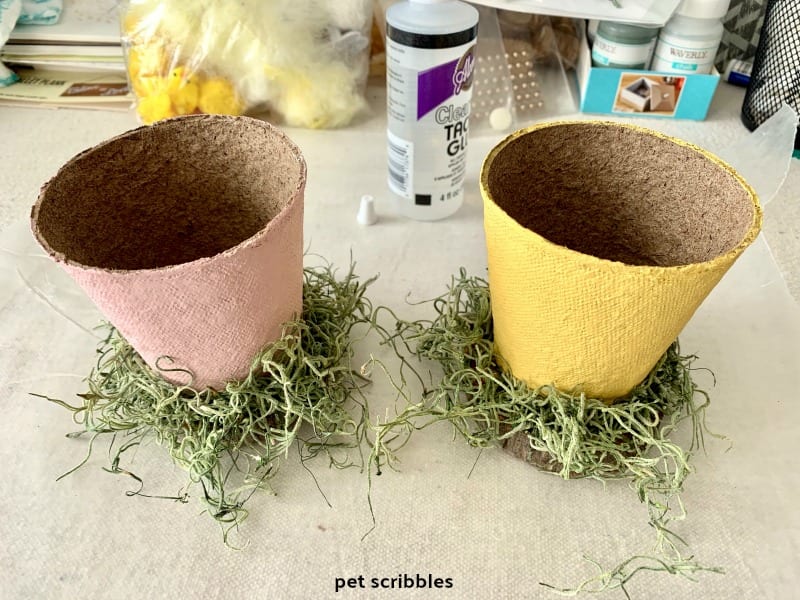
This step is messy, so work over a sheet of wax paper.
Aleene’s Tacky Glue is a fabulous adhesive for adhering hard-to-attach materials like Spanish moss, although it isn’t as strong as E6000.
Helpful tip: Don’t use E6000 for this step because this adhesive is not as easy to manipulate and you’ll have Spanish moss glued to your own fingers before you know it. (My opinion!)
Let everything dry for several hours before going to the next step.
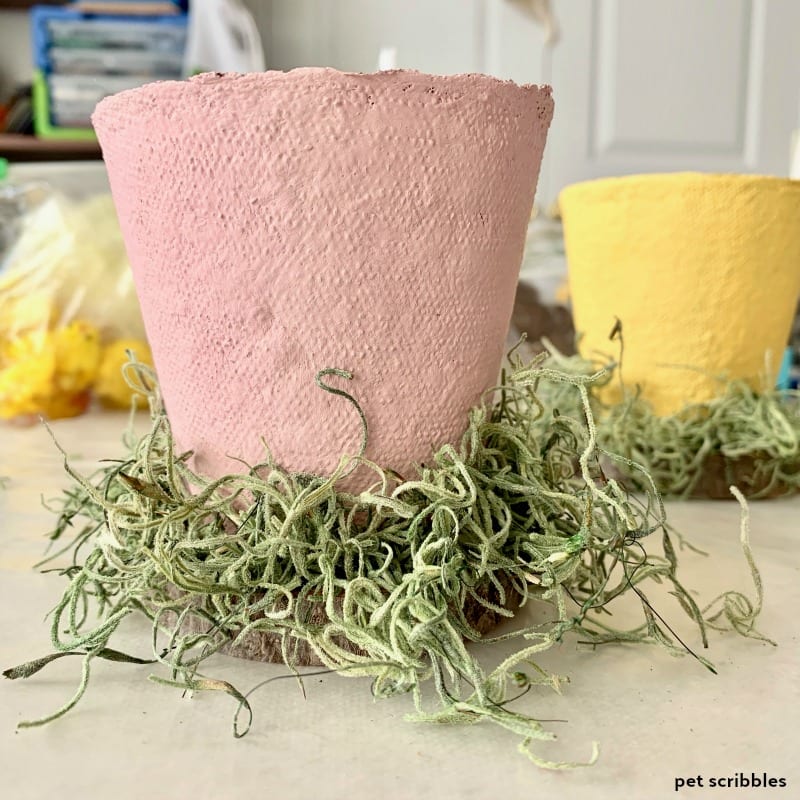
Step Four: Using small scissors, gently trim the Spanish moss so you can see the wood slice bases. I suggest gently trimming, because this moss can fly all over if you aren’t careful!
Step Five: Cut two small squares from recycled foam packaging material.
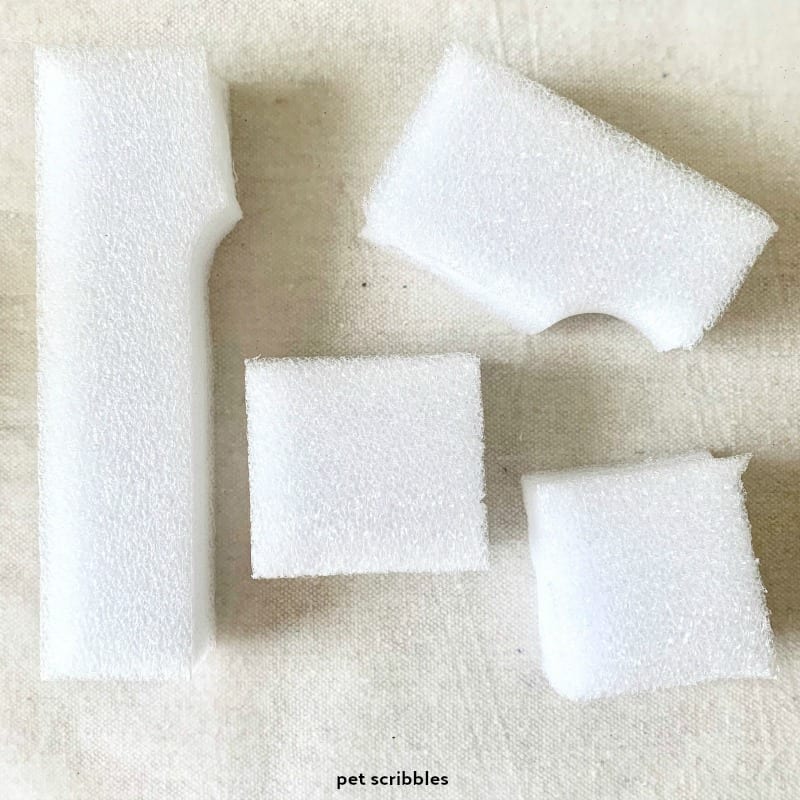
Insert a square into each peat pot and press down slightly so the foam is below the top of each peat pot opening.
The foam inserts mean you won’t have to fill up the peat pots completely in the next step. And since the foam gets covered up, nobody needs to know your secret!

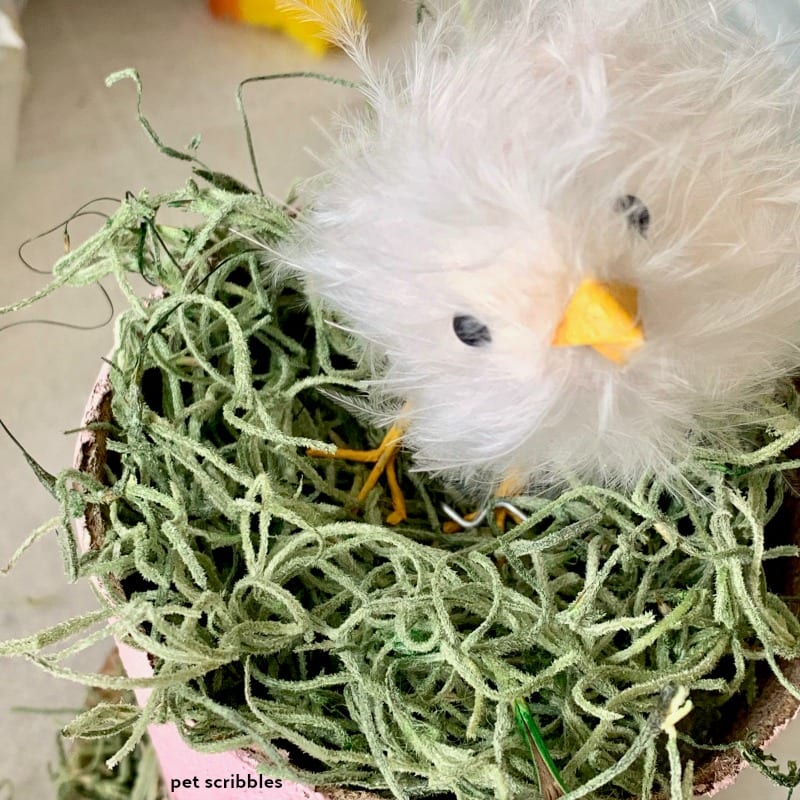
Step Six: Add Spanish moss into the top of each peat pot, to make nesting material.
When I bought my Spanish moss last year, I also purchased a plastic craft bin to keep it in. This keeps the mess I make to a minimum!
Add the Easter Chicks
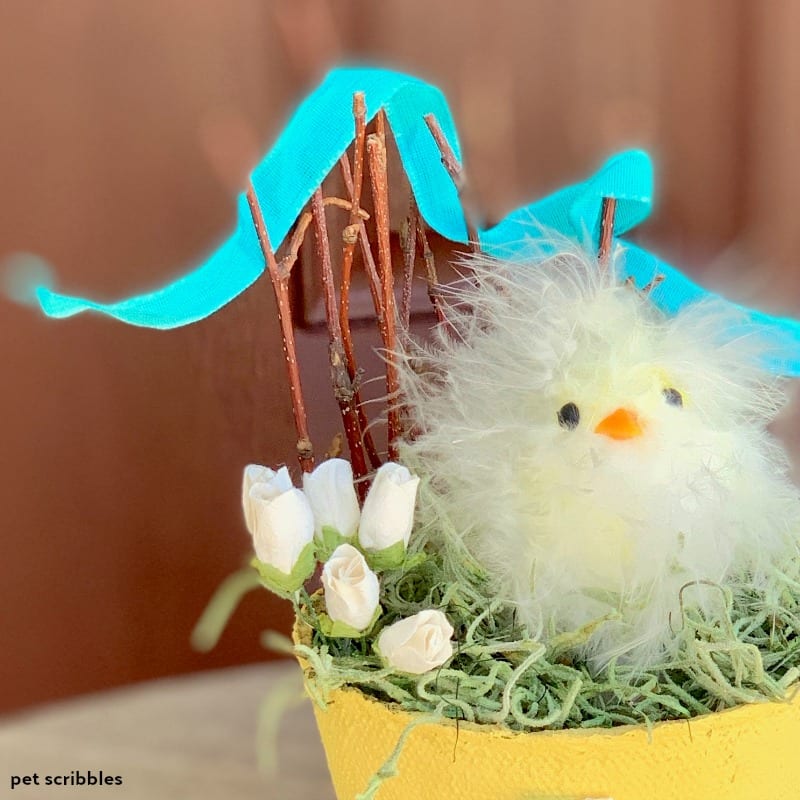
Step Seven: Attach the Easter chicks into the top of each peat pot using floral pins — also called greening pins.
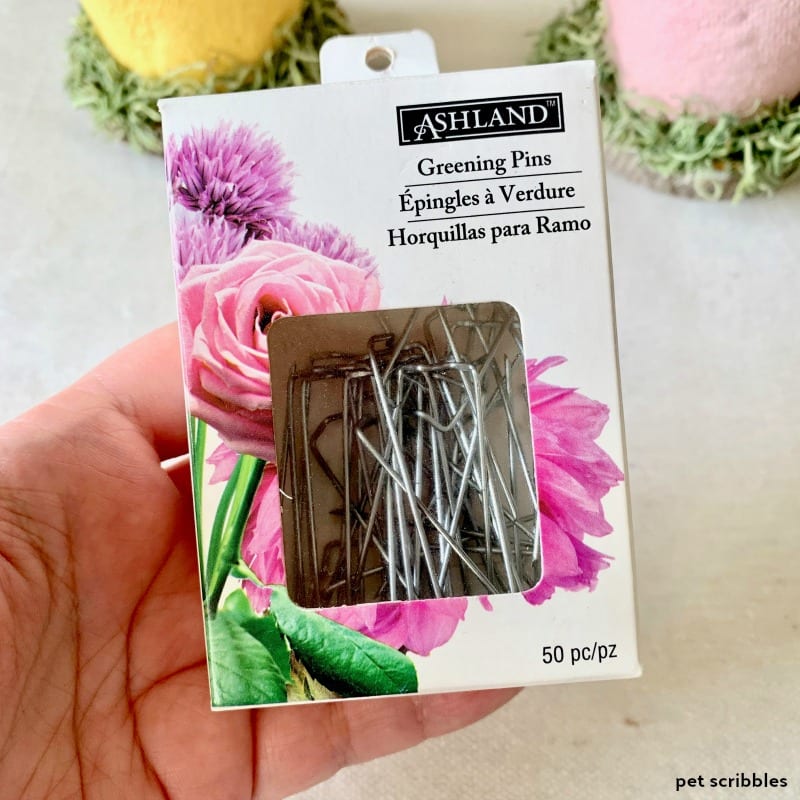
These pins are handy when crafting — including when covering Styrofoam wreaths with burlap like I did in my coastal Winter wreath project.
Take a floral pin and place it over at least one of the Easter chick’s legs . . .
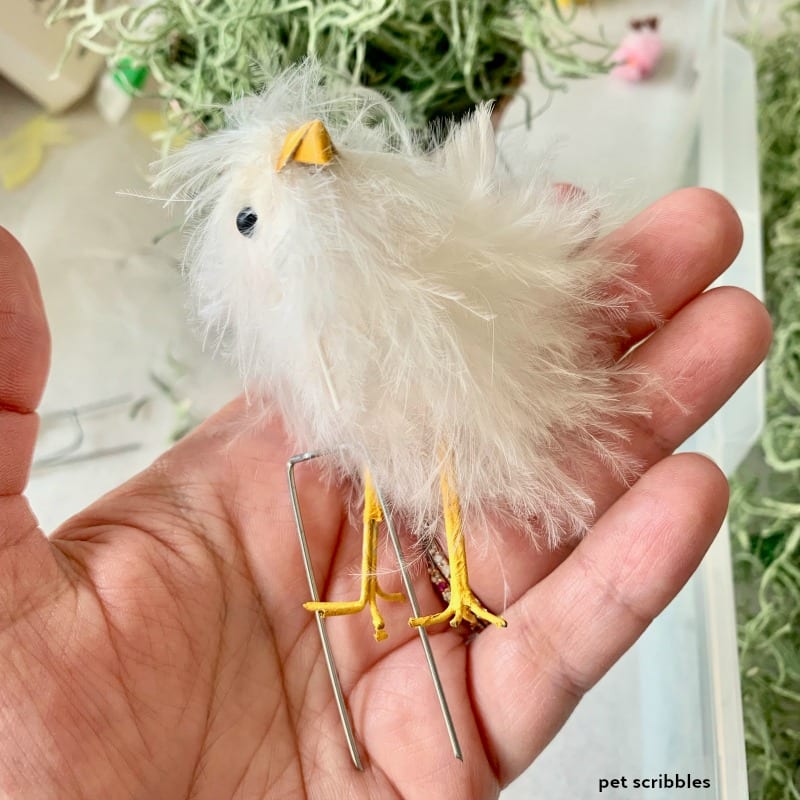
. . . then push the floral pin (and chick) into the moss-covered foam square inside the peat pot. right through the Spanish moss.
Give the Easter Peat Pot Decorations Some Finishing Touches
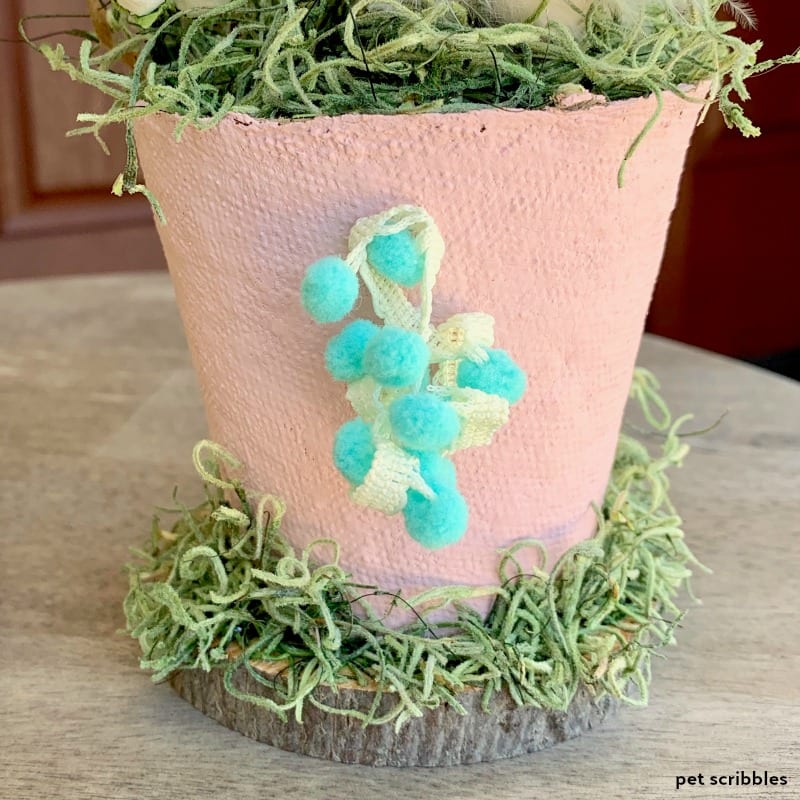
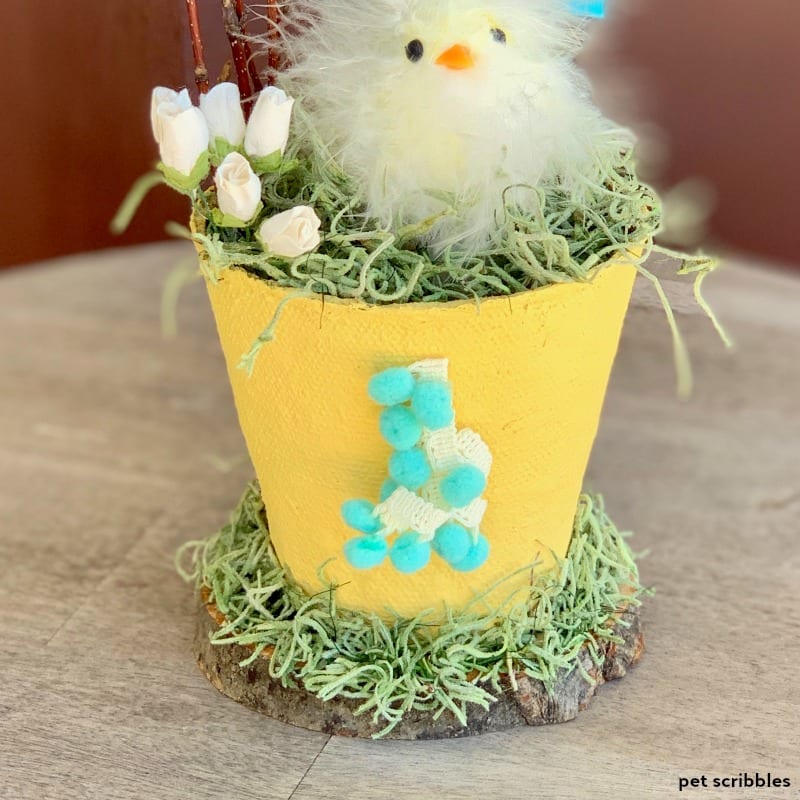
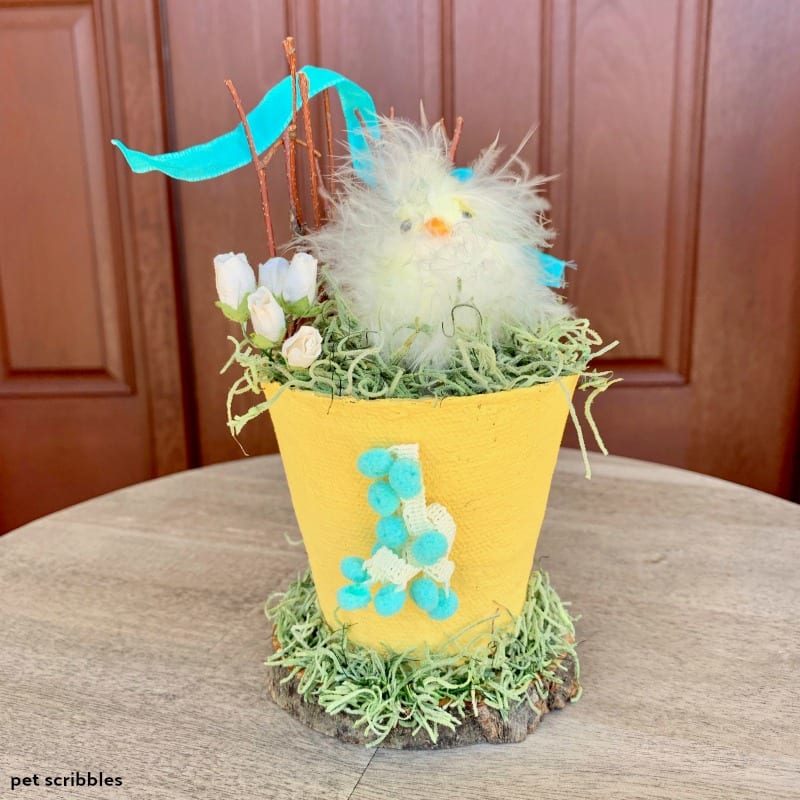
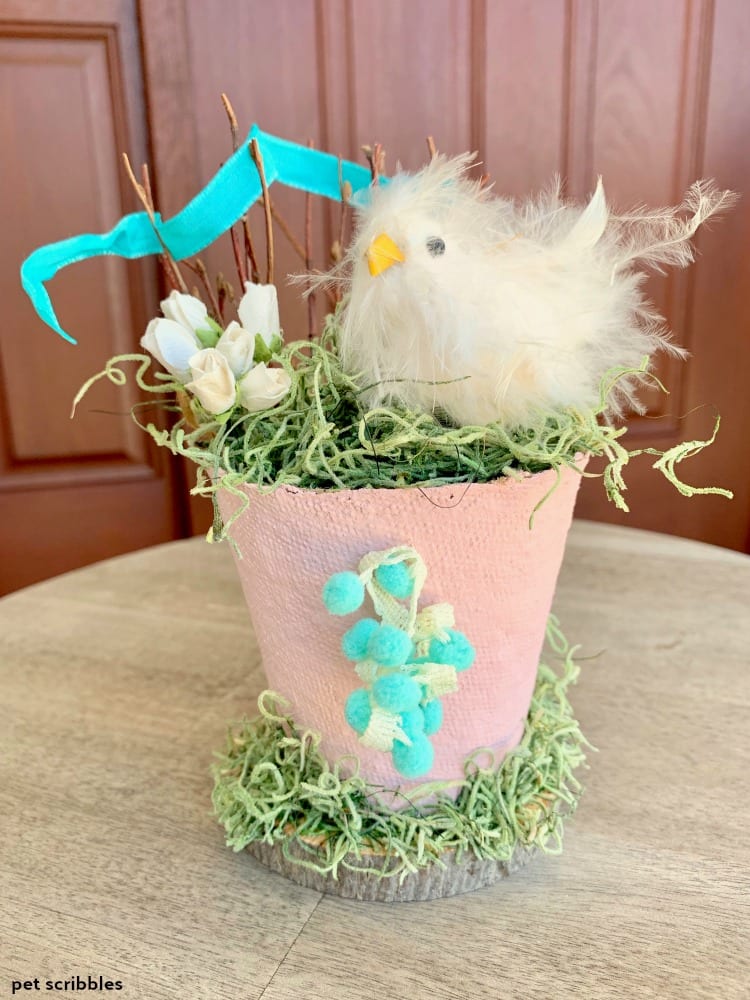
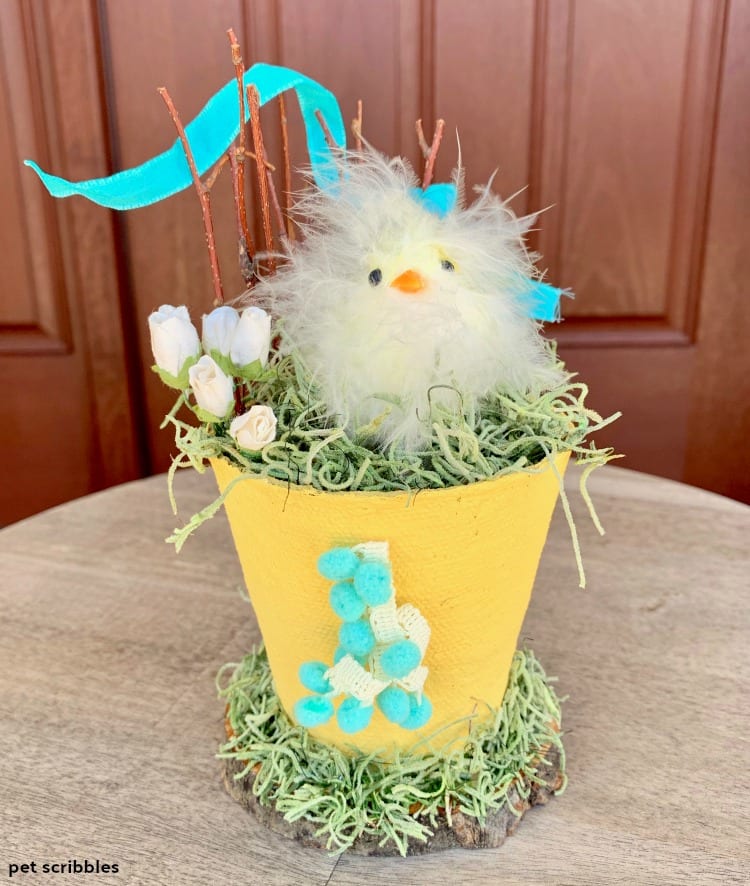
Step Eight: Add vintage trims and embellishments.
First, add a piece of vintage trim, ribbon, lace or anything else you want to use.
A piece of vintage pom-pom trim is perfect for a pop of color. In addition, the pom poms look like little Easter eggs. Well, almost!
Attach the trim to the front of each peat pot using mini Glue Dots.
Next, add some tiny mulberry paper flowers. You can find these in craft stores and on Amazon, usually in varying quantities. (Click the link in my supplies list, which will take you to a page on Amazon filled with choices, to see the variety of tiny flowers you can buy.)
These mulberry flowers came on tiny green wires all twisted together, which made sticking them into the peat pot easy peasy!
Finally, add some small twigs into the arrangement.
I bought this box of twigs at a garage sale years ago. These are great for crafting. Again, search the craft stores and Amazon — or your own backyard too!
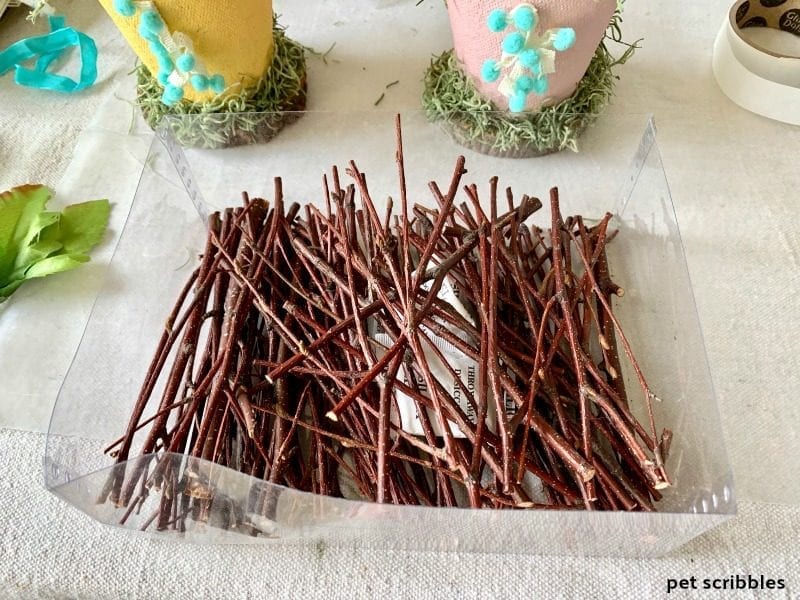
The twigs are inserted vertically, with a ribbon wound around the top for another pop of color.
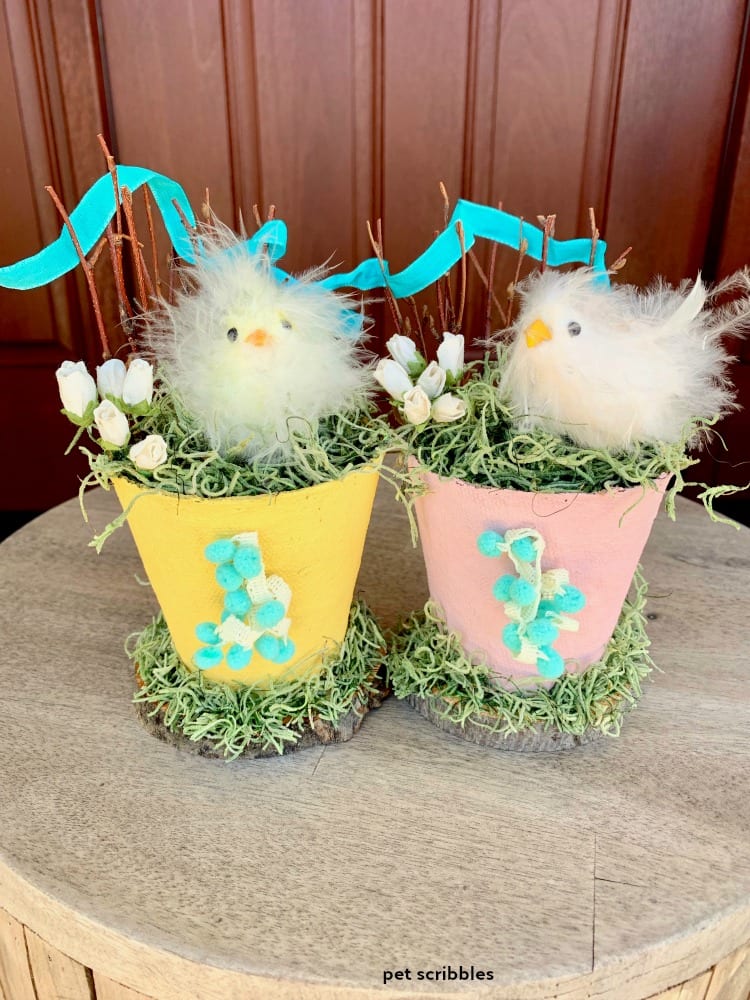
Easter Chick Peat Pot Decorations
Here they are!
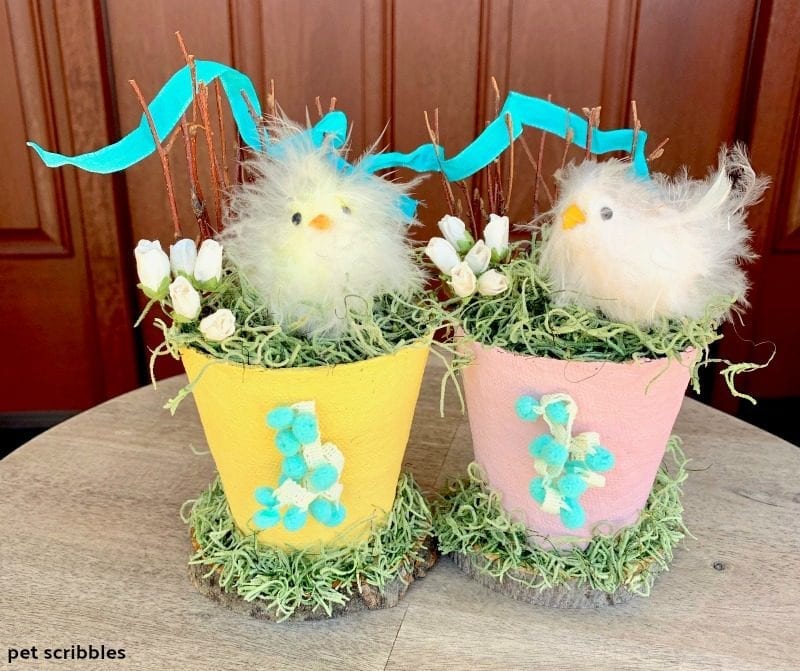
First we have the sweet pale yellow Easter chick, all tucked into his nesting bed . . .
Next, we have our pretty pale pink Easter chick, also snuggled into her nesting material.
Mama Chick is watching over them, but who is watching over Mama Chick’s hairdo as it gets blown apart by the wind?
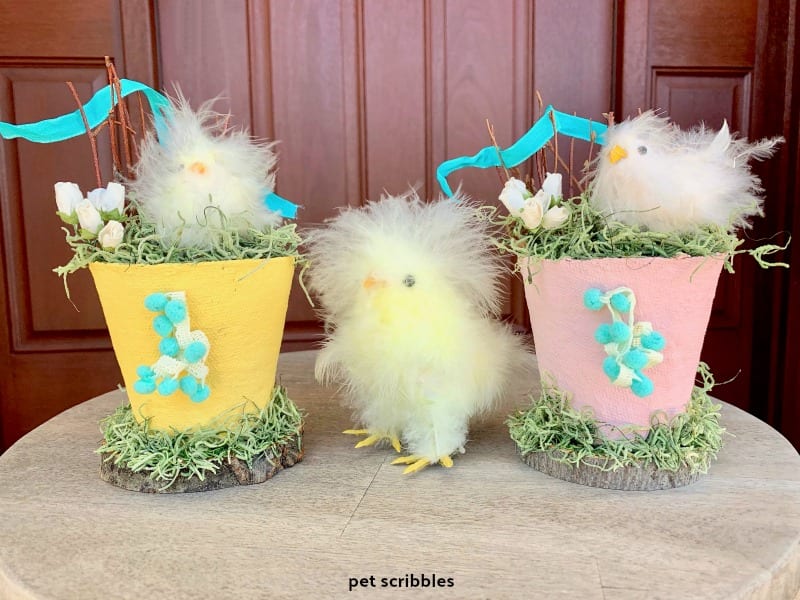
Photographing them outside was pretty funny, as their feathers were blowing all over the place!
Both chicks are enjoying the flowers and the early Spring day!
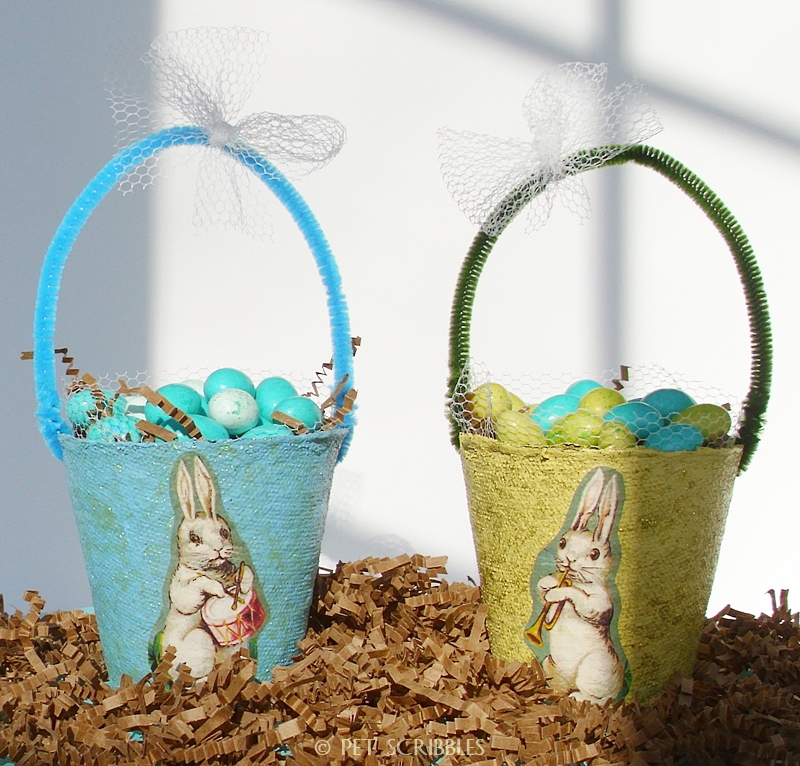
Easter Basket Peat Pots
Here’s another fun Easter DIY I created. These Easter Basket Peat Pots were featured in Parade Magazine years ago. Click below to see the easy DIY!
Easter Basket Peat Pots Tutorial
Peat Pot Wedding Favors
These Peat Pot Wedding Favors serve as inspiration for painting your peat pots in pretty Spring colors!
Peat Pot Wedding Favors DIY and Video Tutorial
Happy crafting!
Leave a Reply