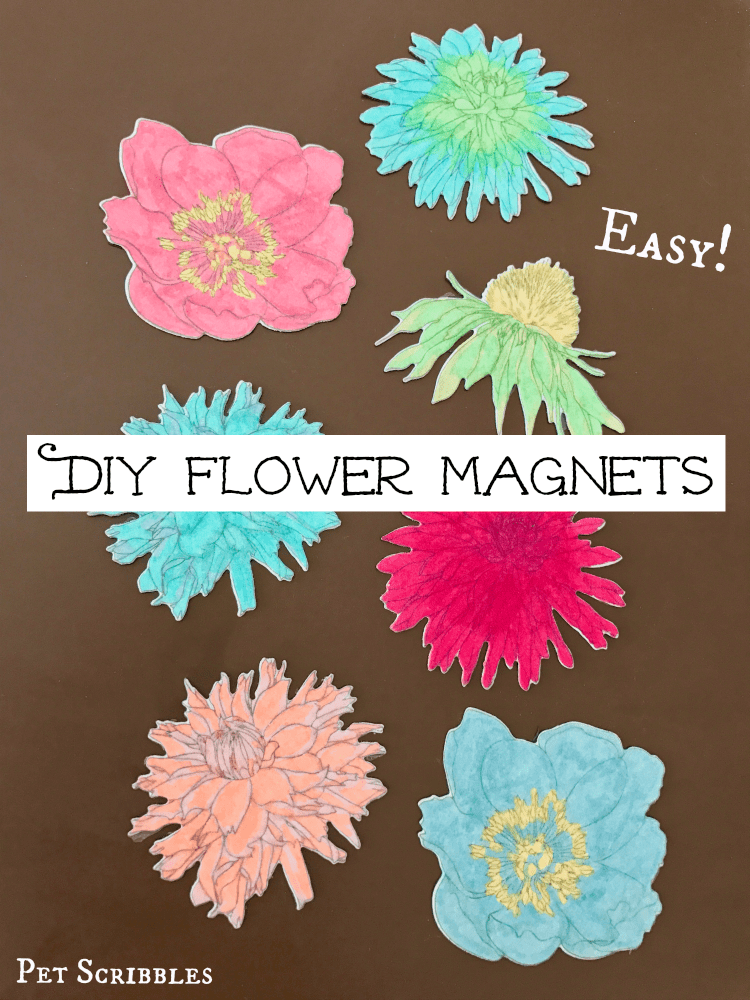
How to make and color your own flower magnets, using pretty stamps and the Xyron Creative Station Lite machine! An easy craft with beautiful results!
Do you have crazy freezing cold temperatures where you are?
We sure do, and it’s the very reason I decided to make these pretty DIY flower magnets!
My favorite Xyron tool for crafting is…
This is my last challenge as part of the 2017 Xyron Design Team, and we’ve been asked by Xyron to share what our favorite Xyron tool is.
I love using the Xyron Creative Station Lite, especially with my favorite cartridge: the laminate/magnet combination!
There’s no easier way to make magnets. None.
Seriously.
I’ve made magnets many different ways over the years, so I know.
The laminate/magnet cartridge makes it super easy to turn anything into a magnet, plus the front is protected with a laminate coating.
Easy peasy and looks awesome too!
FTC Disclaimer: I’ve received products/compensation as part of the Xyron Design Team. These DIY Flower Magnets, however, are 100% my own project! Some of the links in this post are affiliate links. I explain more here.
How to make and color your own flower magnets!
Supplies:
- Xyron® Creative Station Lite
- Xyron® Laminate/Magnet Refill Cartridge, 5″
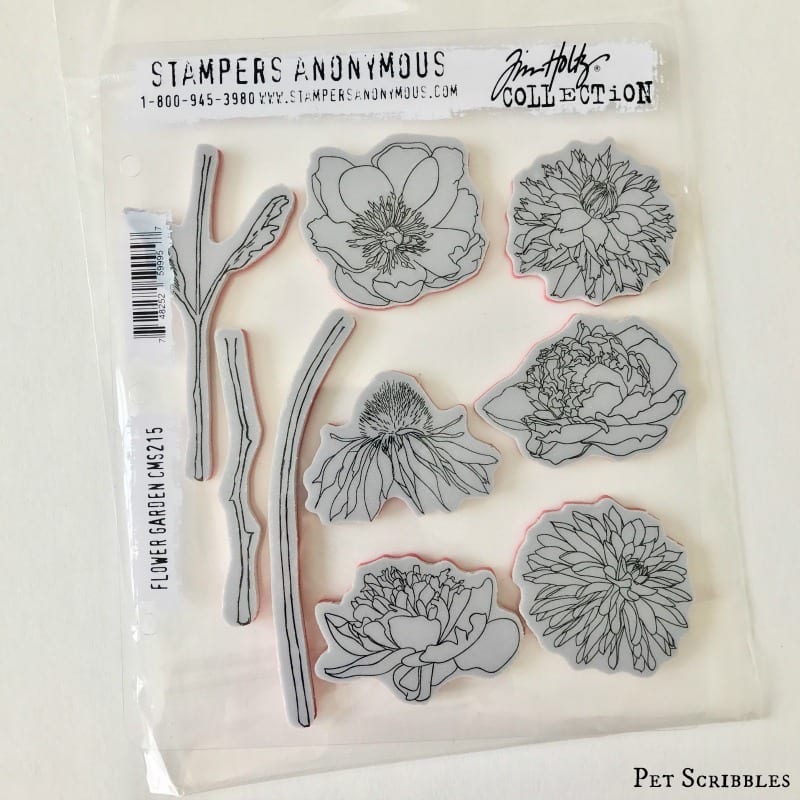
- Tim Holtz Stampers Anonymous Flower Garden Stamp Set
- Tim Holtz Sizzix Framelits Flower Garden & Mini Bouquet Die Set
- Suede Pure Mistable 12 x 12 Paper — Tattered Angels
- StazOn Ink Pad in Stone Gray — Tsukineko
- Acrylic stamping blocks
- Spectrum Noir Alcohol Markers — assorted colors
- Scrap paper
- Diecut machine (I used my Sizzix Big Shot)
- Scissors
Tutorial:
Step One: Stamp your chosen flower stamp images onto cardstock or specialty paper.
Here are the pretty stamps by Tim Holtz that I’m using for this project. I love how intricate the drawings are — and, as you’ll soon see — they are reproduced wonderfully as stamped images!
I used a dark gray ink color instead of black. I do this whenever I want the lines of a stamped image to be slightly less dark.
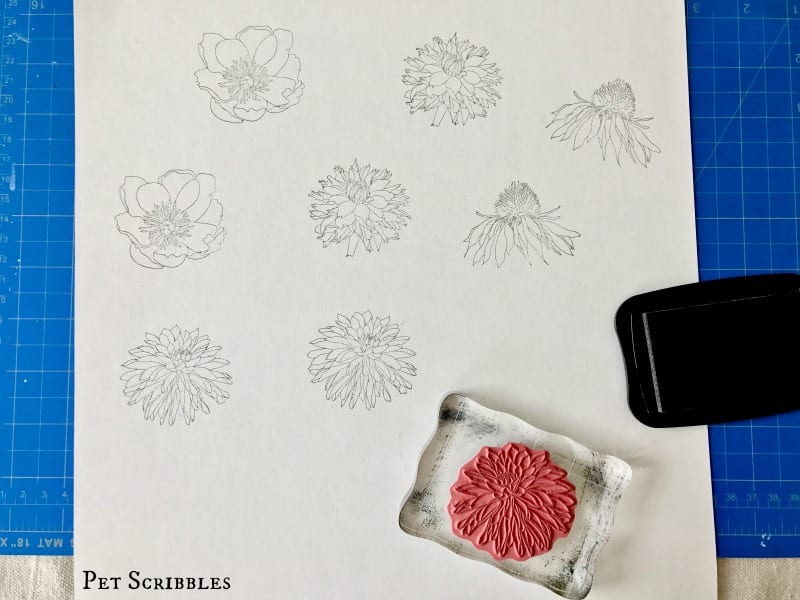
The paper I used is a gorgeous paper from Tattered Angels, part of their “mistable papers” line. This paper absorbs color so beautifully! You can also use watercolor paper or cardstock.
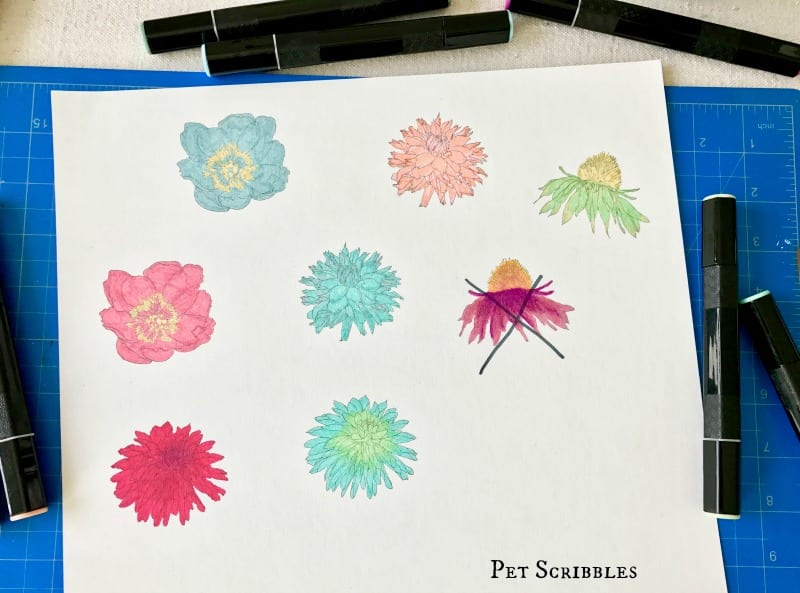
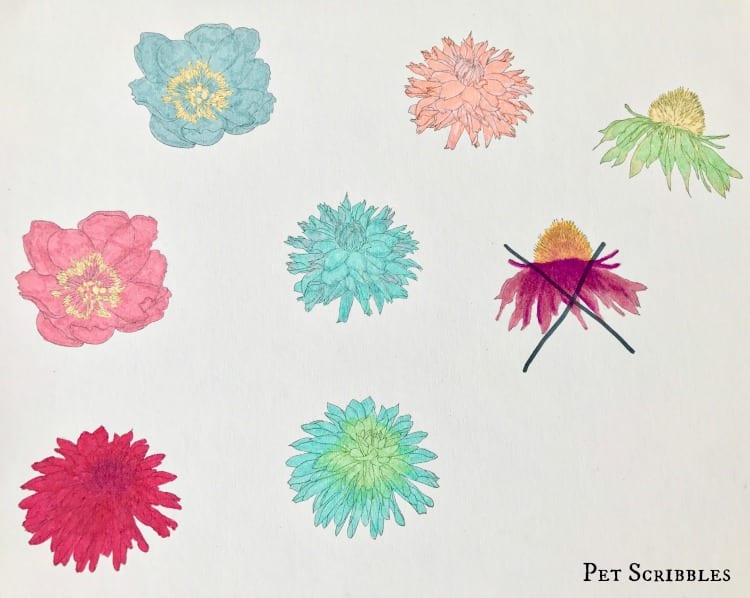
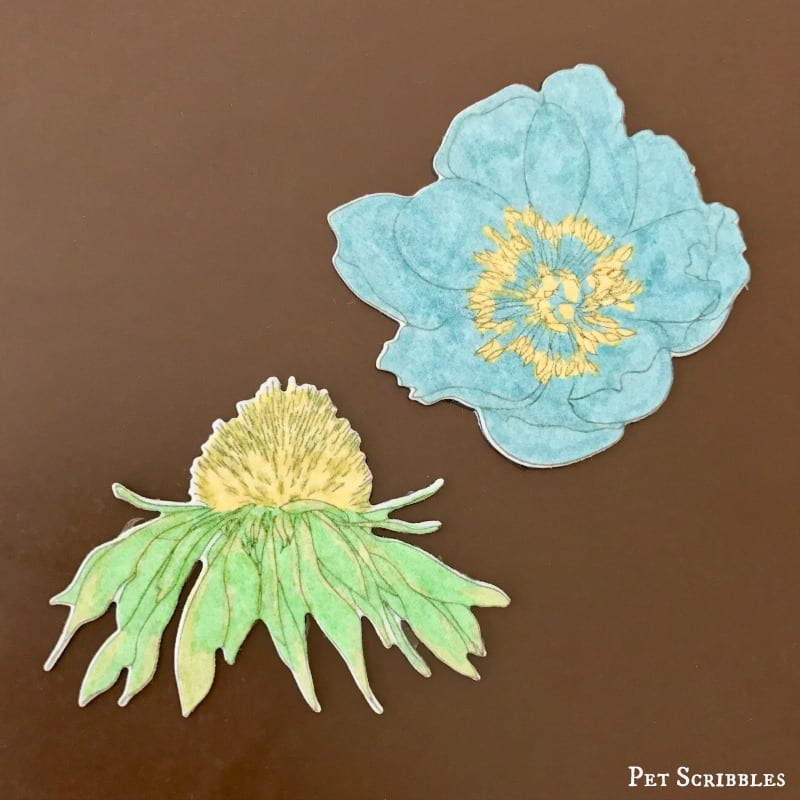
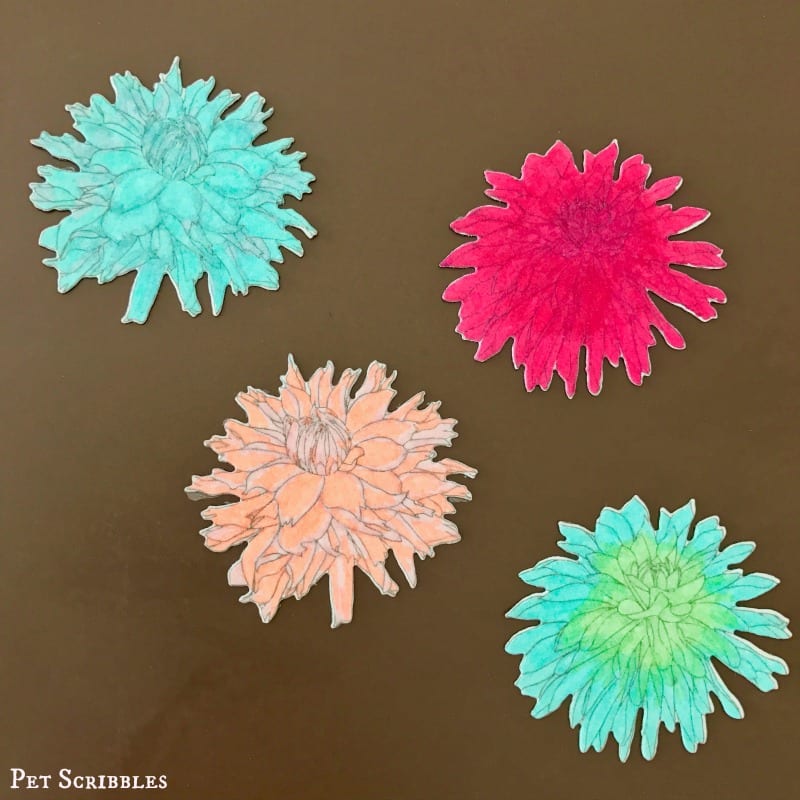
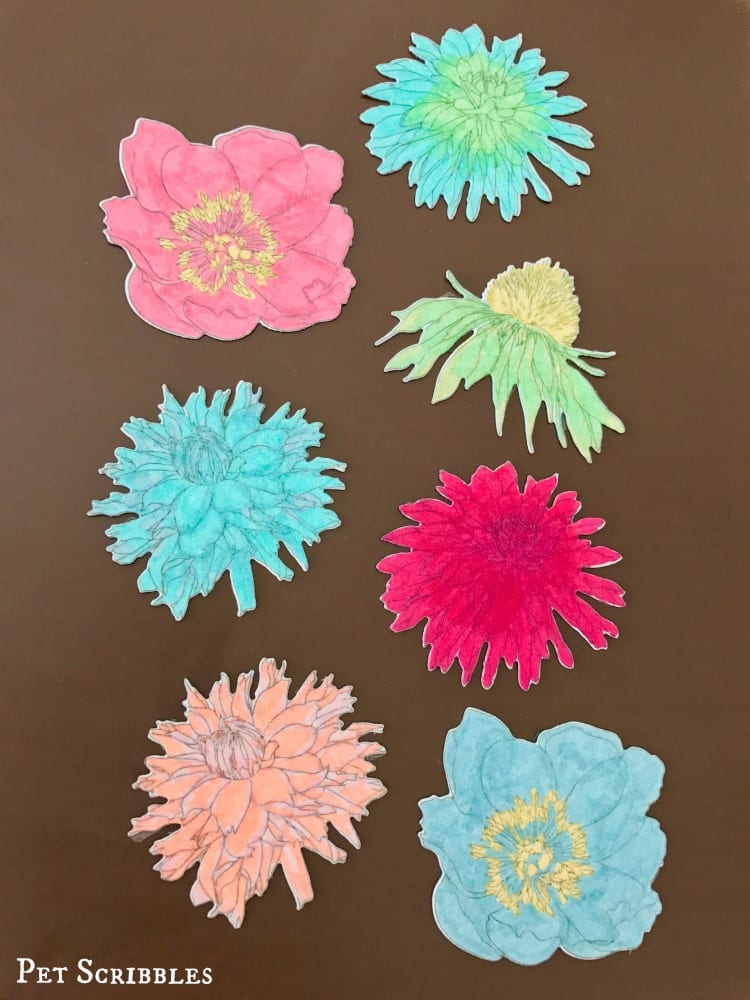
Step Two: Color in your stamped flower images.
This is the truly fun step because… Coloring!!
I kept scrap paper next to me while coloring in the images, to make choosing colors easy. The marker caps sometimes fool me into thinking a color is lighter than it truly is.
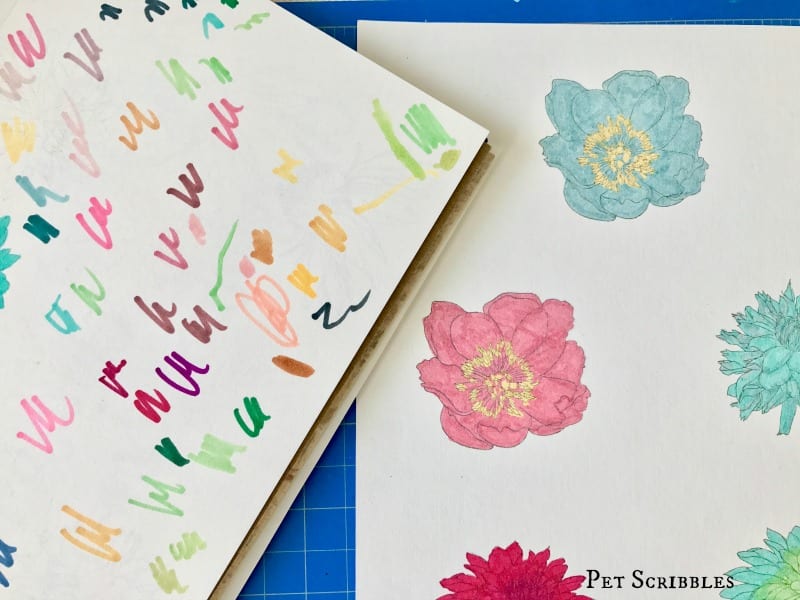
I’m still playing with my Spectrum Noir alcohol markers, which means my experiments with blending colors don’t always go so well. Case in point? That purple coneflower, below!
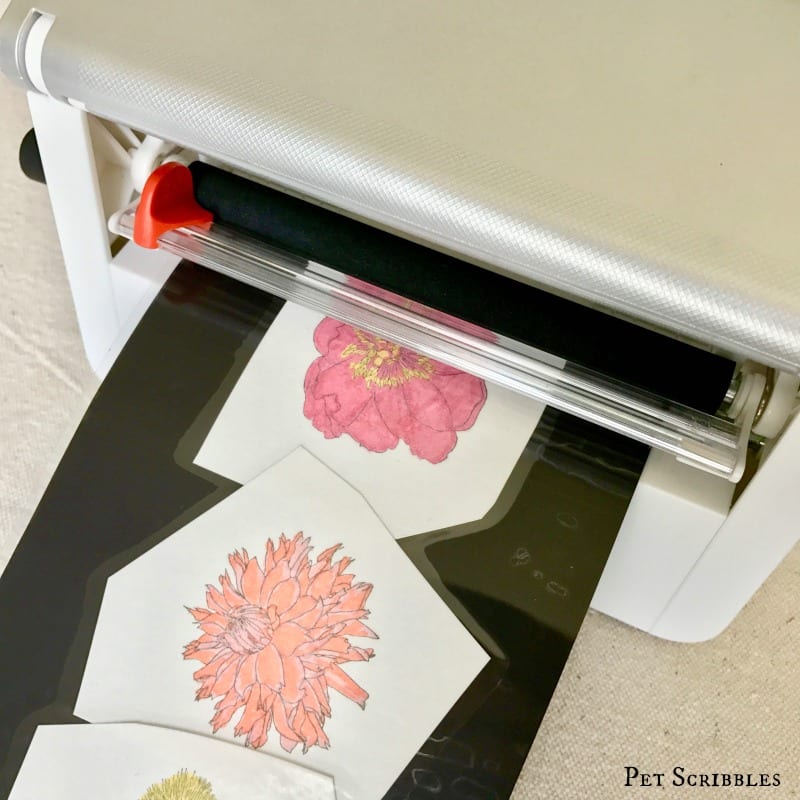
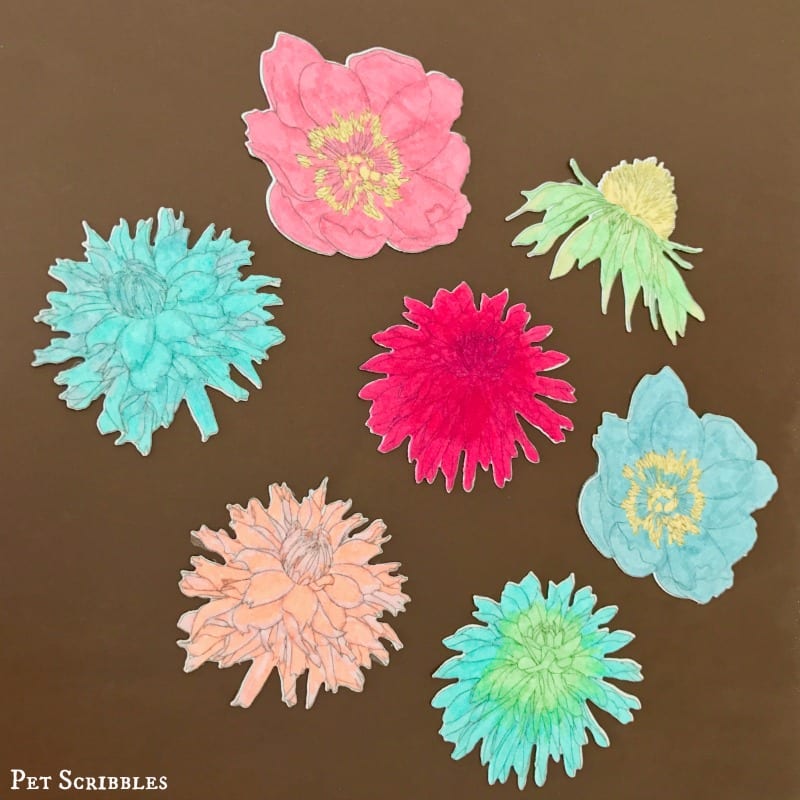
Step Three: Cut out the flower shapes — leaving plenty of space around each one — in order to run them through the Xyron Creative Station Lite.
Step Four: Using the Xyron Laminate/Magnet Cartridge, run your individual flower images through the Xyron Creative Station Lite.
Place the image side face up, and slide it into the machine until you feel it stop . . .
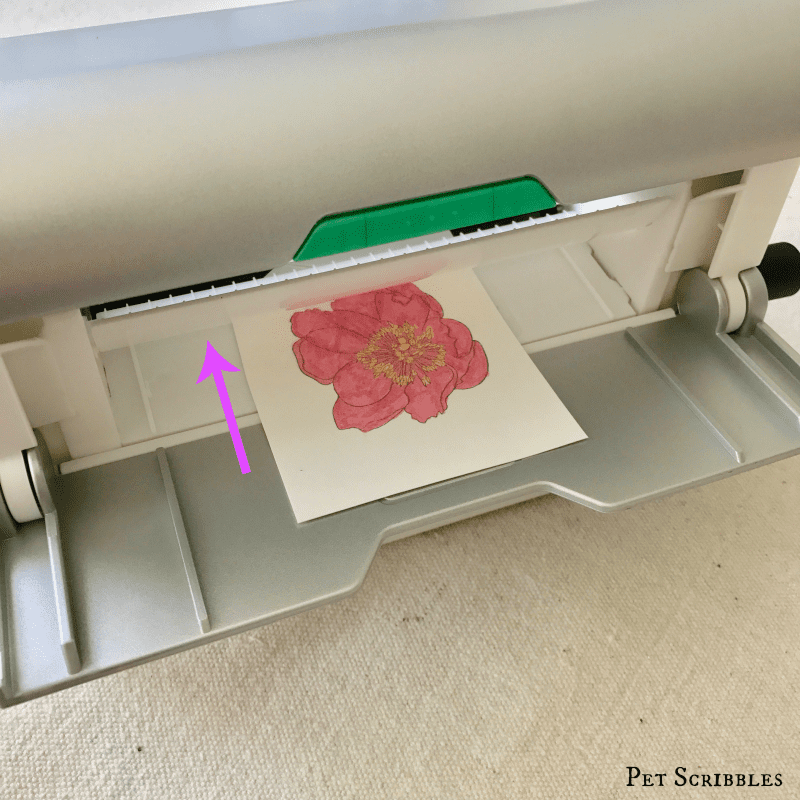
As you turn the handle, your image will travel through the machine and come out the other side with laminate over the image and a magnet backing too . . .
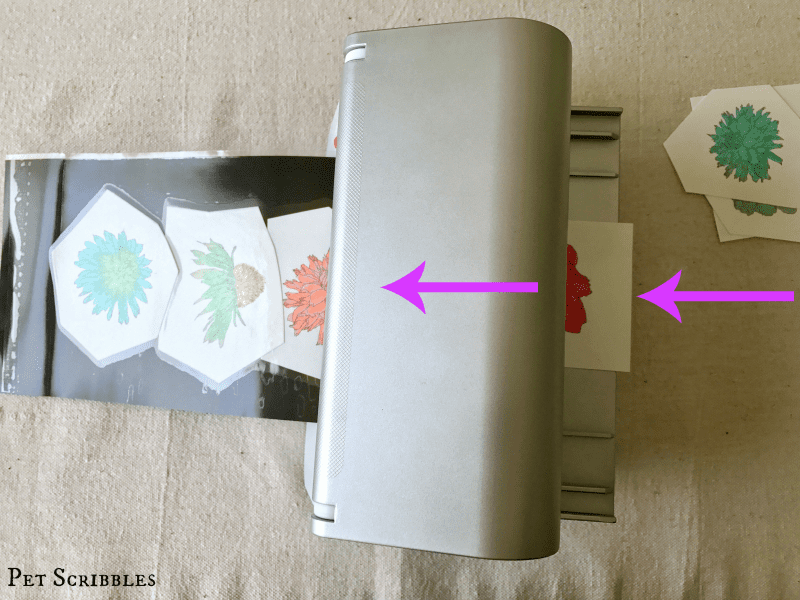
You’ll notice above that my images are overlapping a bit as they come out. Since I knew I was die-cutting them later, this was ok. Otherwise I leave a bit of space between what I’m turning into magnets.
Step Five: Separate the flower magnets into individual pieces by cutting horizontally in between each flower. (Just do this roughly — no need to worry about cutting the individual flowers out because the matching dies will do it for you, in the the next step!)
Step Six: Using your die cutting machine of choice, cut out the flower shapes with their matching dies.
Below is the packaging — so you can see what it looks like — of the matching flower dies that go along with the pretty stamps I’m using by Tim Holtz.
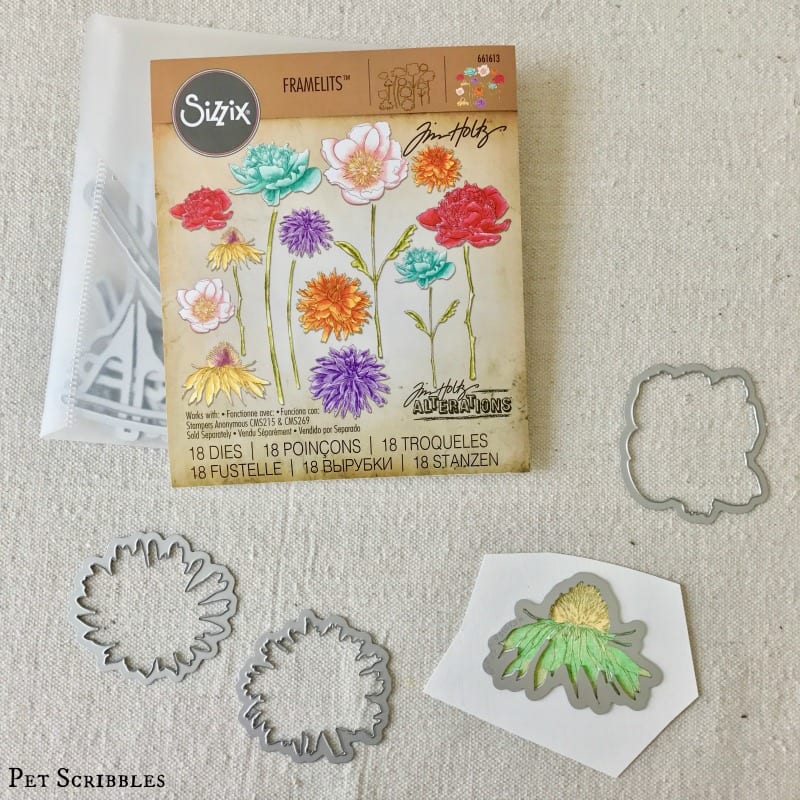
Because these dies are small, and the laminate is slippery, I used a couple of pieces of tape to gently keep my dies in place while they went through the cutting machine.
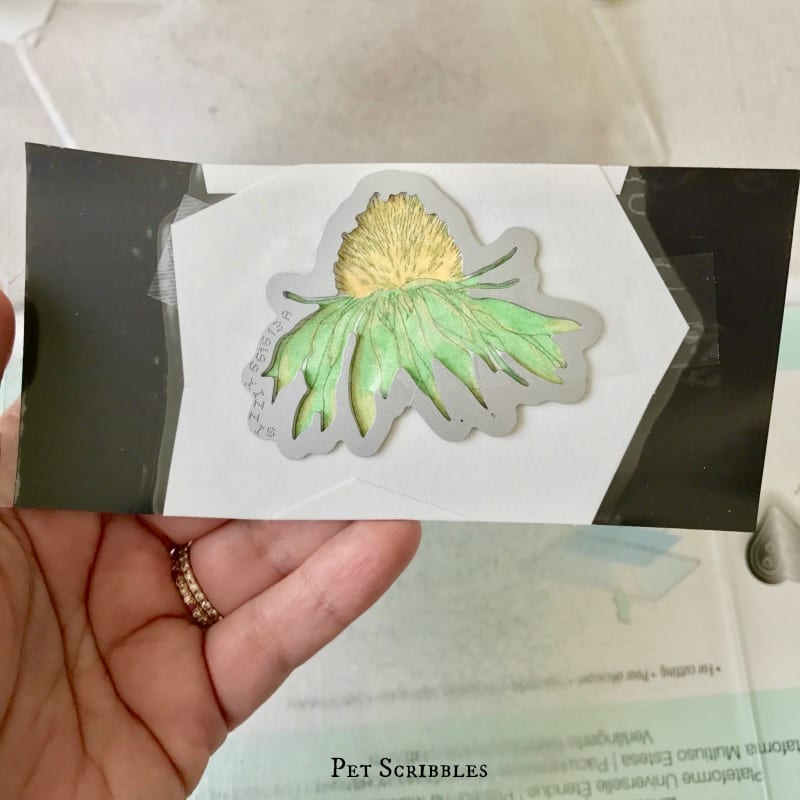
Each cutting machine is different, so you may need to do a few passes with yours to make sure the dies cut through all the way.
I used my Big Shot machine, and just needed to roll it through back and forth twice.
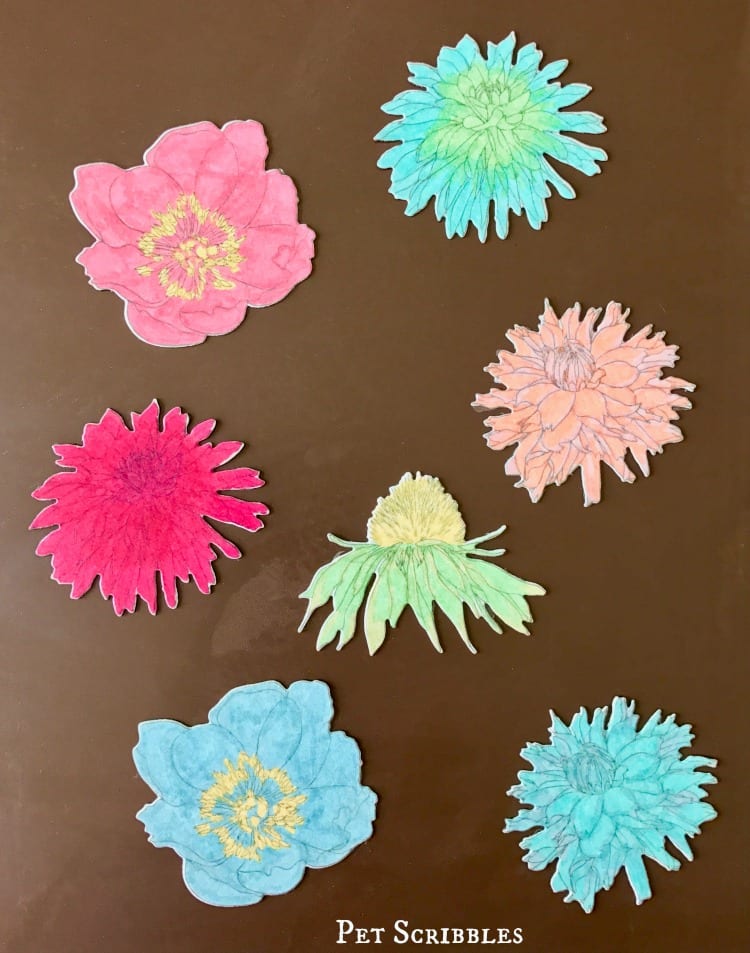
Voila!
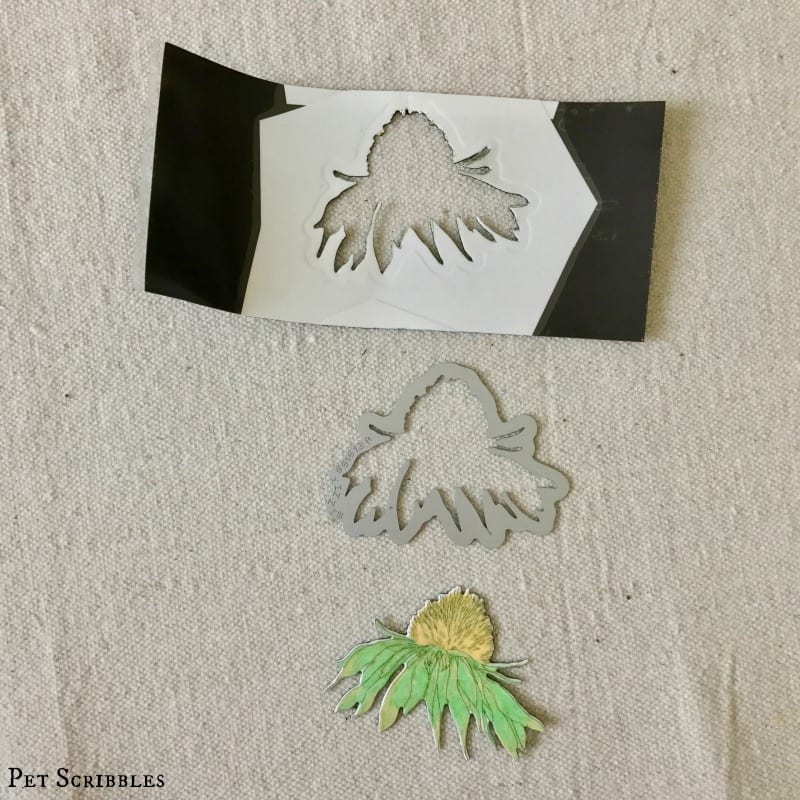
I love how well the Xyron laminate/magnet material cuts! It’s a strong material yet very flexible, and just look at the detailed edges!
These flowers pop against my rusty magnet board!
What’s also great about the Xyron laminate/magnet material is that your magnets will have full coverage on the back of every part of your chosen design.
So for the flowers here, there is magnet film end to end, edge to edge, flower petal to flower petal!
And on the front, these flowers are laminated the same way — end to end, edge to edge and every single flower petal!
Aren’t they pretty? I love that I can make and color my own flower magnets, creating a truly customized collection of magnets!
These magnet collections make great hostess gifts, but also can look wonderful when incorporated into your DIY wedding ideas too. Think placecards, with these all mounted onto a large decorative magnet board. Or place on top of each place setting at the dinner reception. You can add these flowers to “save the date” announcements, making it easy for your guests to stick on their fridge!
The possibilities with these magnets are endless, which is why the Xyron laminate/magnet cartridge is one of my favorite tools with my Xyron Creative Station Lite and the larger Xyron Creative Station too.
Happy crafting!
I have a creative station and love it. Your magnets are SO pretty! Love the colors!
Thanks Amy! Yes, the Creative Station is a handy tool that I didn’t know I needed until I tried it! 🙂 Now it’s used a ton in my crafts!