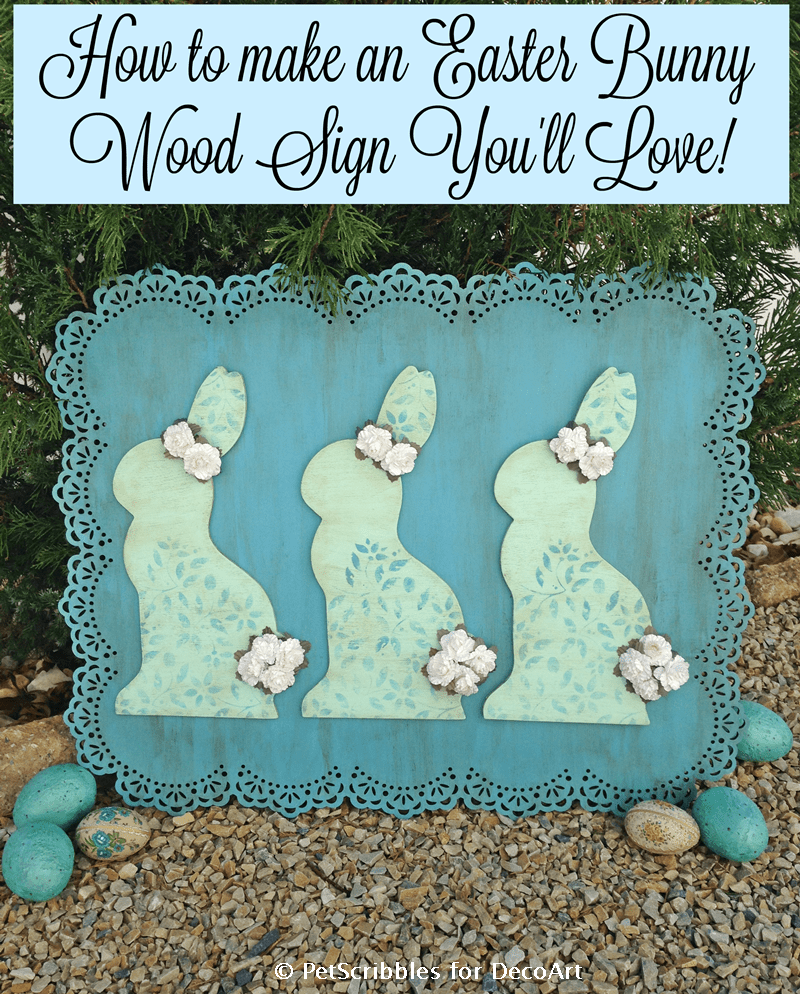
You can make an Easter Bunny Wood Sign using pre-made wood cutouts from the craft store, then painting to match your decor. I’ll show you how step by step.
Thanks to DecoArt for sponsoring this project and sharing it with their readers. This project idea and tutorial is 100% my own.
There’s an easy trick to making an Easter bunny sign that you will love year after year: take your time choosing your wood pieces and embellishments as the first step in the process.
It may sound way too simple, but it’s true. When I take the time at the craft store to pick up various wood craft shapes and blanks, and arrange them in certain ways, I can see instantly what works and what doesn’t.
For example, I went to both Michael’s and AC Moore on a mission to come up with an Easter bunny wood sign. I knew I wanted to make a sign with multiple bunnies on it. Why? Because most of the other signs I’ve seen have just one bunny on them. I say the more the merrier!
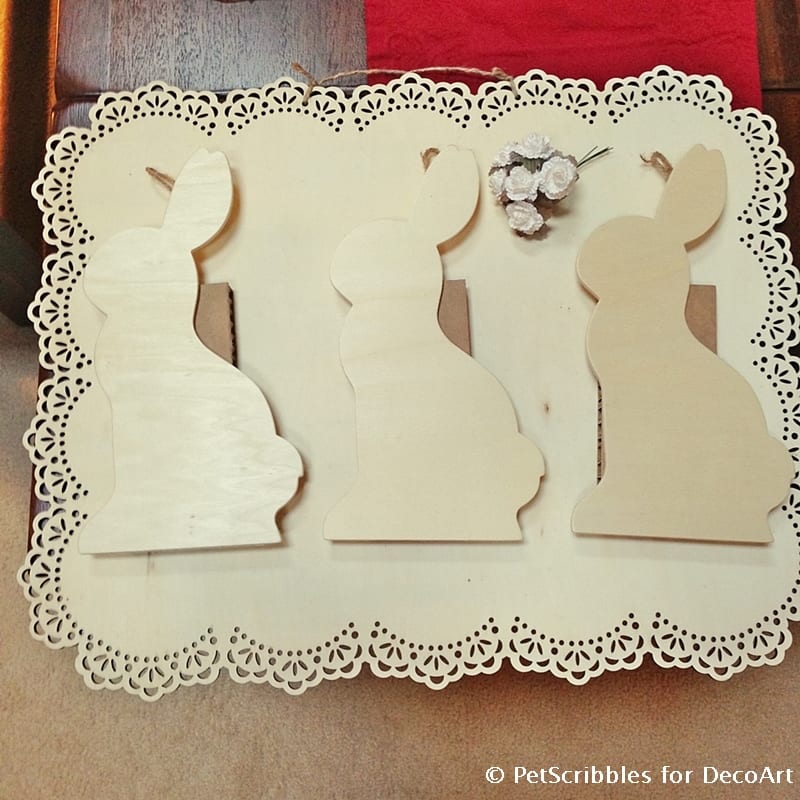
For this particular project, I knew that I’d need flat bunny wood cutout shapes, and I’d need a large wood background. That’s as far as my list went to start with. I found the bunny shapes right away and knew they’d be perfect.
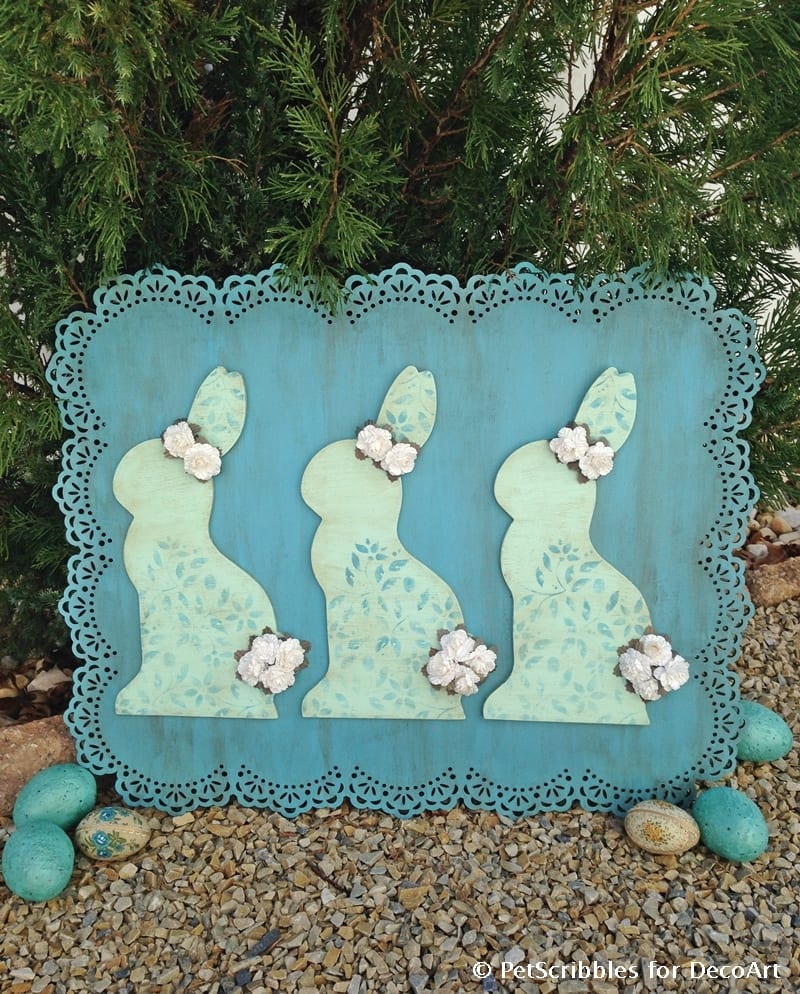
What took longer was deciding which large wood surface to use as the background. Did I want a rustic wood pallet background? How did the bunnies look on top of the wood pallets? How about a shadow box frame? I finally settled on what you see above – a very pretty laser cut plaque. Those edges look like lace to me!
The cardboard underneath the rabbits is there to help show you the unfinished wood shapes better.
Where to buy: I purchased this particular laser cut plaque at Michael’s, and you can click here to see the exact item I used. The bunnies were also purchased at Michael’s, but I don’t see them in their online store.
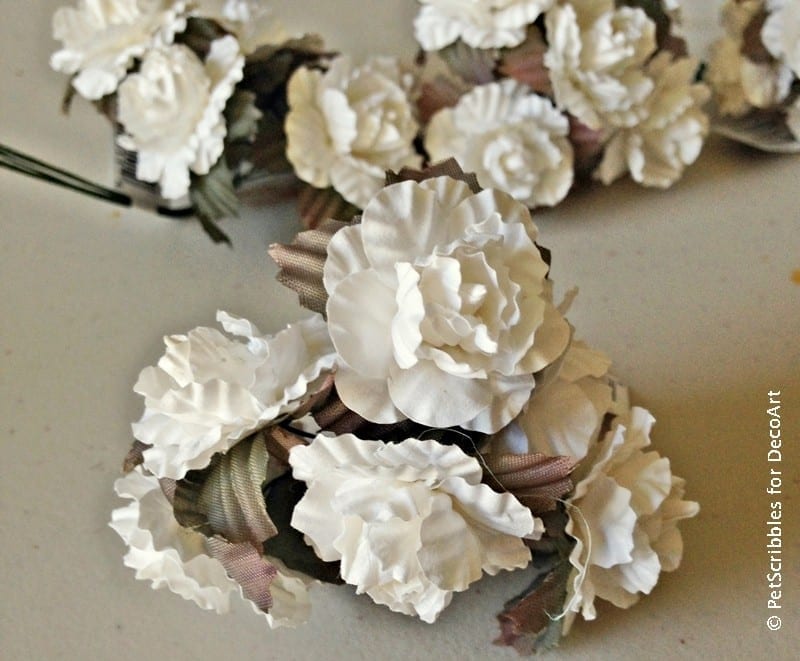
Although I hadn’t yet decided on colors, I knew I wanted these bunnies to have adorable little bunny tails. And again – to be different – I wanted them to also wear flower garlands. I found these miniature craft flowers and knew they’d work no matter what colors I ended up choosing. If needed, I could paint them to match!
Once I got my supplies in order, only then did I decide on colors. I chose very serene, calming shades of chalky finish paint in turquoise blue and mint green. These colors are perfect for Spring and look great against the taupe-brown walls of our living room. Think about where you want to display your piece, then consider what colors you want to see there. This is an important point often overlooked.
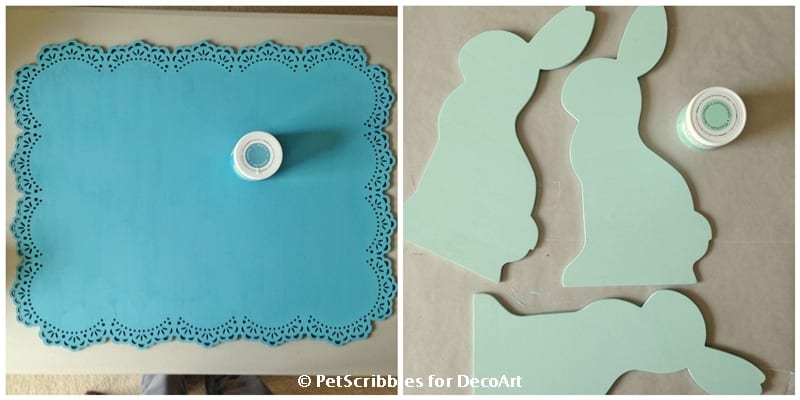
I could have stopped there, as these colors are so pretty just as they are (in the photo above), but I gave everything a rustic finish by using both clear and brown waxes. When it was time for the flower garlands and bunny tails, the white flowers looked so pretty against the painted surfaces, so no need to paint the flowers.
You can see my complete tutorial — including step-by-step photos and a list of supplies needed — on the DecoArt website!

Click the image above or click here:
- Head to the craft stores and play around with the wood cutouts and shapes until you love how it looks.
- Next, pick out your embellishments such as flowers or adorable pom pom bunny tails.
- Finally, choose your paint colors paying attention to where you plan on displaying your sign.
For more of my easy Easter and Spring craft ideas, click here:
Happy crafting!
Laura, this is so pretty! I love everything about this and the colors are perfect!
Thanks Mary Beth! So happy you love the colors! I really wanted to make something for Easter that could work for Springtime too, so I thought I’d stick with blue and green shades. 🙂
I love it, I want one. I just wish I had seen this BEFORE Easter. Just one thing, you didn’t tell us where you purchased the wood board.
Thanks so much Bev, I really appreciate it! And I hope you make this for next Easter and Spring too! My apologies for not mentioning where I got the wood board: I purchased it at Michael’s. I’m going to add in the information to my post today with a link to the product so you can purchase it online if they don’t have it in your local Michael’s store. Let me know if you have any other questions!