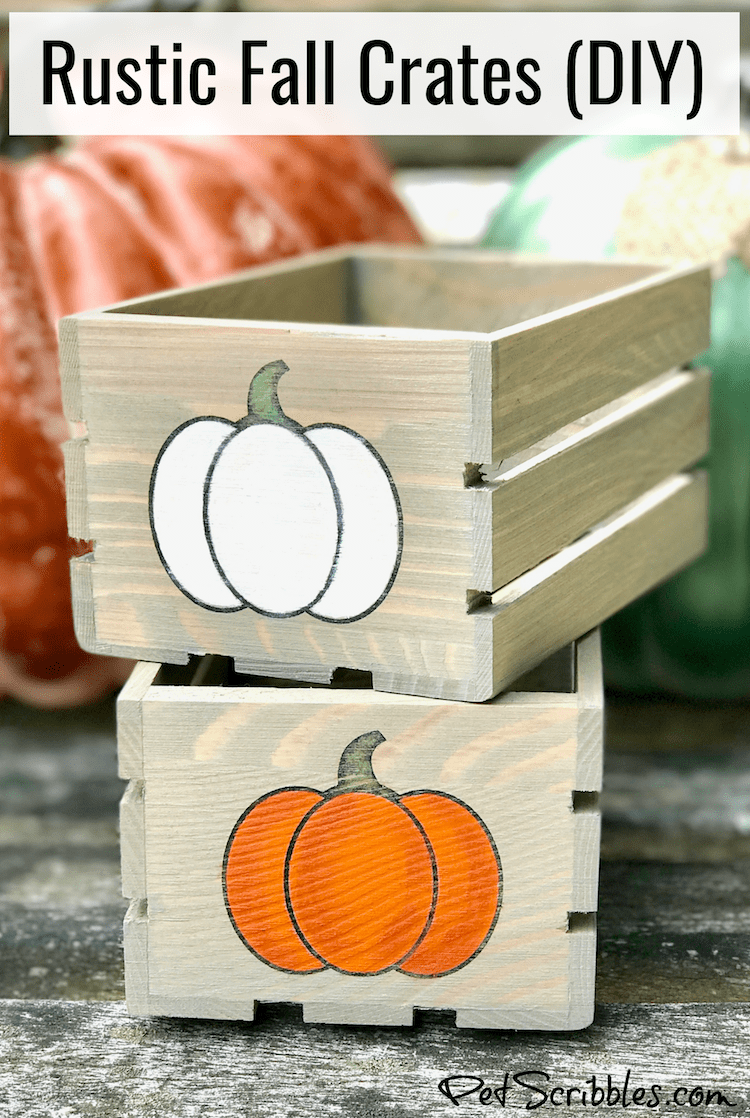
How to make rustic Fall crates using stamps and unfinished wood crates, along with some craft paints! This Fall farmhouse decor project is simple to create!
Fall Decor needs — and wants!
It’s nearing the end of August already, so why not begin thinking about your Fall decorating needs…and wants!
One of my “wants” is to have my Fall decorations out the entire Autumn season, from September through Thanksgiving.
Yes, I add Halloween items here and there around Halloween, and I love incorporating Thanksgiving-themed touches in November, but the majority of our Fall decorations are on display for three full months.
As part of the Simply Stamps Design Team, I have a rustic farmhouse decor project that is perfect for the entire Fall season!
Rustic Fall Crates!
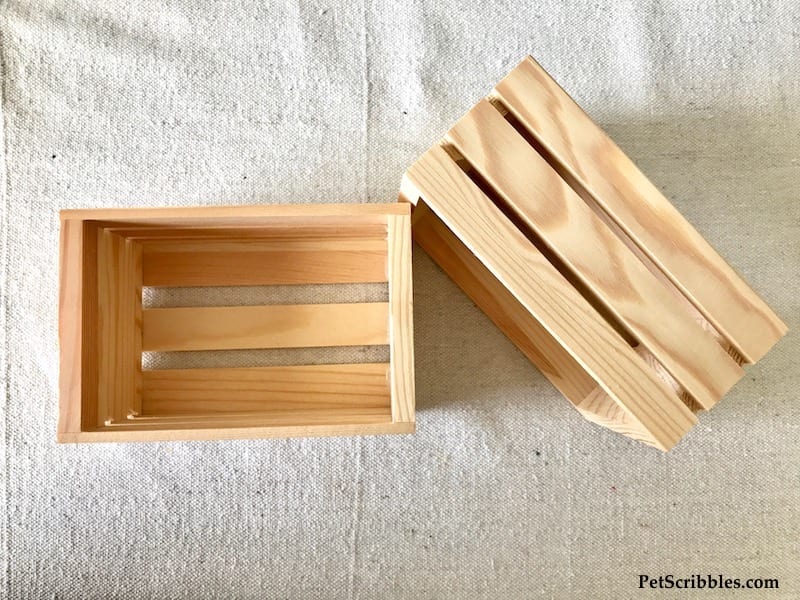
Wood crates continue to be a popular home decor trend, which means you can find them just about anywhere, and in many different sizes too!
I found these at the craft store.
And this is what the ends of both crates look like: a perfect surface for Fall images!

And since I’m not good at hand-drawing anything, I use stamps to get the exact look I want!
Check out these two stamps I got from Simply Stamps, which are perfect for my rustic Fall crates:
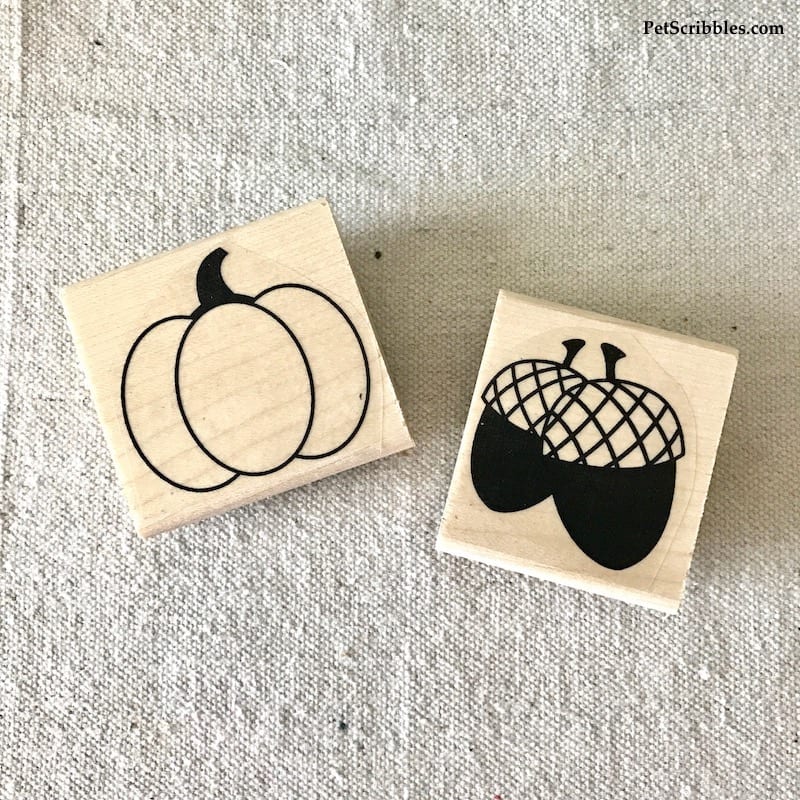
These stamps both come in a variety of sizes, so you can order the exact size you need for your own projects!
(I really love that Simply Stamps offers their craft stamps in different sizes! It’s not something I’ve seen other stamp companies do.)
FTC Disclaimer: I’ve received products/compensation as part of the Simply Stamps Design Team. These rustic fall crates, however, are 100% my own project! Some of the links in this post are affiliate links. I explain more here.
Now that I have my unfinished wood crates and my Fall images — I’m ready to create!
How to make rustic Fall crates using stamps!
Supplies:
- Large Round Pumpkin Craft Stamp — Simply Stamps
- Acorns Craft Stamp — Simply Stamps
- Unfinished wood crate — craft store
- Black permanent ink pad
- Craft paints
- Fine detail paint brush
- FolkArt Pickling Wash in “Driftwood” — Plaid Crafts
- Paint brush
- Lint-free cloth (a rag or old t-shirt works great)
Tutorial:
Step One: Sand the crates for any rough spots or splinters and wipe away dust with a damp cloth. Let dry.
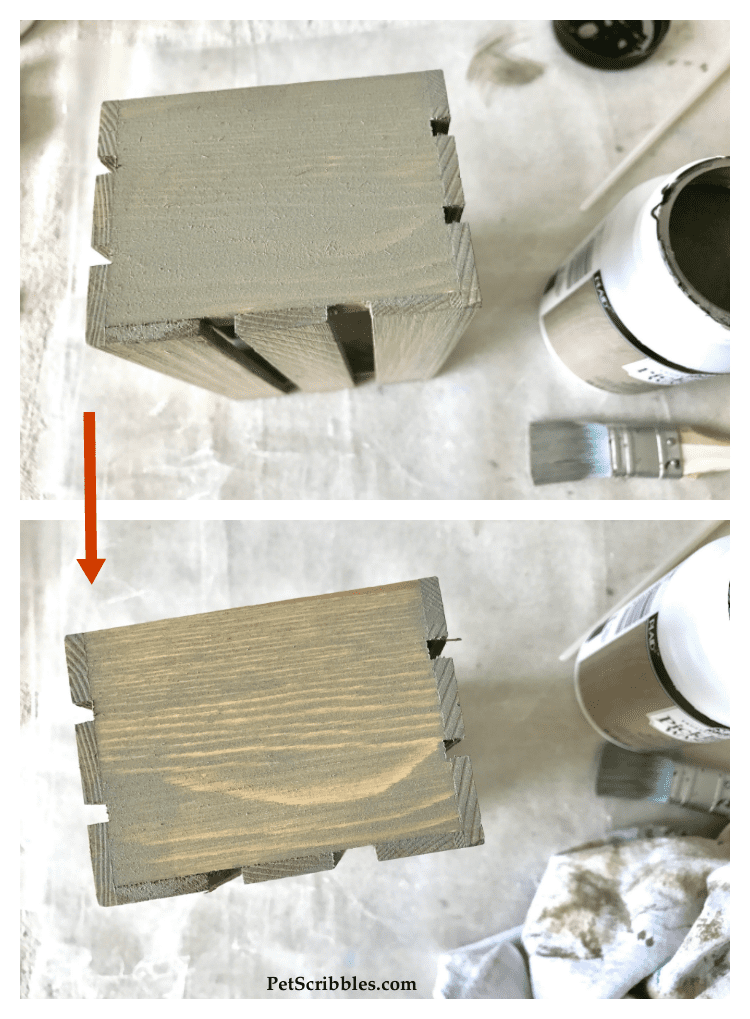
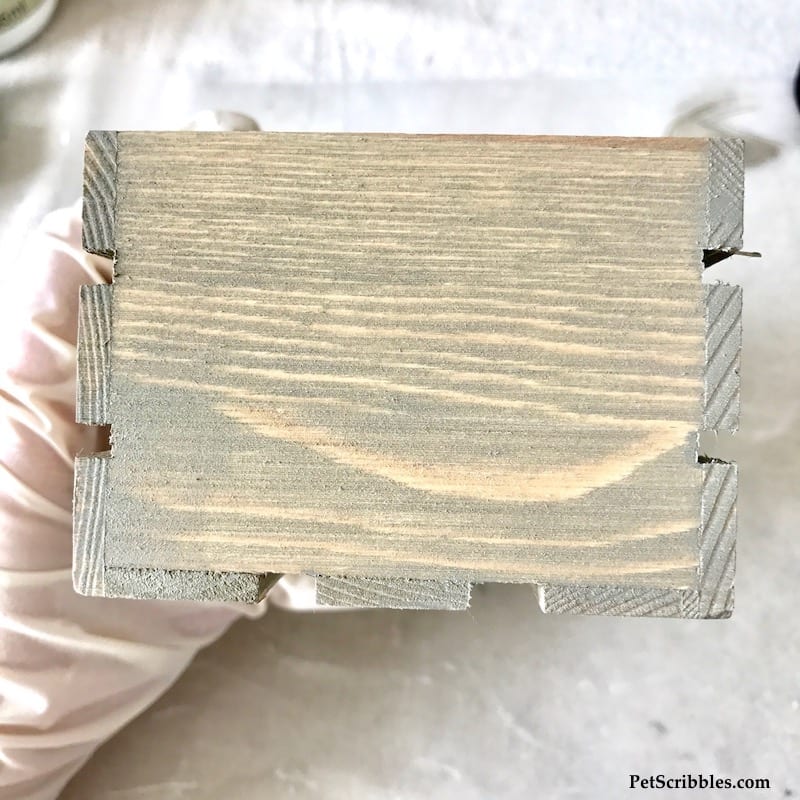
Step Two: Stain the crates to create a weathered wood look.
I love to use pickling wash for this purpose, because it’s so easy to apply.
- First, using a regular paint brush, apply a coat of the pickling wash to an area of the crate.
- Next, wipe “off” some of the pickling wash using a lint-free cloth. You can do this immediately, no need for waiting or drying.
Here’s a close-up of the area where I’ll be adding Fall stamped designs:
Set the crates aside to dry, while you work on the next steps.
Step Three: Practice your stamping.
This probably goes without saying, but I’m including it here just in case.
Especially with new stamps, I like to ink them up and practice stamping several times to get the feel of the stamp.
Bonus tip: Save these stamped images and use them to try different color options with your favorite markers or craft paints. (I’ll cover this idea further down.)
Step Four: Ink up your stamp.
If stamping with a medium-to-large size stamp — like these acorns — hold the stamp in one hand facing up, and stamp the ink pad onto the stamp with the other hand. (It’s much easier than doing it the other way which works great for small stamps.)
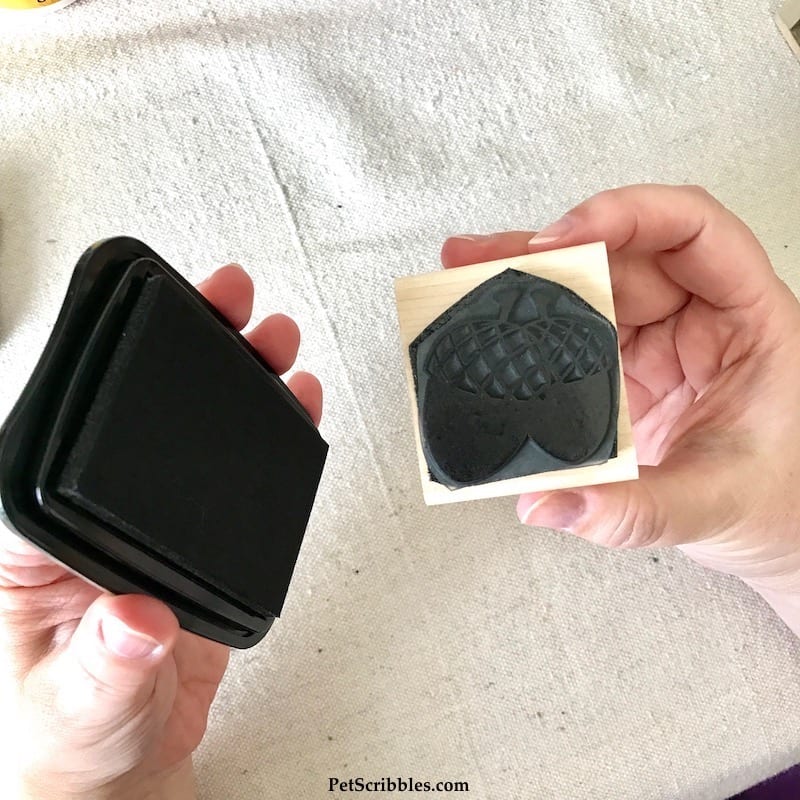
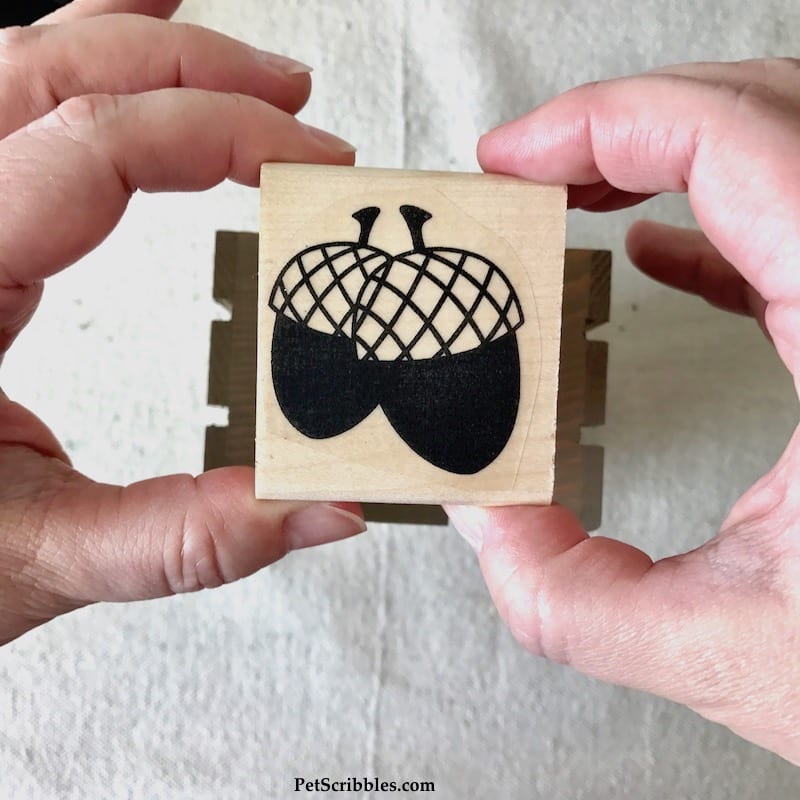
Step Five: Stamp one end of each crate with the Acorns Craft Stamp and black permanent ink.
Let dry thoroughly before the next step.
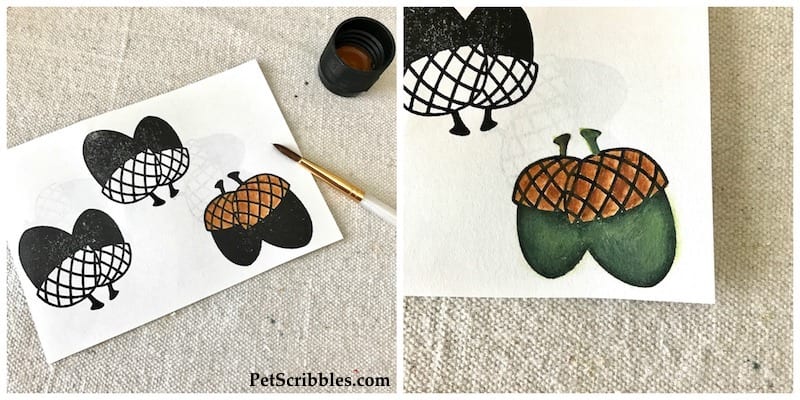
Step Six: Using your stamped designs on paper, play with ideas for coloring them in.
I used craft paints and a fine detail brush to come up with several ideas (below, right) before deciding on my favorite color combination (below, left).
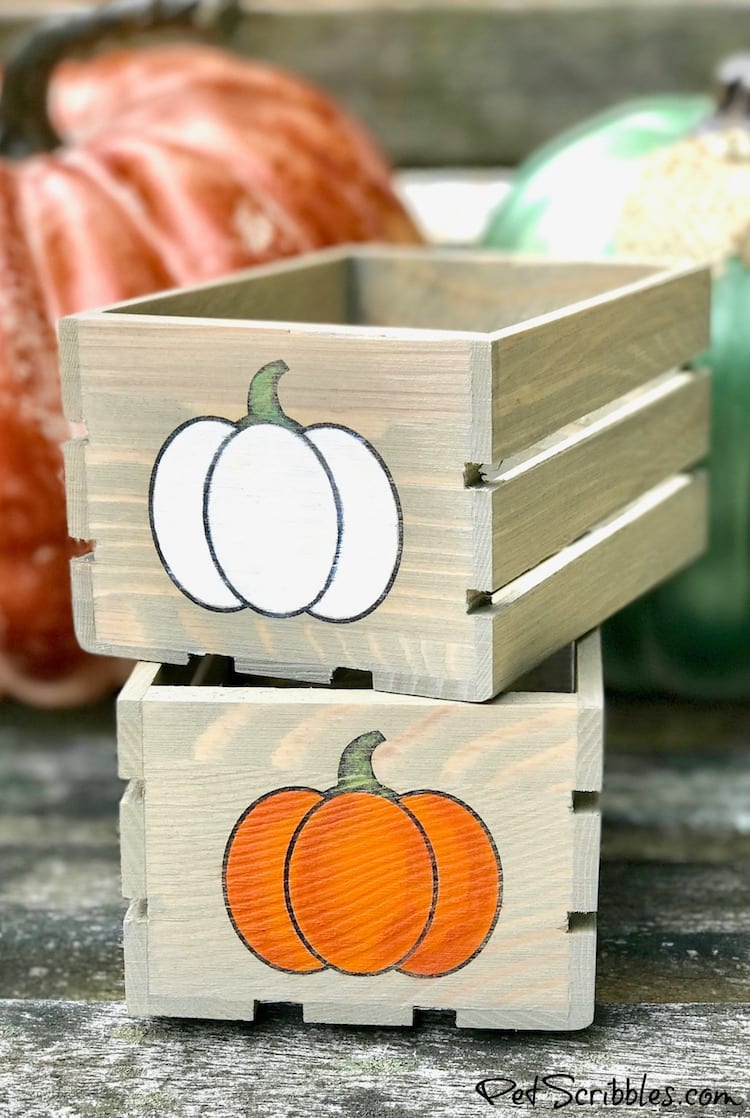
Step Seven: Stamp the other end of each crate with the Large Round Pumpkin Stamp and black ink. Let dry thoroughly.
Step Eight: Repeat Step Six with your stamped pumpkin images to choose colors for your stamped pumpkins.
Step Nine: Paint your stamped designs!
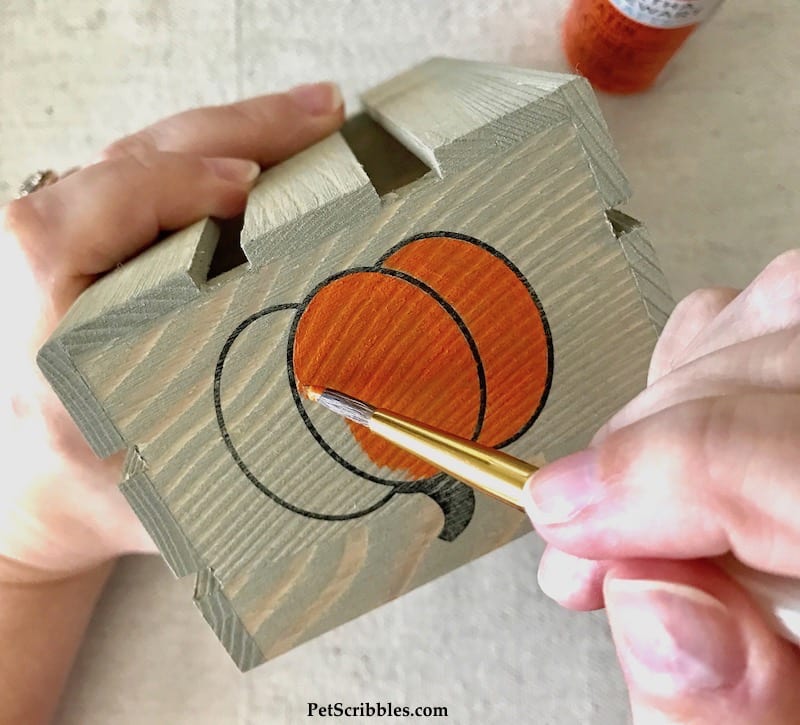
The key to getting clean lines (when using craft paints to color in stamped designs) is to use a fine detail paint brush, like the one I’m using above.
Bonus tip: Paint your images with single colors, or combine similar shades of the same color to create some depth.
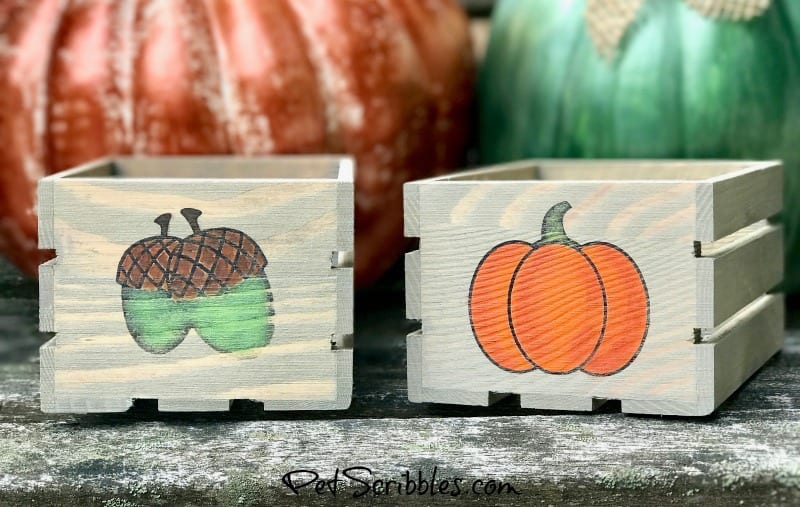
Here’s one side of each crate, all finished . . .
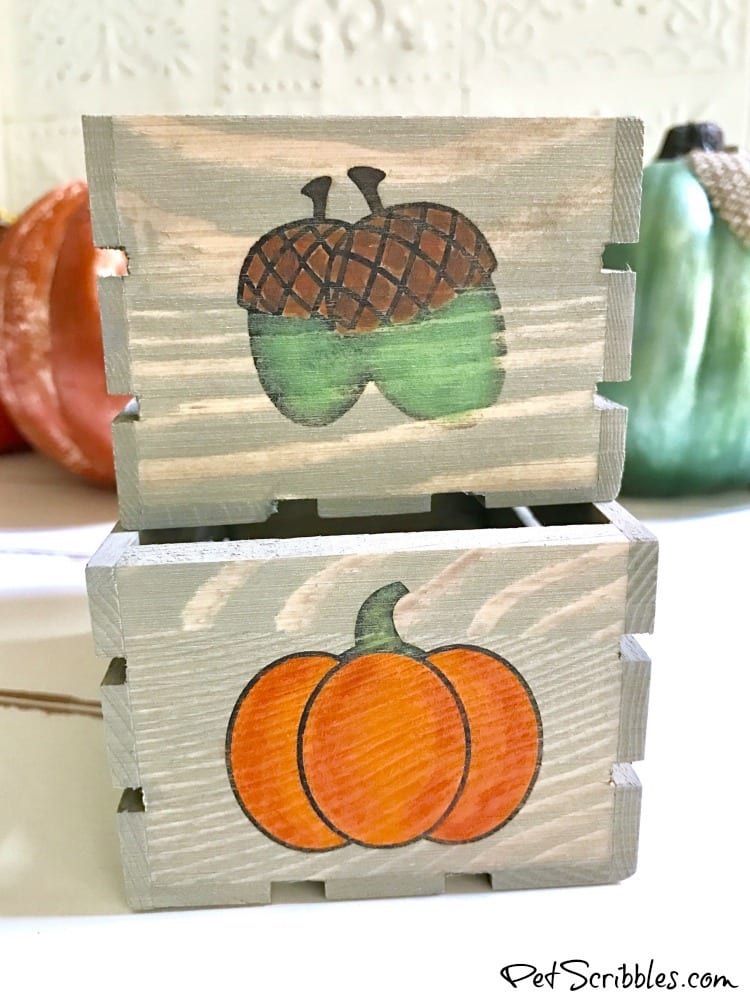
And here are the opposite sides . . .
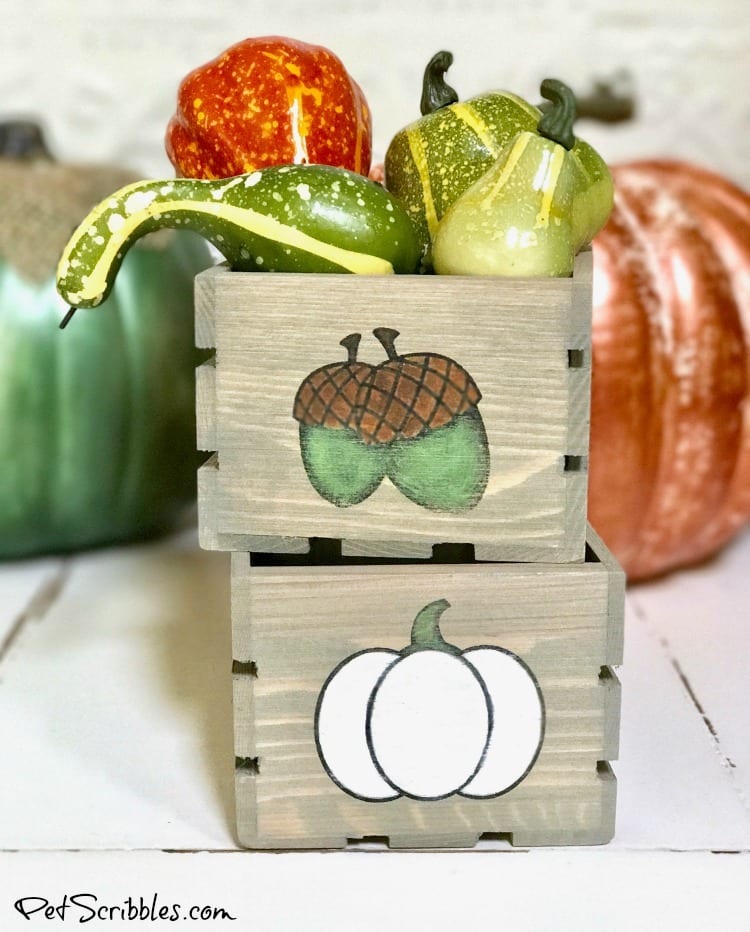
You can mix and match up the ends too, which keeps it interesting when you have decorations displayed for a few months!

Simply Stamps has a unique selection of Fall stamps — you can see them here — as well as stamps for Halloween and Thanksgiving!
I already picked out some fun Halloween and Thanksgiving stamps, so stay tuned for more seasonal decorating ideas!
Happy crafting!
~Laura
Adorable!! Love this mini project, can’t wait to make it here too!