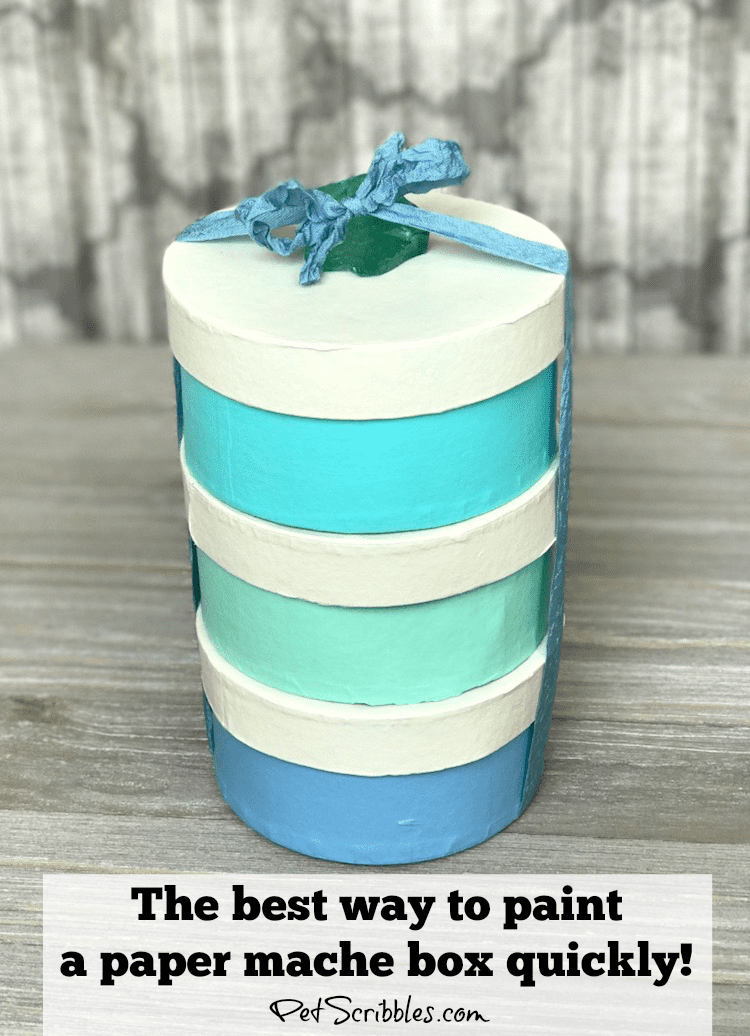
Today I’m going to show you the best way to quickly paint paper maché boxes! Yes, you can paint a paper maché box in about 15 minutes, give or take a tiny bit of drying time, with my helpful tips!
One of the most versatile crafts to do is to paint paper maché, whether it’s boxes, shapes, letters or numbers. Luckily, all of the craft stores carry paper maché products, and you can even find them online too.
Supplies:
Please note: Some of these links below are Amazon affiliate links, which means a portion of your purchase will go to support this website, at no additional cost to you.
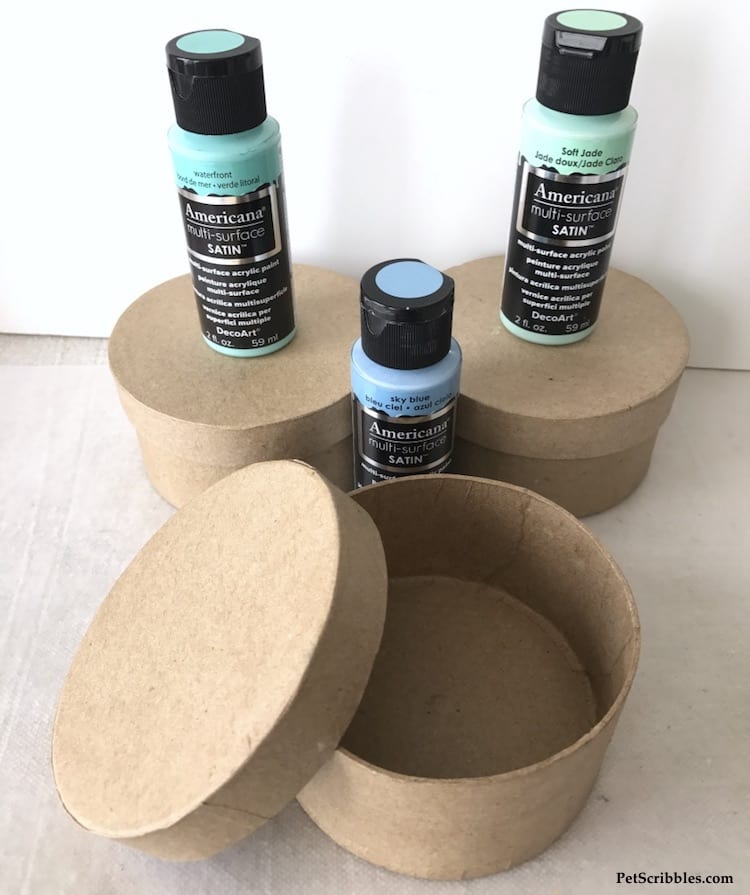
- paper maché boxes (Darice Crafts)
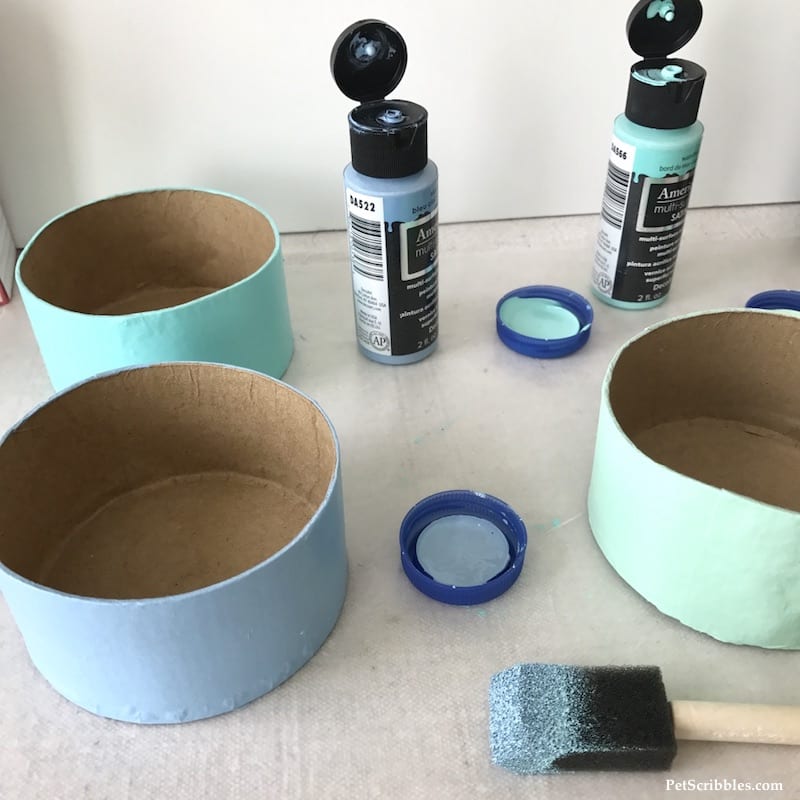
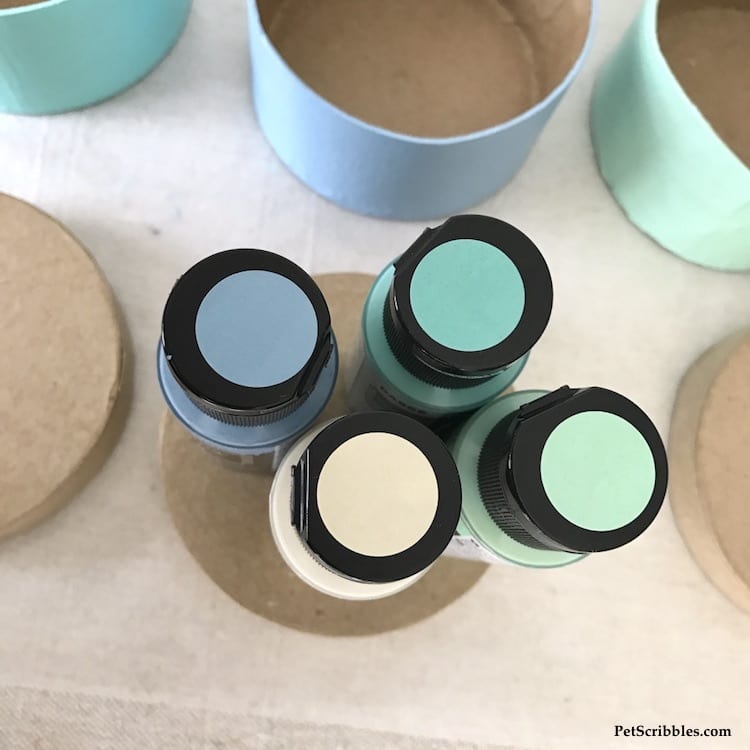
- multi-surface acrylic craft paints
- colors used: Soft Jade, Sky Blue, Waterfront, Vanilla Shake (DecoArt)
- foam brushes, 1-inch size
- recycled lid (used to hold paint)
- wax paper
- seam binding
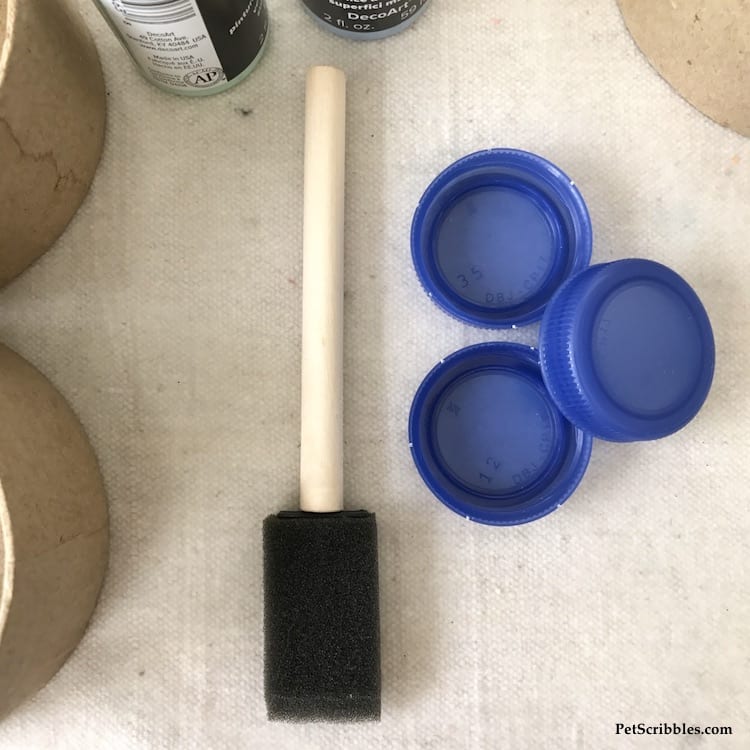
Recycled lids: I’ve used these for years to hold my craft paints. In fact, I’ve developed quite a collection of recycled lids just from our own groceries. I love the edges of these lids, because they hold the paint in. When you’re done, you can rinse them out and either use them again or recycle them.
Foam brushes: It can be very hard to avoid showing paint lines when painting paper maché boxes. One of the best tips is to use a foam brush. And use it lightly — no need to press hard.
Multi-surface paint: One of the best types of craft paints to use on paper maché — especially when you don’t want to show any brushstrokes — is multi-surface paint. Just about every craft paint company has their own line of these and they all work with the same concept: they go on smoothly and are self-leveling.
(You can save money by purchasing these paints in sets. Many companies sell their paints in sets on Amazon here.)
The key to being able to paint paper maché boxes quickly is to use several light coats, barely covering the previous coat each time. Trust me, it works. And it’s fast!
I’ll show you how I do it . . .
The best way to quickly paint paper maché boxes!
Step One: Use a tissue to wipe the insides and outsides of the boxes to remove any dust.
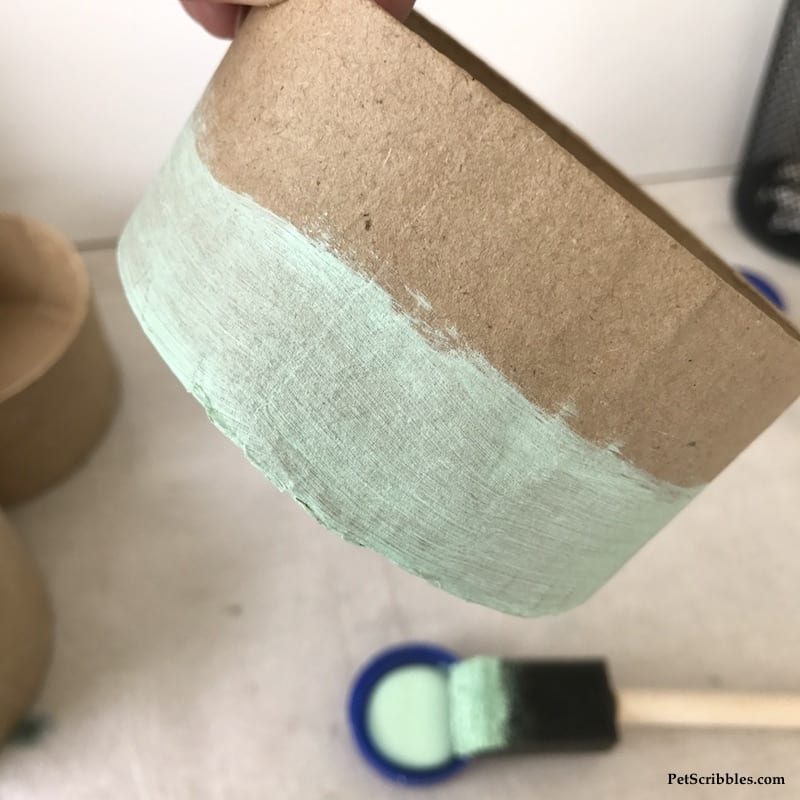
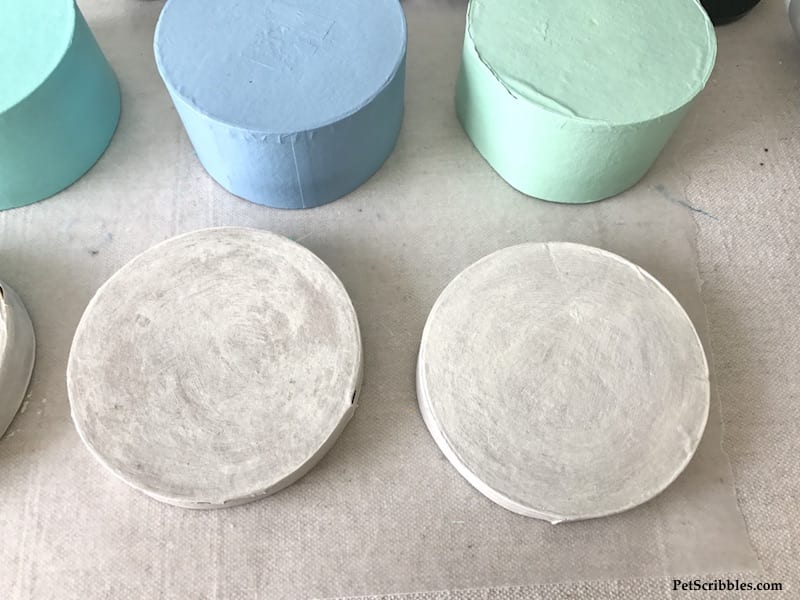
Step Two: Using a foam brush, paint a very thin, very light coat of Soft Jade onto the bottom of a box. As you can see from the picture below, my first layer of paint didn’t completely cover the original paper maché color . . .
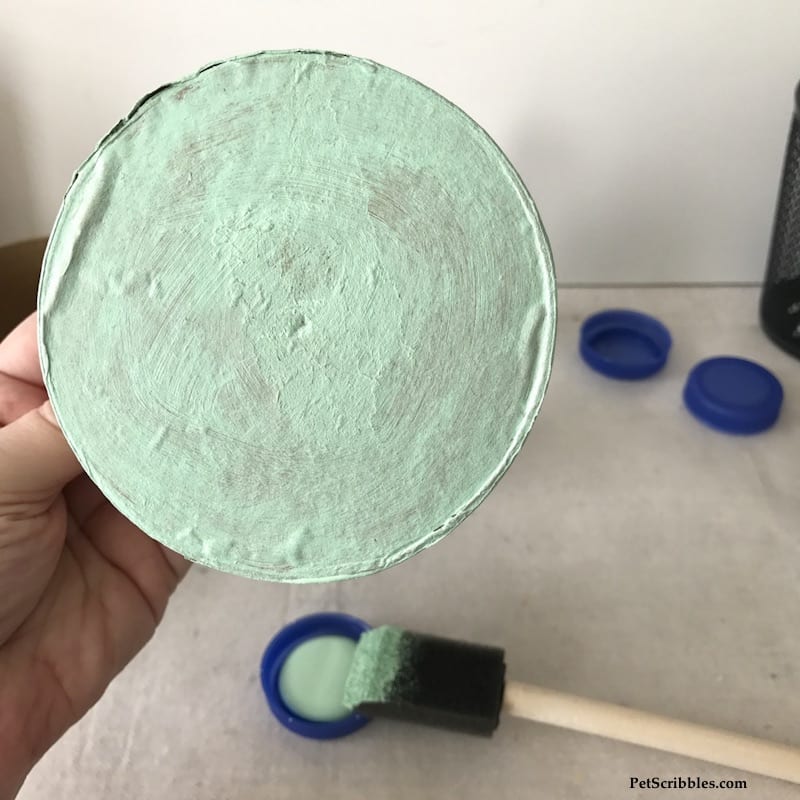
That’s what you want it to look like after one coat.
Step Three: As the bottom dries, hold the box by its side and begin painting a thin and light coat of Soft Jade around the outside. I painted the bottom half first, then continued painting the top half.
To avoid getting your fingers in the way, leave a tiny spot unpainted, then hold the box from the inside to paint that remaining spot.
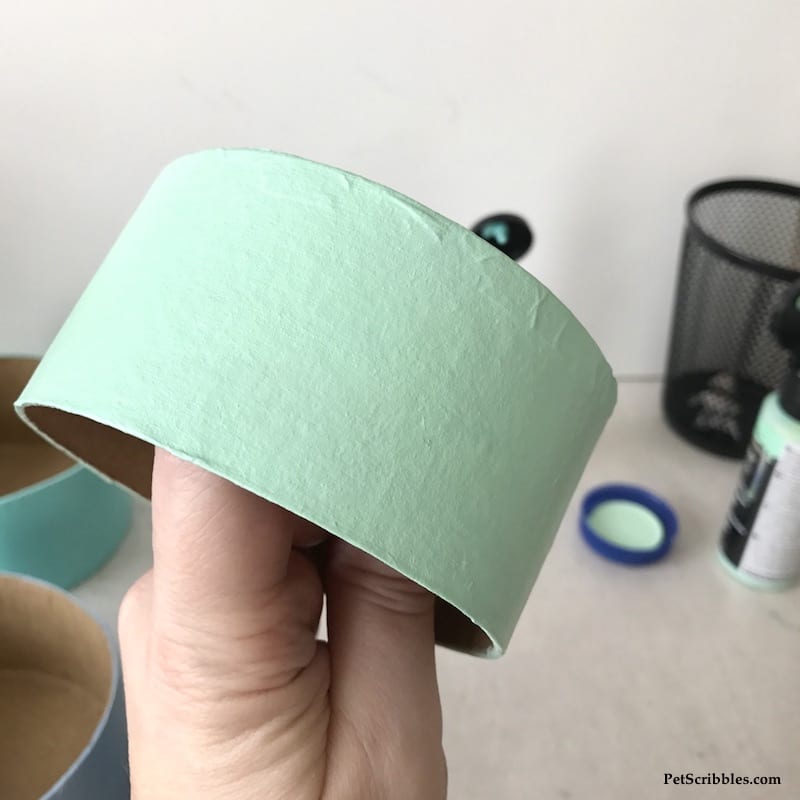
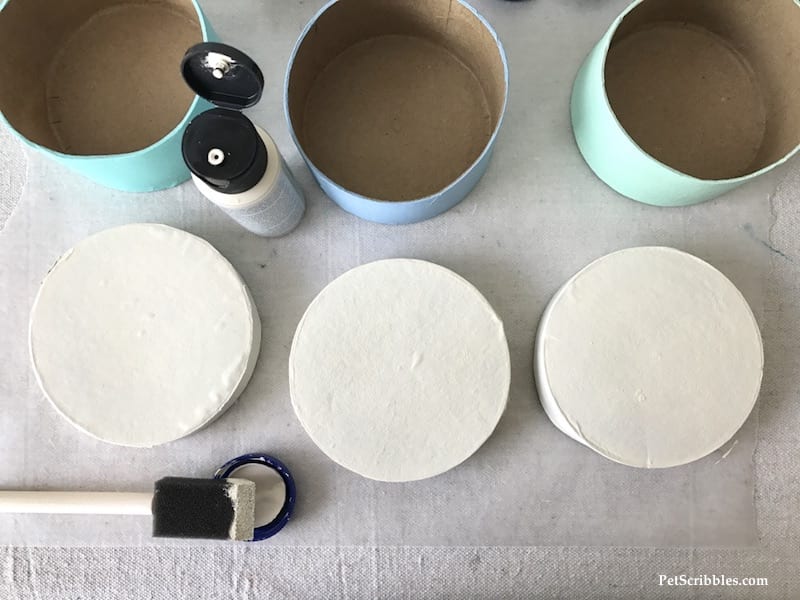
Step Four: Repeat Steps One and Two until you like the coverage. I needed three thin coats for mine:
Helpful tip: When you’re painting quickly, and changing colors, you can cheat a little bit. Since my coats were light, it was easy to wipe off any remaining color onto a paper towel before proceeding with the next box and new color. No need to rinse out or change out the foam brush!
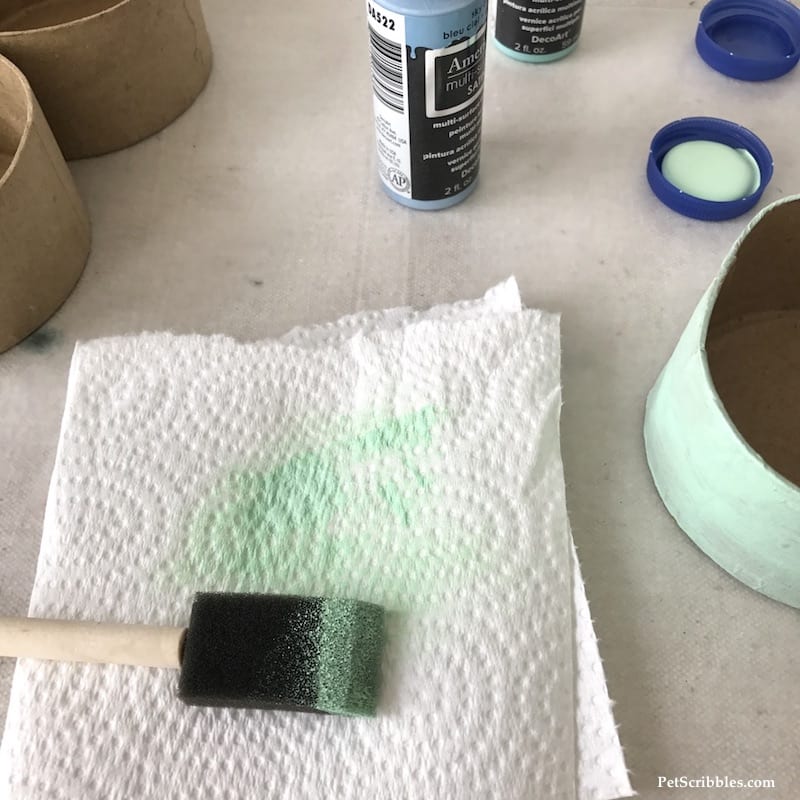
This meant that I could paint all of the boxes at the same time, without the need for rinsing the foam brush.
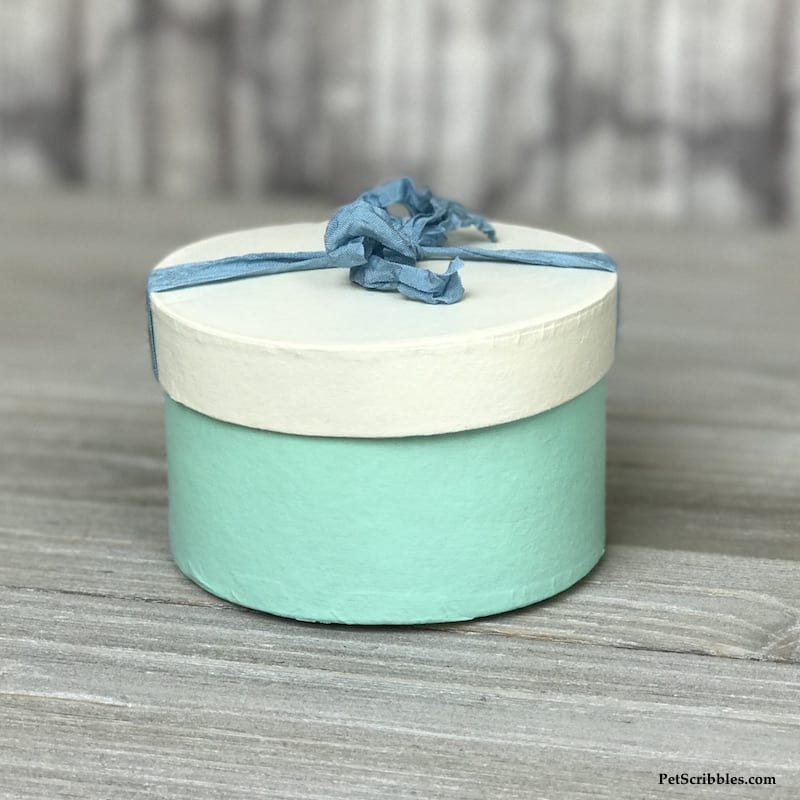
Each of the paper maché boxes required three thin and light coats of paint. Because the paint dries so quickly, there really wasn’t any waiting time. I simply wiped my brush and started on the next box.
Step Five: Using a foam brush — a different one this time — paint the top of the lid with one thin and light coat of Vanilla Shake.
I like how the vanilla color plays off of the blues and greens, almost seems to soften them a bit.
Step Six: As the top dries, hold the lid by its side and paint a thin and light coat of Vanilla Shake around the outside.
Step Seven: Repeat Steps Five and Six until you like the coverage.
Here is a picture to show you what the lid will look like after just one coat (below left) and after two coats (below right):
Because I chose a lighter paint color for the lid, I needed five quick coats to get the coverage I was happy with. Your mileage may vary.
Here are the lids after five coats:
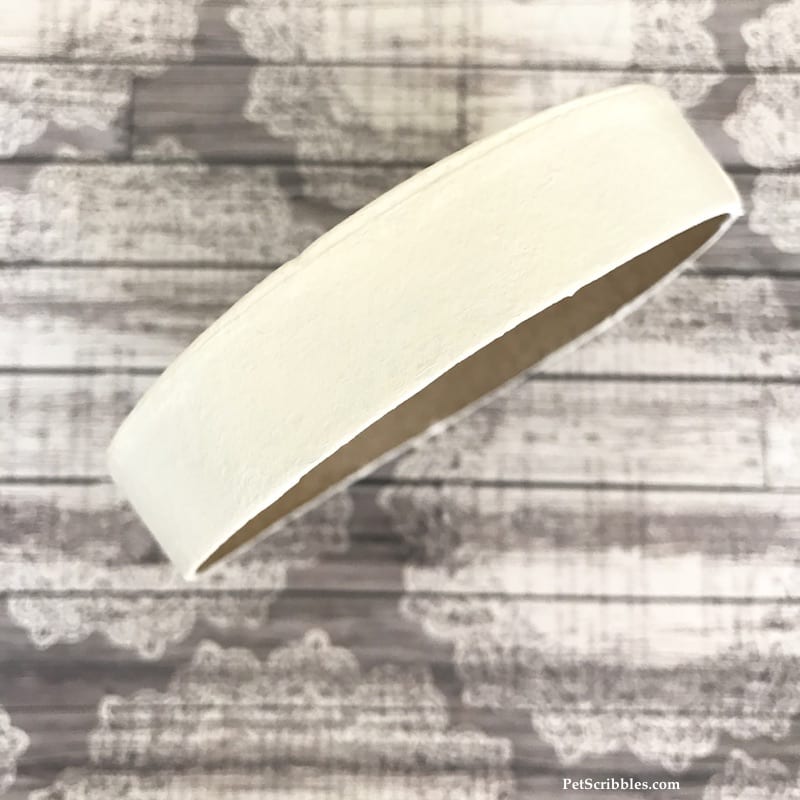
Helpful tip: Do you get frustrated with using light colors on paper maché? Sometimes, no matter how careful I am, I will still see lines or strokes of the paint. This happens most often with white or ivory colors.
It could be just me. In case it’s happened to you, here’s my trick…
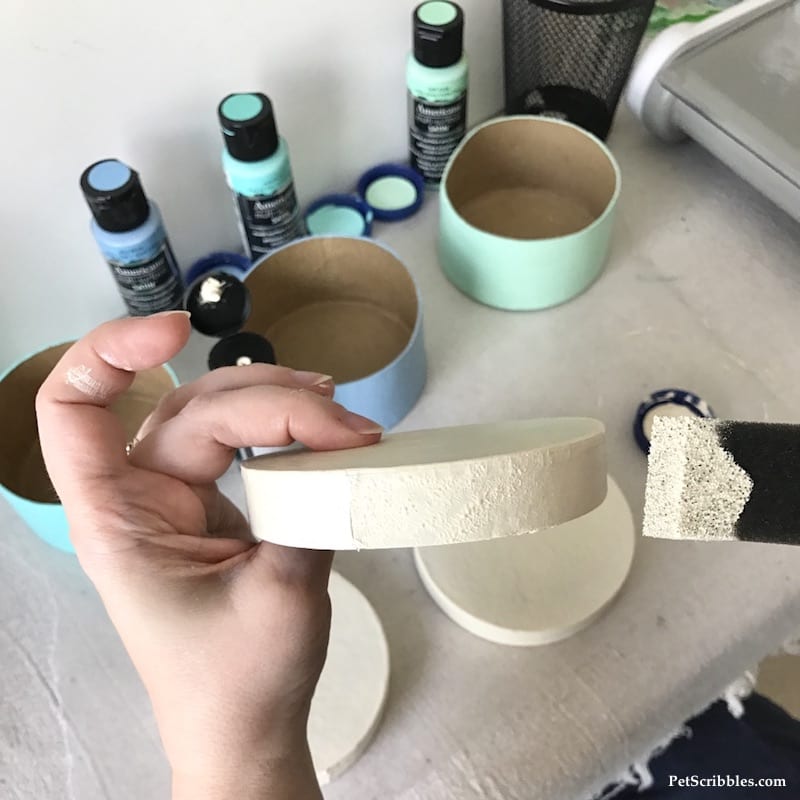
Use the end of the foam brush and gently tap on the final coat of paint, instead of brushing it on. My “action shot” is above for you, so you can see what the paint looks like while wet.
Once the paint dries, there’s hardly any noticeable texture:
How long did this take?
To paint all three of these paper maché boxes quickly, it took me about 45 minutes. And that included waiting a few minutes in between coats. So if you’re doing just one box, you could quickly paint it in about 15 minutes.
Because paper maché absorbs the paint so quickly, the drying time is amazingly fast. Win-win!
Just remember to keep each coat thin and light.
Time to wrap it up — literally!
Once everything is dry — and I usually like to let things dry overnight whenever I can, but wait at least 12 hours to be on the safe side — it’s time to wrap up your gift box.
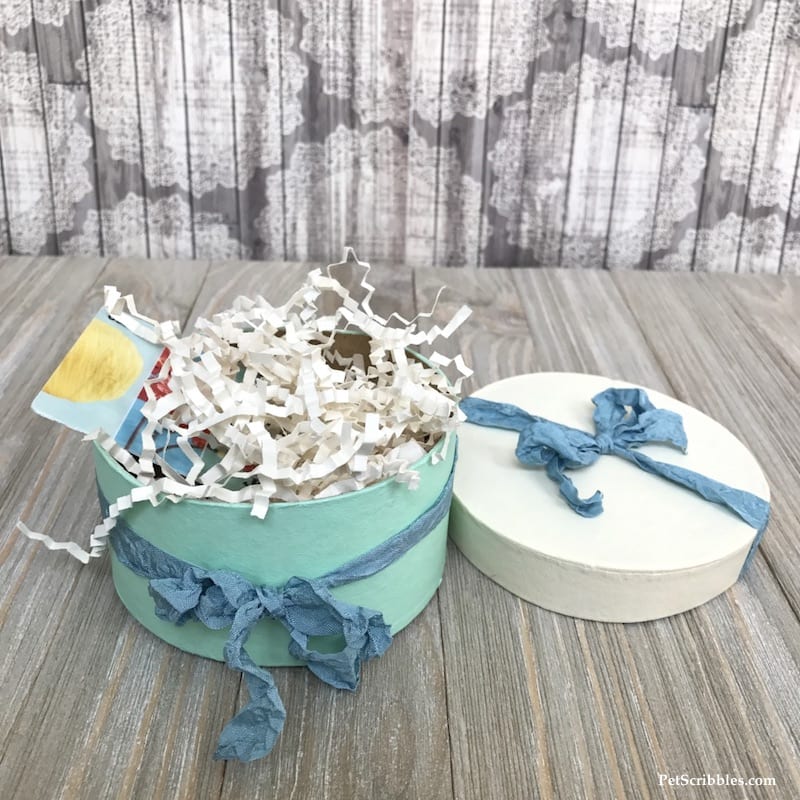
I love using crinkled seam binding because of its vintage vibe.
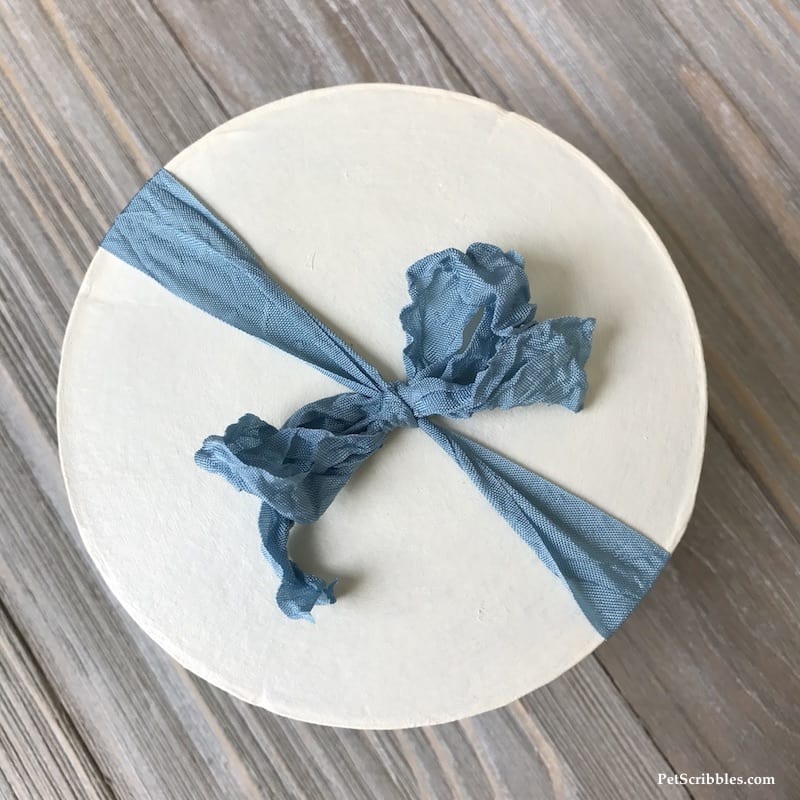
Step Eight: Tie a pretty ribbon around your gift box.
“How” you choose to do this, of course, is entirely up to you.
If you’re going to use the box as a sweet way to give a pretty succulent for Mother’s Day, you could wrap it up like this:
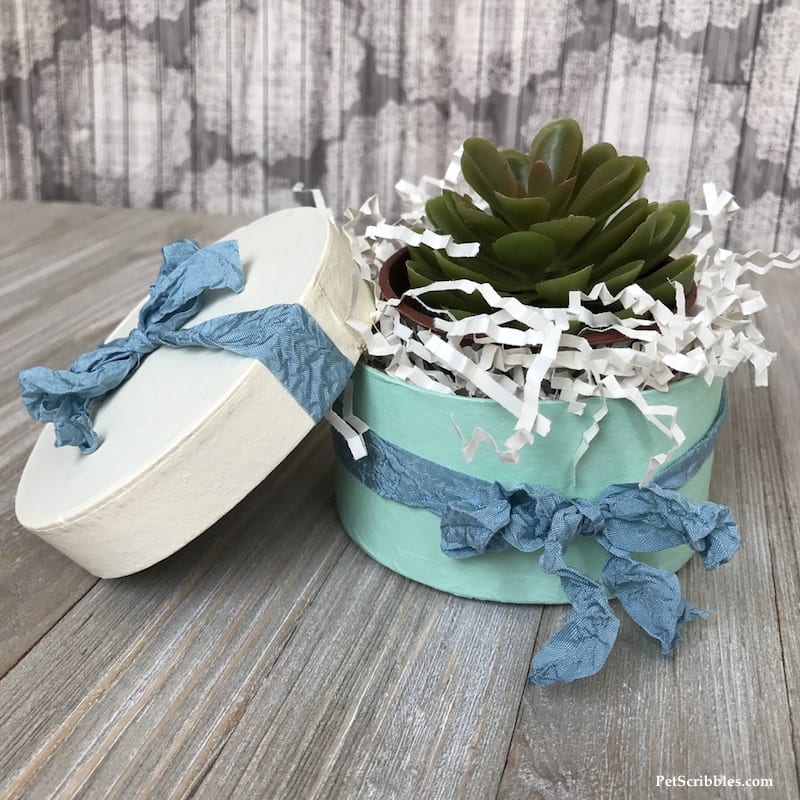
Add a fun gift card inside and wrap it up like this:
If you’re giving multiple boxes, you can wrap them up like this:
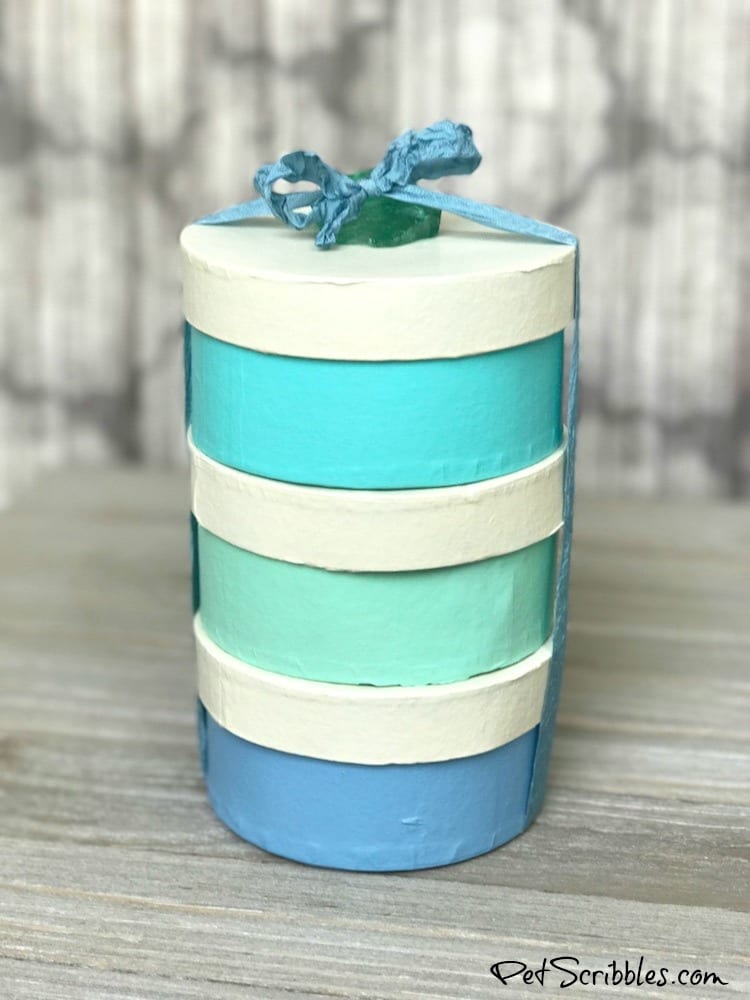
I added a piece of sea glass for fun!
For more DIY paper maché projects — just click on any of the links below to see my easy tutorials!
Happy crafting!
I love paper mache crafts!