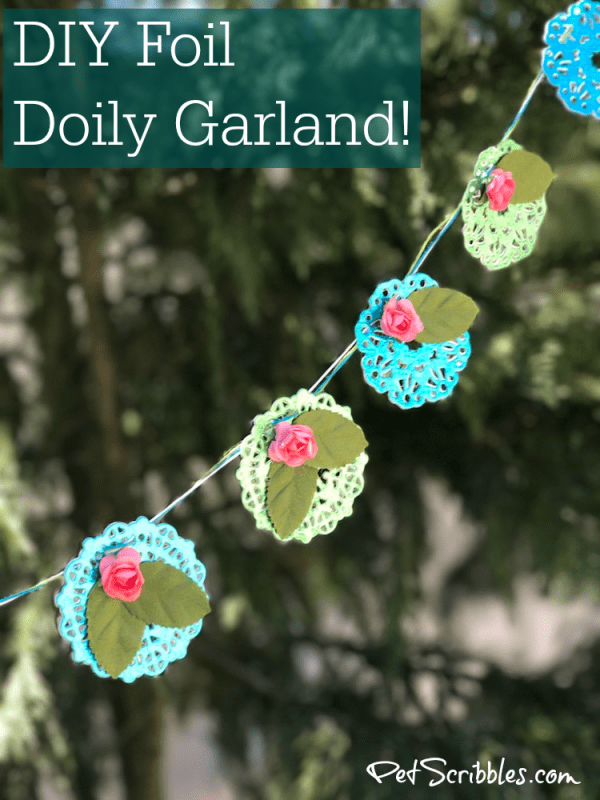
Today I’m going to show you how to make a lovely foil doily garland! This garland is one part modern and dazzling, and one part vintage goodness: my favorite combination!
All this week, our Xyron Design Team is partnering with Maya Road to bring you wonderfully creative craft projects! There’s also a wonderful giveaway too — more info at the end of this post!

FTC Disclaimer: I’ve received products/compensation as part of the Xyron Design Team. This foil doily garland, however, is 100% my own project! Some of the links in this post are affiliate links. I explain more here.
Supplies:
- Xyron® Creative Station Lite
- Xyron® Mega Runner
- steel dies: Vintage Doilies (Maya Road)
- small vintage pink paper flowers, 12 (Maya Road)
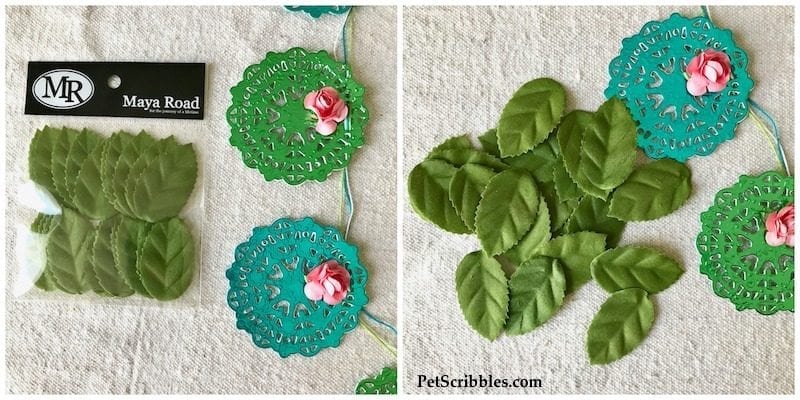
- green leaves, 20 (Maya Road)
- foil paper cardstock in teal blue and bright green
- die cutting machine (Sizzix Big Shot)
- hemp cord: blue, green, white
- scissors
How to make a lovely foil doily garland!
Step One: Cut the 6×6 foil cardstock in half, making 3×6 strips.
Step Two: Using the Vintage Doilies dies and a cutting machine, make several doily die cuts from the foil cardstock.
Here are the steel dies from Maya Road:
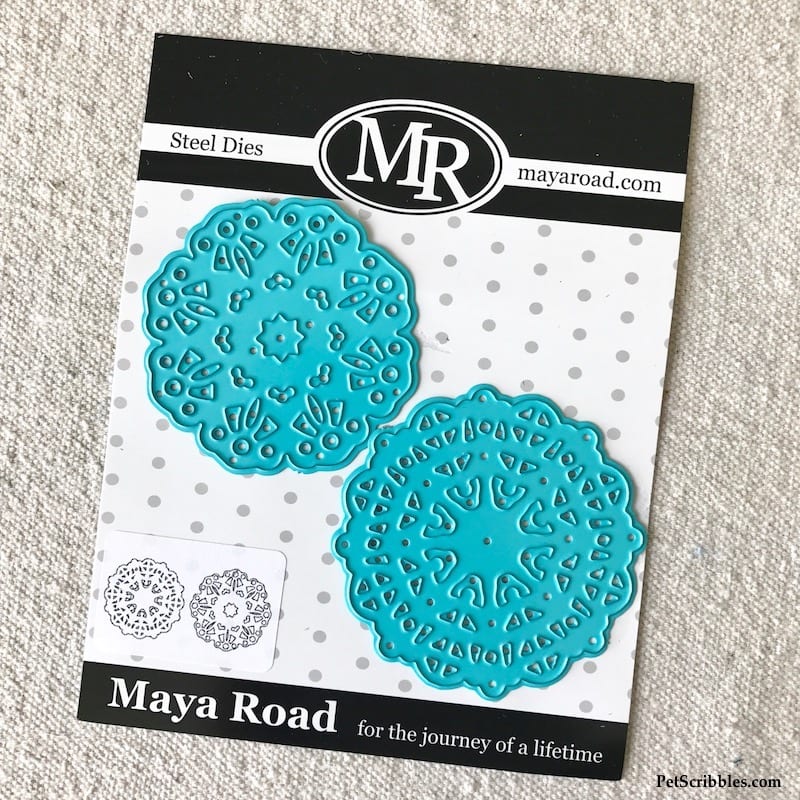
These dies are impressive, cutting through foil cardstock with ease.
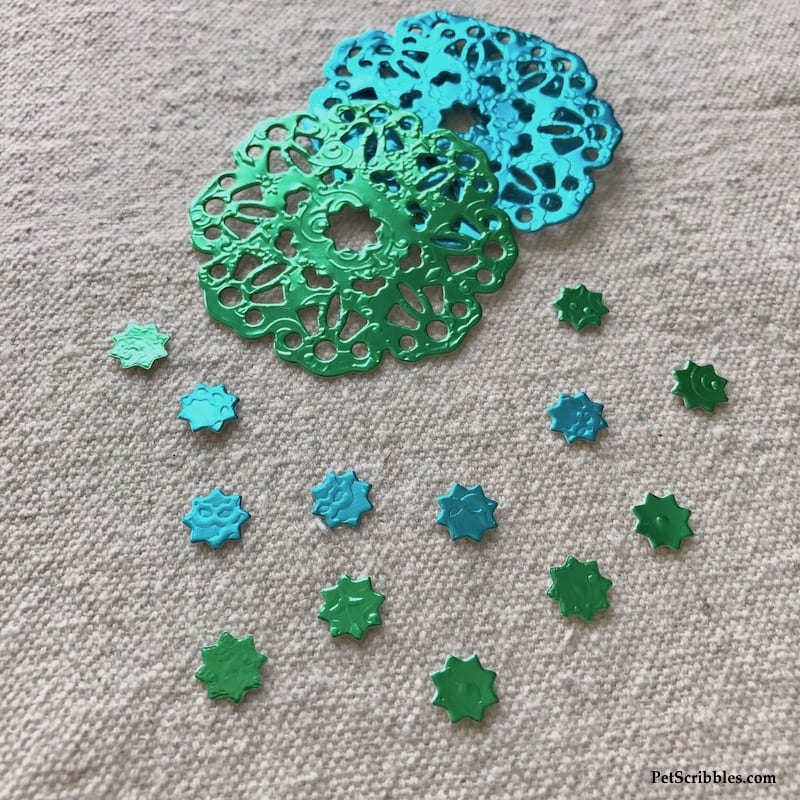
These are the larger doilies cut out (below left).
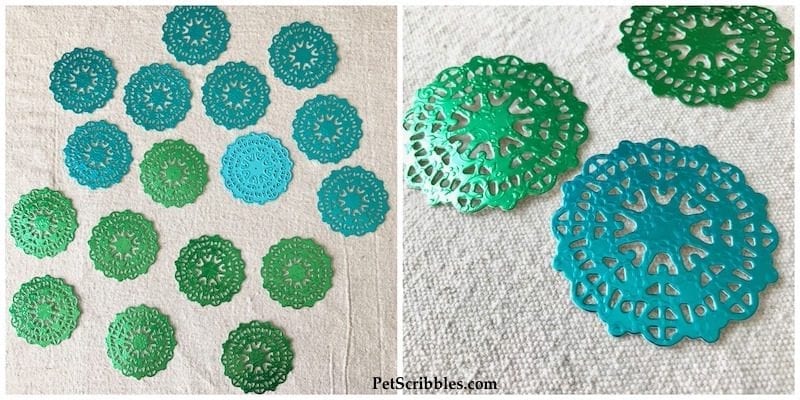
This particular foil cardstock has a texture to it, which you can see above (right).
These are the smaller doily die cuts (below left). You can see the texture on these as well (below right).
I noticed the centers that popped out looked like stars, so needless to say I kept these for a future project.
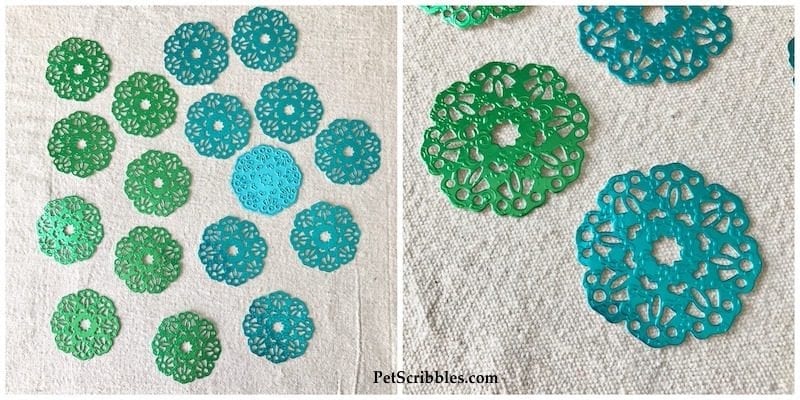
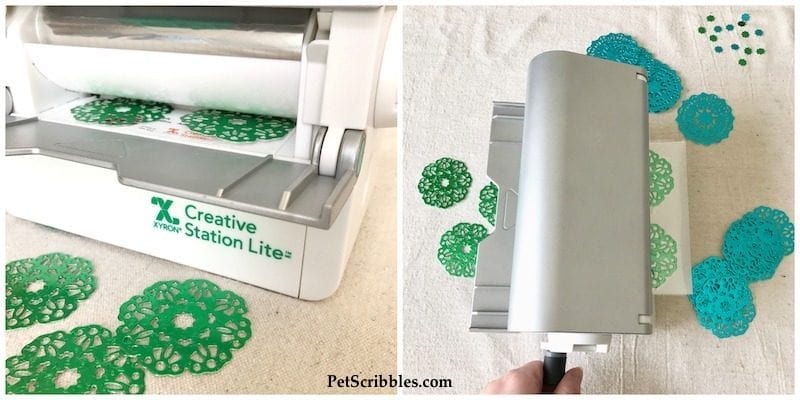
Step Three: Add adhesive to the back half of the garland pieces.
To make a garland that can be enjoyed from either side — not just from the front — simply adhere two foil doilies back to back.
Note: You only need to apply adhesive to one of the two doilies you will stick together.

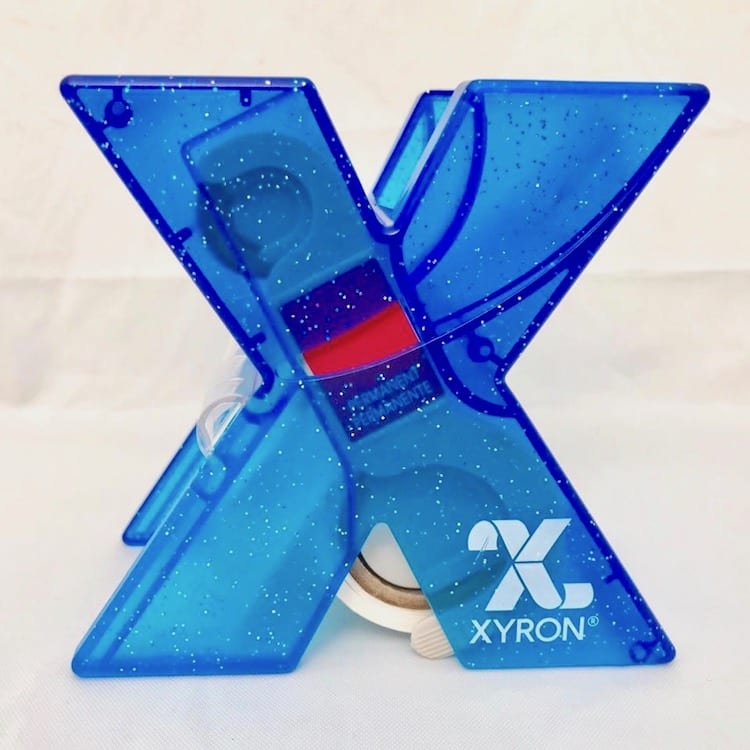
Enter the Xyron Creative Station Lite!
As you may have seen in some of my recent posts, I use this handy little machine a lot.
Just place your foil doilies into the machine (below left). Turn the handle to pull the doilies through the machine (below right).
Out come your doilies, now as stickers! (below)
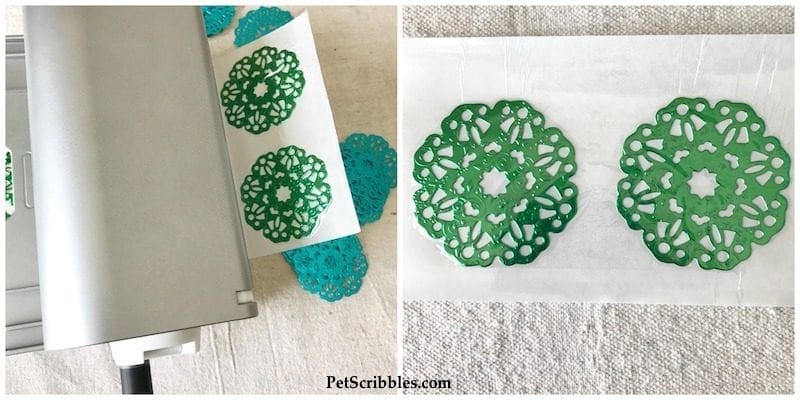
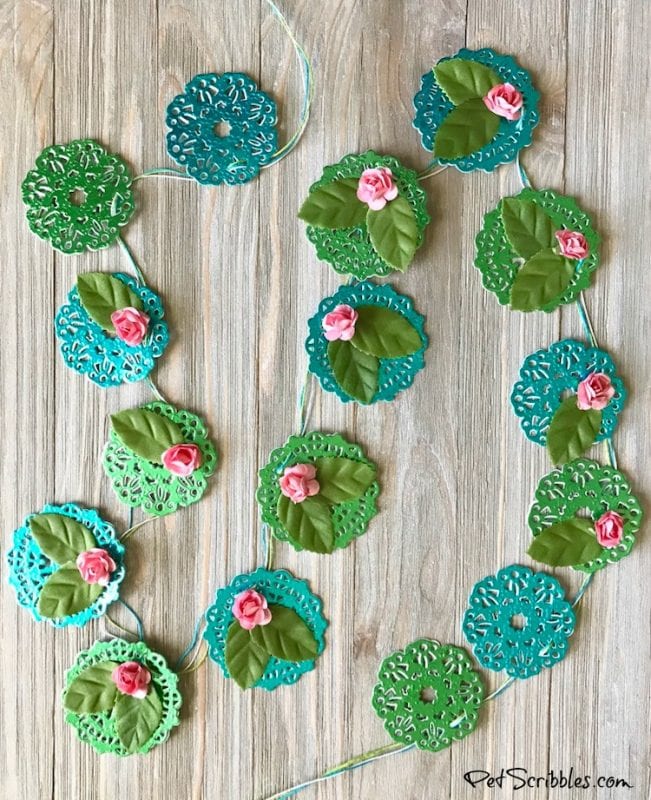
Step Four: Attach the foil doilies together.
Step Five: Take three long pieces of hemp cord (blue, green, white) and thread through the holes in each doily.
Since I used three different colors of the cord at the same time, this step was a bit time-consuming. You could use one color just as well. (I wanted to play off the blue and green of the doilies.)
Almost done: You could end your garland here, as the shiny foil is dazzling all by itself!
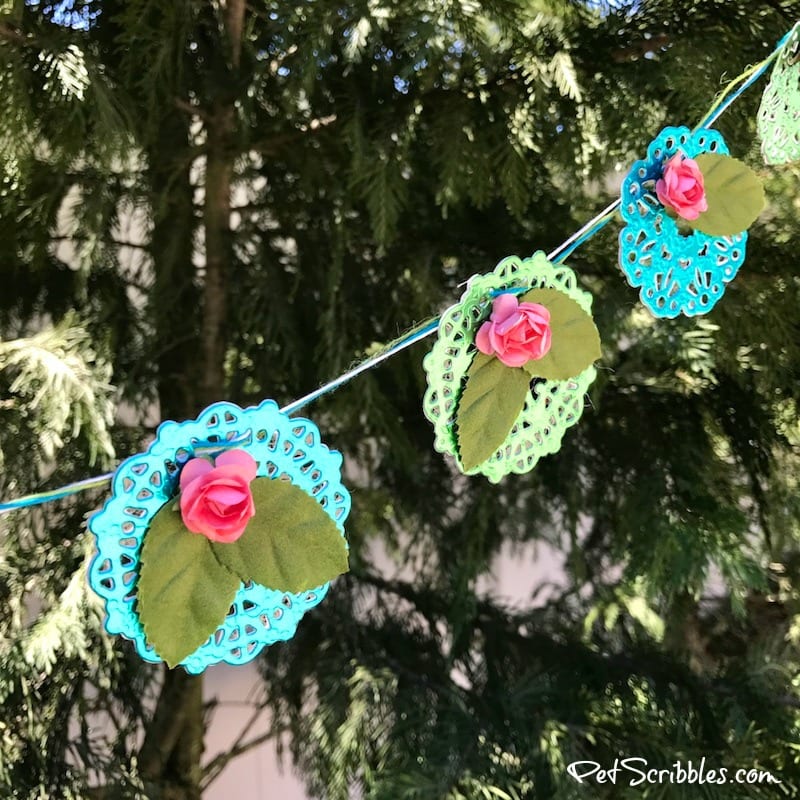
Step Six: Add flowers to each foil doily.
One of my favorites from Maya Road are their paper flower embellishments. They are so pretty and add so much to craft projects of all kinds.
The flowers come with their wire stems twisted together. (below left) Carefully untwist the stems and you have gorgeous individual blooms ready to use! (below right)
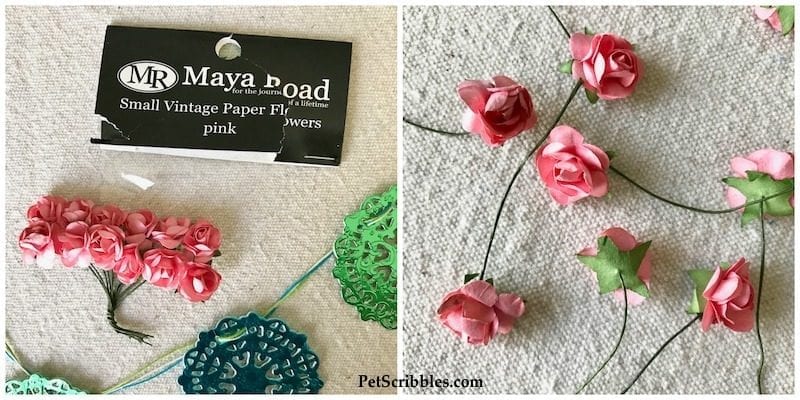
I snipped off some of the wire (to make it shorter), then wound each flower through one of the openings in the foil doily die cuts.
Twist the wire to secure. (I threaded my wire through to the front again, and wrapped it underneath the flower base, so nothing is visible.)
Step Seven: Add leaves to each foil doily.
I love these leaf embellishments from Maya Road. They have such a vintage feel to them, and you can get them in more than just a green color too.
The leaves come in a plastic package, all loose and ready to use!
I added a bit of adhesive to the bottom of each leaf with my Xyron Mega Runner, then adhered the leaves to my garland.
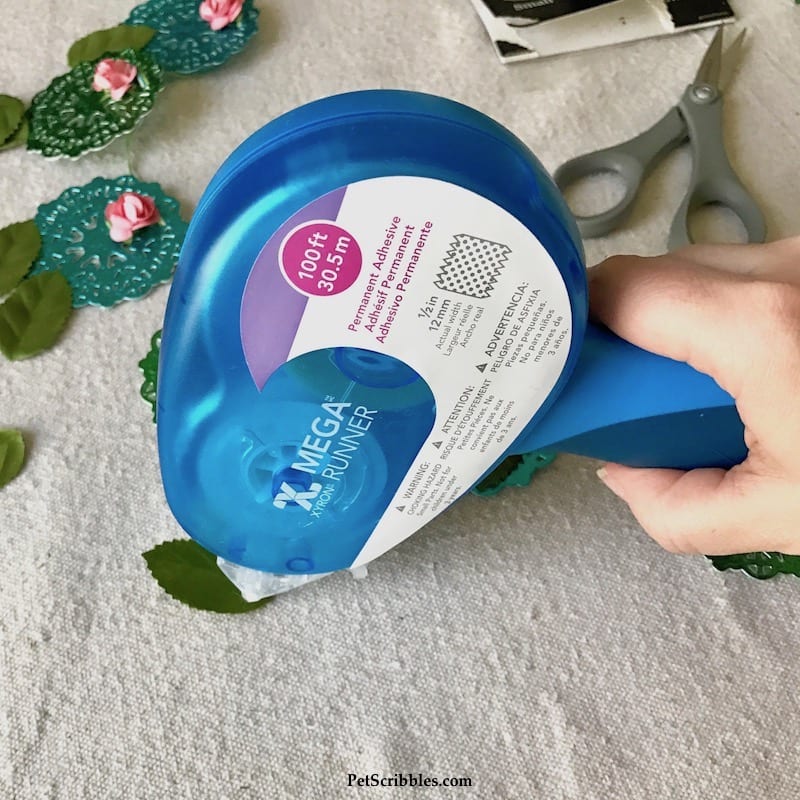
I attached two leaves on the larger foil doilies, and just one leaf on the smaller doilies, tucking the sticky end of the leaf underneath the flower so it looks like part of it.
I also left two foil doilies on each end without any embellishments, just to mix it up a bit.
Note: I didn’t apply adhesive to the entire leaf, as I wanted the leaves to stick out slightly from each doily.
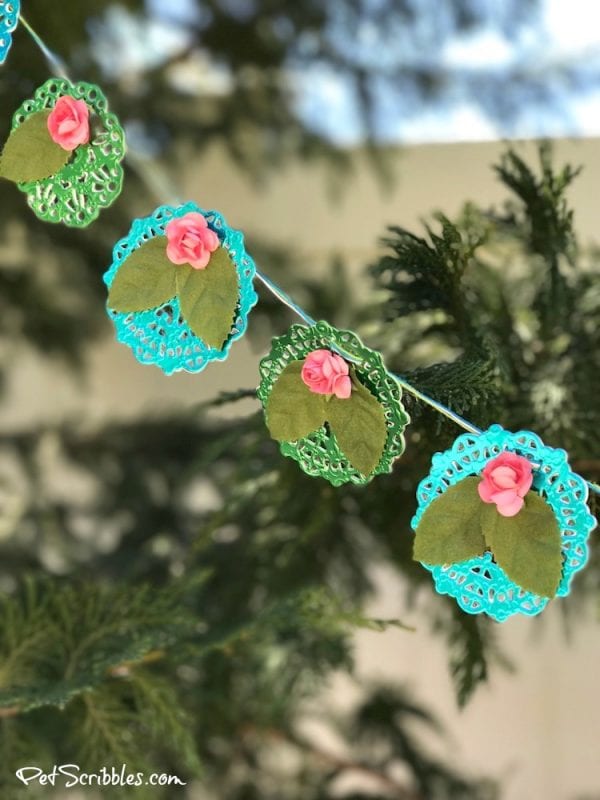
I love how this garland turned out! It is dazzling with the modern foil, yet vintage with the doily die cut shapes and the charming flowers and leaves.
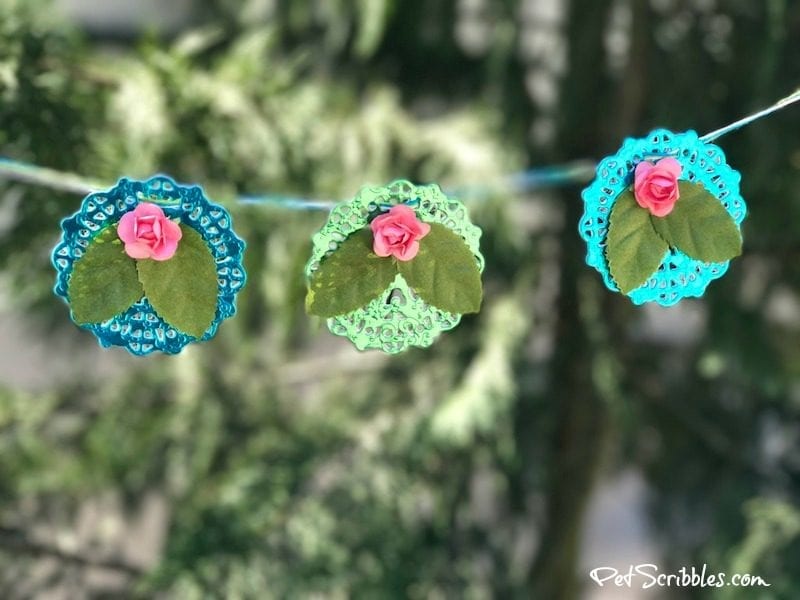
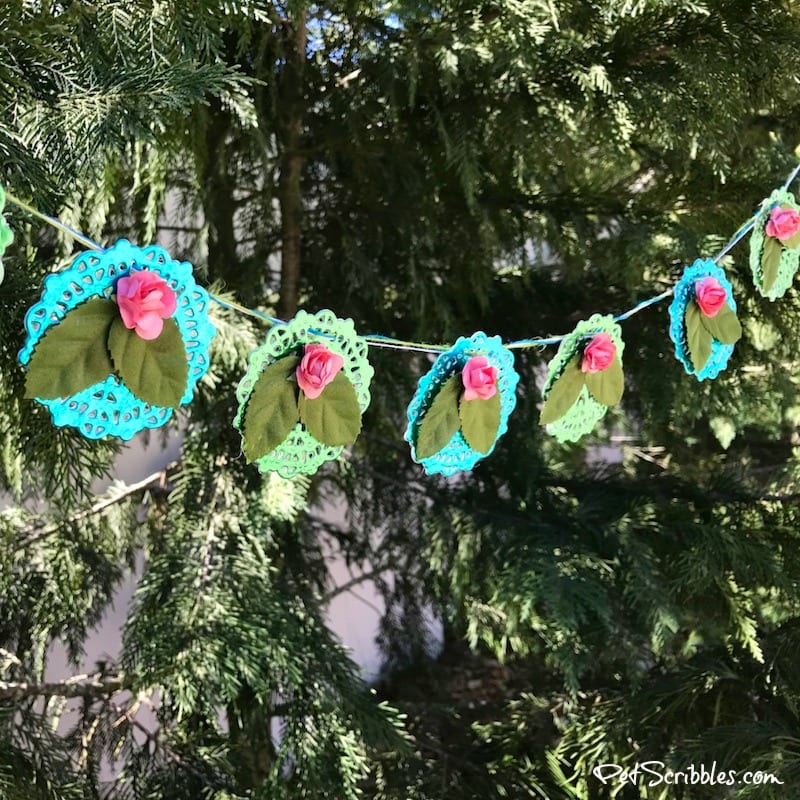
Modern and vintage? The best of both worlds!
Xyron Giveaway Time!
Every day this week, Xyron is giving away one of their fabulous sparkly blue X Sticker Makers, shown below!
Enter to win by heading over to the Xyron Facebook page and leaving a comment on the projects posted there each day! Winners are announced on the Xyron Facebook page each day. Good luck!
Maya Road
To learn more about the fabulous product lines from Maya Road, visit their website here.
Sale alert! During the month of April, all of their flowers are 30% off! What a great deal!
And be sure to follow Maya Road on Facebook and Instagram too!
Here’s what my garland looks like as the sun began to set. I love it!
Happy crafting!
~Laura
So pretty and festive
looking. Thanks for
the tutorial to make
them.
Carla from Utah
Aw! This is a such a great idea! Thanks for sharing 🙂