Pet Scribbles

A crafty blog with a vintage vibe. And cats.

  • Home
  • About
    • About Me
    • Why “Pet Scribbles”
    • Featured On
    • Work with Me! Hire Me!
    • Contact
    • Copyright
    • Privacy Policy
  • Gardening
    • All
    • My Favorite Plants
    • Easy Pruning Tips
  • Crafts & DIY
    • All
    • Winter
    • Spring
    • Summer
    • Fall
  • Holidays
    • Valentine’s Day
    • St. Patrick’s Day
    • Easter
    • Mother’s Day
    • Father’s Day
    • Patriotic
    • Halloween
    • Thanksgiving
    • Christmas and New Year’s Eve
  • Life
    • Cats
    • Personal
    • Books
    • Blogging
    • Food

How to make a faux moss frame (with a kit!)

March 11, 2017 By Laura

Pin
Share
Tweet
3Shares

This post and photos may contain Amazon or other affiliate links. If you purchase something through any link, I may receive a small commission at no extra charge to you. Any supplies used may be given to me free of charge, however, all projects and opinions are my own.


How to make a faux moss frame (with a kit!) because A) moss is on trend in decorative home accents, and B) it’s fun to give indoor items an outdoor look! Oh, and it’s easy to use too!

How to make a faux moss frame (with a kit!)

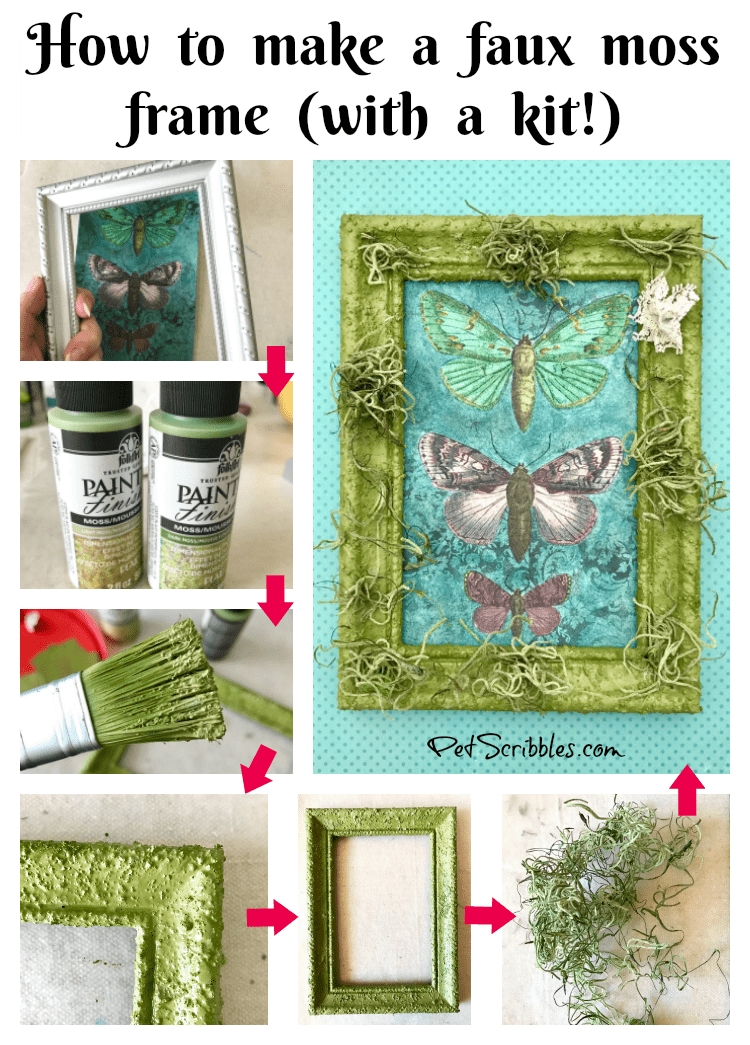
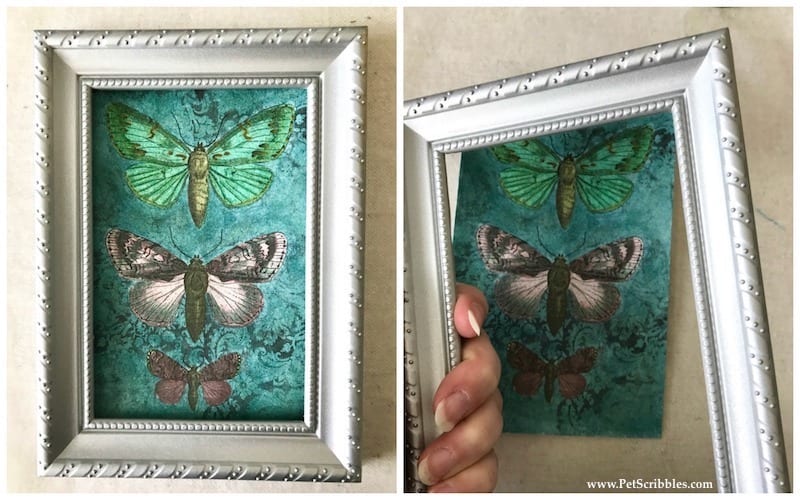
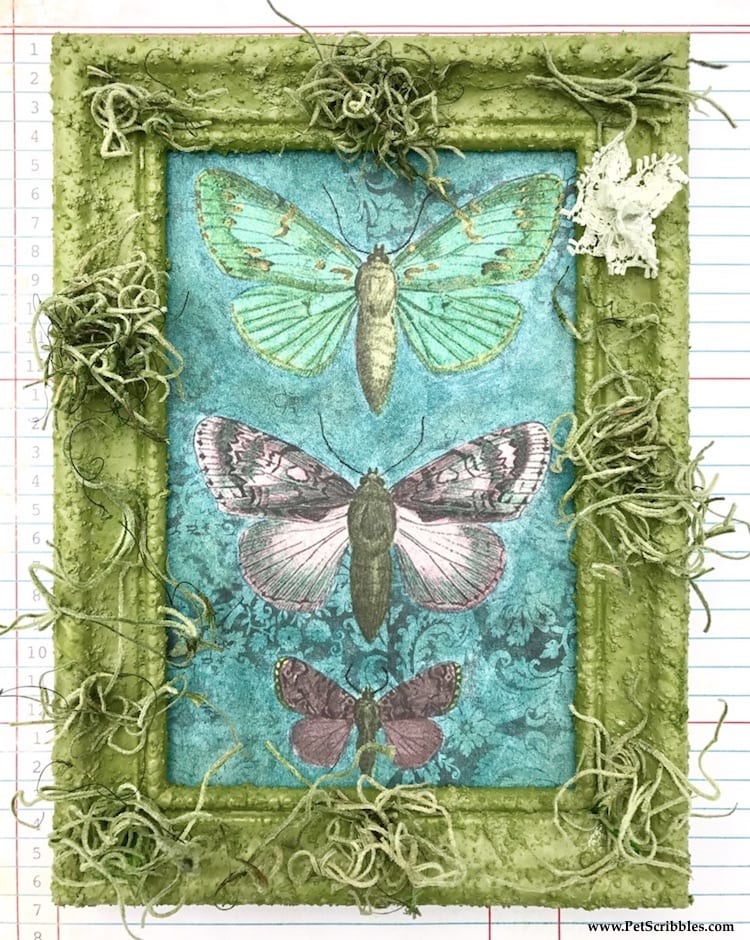
After I colored my pretty painted butterflies — see yesterday’s tutorial here — I wasn’t satisfied with the dollar store frame I happened to have on hand . . .

How to make a faux moss frame (with a kit!)

Lucky for me, I also happened to have a kit on hand that I’ve been dying to try out: Folk Art’s Painted Finishes in Moss, by Plaid Crafts. (I found mine on Amazon here. affiliate link)

How to make a faux moss frame (with a kit!)

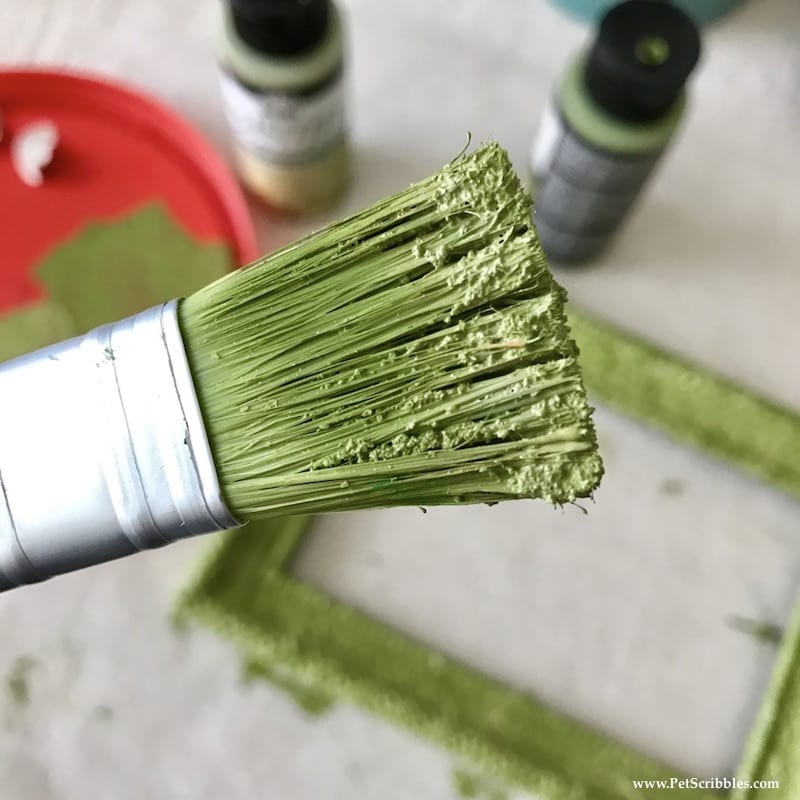
Above you can see how the kit looks when it arrives. You get two bottles — same size that we’re all used to with craft paints — and from the outside they look like two similar shades of green.

But wait until you see the texture!

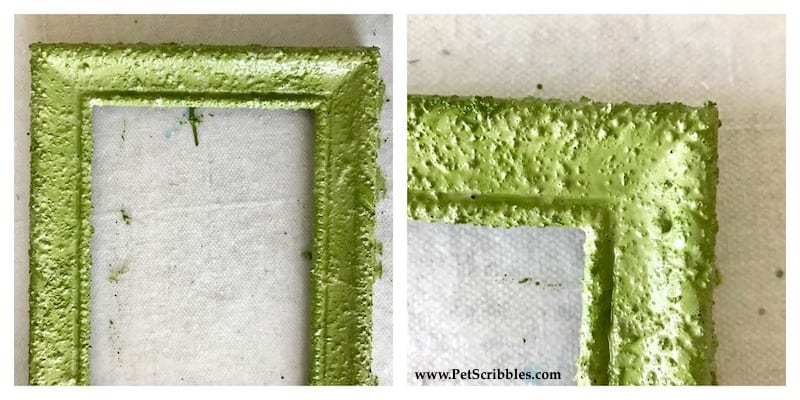
Here’s an extreme close-up photo of the paint on my paintbrush . . .

How to make a faux moss frame (with a kit!)

The “tutorial” is really quite straight-forward and simple. After shaking well, I squirted out a blob of each color onto a recycled plastic lid. (You can use something fancier, but recycled lids are my go-to.)

Below, you can see a difference in the two colors.

How to make a faux moss frame (with a kit!)

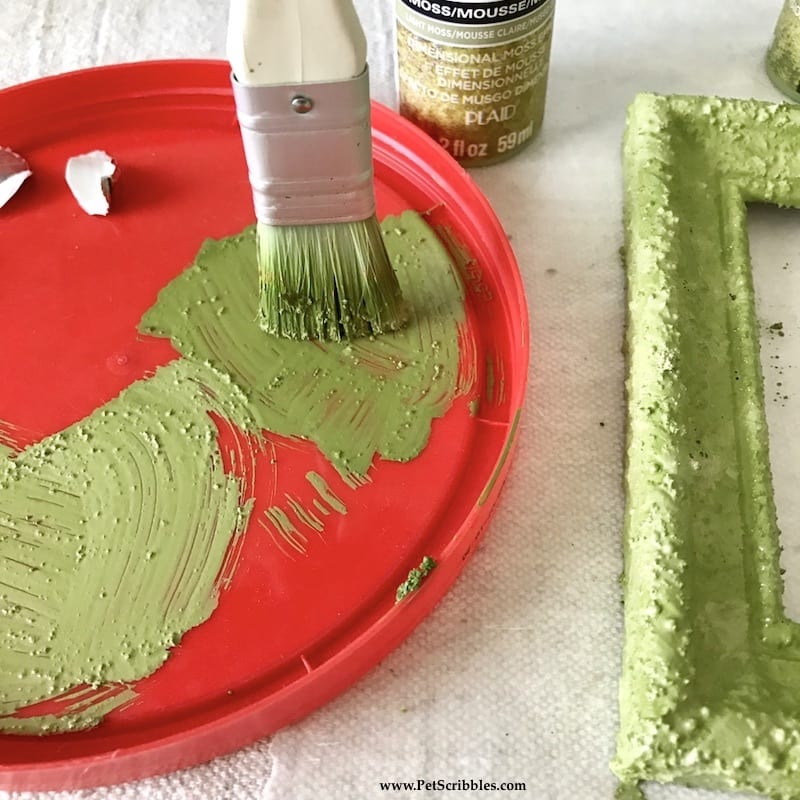
I followed the package directions which basically say to paint on the darker color first, and then while it’s still wet, paint on the lighter color in different spots, knowing the colors will run and blend together.

Because I was loving the texture, I went back over the frame using the bottom of my brush (see above) and tapping the chunky paint into different areas. I did this with both colors. I played! It was fun!

How to make a faux moss frame (with a kit!)

Above, the frames are still wet. You can see that the colors are blending together.

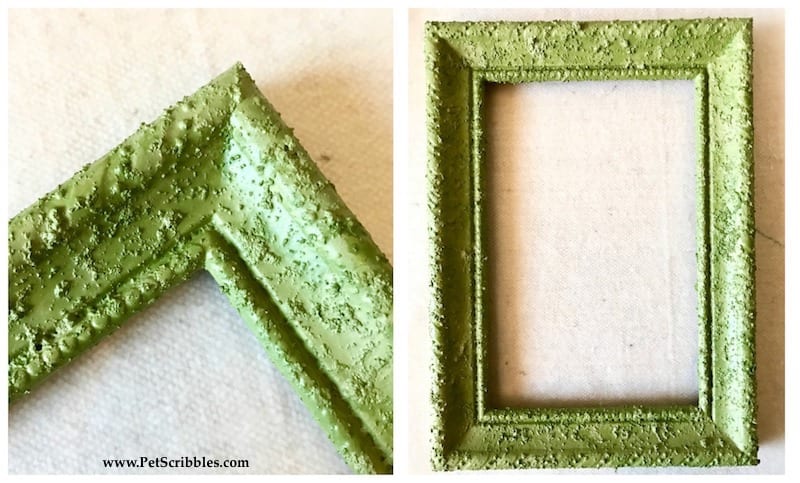
Below, the frames are completely dry. You’re left with an awesome textured surface that is really durable: you can rub your finger over the surface and the moss finish is not going to come off.

How to make a faux moss frame (with a kit!)

I am in LOVE with the moss finish!

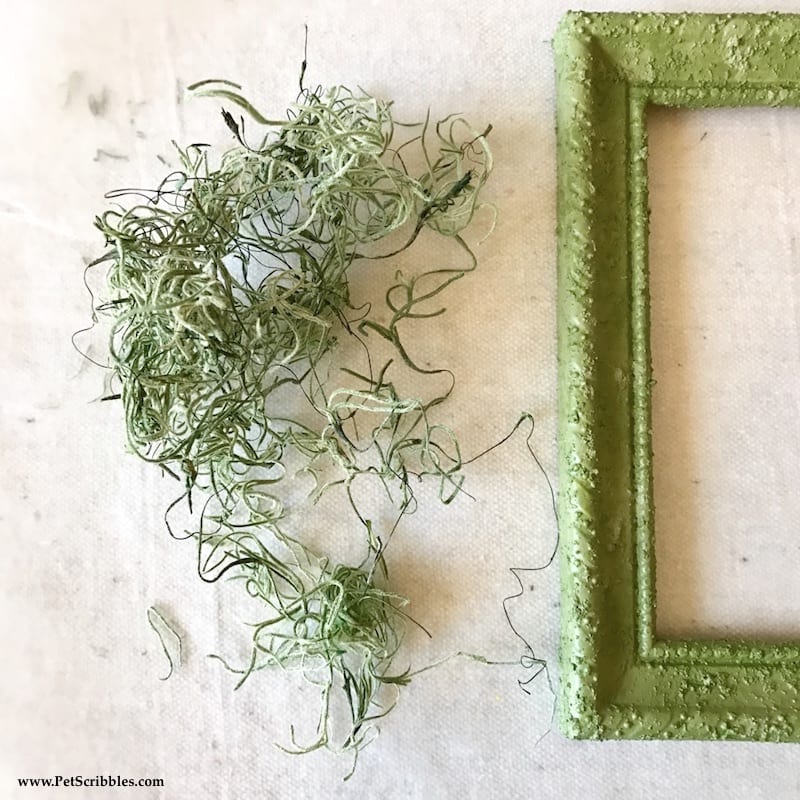
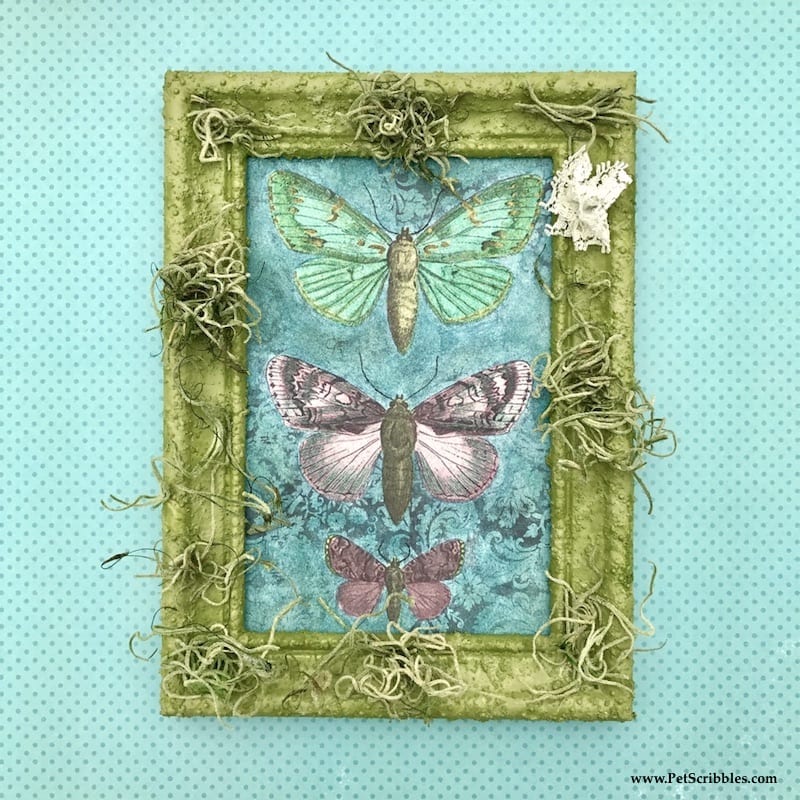
I also attached some dried moss from the craft store here and there, using E6000 adhesive, because…I love moss!

How to make a faux moss frame (with a kit!)

This finish really helps show off the painted butterflies!

Here’s another up close and personal look at the details . . .

How to make a faux moss frame (with a kit!)

This faux moss paint finish is SO cool!

I know it’s meant to be used more on garden pots, urns or things that would “naturally” have moss on them, but I just couldn’t resist seeing what it would look like on a picture frame!

How to make a faux moss frame (with a kit!)

And now that I’ve finally tried out this moss kit, you can bet I’ll be using it on some garden pots and garden-themed items…oh I have so many ideas!

How to make a faux moss frame (with a kit!)

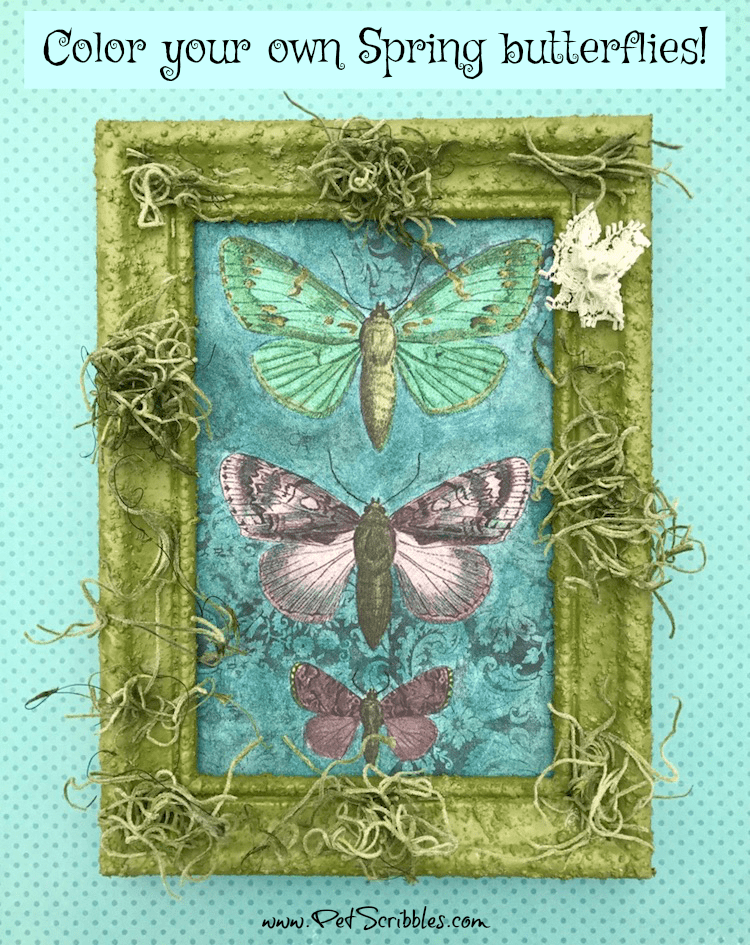
If you want to see how the painted butterflies came to be — or see how I made the tiny lace flower (on the frame) — click here or on the photo below for the tutorial and more pictures.

Welcome in Spring with Pretty Painted Butterflies! If you love to color, you'll love this!

Happy crafting!

~Laura


More from my site

  • Welcome in Spring with Pretty Painted Butterflies!Welcome in Spring with Pretty Painted Butterflies!
  • Welcome Summer with a Garden Theme Altered ClipboardWelcome Summer with a Garden Theme Altered Clipboard
  • Make A Pretty Mini Picnic Basket Favor!Make A Pretty Mini Picnic Basket Favor!
  • Sea Glass Paint: how to easily create beautiful beach glassSea Glass Paint: how to easily create beautiful beach glass
  • How to make weathered fairy garden beach chairsHow to make weathered fairy garden beach chairs
  • A faux verdigris picture frame in one simple step!A faux verdigris picture frame in one simple step!
Pin
Share
Tweet
3Shares

Pet Scribbles is where I share my craft tutorials, home and garden projects, and occasional stories about my cats. I can never have enough pretty craft paints to work with, and I love to make things look time-worn with distressing and aging. Gardening is my therapy!

  • Email
  • Facebook
  • Instagram
  • Pinterest
  • RSS
  • Twitter
  • YouTube

Subscribe to our Newsletter

Pet Scribbles is a participant in the Amazon Services LLC Associates Program, an affiliate advertising program designed to provide a means for sites to earn advertising fees by advertising and linking to Amazon.com. As an Amazon Associate, I earn from qualifying purchases.

Archives

Looking for Something?

Categories

COPYRIGHT © PET SCRIBBLES LLC • PRIVACY POLICY